


Old-time farmers planted by the moon.
Not superstition. Observation.
Generations of agricultural knowledge condensed into lunar cycles. The relationship between moon phases and plant growth guided planting, watering, and harvesting for centuries.
A DIY moon calendar brings this tradition into tangible form. A hands-on craft project. A functional tool. A connection to agricultural history.
This guide covers the complete process of building a rotating moon phase calendar from basic materials.
What Is a Moon Calendar?
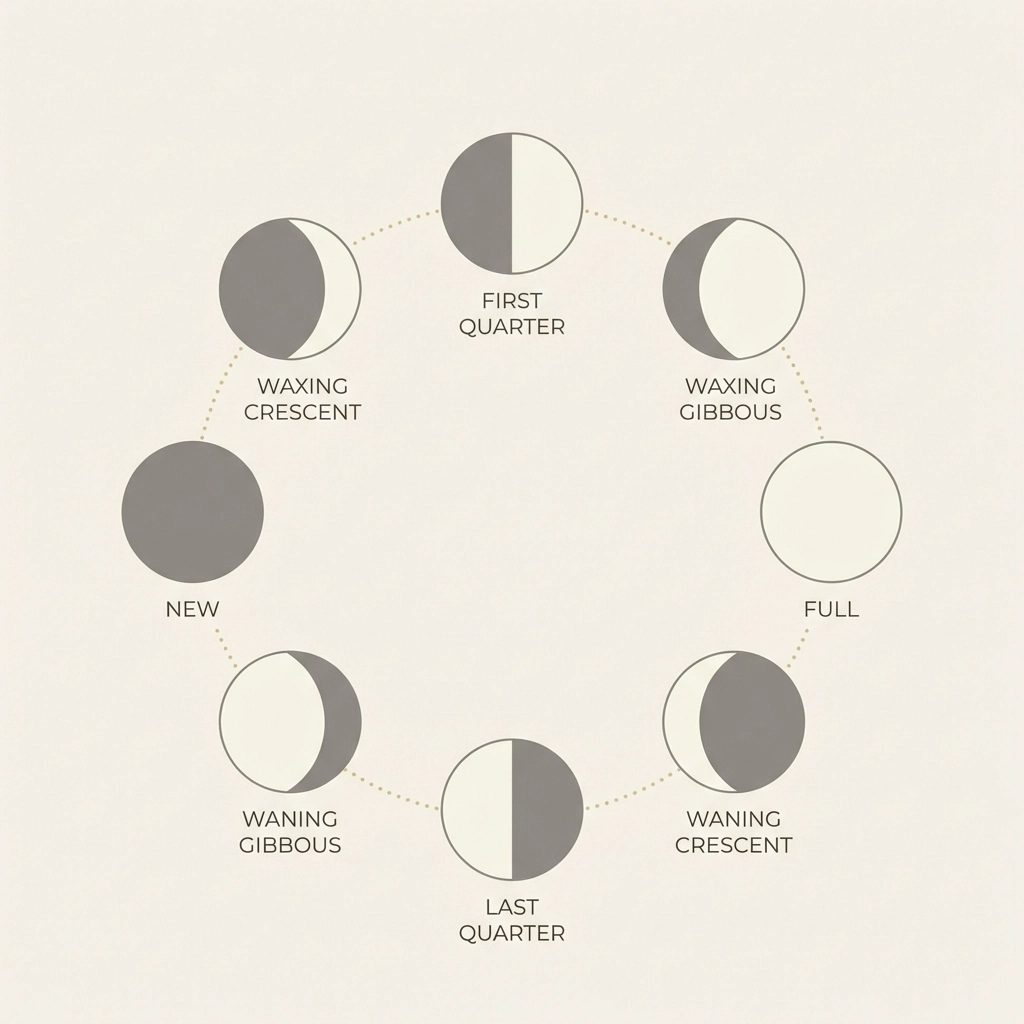
A moon calendar tracks the lunar cycle through its eight distinct phases.
The cycle lasts approximately 29.5 days. Each phase carries specific characteristics that farmers historically used to time garden tasks.
The eight phases:
- New moon
- Waxing crescent
- First quarter
- Waxing gibbous
- Full moon
- Waning gibbous
- Last quarter
- Waning crescent
A physical moon calendar uses rotating wheels to display the current phase and its position within the monthly cycle.
The design allows daily tracking without digital devices. A simple turn of the wheel advances through the phases.
Why Did Farmers Use Moon Phases?
Gravitational pull affects moisture in soil.
The moon’s position influences water movement in plants. Farmers observed patterns over generations.
Waxing moon (new to full): Sap rises. Energy moves upward. Traditional planting time for above-ground crops.
Waning moon (full to new): Energy draws downward. Root development strengthens. Traditional time for root vegetables and transplanting.
Full moon: Maximum gravitational pull. Highest moisture absorption. Peak activity for leafy growth.
New moon: Lowest light. Rest period. Soil preparation and planning.
Modern studies continue to examine these correlations. The practice persists among organic farmers and gardeners worldwide.
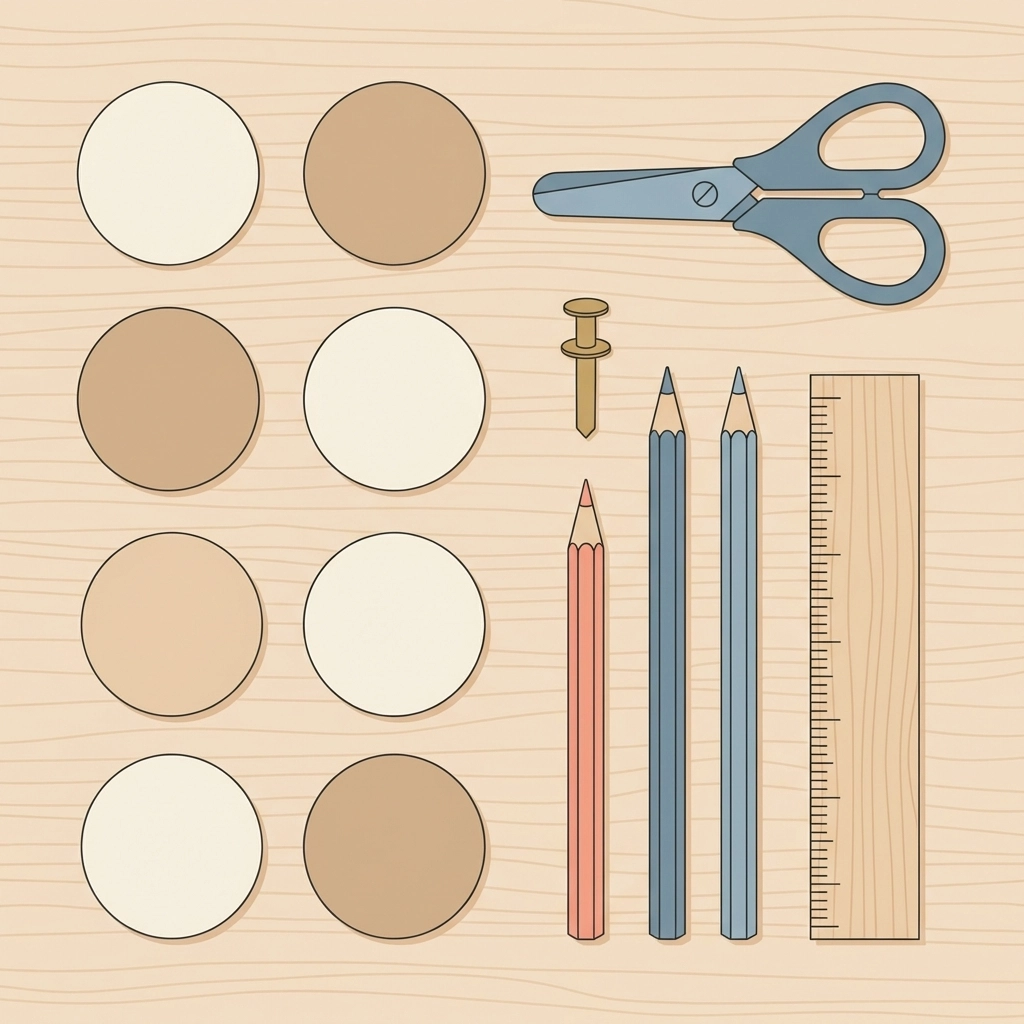
What Materials Are Needed?
Basic supplies found in most homes.
Essential materials:
- Cardboard (pizza box thickness works well)
- Cardstock or heavy paper
- Scissors
- Ruler
- Pencil
- Compass or circular objects for tracing
- Brass fastener (paper brad)
- Hole punch or sharp pencil
Optional additions:
- Colored pencils or markers
- Craft paint
- Clear contact paper for durability
- Printable templates
No specialized tools required. The project adapts to available materials.
A brass fastener connects the rotating wheels. Alternative: two buttons threaded together with needle and thread through the center point.
How Is the Base Wheel Constructed?
The base wheel displays the lunar cycle.
Step 1: Cut a circle from cardboard. Diameter of 8-10 inches provides adequate space for labeling.
Step 2: Divide the circle into eight equal sections. Each section represents one moon phase.
Use a ruler to draw lines from center to edge. The sections should measure 45 degrees each.
Step 3: Label each section with the phase name.
Proceed counterclockwise from the top:
- New moon
- Waxing crescent
- First quarter
- Waxing gibbous
- Full moon
- Waning gibbous
- Last quarter
- Waning crescent
Step 4: Draw or paste the corresponding moon shape in each section.
New moon appears fully dark. Full moon appears fully light. Quarter moons show half illumination. Crescents and gibbous phases show partial illumination.
Step 5: Punch or poke a small hole in the exact center.
The base wheel is complete.
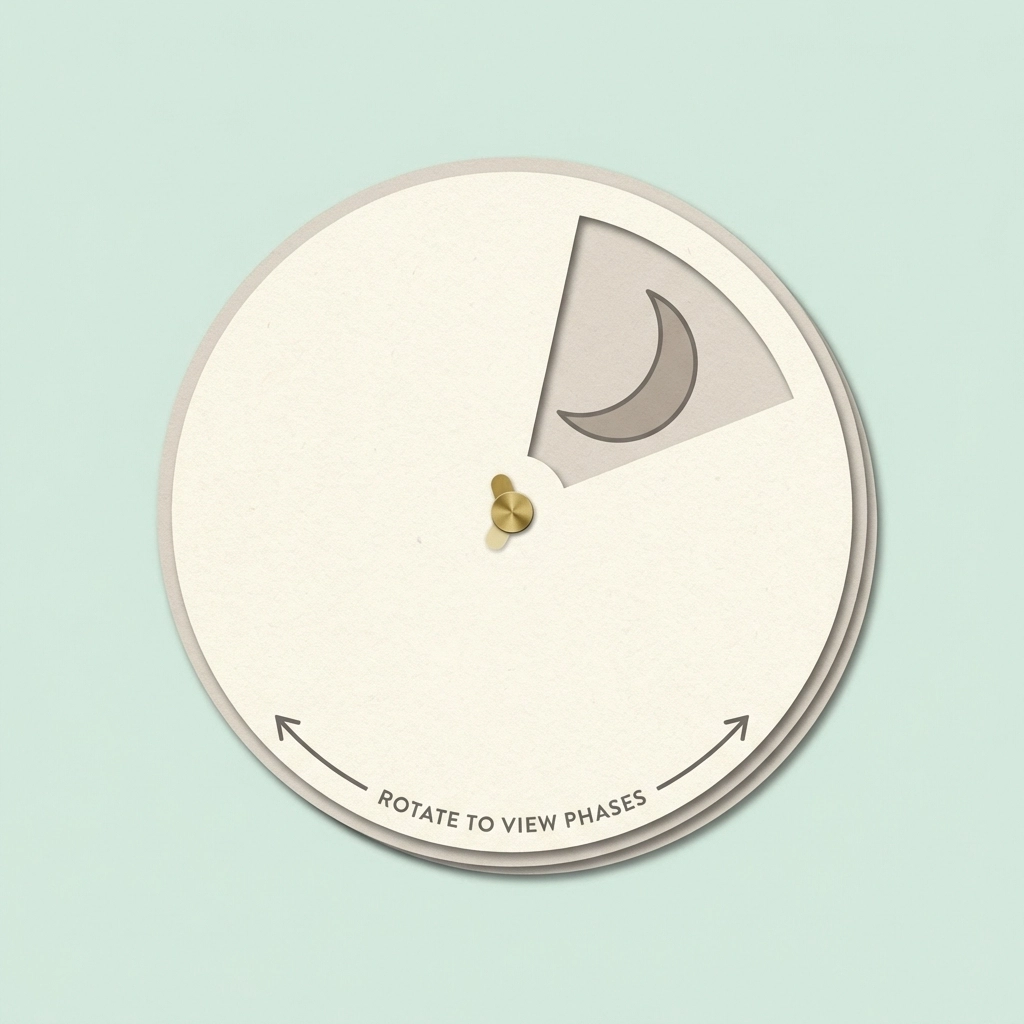
How Is the Viewing Wheel Made?
The viewing wheel sits on top. It reveals one phase at a time through a window.
Step 1: Cut a second circle from cardstock. Same diameter as the base wheel.
Step 2: Cut a wedge-shaped window. The window should expose one section of the base wheel beneath.
Position the window opening toward the outer edge. Leave the center intact for the fastener.
Step 3: Punch a center hole matching the base wheel.
Step 4: Decorate the top surface. Add month markers around the edge if desired.
The viewing wheel controls which phase appears visible.
How Are the Wheels Assembled?
Assembly takes approximately five minutes.
Step 1: Place the base wheel flat. Moon phases facing upward.
Step 2: Position the viewing wheel on top. Align center holes.
Step 3: Insert the brass fastener through both holes from the front.
Step 4: Open the fastener arms flat against the back of the base wheel.
Step 5: Test rotation. The viewing wheel should spin freely while staying connected.
The window reveals each moon phase as the top wheel rotates.
Rotation moves counterclockwise to follow the natural lunar progression.
How Is an Annual Calendar Version Created?
A more advanced design tracks the entire year.
Additional wheel required: A calendar wheel with 12 monthly divisions.
This wheel sits beneath both others. It allows alignment of moon phases with specific dates throughout the year.
Construction steps:
- Cut a third circle slightly larger than the others
- Divide into 12 equal sections (30 degrees each)
- Label each section with a month name
- Mark approximate new moon and full moon dates within each month
- Stack all three wheels with the calendar wheel at the bottom
- Secure with a single fastener through all centers
The lunar cycle repeats approximately 12.3 times per year. Moon phase dates shift annually.
Current astronomical data provides exact dates for any given year. Online lunar calendars offer reference points for marking.
What Customization Options Exist?
The basic design adapts to various purposes.
Garden planning version:
- Add planting symbols to each phase
- Include task reminders (plant, water, fertilize, harvest)
- Color-code for different crop types
Educational version:
- Include astronomical facts about each phase
- Add moonrise and moonset time ranges
- Note the moon’s position relative to Earth and sun
Decorative version:
- Use watercolor paper for painting
- Add pressed flower elements
- Create woodburned designs on thin plywood
Pocket version:
- Reduce diameter to 3-4 inches
- Use laminated paper for durability
- Punch hole at top for keychain attachment
How Long Does the Project Take?
Basic version: 20-30 minutes.
Annual calendar version: 45-60 minutes.
Decorated or painted version: 1-2 hours including drying time.
The craft scales to available time and interest level. A simple version functions identically to an elaborate one.
What Are Common Construction Mistakes?
Loose fastener: The wheels slip instead of rotating smoothly. Solution: use a shorter fastener or add a cardboard washer behind the brad.
Misaligned centers: The wheels wobble during rotation. Solution: measure and mark centers precisely before cutting.
Window too large: Multiple phases show simultaneously. Solution: size the window to reveal only one section at a time.
Wheels too tight: Rotation requires excessive force. Solution: widen the center hole slightly or use a larger fastener.
Incorrect phase order: The cycle appears reversed. Solution: follow counterclockwise arrangement from new moon.
How Is the Calendar Used Daily?
Rotate the viewing wheel to match the current moon phase.
Check the phase each morning. Advance the wheel as the moon progresses.
Practical applications:
- Time seed planting during appropriate phases
- Schedule watering during high-moisture periods
- Plan harvesting around the waning moon
- Coordinate transplanting with root-strengthening phases
The calendar serves as both tracking tool and planning reference.
No batteries. No screens. No subscriptions.
A functional piece of agricultural heritage. Built by hand. Used daily.
The same lunar patterns that guided farmers centuries ago remain visible in the night sky. A handmade moon calendar creates direct connection to that continuous cycle.


