


A miniature working waterwheel requires two paper plates, four cups, one straw, and tape. Assembly takes under 20 minutes. The finished wheel spins under running water or when submerged in a bowl.
This project demonstrates mechanical energy conversion. Water weight creates rotational force. Gravity does the work.
Waterwheels powered civilization for centuries. Mills ground grain. Sawmills cut lumber. Irrigation systems moved water uphill.
Building a small version brings that engineering principle to a kitchen table.
What Materials Are Needed for a DIY Waterwheel?
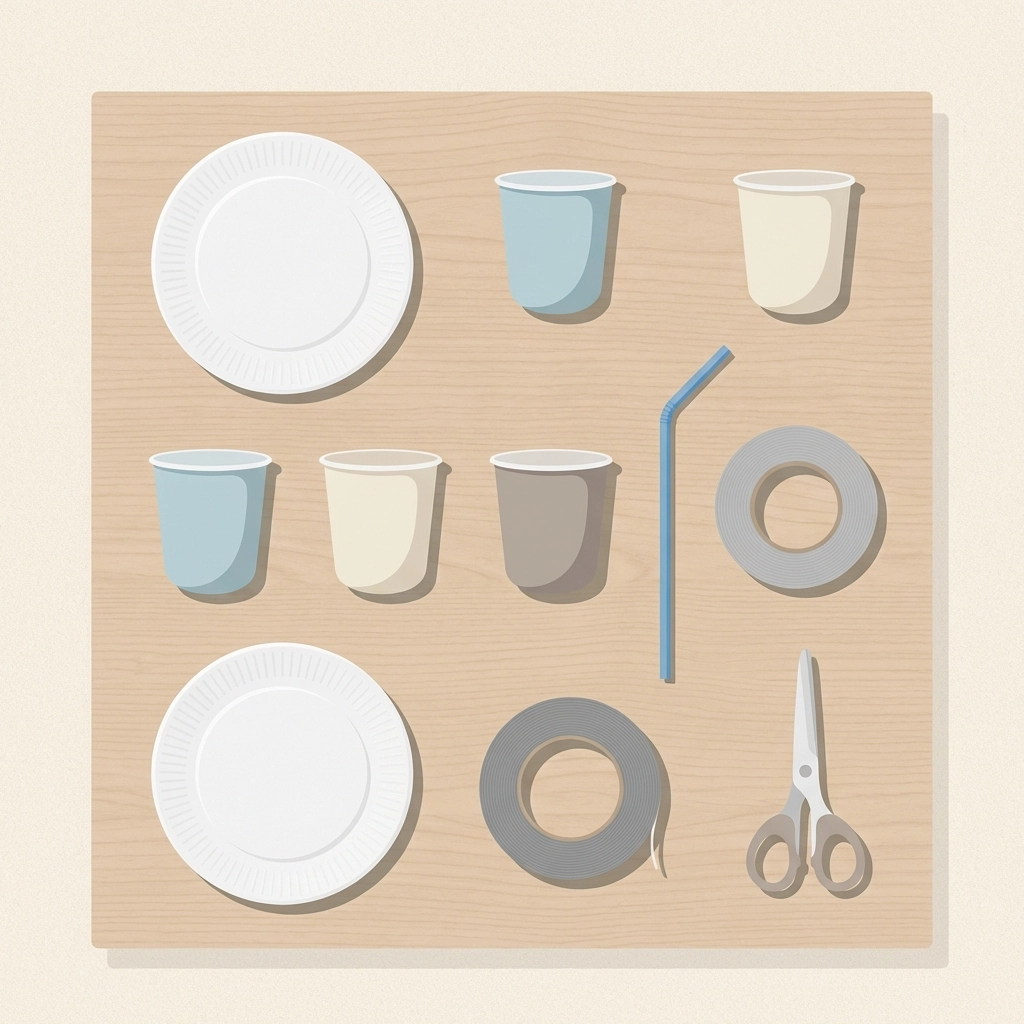
Gather these supplies before starting:
- 2 paper plates (standard dinner size)
- 4 plastic cups or paper cups (small, 3-5 oz work best)
- 1 plastic drinking straw (or wooden dowel for durability)
- Waterproof tape (duct tape or packing tape)
- Scissors or a sharp pencil
- Large bowl, sink, or outdoor water source
Optional additions:
- Hot glue gun (for permanent assembly)
- Cardboard for reinforcement
- String and small weight (to demonstrate power output)
- Food coloring (to visualize water flow)
All materials exist in most households. No specialty purchases required.
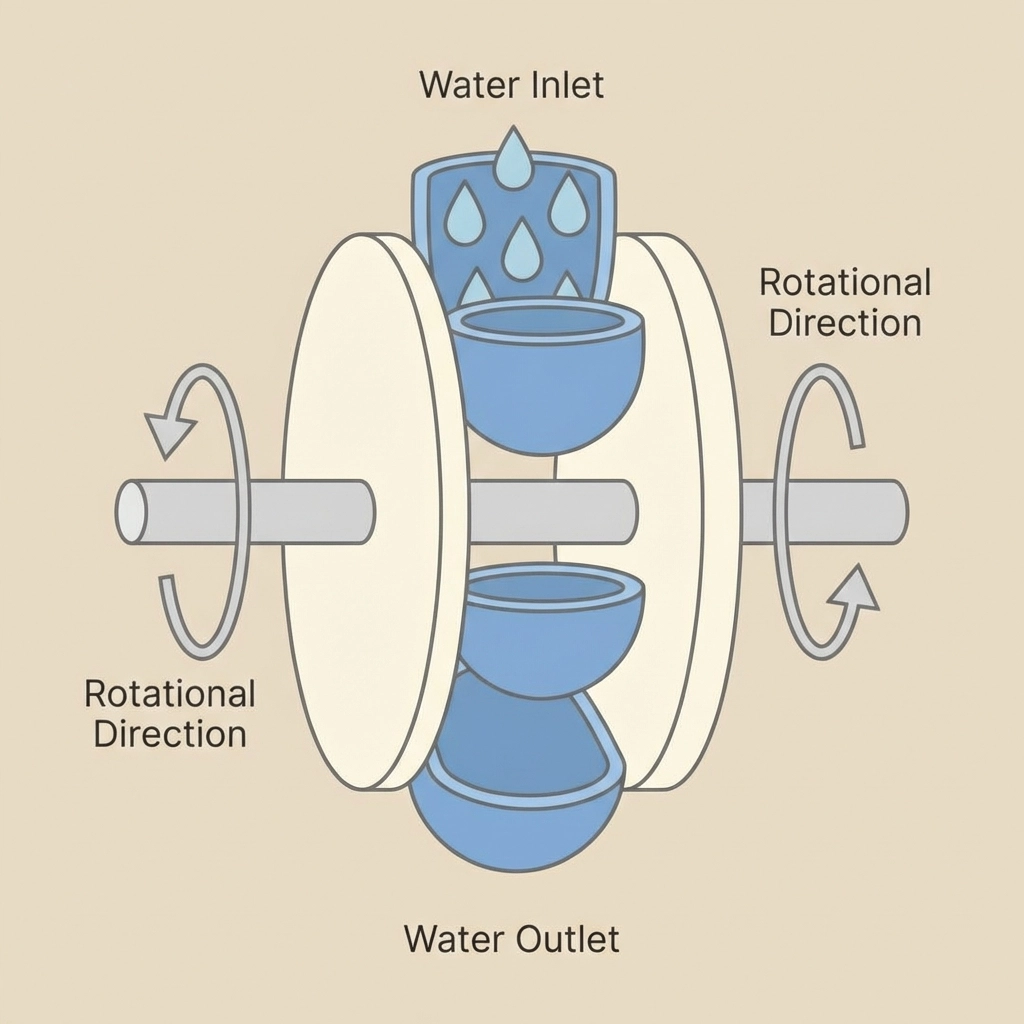
How Do Waterwheel Paddles Work?
Paddles catch water. Water has weight. Weight creates force.
Each paddle fills as it passes under flowing water. The filled paddle becomes heavier than empty ones. Gravity pulls the heavy side down.
The wheel rotates.
As each paddle reaches the bottom of its arc, water spills out. The paddle rises. Another paddle fills at the top.
This cycle repeats continuously.
The overshot waterwheel design works this way. Water enters from above. Gravity maximizes efficiency.
Undershot wheels work differently. Water flows beneath the wheel and pushes paddles horizontally. Less efficient but useful in shallow streams.
This project uses the overshot principle. Cups act as buckets. The straw serves as an axle.
What Are the Step-by-Step Instructions?
Step 1: Prepare the Plates
Place both paper plates face-down on a flat surface.
Locate the exact center of each plate. Mark it with a pencil.
Poke a hole through each center point. The hole must fit the straw snugly but allow rotation.
Test the straw. It should spin freely without excessive wobble.
Step 2: Attach the Paddles
Take one paper plate. Keep it face-down.
Position the first cup on the plate’s edge. The cup opening faces sideways, perpendicular to the plate surface.
Tape the cup securely. Use multiple strips of tape. The cup must stay attached when wet.
Attach the second cup directly opposite the first. Space them 180 degrees apart.
Add the third and fourth cups at 90-degree intervals. All four cups now divide the plate into equal quarters.
All cup openings face the same rotational direction. This matters. Water must enter each cup as it passes through the stream.
Step 3: Seal the Wheel
Place the second paper plate on top of the cups. Face-down orientation.
Align the center holes of both plates.
Tape the plates together around the edges. Create a sealed drum with cups sandwiched between the plates.
The structure now resembles a cylinder with four bucket compartments.
Step 4: Insert the Axle
Thread the straw through both center holes.
The straw should extend 2-3 inches beyond each plate on both sides.
Spin the assembly. Confirm smooth rotation.
If the wheel sticks or wobbles, enlarge the holes slightly. Too loose creates instability. Too tight prevents spinning.
Step 5: Test the Waterwheel
Hold the straw horizontally between two fingers.
Position the wheel under a slow faucet stream. Direct water into the top of the wheel where cups pass through.
The wheel spins.
Adjust water pressure. Too fast overwhelms the cups. Too slow lacks force. Find the optimal flow rate.
Alternatively, dip the wheel into a filled bowl and pour water over the top edge. Same principle applies.

Why Does the Wheel Keep Spinning?
Continuous rotation depends on four factors:
- Steady water supply – Each cup must fill before the previous one empties
- Proper cup angle – Openings must catch water efficiently
- Low axle friction – The straw must spin freely
- Balanced weight distribution – Cups should be identical in size and attachment
The wheel stops when water flow ends. No stored energy exists in this basic design.
Real waterwheels connect to gears and shafts. Rotational energy transfers to grindstones, pumps, or generators.
A simple extension: tie a string around the straw with a small weight attached. The spinning axle winds the string and lifts the weight.
Mechanical advantage demonstrated.
What Variations Improve Performance?
Increase Paddle Count
Eight cups spin faster than four. More paddles catch more water per rotation.
Smaller cups work better for higher counts. Bathroom-size paper cups fit eight around a standard plate.
Use Waterproof Materials
Paper degrades when wet. Repeated use causes failure.
Plastic plates last longer. Cut plastic cups in half lengthwise for curved paddles.
Hot glue creates permanent waterproof bonds. Replace tape for durable assembly.
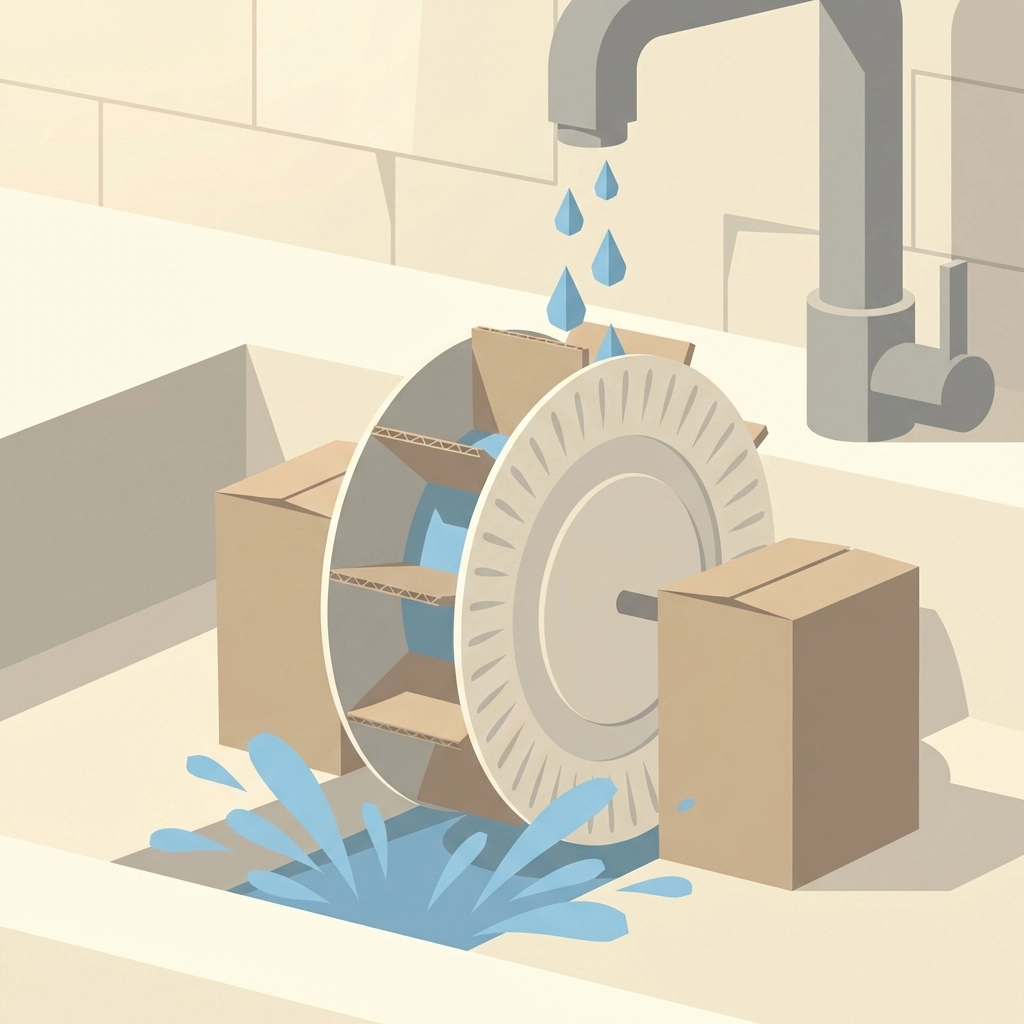
Build a Support Frame
Holding the straw by hand limits observation time.
Create a simple frame:
- Two cardboard boxes of equal height
- Cut V-notches in the top of each box
- Rest the straw ends in the notches
- Position water source above the wheel
The wheel now spins hands-free.
Add a Power Output
Wrap string around the straw axle. Attach a small weight to the string end.
Pour water over the wheel. The spinning axle winds the string and lifts the weight.
This demonstrates work output. The waterwheel converts water’s potential energy into mechanical lifting power.
What Science Concepts Does This Project Teach?
The waterwheel illustrates multiple principles:
- Potential energy – Water held at height contains stored energy
- Kinetic energy – Moving water transfers force to paddles
- Gravity – Pulls filled cups downward, creating rotation
- Mechanical advantage – Axle rotation can lift weights or drive machinery
- Renewable energy – Water power requires no fuel consumption
Teachers use this project for STEM curriculum. Homeschool families integrate it with history lessons about pre-industrial technology.
The activity scales. Younger children focus on construction and observation. Older students calculate efficiency ratios and energy transfer rates.
What Common Mistakes Should Be Avoided?
Cups facing wrong direction. All openings must face the same way relative to rotation. Backwards cups dump water before reaching the bottom.
Holes too tight. Friction stops the wheel. The straw must spin freely.
Uneven cup placement. Asymmetry causes wobble. Measure angles carefully.
Too much water pressure. Overwhelming flow floods the system. Gentle streams work better.
Paper plates too flimsy. Reinforce with cardboard circles glued to the backs. Or use plastic plates.
How Does This Connect to Real Engineering?
Hydroelectric dams operate on identical physics. Water falls from reservoir height. Turbines spin. Generators produce electricity.
The scale differs. The principle remains constant.
Historical mills used waterwheels for centuries before steam engines existed. Communities built around rivers. Water access determined economic viability.
Modern micro-hydro systems power off-grid homes. Small streams generate continuous electricity. No fuel costs. Minimal environmental impact.
Building a miniature version creates understanding. Abstract concepts become tangible.
Engineering education benefits from hands-on construction. Concepts stick when built, not just read.
What Comes After the Basic Build?
Advanced projects extend the waterwheel concept:
- Connect to a small generator and power an LED light
- Build a gear system to increase rotational speed
- Design a pump mechanism to lift water between containers
- Construct a larger outdoor version using buckets and PVC pipe
Each extension adds complexity. Each teaches additional principles.
The simple paper plate version serves as foundation. Mastery opens doors to sophisticated engineering challenges.


