


The tissue paper method.
Paint adhesive onto a mason jar. Press colorful tissue paper pieces onto the surface. Let dry. Drop in an LED tealight.
Total time: 20 to 30 minutes.
Total cost: under $10.
Appropriate ages: 5 and up.
This craft requires no special skills. No heat. No sharp tools. The result looks like stained glass when lit from within.
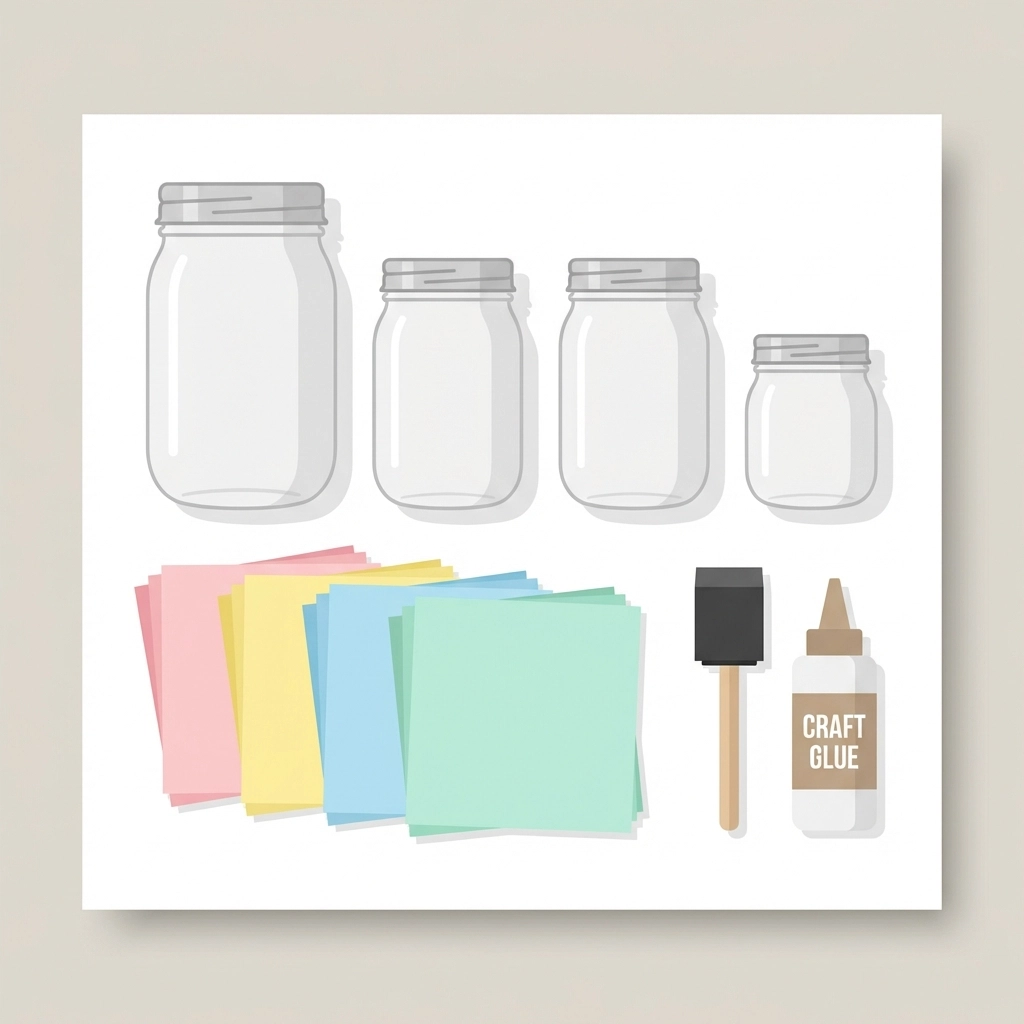
What Supplies Are Needed for Mason Jar Lanterns?
The supply list is short.
Essential materials:
- Mason jars (any size works)
- Tissue paper in multiple colors
- Mod Podge or white school glue
- Foam brush or paintbrush
- LED flameless tealight candles
Optional additions:
- Glitter
- Ribbon
- Twine
- Dried flowers
- Acrylic gems
Most households already own half these items. The rest cost a few dollars at any craft store or dollar shop.
Mason jars come in various sizes. Pint-sized jars work best for small hands. Quart-sized jars create larger lanterns for centerpieces.
A note on adhesive: Mod Podge dries clear and creates a sealed finish. White school glue works equally well when diluted with a small amount of water. Both options wash off hands and surfaces easily.
How Does the Tissue Paper Method Work?
This technique creates a translucent, mosaic-like surface.
Light passes through the colored tissue paper. Each piece glows. The effect resembles stained glass windows.
The process involves three basic actions:
- Apply adhesive to the jar
- Press tissue paper onto the adhesive
- Seal with another layer of adhesive
Children grasp this sequence quickly. Repetition builds confidence. The forgiving nature of tissue paper means mistakes blend into the design.
What Are the Step-by-Step Instructions?
Step 1: Prepare the Workspace
Cover the work surface with newspaper or a plastic tablecloth.
Gather all supplies within reach. Pour Mod Podge or diluted glue into a shallow dish.
Clean the mason jar with a damp cloth. Remove any labels or sticky residue. Dry completely.
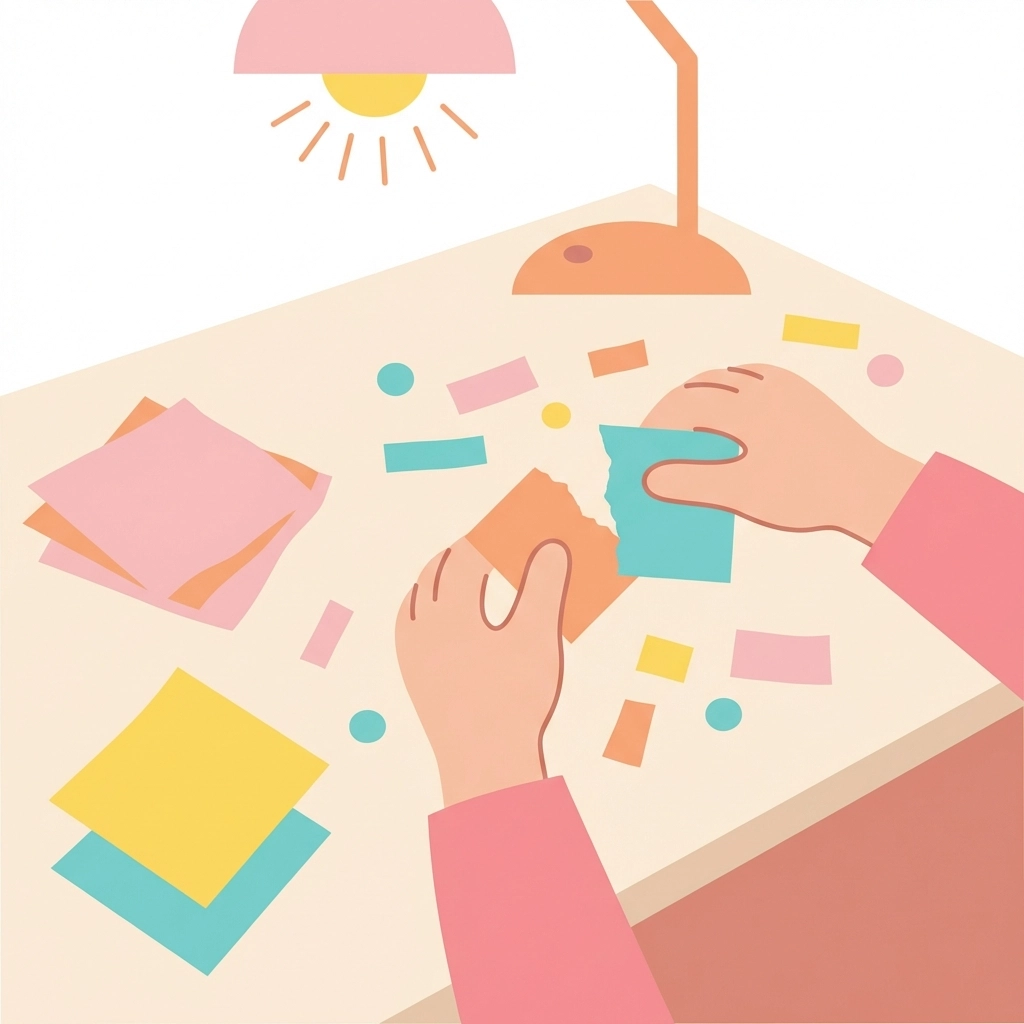
Step 2: Cut or Tear the Tissue Paper
Tissue paper can be cut into shapes or torn into random pieces.
For younger children (ages 5-7): Tearing works best. No scissors required. Irregular edges create an organic, artistic look.
For older children (ages 8+): Cutting allows for geometric patterns, specific shapes, or themed designs.
Recommended piece sizes:
- Small pieces: 1 to 2 inches
- Medium pieces: 2 to 3 inches
- Large pieces create fewer layers and less color variation
Prepare 30 to 50 pieces before beginning. This prevents stopping mid-project.
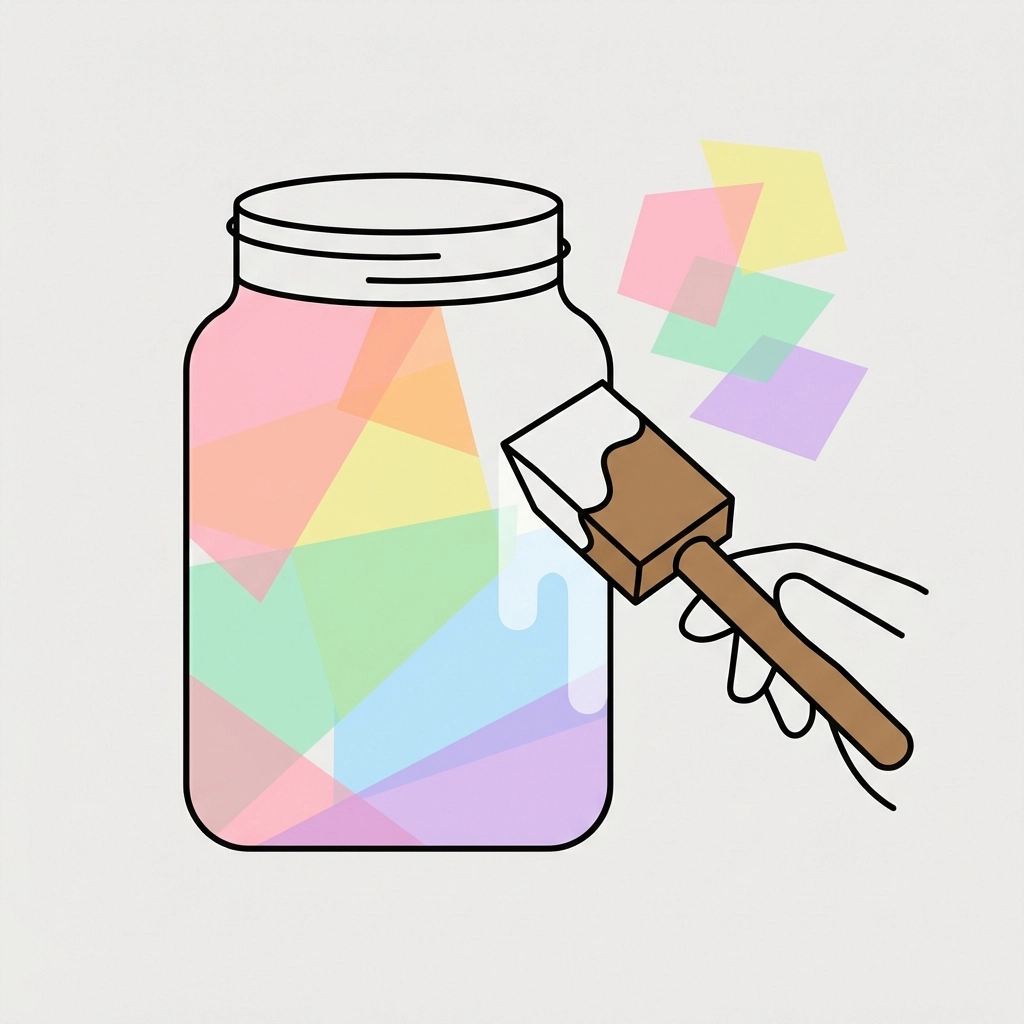
Step 3: Apply the First Layer of Adhesive
Use the foam brush to paint a thin layer of Mod Podge onto a small section of the jar.
Work in sections. The adhesive dries within minutes. Coating the entire jar at once causes the first sections to dry before tissue paper application.
Start with a 2-inch by 2-inch area.
Step 4: Place the Tissue Paper
Press a piece of tissue paper onto the wet adhesive.
Smooth gently with fingertips or the brush. Wrinkles add texture. They catch light in interesting ways.
Overlap pieces slightly. This prevents gaps where plain glass shows through.
Continue the pattern:
- Apply adhesive to a new section
- Press tissue paper onto the wet surface
- Overlap with adjacent pieces
- Repeat until the entire jar is covered
Leave the bottom of the jar uncovered. The lantern sits on this surface.
Step 5: Seal with a Top Coat
Once the entire jar is covered, let it rest for 5 minutes.
Apply a thin layer of Mod Podge over all the tissue paper. This seals the design. It prevents peeling. It adds a subtle sheen.
Cover every piece of tissue paper. Pay attention to edges.
Step 6: Dry Completely
Drying time: approximately 30 minutes.
A hair dryer speeds this process. Children find this step entertaining. Use the low heat setting. Hold 6 inches from the jar surface.
The jar feels slightly tacky when partially dry. Fully dry jars feel smooth and solid.
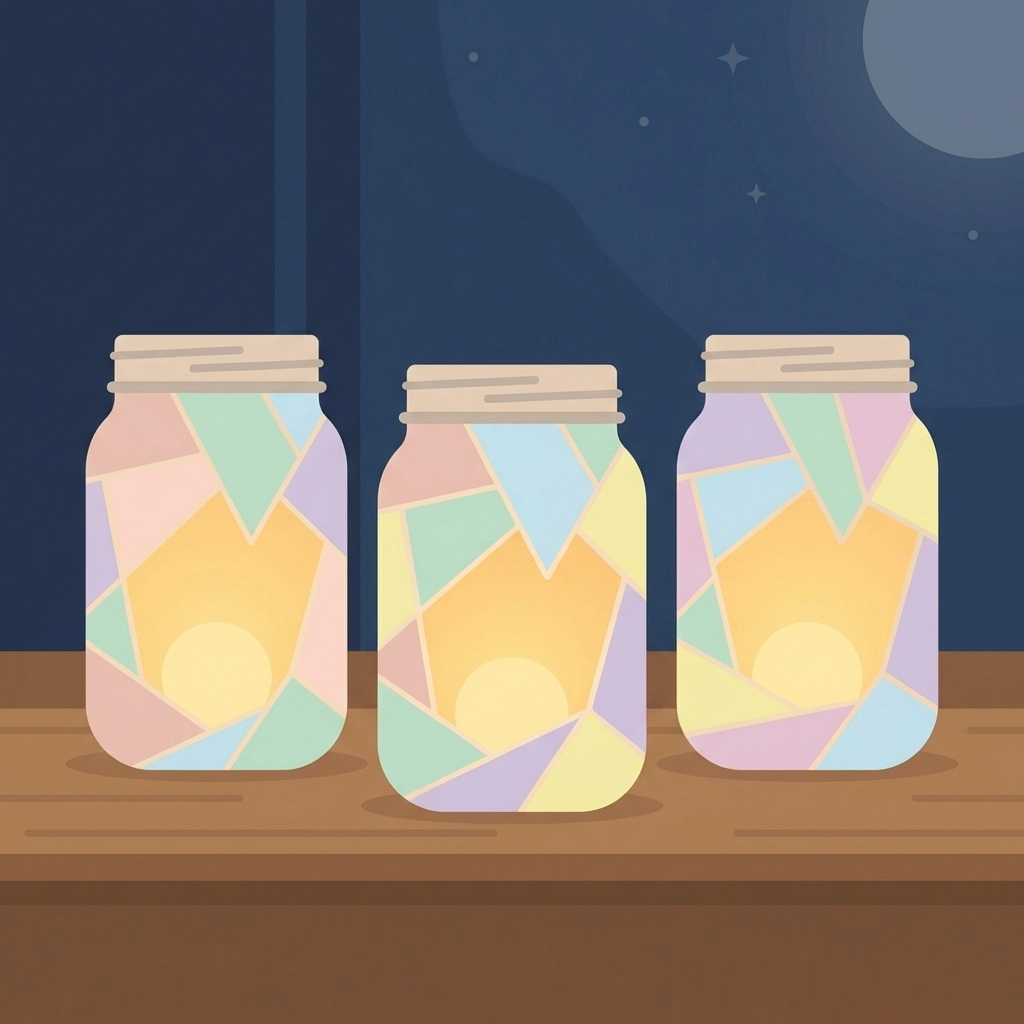
Step 7: Add the Light Source
Drop an LED flameless tealight into the jar.
LED candles only. Real candles pose fire hazards. Paper and adhesive are flammable materials. Flameless options eliminate risk entirely.
Battery-operated tealights cost $1 to $3 for a multi-pack. They last for dozens of hours.
Turn on the light. Place in a dim room. Watch the colors glow.
What Are Some Design Variations?
The Rainbow Pattern
Arrange tissue paper in color order: red, orange, yellow, green, blue, purple.
Create horizontal stripes or diagonal bands. This teaches color sequencing while crafting.
The Mosaic Style
Use small, uniform squares of tissue paper.
Arrange in a grid pattern. Leave tiny gaps between pieces. The glass peeks through, creating a true mosaic effect.
The Ombre Effect
Select three shades of one color: light, medium, dark.
Apply the darkest shade at the bottom. Transition to medium in the middle. Finish with the lightest shade at the top.
The Themed Lantern
Cut tissue paper into specific shapes:
- Hearts for Valentine's Day
- Leaves for autumn
- Stars for Independence Day
- Snowflakes for winter
Layer shapes over a base color for dimensional designs.
What Optional Embellishments Work Best?
Glitter: Apply a thin line of glue around the jar rim. Sprinkle glitter onto the wet glue. Shake off excess. Creates a sparkling border.
Ribbon or Twine: Tie around the jar neck after the lantern dries completely. Adds texture and a finished appearance.
Dried Flowers: Press small dried flowers onto the jar during the tissue paper application. Seal with Mod Podge. Creates botanical lanterns.
Acrylic Gems: Glue flat-backed gems onto the dried surface. Position randomly or in patterns.
Each embellishment adds 5 minutes to the project. Choose one or two. Too many elements overwhelm the design.
Where Should Finished Lanterns Be Displayed?
Mason jar lanterns serve multiple purposes.
Indoor display ideas:
- Bedroom nightlights
- Dining table centerpieces
- Bathroom counter accents
- Bookshelf decorations
- Windowsill arrangements
Outdoor display ideas:
- Patio table lighting
- Porch step decorations
- Garden path markers
- Outdoor dinner ambiance
Gift applications:
- Teacher appreciation gifts
- Grandparent presents
- Holiday hostess gifts
- Birthday party favors
Group multiple lanterns together for greater impact. Three to five jars of varying heights create visual interest.
What Safety Considerations Matter?
Adhesive safety: Mod Podge and school glue are non-toxic. Wash hands after crafting. Avoid contact with eyes.
Glass safety: Mason jars can break if dropped. Supervise younger children during handling. Work on carpeted surfaces when possible.
Light safety: LED tealights only. Never use real candles inside paper-covered jars. Battery-operated lights eliminate fire risk completely.
Cleanup: Mod Podge washes off surfaces and skin with warm water while still wet. Dried adhesive requires scrubbing.
Why Does This Craft Work So Well for Kids?
The tissue paper lantern method succeeds for specific reasons.
Low skill barrier. Tearing paper and pressing it onto a sticky surface requires no fine motor precision.
Immediate results. The project completes in one sitting. No waiting days for results.
Creative freedom. No wrong way to arrange tissue paper. Every design works.
Functional outcome. The finished product serves a real purpose. Children see their work used.
Affordability. Under $10 for supplies that make multiple lanterns.
Mason jar lanterns combine simplicity with satisfaction. The glowing result rewards the effort. Children remember making something beautiful and useful.
The craft scales easily. One child completes it in 20 minutes. A group of ten children completes it in 30 minutes with minimal supervision.
This remains one of the most reliable, repeatable crafts for ages 5 and up.


