


The best upcycling projects for backyard gardens with kids include tin can planters, bottle cap flowers, colander hanging baskets, old boot planters, and teacup succulent gardens. These projects transform everyday household items headed for the trash into colorful, functional garden art: while teaching kids about creativity, sustainability, and growing things.
Let's dig into each project with simple step-by-step instructions your whole family can tackle this weekend.
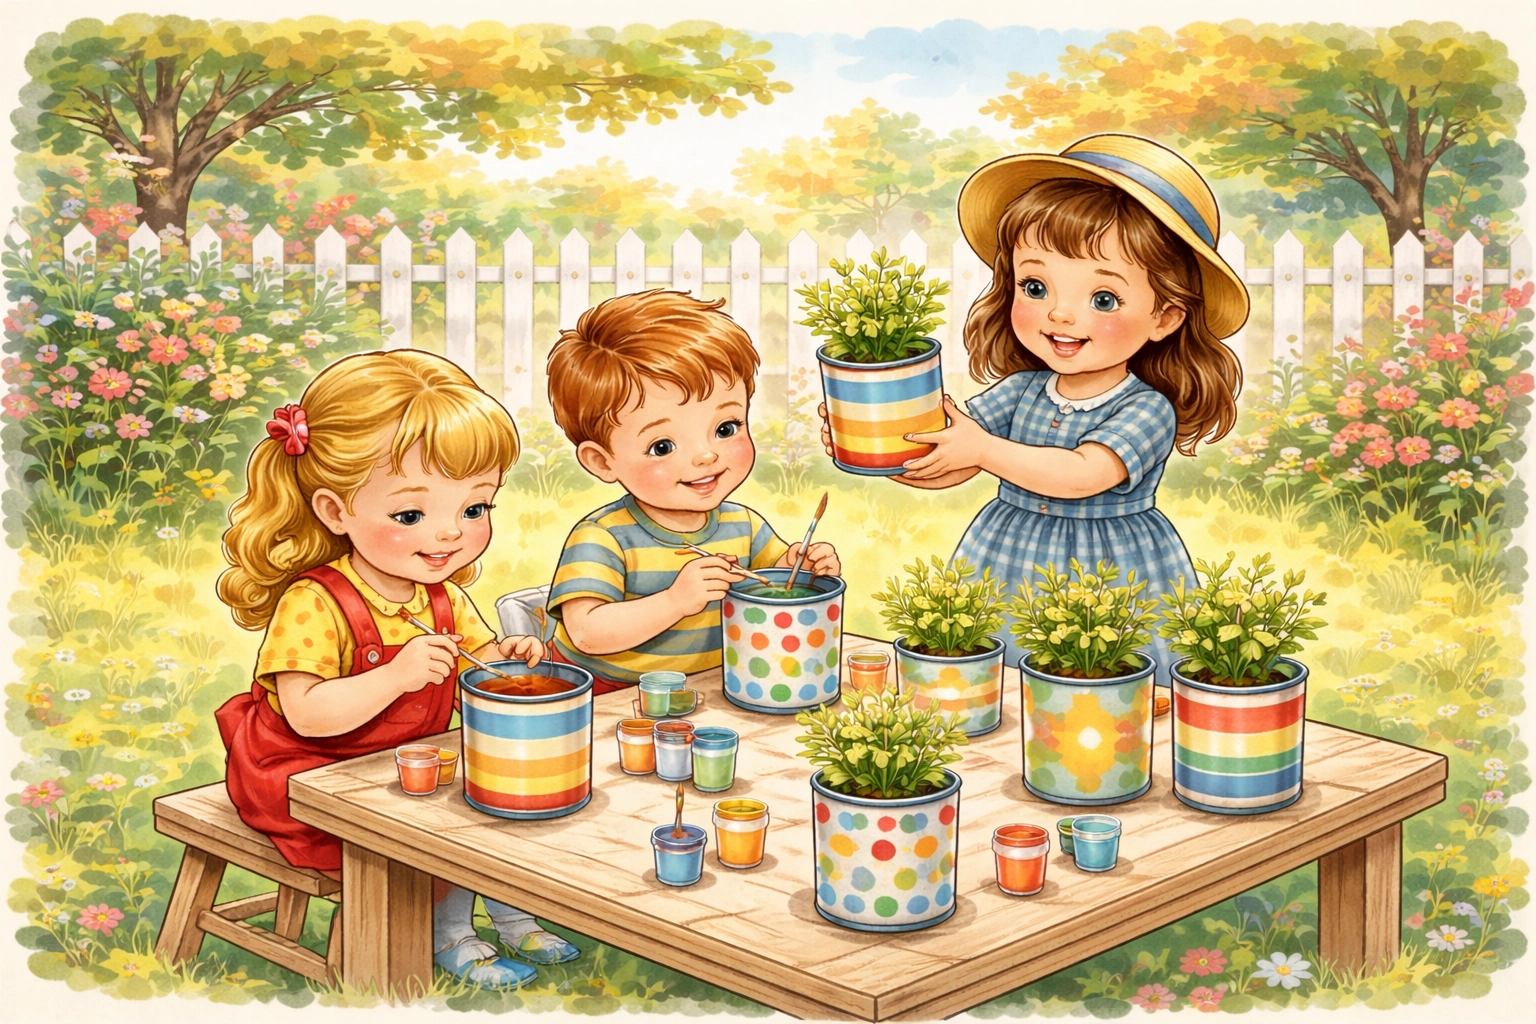
Project 1: Rainbow Tin Can Planters
Those empty soup and vegetable cans? They're about to become the cutest little planters in your garden.
What You'll Need
- 4–6 clean tin cans (labels removed)
- Acrylic outdoor paint in bright colors
- Paintbrushes
- Hammer and nail (adult step)
- Potting soil
- Small herb or flower seedlings
Step-by-Step Instructions
Step 1: Wash your cans thoroughly and let them dry completely. Make sure there are no sharp edges: if there are, use a can opener that leaves smooth edges or cover the rim with tape.
Step 2: Using the hammer and nail, poke 3–4 drainage holes in the bottom of each can. This is a grown-up job, but kids can mark where the holes should go with a marker.
Step 3: Let the kids go wild with paint! Stripes, polka dots, rainbow swirls: anything goes. Let dry for at least 2 hours (or overnight for best results).
Step 4: Fill each can about three-quarters full with potting soil.
Step 5: Plant your seedlings. Herbs like basil, mint, or chives work great in these smaller containers.
Step 6: Arrange your rainbow planters along a fence, on a windowsill, or grouped together on your patio.
Pro tip: Want to turn these into wind chimes instead? Skip the drainage holes, punch one hole near the top rim, thread twine through, and hang several cans at different heights from a sturdy branch or dowel.
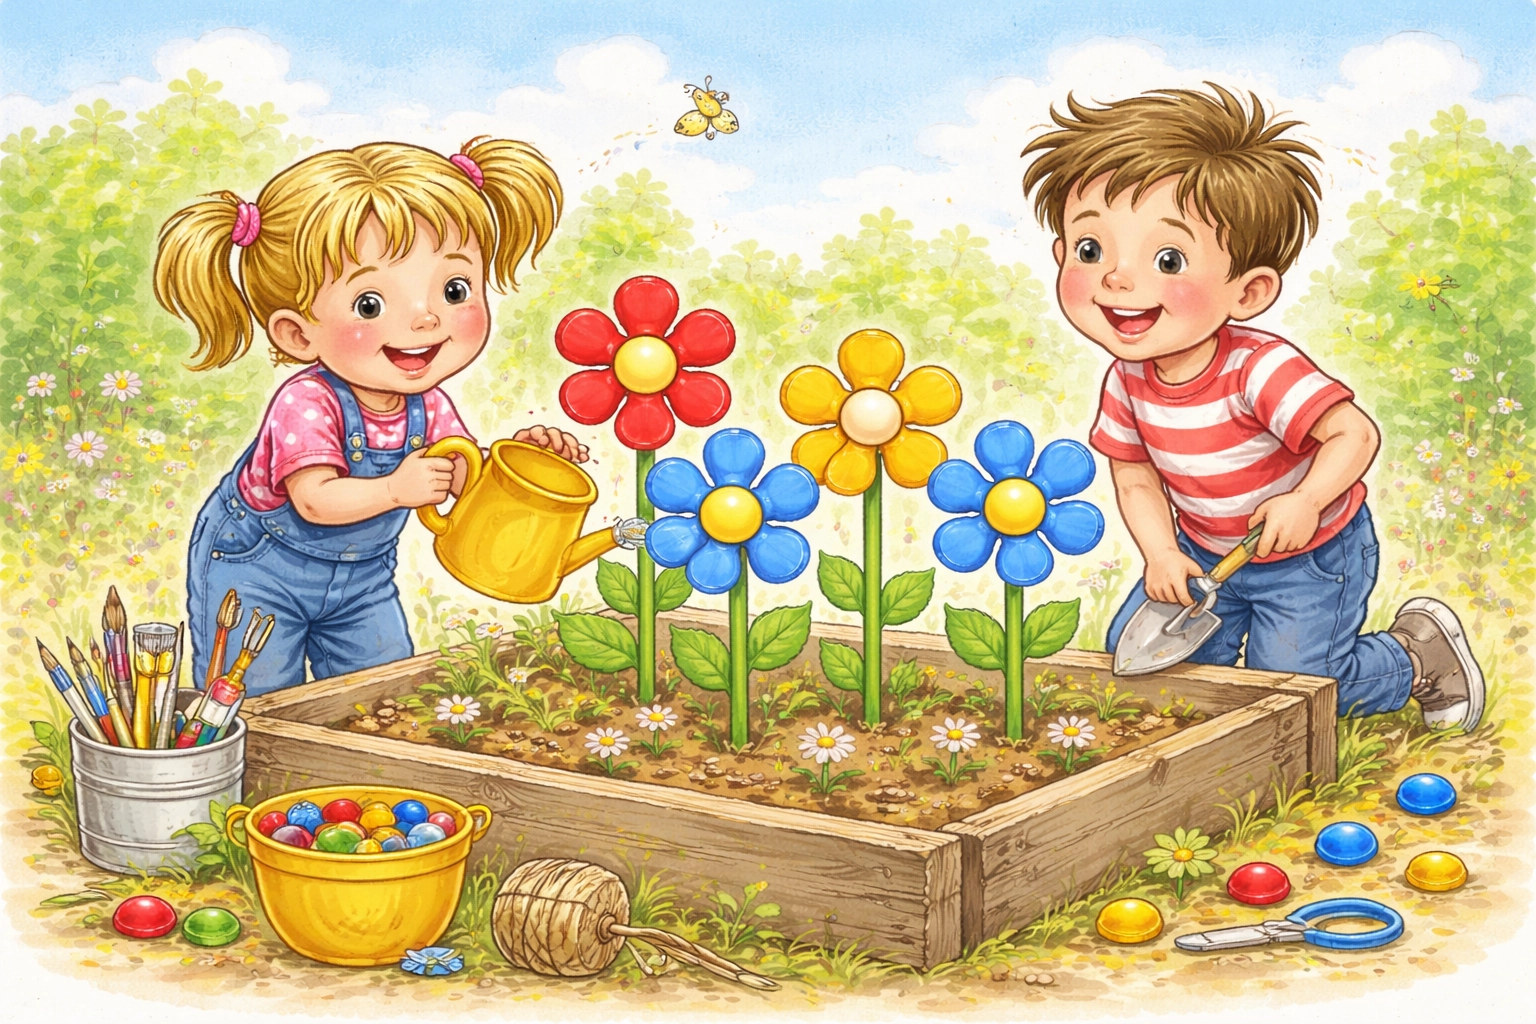
Project 2: Bottle Cap Garden Flowers
Every time you open a soda or juice bottle, you're one cap closer to a garden full of flowers that never need watering.
What You'll Need
- 20–30 plastic bottle caps (various colors work great)
- Acrylic paint (if caps need color)
- Hot glue gun (adult supervision required)
- Wooden garden stakes or sturdy sticks
- Green paint for stakes
Step-by-Step Instructions
Step 1: Sort your bottle caps by color. If you don't have enough colorful ones, paint plain caps and let them dry completely.
Step 2: Paint your wooden stakes green to look like flower stems. Set aside to dry.
Step 3: Arrange 6–7 caps in a flower pattern on a flat surface: one cap in the center surrounded by the others as petals.
Step 4: Once you're happy with your arrangement, have an adult use the hot glue gun to secure the caps together.
Step 5: Glue the finished flower to the top of your green stake.
Step 6: Stick your bottle cap flowers throughout the garden. They add pops of color in spots where real flowers haven't bloomed yet: and they look cheerful all year round.
Bonus idea: Create an entire bottle cap flower garden along a pathway or use them to mark different sections of your vegetable garden.
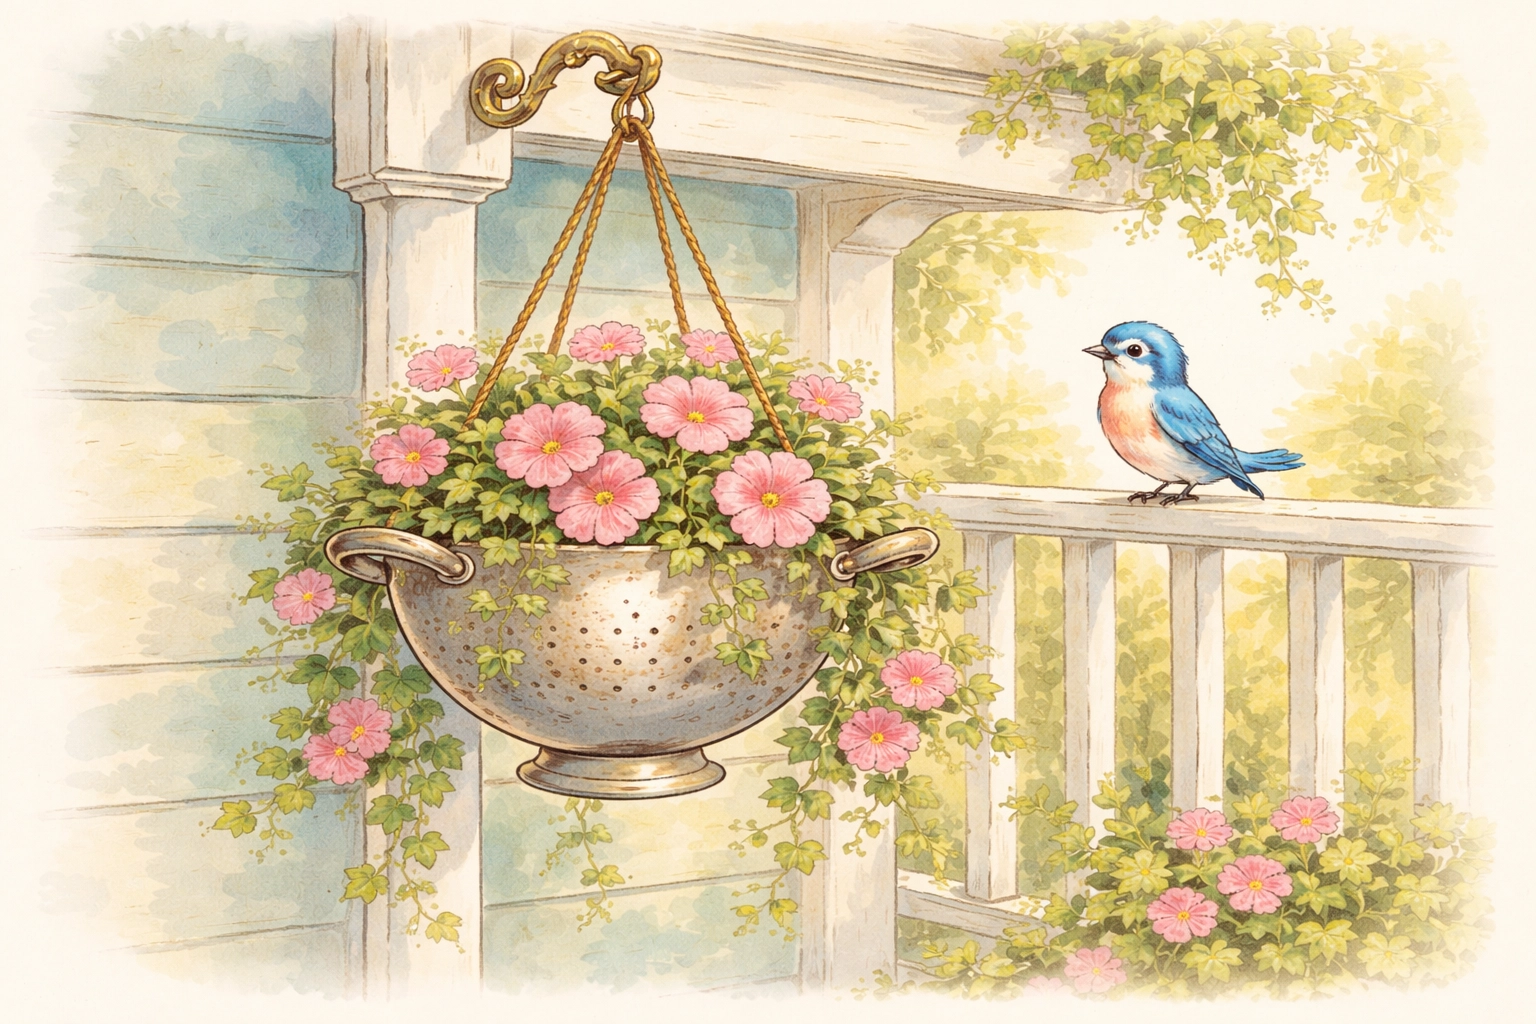
Project 3: Colander Hanging Baskets
That old colander with the wobbly handle? It's already got built-in drainage holes: which makes it a perfect planter just waiting to happen.
What You'll Need
- Old colander (metal or plastic)
- 3 lengths of chain or sturdy rope (each about 2 feet long)
- S-hook or carabiner for hanging
- Landscape fabric or burlap
- Potting soil
- Trailing plants (petunias, ivy, or strawberries work beautifully)
Step-by-Step Instructions
Step 1: Line the inside of your colander with landscape fabric or a piece of burlap. This keeps soil from falling through the drainage holes while still allowing water to escape.
Step 2: Attach your three chains or ropes evenly around the colander's rim. If your colander has handles, you can loop through those. Otherwise, thread the chains through holes near the rim.
Step 3: Gather the three chains at the top and connect them with an S-hook or carabiner.
Step 4: Fill the lined colander with potting soil, leaving about an inch of space at the top.
Step 5: Plant your trailing flowers or plants, pressing the soil gently around the roots.
Step 6: Hang your new planter from a sturdy hook on your porch, a tree branch, or a shepherd's hook in the garden.
Kids love watching the plants trail down over the edges: and it's a great conversation starter when guests ask, "Is that a colander?!"
Project 4: Old Boot and Rain Boot Planters
Those rubber rain boots the kids outgrew last spring? They're about to get a second life as the quirkiest planters on the block.
What You'll Need
- Old rain boots, work boots, or rubber boots
- Drill or sharp knife (adult step)
- Gravel or small rocks
- Potting soil
- Small flowers or succulents
Step-by-Step Instructions
Step 1: Clean out the boots and let them dry.
Step 2: Have an adult drill or poke 4–5 drainage holes in the sole of each boot. Without drainage, water will pool and rot your plants' roots.
Step 3: Add a 1-inch layer of gravel to the bottom of each boot for extra drainage.
Step 4: Fill the boots with potting soil up to about 2 inches from the top.
Step 5: Plant small flowers, succulents, or herbs. Pansies, marigolds, and sedum all do great in boot planters.
Step 6: Arrange your boot garden along a fence, on porch steps, or even hang them by their loops on hooks.
Fun twist: Use a mismatched collection of boots in different sizes and colors for a whimsical "garden march" effect.
Project 5: Teacup and Teapot Succulent Gardens
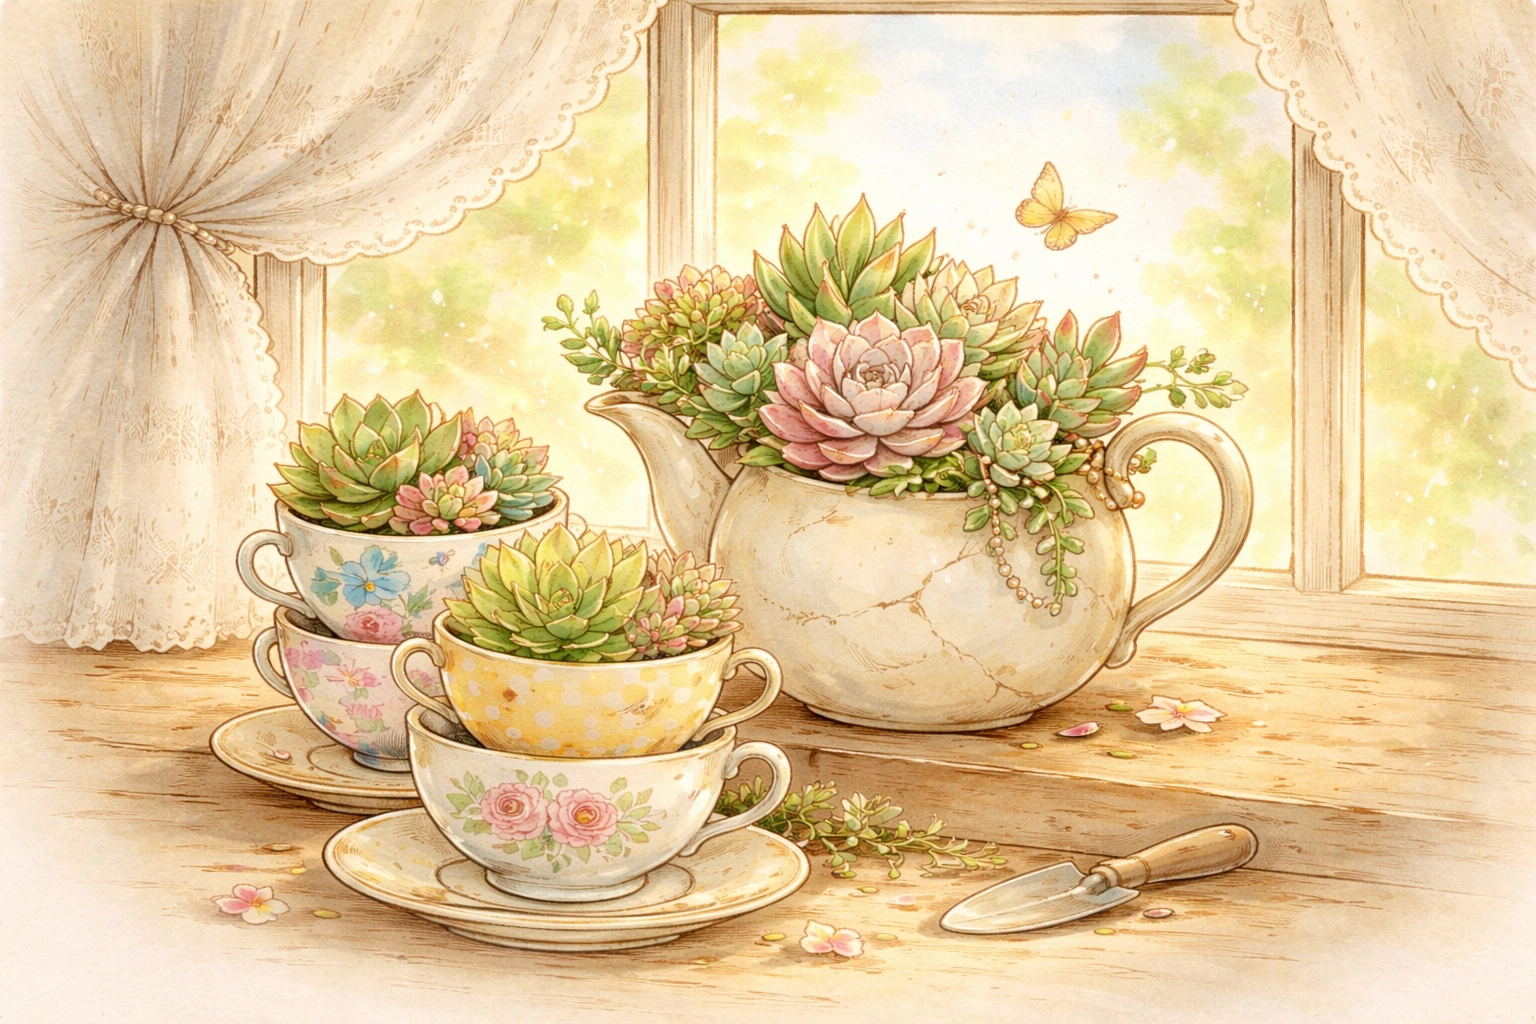
Chipped teacups, cracked teapots, mismatched mugs: they're all destined for succulent greatness.
What You'll Need
- Old teacups, mugs, or teapots
- Drill with ceramic/glass bit OR skip drilling and use as indoor planters
- Small pebbles
- Cactus/succulent potting mix
- Assorted small succulents
Step-by-Step Instructions
Step 1: If using outdoors, drill a drainage hole in the bottom of each cup or pot. If you'd rather skip this step, these make perfect indoor windowsill gardens: just water sparingly.
Step 2: Add a thin layer of pebbles to the bottom for drainage.
Step 3: Fill with cactus and succulent potting mix (it drains faster than regular soil, which succulents love).
Step 4: Gently remove succulents from their nursery pots and nestle them into the soil. You can plant one variety per cup or create little mixed arrangements.
Step 5: Place your teacup gardens on a sunny windowsill, patio table, or clustered together as a centerpiece.
These make adorable gifts, too. Kids can decorate the saucers with paint pens for an extra personal touch.
Why Upcycling Projects Matter for Kids
Beyond the crafting fun, these projects teach children valuable lessons:
- Waste reduction: Seeing trash become treasure shifts how kids think about what they throw away.
- Creativity: There's no "right" answer when you're inventing planters from kitchen castoffs.
- Responsibility: Caring for the plants in their upcycled containers gives kids ownership over something living and growing.
If your family is looking for more hands-on garden projects, check out our guide on how to make a DIY kitchen scrap regrow garden for under $10 with your kids or learn how to create a DIY worm composting bin with children.
Quick Reference: Upcycling Project Checklist
| Project | Best Plants | Difficulty |
|---|---|---|
| Tin Can Planters | Herbs, small flowers | Easy |
| Bottle Cap Flowers | N/A (decorative) | Easy |
| Colander Baskets | Trailing flowers, strawberries | Medium |
| Boot Planters | Pansies, succulents | Easy |
| Teacup Gardens | Succulents | Easy |
Grab some items from your recycling bin and junk drawer this weekend. Your backyard: and your kids( will thank you.)
FAQ: Upcycling Garden Projects With Kids
- What is the easiest backyard upcycling project? Turning an old tire or a wooden pallet into a planter is a classic and easy project. Just make sure to clean them well before adding soil!
- Can we use plastic bottles for garden projects? Yes! You can cut them into seed starters, bird feeders, or even self-watering pots. It’s a great way to keep plastic out of the landfill and save money.
- Is upcycling really better for the environment? Absolutely. It takes much less energy to "reuse" something than it does to "recycle" it into a new material. Plus, it encourages kids to think creatively about the items they use every day.


