


Quick Answer: The best seed starting activities that double as science experiments include germination jars with paper towels, variable testing experiments (light, water, temperature), plastic bag seed growing, CD case root observation, and phototropism studies. These hands-on projects teach kids the scientific method, plant biology, and observation skills, all while growing something real.
Why Seed Starting Makes the Perfect Science Experiment
Here's the thing about seeds: they're tiny science labs waiting to happen. When your kids plant a seed and watch it sprout, they're not just gardening, they're conducting real experiments with observable results.
These activities work for kids roughly kindergarten through 4th grade, though honestly, even older kids (and adults) find them fascinating. Each project below includes what you'll need, simple steps to follow, and the science concepts your child will actually learn.
Let's dig in.
1. Seed Germination in a Jar with Paper Towels
This classic experiment lets kids watch the entire germination process unfold, roots, shoots, and all.
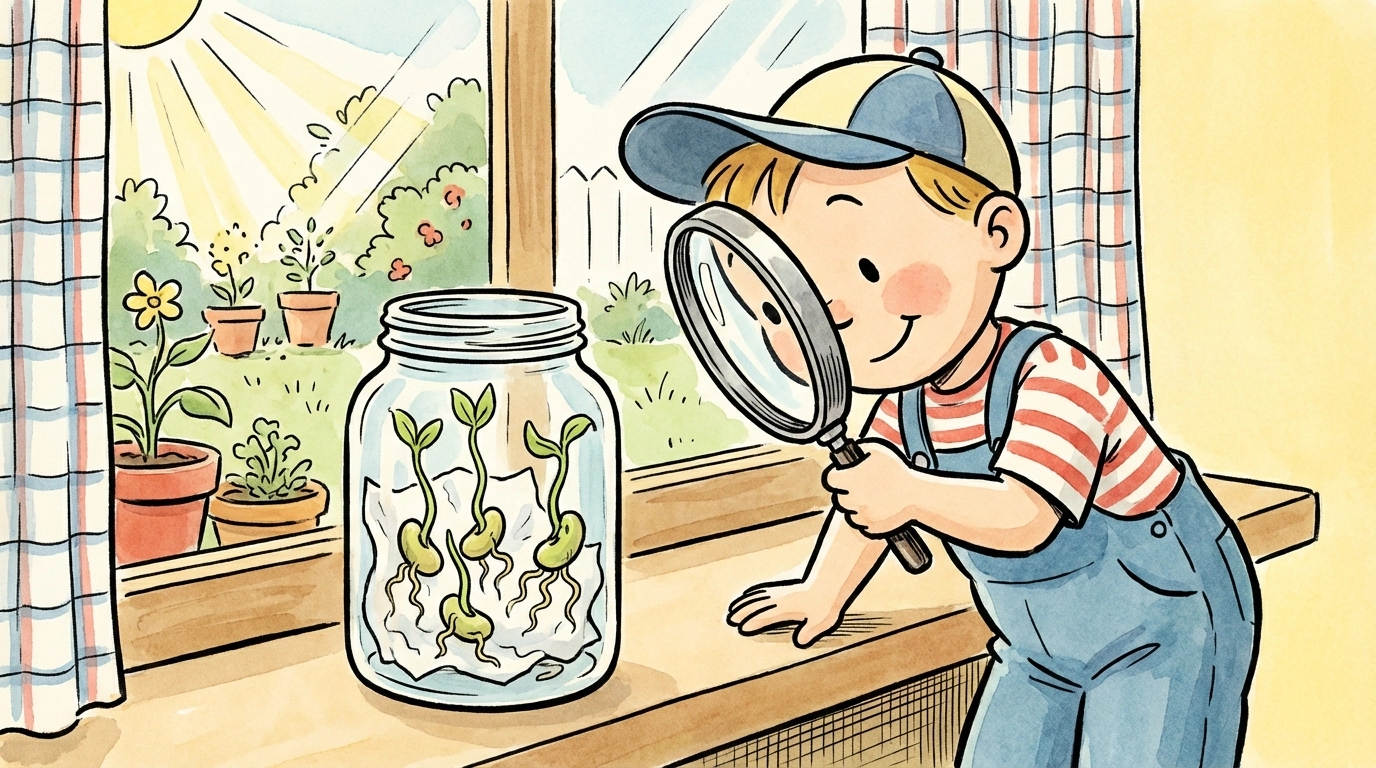
What You'll Need:
- Clear glass jar or mason jar
- Paper towels
- Bean or pea seeds (they're large and easy to observe)
- Water
- Spray bottle
Steps:
- Fold paper towels and dampen them thoroughly (wet but not dripping).
- Line the inside of the jar with the damp paper towels.
- Place 3-4 seeds between the glass and the paper towel, positioning them so they're visible from outside.
- Keep the paper towels moist by spraying daily.
- Place the jar in a warm spot with indirect light.
- Observe and record changes daily.
What Kids Learn: The plant life cycle, root vs. shoot development, and that seeds need water and air, not necessarily soil, to germinate.
2. Testing Germination Variables (The Real Scientific Method)
This is where things get exciting. Instead of just growing seeds, your child becomes a scientist testing a hypothesis.
What You'll Need:
- 4 clear jars or cups
- Paper towels
- Identical seeds (at least 12 of the same type)
- Labels or tape
- A dark cupboard and a sunny windowsill
Steps:
- Set up four identical germination jars using the method above.
- Label them: "Light + Water," "Dark + Water," "Light + No Water," "Dark + No Water."
- Place two jars in sunlight and two in a dark cupboard.
- Water only the jars labeled "Water" daily.
- Predict which seeds will sprout first and which won't sprout at all.
- Record observations for 7-10 days.
What Kids Learn: The scientific method, how to isolate variables, and what conditions seeds actually need to germinate (spoiler: light isn't required for germination, but water is essential).
3. Seed Growing in a Plastic Bag
Minimal supplies, maximum visibility. This is perfect for younger kids or classroom settings.
What You'll Need:
- Resealable plastic bag
- Paper towels
- Seeds
- Tape
- Window
Steps:
- Dampen a paper towel and fold it to fit inside the bag.
- Place 2-3 seeds on top of the paper towel.
- Seal the bag, leaving a small air pocket.
- Tape the bag to a sunny window at your child's eye level.
- Check daily for moisture (add water drops if the towel dries out).
- Watch roots grow downward and shoots reach upward.
What Kids Learn: Observation skills, the greenhouse effect (the bag traps moisture), and gravitropism (roots grow down, shoots grow up, regardless of how the bag is positioned).
4. Comparing Germination Rates of Different Seeds
Not all seeds sprout at the same speed. This experiment turns that fact into measurable data.
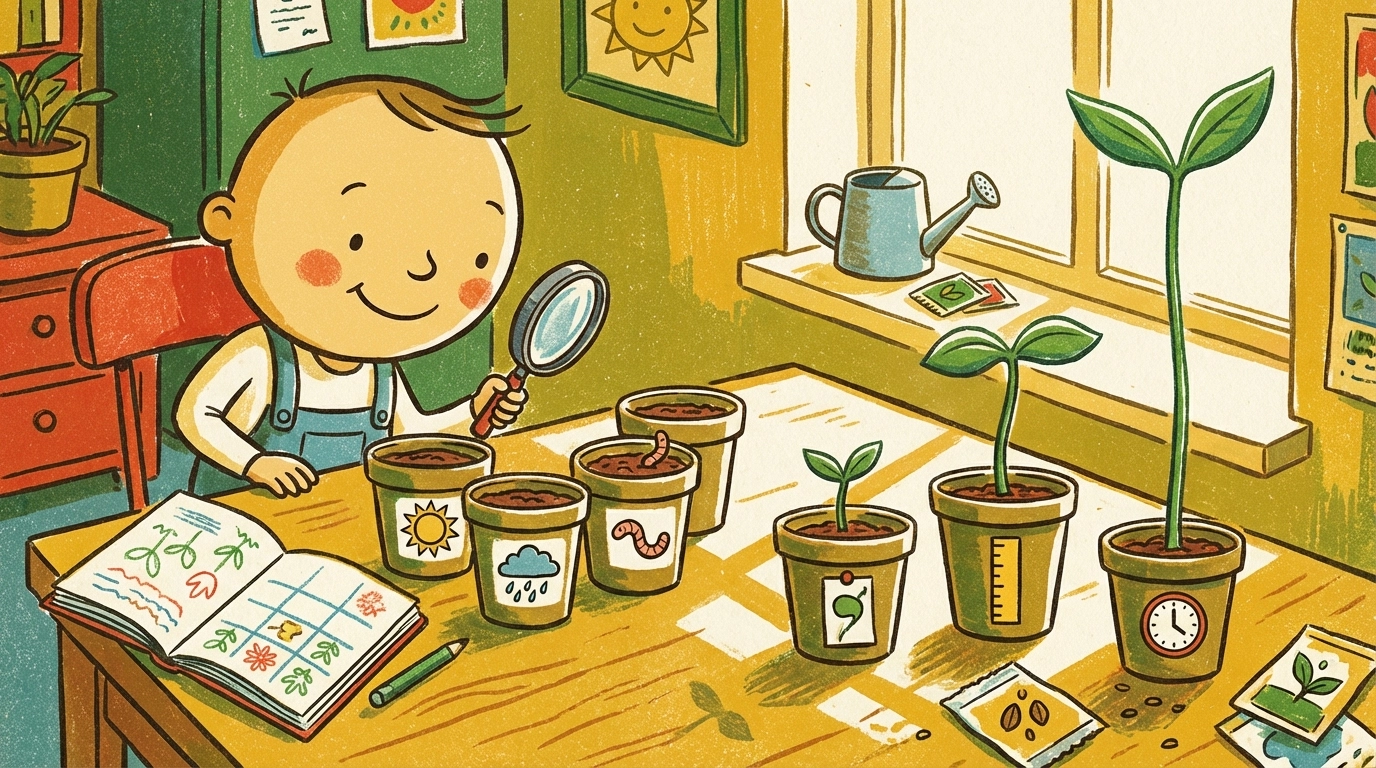
What You'll Need:
- 3 different seed types (try bean, pea, and sunflower)
- 3 identical containers with soil
- Ruler
- Notebook for recording data
- Water
Steps:
- Plant each seed type in its own labeled container at the same depth.
- Water all three containers equally.
- Place them in the same location with identical light exposure.
- Check daily and record when each seed first breaks the soil surface.
- Measure and chart growth over two weeks.
- Compare results and discuss why some seeds sprout faster.
What Kids Learn: Data recording, creating simple charts, and understanding that seed size and type affect germination speed.
5. Sunflower Seed Growth Tracking
Sunflowers grow fast and tall, making them perfect for long-term observation projects.
What You'll Need:
- Sunflower seeds
- Cup or small pot with drainage
- Potting soil
- Ruler
- Growth chart (make your own or download one)
Steps:
- Fill the container with moist potting soil.
- Plant 2-3 sunflower seeds about 1 inch deep.
- Place in a sunny window.
- Water when the top inch of soil feels dry.
- Once sprouts appear, measure height every 2-3 days.
- Record measurements on a growth chart.
What Kids Learn: Long-term observation, measurement skills, and how quickly plants can grow under the right conditions.
6. Seed Germination in a CD Case
Yes, those old CD cases finally have a purpose. This clever setup lets kids watch root development in a way traditional pots can't show.
What You'll Need:
- Empty CD case (the clear kind)
- Potting soil
- Seeds (beans work great)
- Water
- Tape
Steps:
- Open the CD case and fill the bottom half with moist soil.
- Place a seed against the clear side of the case so it's visible.
- Gently close the case and secure with tape if needed.
- Stand the case upright with the seed near the top.
- Keep soil moist by opening and adding water drops as needed.
- Watch roots grow downward through the soil.
What Kids Learn: Root system development, how roots navigate through soil, and why we can't usually see what's happening underground.
7. Exploring Phototropism (How Plants Chase Light)
Plants move toward light. This experiment makes that invisible process completely visible.
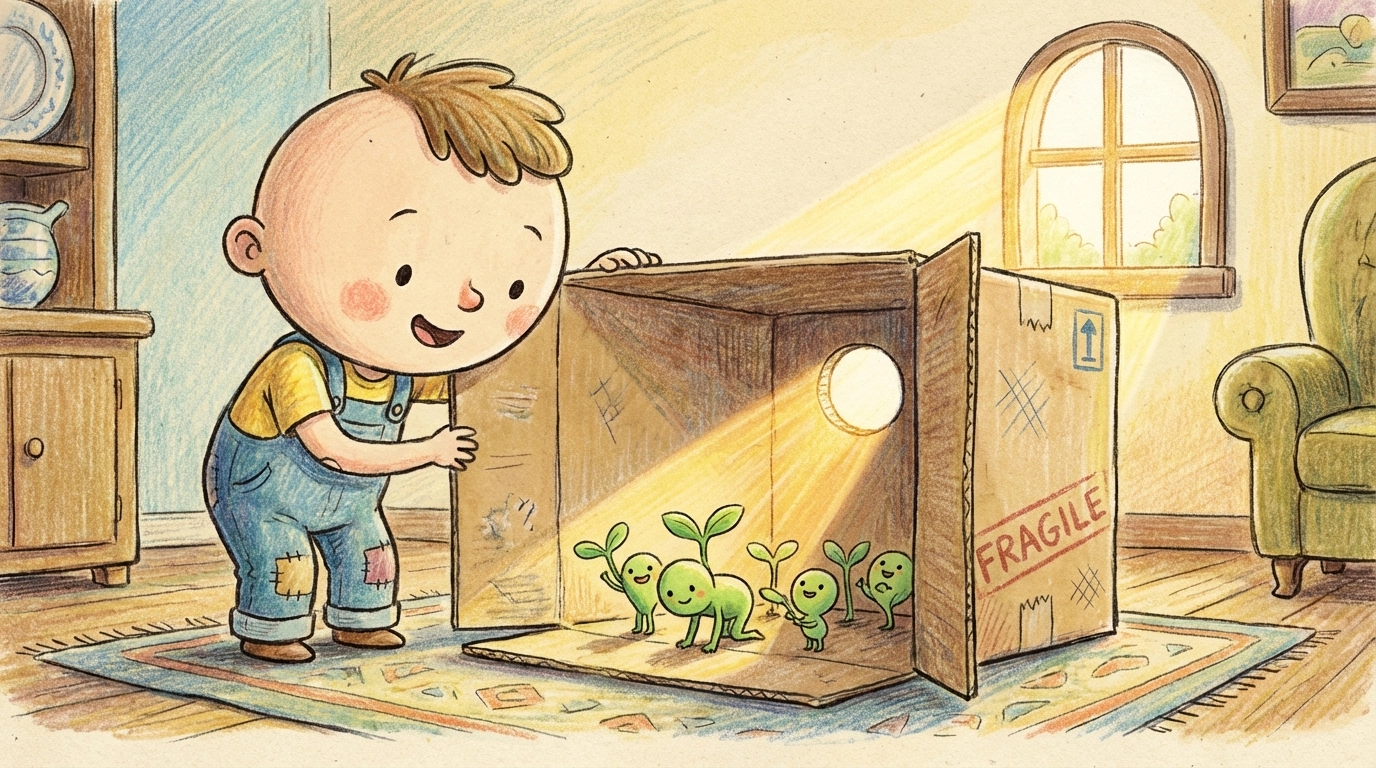
What You'll Need:
- 2 small pots with seedlings (or start seeds a week early)
- Cardboard box
- Scissors
- Sunny window
Steps:
- Grow two identical seedlings in small pots.
- Cut a hole in one side of the cardboard box.
- Place one seedling inside the box with the hole facing a light source.
- Place the other seedling in direct light with no obstruction.
- Observe both plants over 5-7 days.
- Notice how the boxed plant bends and grows toward the hole.
What Kids Learn: Phototropism (plant movement toward light), how plants adapt to their environment, and why houseplants need to be rotated.
8. Testing Seeds Under Extreme Conditions
What happens when seeds don't get what they need? This experiment answers that question dramatically.
What You'll Need:
- 4 small containers or bags
- Seeds
- Paper towels or soil
- Refrigerator access
- Salt
Steps:
- Set up four germination stations with identical seeds.
- Label them: "Normal," "Cold (fridge)," "Salty soil," and "No air (sealed tight)."
- Place each in its designated condition.
- Observe for 10-14 days.
- Record which seeds germinate and which fail.
- Discuss why certain conditions prevent growth.
What Kids Learn: What seeds need to survive, environmental stress, and why farmers worry about frost and soil contamination.
9. Growing Plants from Kitchen Scraps
This one connects seeds directly to the food on your table.
What You'll Need:
- Seeds from fruits/vegetables you eat (tomato, pepper, squash, or apple seeds)
- Small pots with soil
- Water
- Labels
Steps:
- Save seeds from produce you're already eating.
- Rinse seeds and let them dry for a day.
- Plant in labeled pots with moist soil.
- Place in a warm, sunny spot.
- Track which kitchen seeds successfully sprout.
- Discuss why some grocery store produce may not grow (hint: some are hybrids).
What Kids Learn: The connection between seeds and food, where groceries actually come from, and basic food literacy.
10. Temperature Effects on Sprouting Speed
Temperature matters more than most people realize. This experiment proves it.
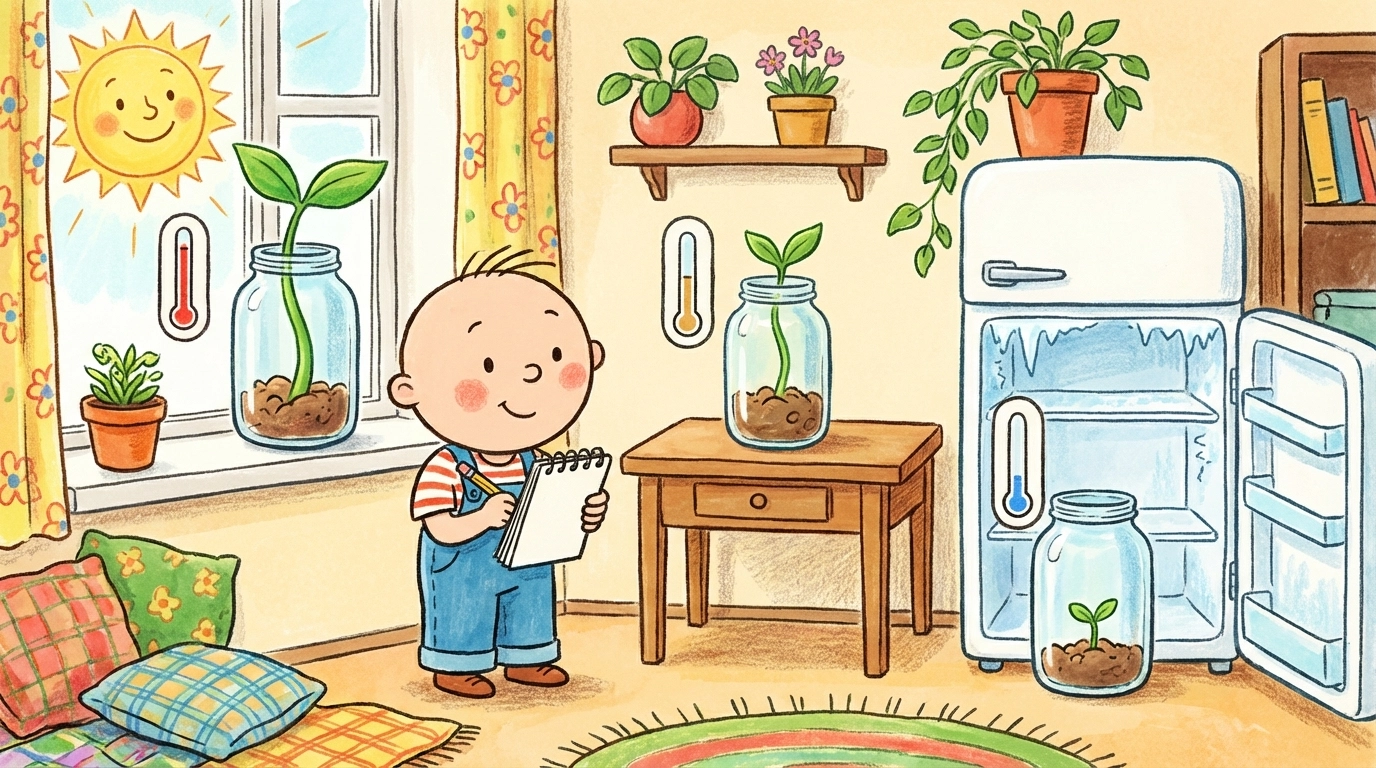
What You'll Need:
- 3 identical jars with seeds and damp paper towels
- Thermometer (optional but helpful)
- Access to warm, cool, and cold locations
Steps:
- Set up three identical germination jars.
- Place one near a warm window, one at room temperature, and one in the refrigerator.
- Check all three daily at the same time.
- Record when each seed germinates.
- Compare results after 10 days.
What Kids Learn: How temperature affects biological processes, why we plant gardens in spring (not winter), and the concept of optimal growing conditions.
Final Tips for Success
- Start with large seeds. Beans, peas, and sunflowers are forgiving and easy to see.
- Keep a science journal. Drawing pictures and recording observations makes these activities stick.
- Ask questions before starting. "What do you think will happen?" turns a project into an experiment.
- Embrace failure. Seeds that don't sprout teach just as much as seeds that do.
Looking for more hands-on projects? Check out our guide on how to create a DIY worm composting bin with children for another science-packed family activity.
FAQ: Seed Starting Science Experiments (Kid-Friendly Answers)
- Which seeds grow the fastest for a science experiment? Radishes and beans are legendary for their speed. You can often see sprouts in just 2 to 4 days, which is perfect for keeping kids engaged.
- Can we grow seeds in just a wet paper towel? Yes! This is called the "baggie method." It’s a great way to let kids see exactly how the roots and first leaves emerge from the seed.
- Why did some of our seeds not sprout? Seeds are living things and sometimes they just don't wake up. It could be they were too cold, too wet, or just old. This is a great "science lesson" on why we always plant a few extras!
References:
- Various seed germination experiment guides for elementary education
- Plant biology curriculum standards for K-4 grade levels
- Scientific method teaching resources for young learners


