


Yes, kids can grow real food without a single scoop of dirt. Hydroponics is the method of growing plants in nutrient-rich water instead of soil, and it's one of the most hands-on STEM activities you can do with your family. The best part? You can set up a beginner system in under 30 minutes with supplies you can grab at any garden center or online.
This guide walks you through the easiest hydroponic method for kids: the Kratky method: so your family can start growing lettuce, herbs, or other greens indoors, any time of year.
What Is Hydroponics and Why Should Kids Learn It?
Hydroponics is simply growing plants in water mixed with dissolved nutrients. Instead of pulling what they need from soil, plants get fed directly through their roots submerged in (or touching) the nutrient solution.
For kids, this opens up a window into how plants actually work. They'll see roots grow in real-time, understand that plants need more than just water, and learn basic chemistry and biology without even realizing it. Plus, there's something genuinely exciting about harvesting salad greens you grew on your kitchen counter.
Hydroponic systems range from super simple to high-tech. For families and classrooms, we recommend starting with the Kratky method: a passive, no-pump, no-electricity setup that's practically foolproof.
What Is the Kratky Method?
The Kratky method is a "set it and forget it" hydroponic technique developed by Dr. Bernard Kratky at the University of Hawaii. Here's the idea: you suspend your plant's roots in a container of nutrient water. As the plant drinks and grows, the water level drops, exposing part of the roots to air. This air gap is essential: it lets roots breathe while still accessing water below.
No pumps. No timers. No electricity. Just a container, some nutrients, and a little patience.
This is why it's perfect for kids. There's very little that can go wrong, and the daily changes are visible and exciting.
What Materials Do You Need for a Kids' Hydroponic Setup?
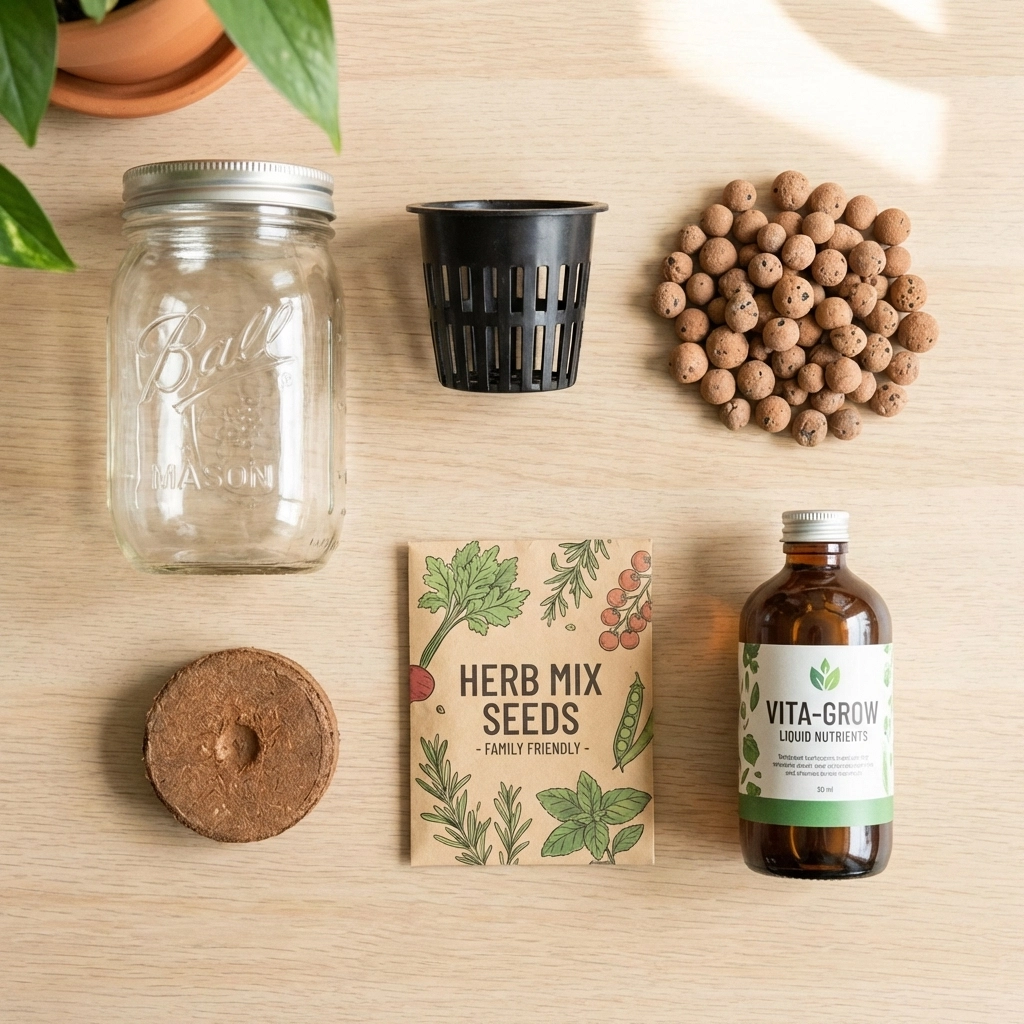
Gather these supplies before you start:
- Container: A mason jar, tall glass planter, or any container that holds water and fits a net pot. Aim for something at least 6 inches tall.
- Net pot: A small plastic pot with holes that lets roots grow through. These are inexpensive and available at garden stores or online.
- Clay pebbles (hydroton): Lightweight, reusable growing medium that supports the plant and allows airflow.
- Coconut coir pellet: A compressed disc of coconut fiber that expands when wet. This is where your seeds will germinate.
- Seeds: Lettuce, basil, cilantro, or other leafy greens work best for beginners.
- Hydroponic nutrient solution: A liquid fertilizer designed for hydroponics. Follow the dilution instructions on the bottle.
- Spray paint (optional but recommended): To block light from reaching the water.
- Masking tape: To create a "window" for checking water levels.
You don't need anything fancy here. A recycled glass jar and a $3 net pot will do the job.
How Do You Set Up a Kratky Hydroponic System Step by Step?
Here's the full walkthrough. This project works great for kids ages 5 and up with a little adult help.
Step 1: Block the Light
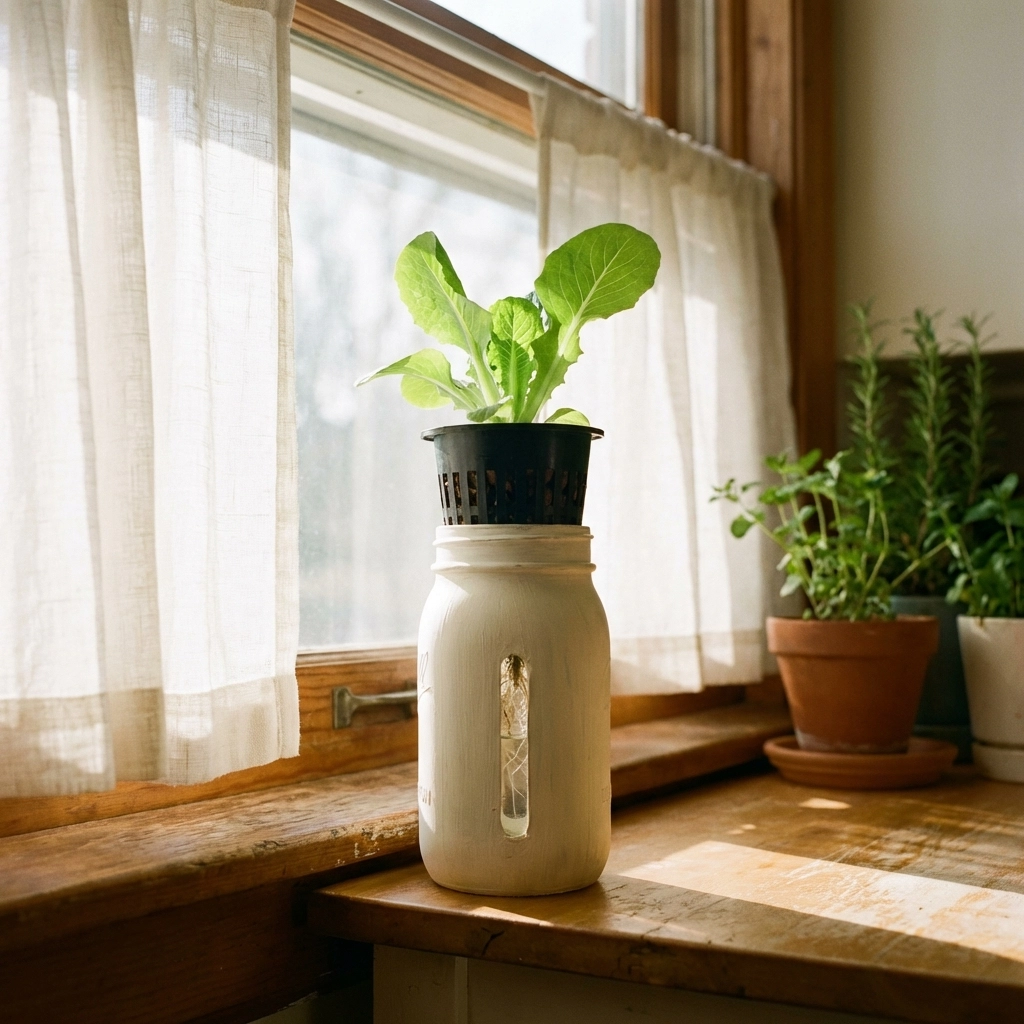
Algae loves light. If your container is clear or translucent, you'll want to block sunlight from reaching the water inside. The easiest fix is spray painting the outside of the jar with any opaque color.
Pro tip: Before painting, use masking tape to cover a vertical strip on the jar. Once painted and dried, peel off the tape. You'll have a little window to monitor water levels without opening the lid.
Let the paint dry completely before moving on.
Step 2: Rinse and Fill the Net Pot
Take your clay pebbles and rinse them under water for about 30 seconds to remove dust. Then fill your net pot with the pebbles, leaving about a quarter inch of space at the top.
The pebbles give your plant stability and allow air and water to flow freely around the roots.
Step 3: Prepare Your Seed Starter
Grab your coconut coir pellet and run it under water until it fully expands: it'll puff up to several times its original size. Gently squeeze out excess water so it's damp but not dripping.
Place the expanded pellet on top of the clay pebbles in your net pot. It should sit level with or just below the rim of the pot.
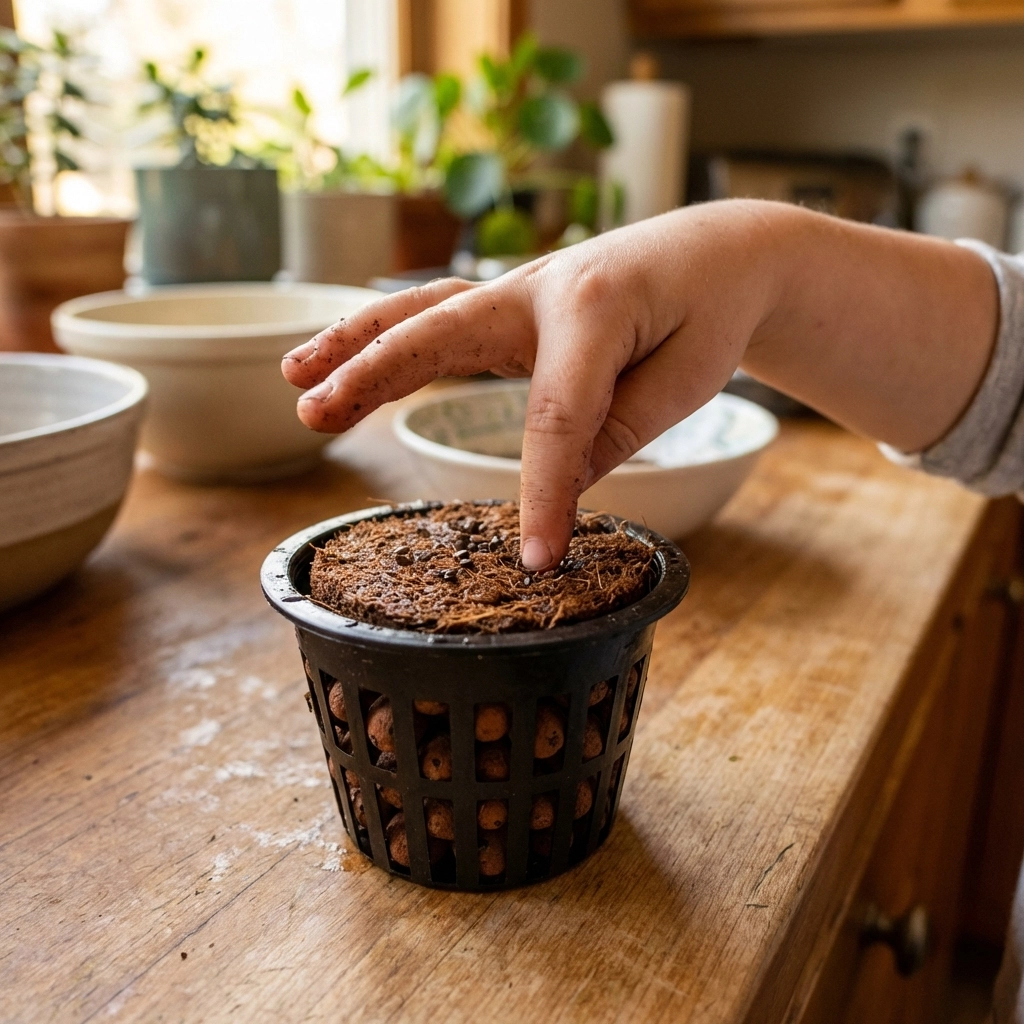
Step 4: Plant Your Seeds
Press 2–3 seeds gently into the top of the coconut coir. Don't bury them deep: most lettuce and herb seeds just need light contact with the surface.
If you're working with very small seeds, a toothpick with a wet tip makes placing them easier.
Step 5: Mix and Add the Nutrient Solution
Follow the instructions on your hydroponic nutrient bottle to mix the solution with water. Most call for a teaspoon or two per gallon: don't eyeball it. Too much can burn your plant's roots.
Fill your painted container with the nutrient solution until the water level just touches the bottom of the net pot when it's placed inside. The bottom of the coir pellet should be wet but not submerged.
Step 6: Place the Net Pot and Wait
Set the net pot into the top of your container. The fit should be snug. If it's loose, you can use a piece of cardboard or a lid with a hole cut in it to hold the pot in place.
Put your setup near a sunny window or under a grow light. Seeds typically sprout in 5–10 days depending on the variety.
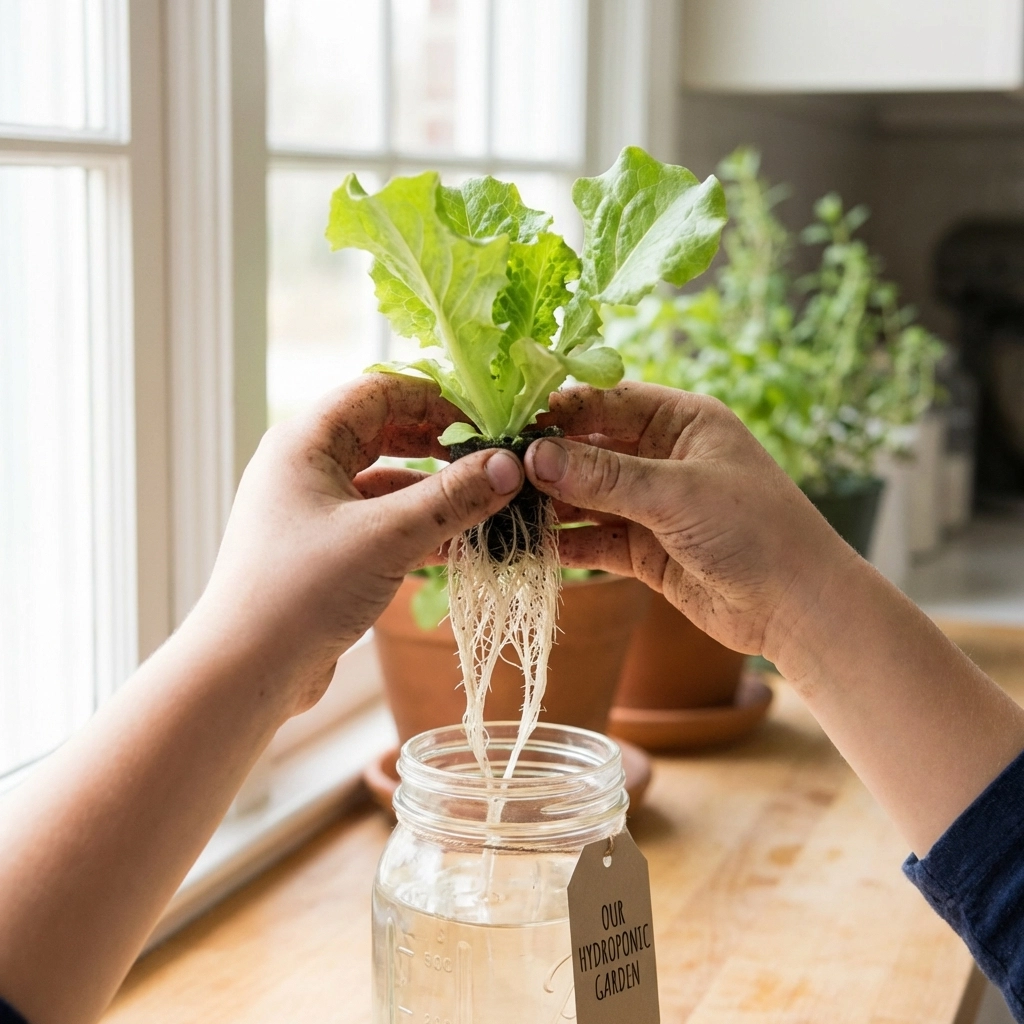
As the plant grows, it will drink the water, and the level will drop. That's exactly what you want. The roots will stretch down to follow the water, and the exposed upper roots will pull oxygen from the air gap.
What Plants Grow Best in a Kratky System?
Stick to leafy greens and herbs for your first grow. These are fast, forgiving, and don't need a ton of root support:
- Lettuce (butterhead, romaine, or leaf varieties)
- Basil
- Cilantro
- Spinach
- Kale
- Mint
Avoid fruiting plants like tomatoes or peppers in a basic Kratky jar: they need more water, nutrients, and support than this system provides.
How Long Until You Can Harvest?
Most leafy greens are ready to harvest in 4–6 weeks from seed. You can do a "cut and come again" harvest by snipping outer leaves and letting the plant keep growing, or harvest the whole head at once.
Kids love this stage. Let them use kid-safe scissors and pick their own salad for dinner.
What's the Next Step After Kratky?
Once your family has the Kratky method down, you might want to try a Deep Water Culture (DWC) system. This uses an air pump and air stone to oxygenate the water constantly, which supports faster growth and larger plants.
DWC is still beginner-friendly and a great second project: but start with Kratky. Nail the basics first, and the upgrade will make a lot more sense.
Growing food without soil sounds like science fiction, but it's actually one of the most accessible family projects you can try. A single jar of lettuce on your windowsill can spark real conversations about biology, sustainability, and where food comes from.
Grab a jar, plant some seeds, and see what grows.
FAQ
- Is hydroponics safe for young kids? Absolutely. Since there is no heavy digging or sharp tools involved, it’s a very safe and clean way for kids of all ages to learn about plants.
- How do the plants get food if there is no soil? We add a special "plant food" liquid to the water. This liquid has all the vitamins and minerals that a plant would normally find in the dirt.
- What if we forget to check the water? Hydroponic systems are quite forgiving, but it’s a good daily habit to check the water level. If it gets too low, just add a little more fresh water!
References:
- University of Hawaii CTAHR – Dr. B.A. Kratky's non-circulating hydroponic method research
- General hydroponics cultivation principles (common knowledge in home gardening education)


