


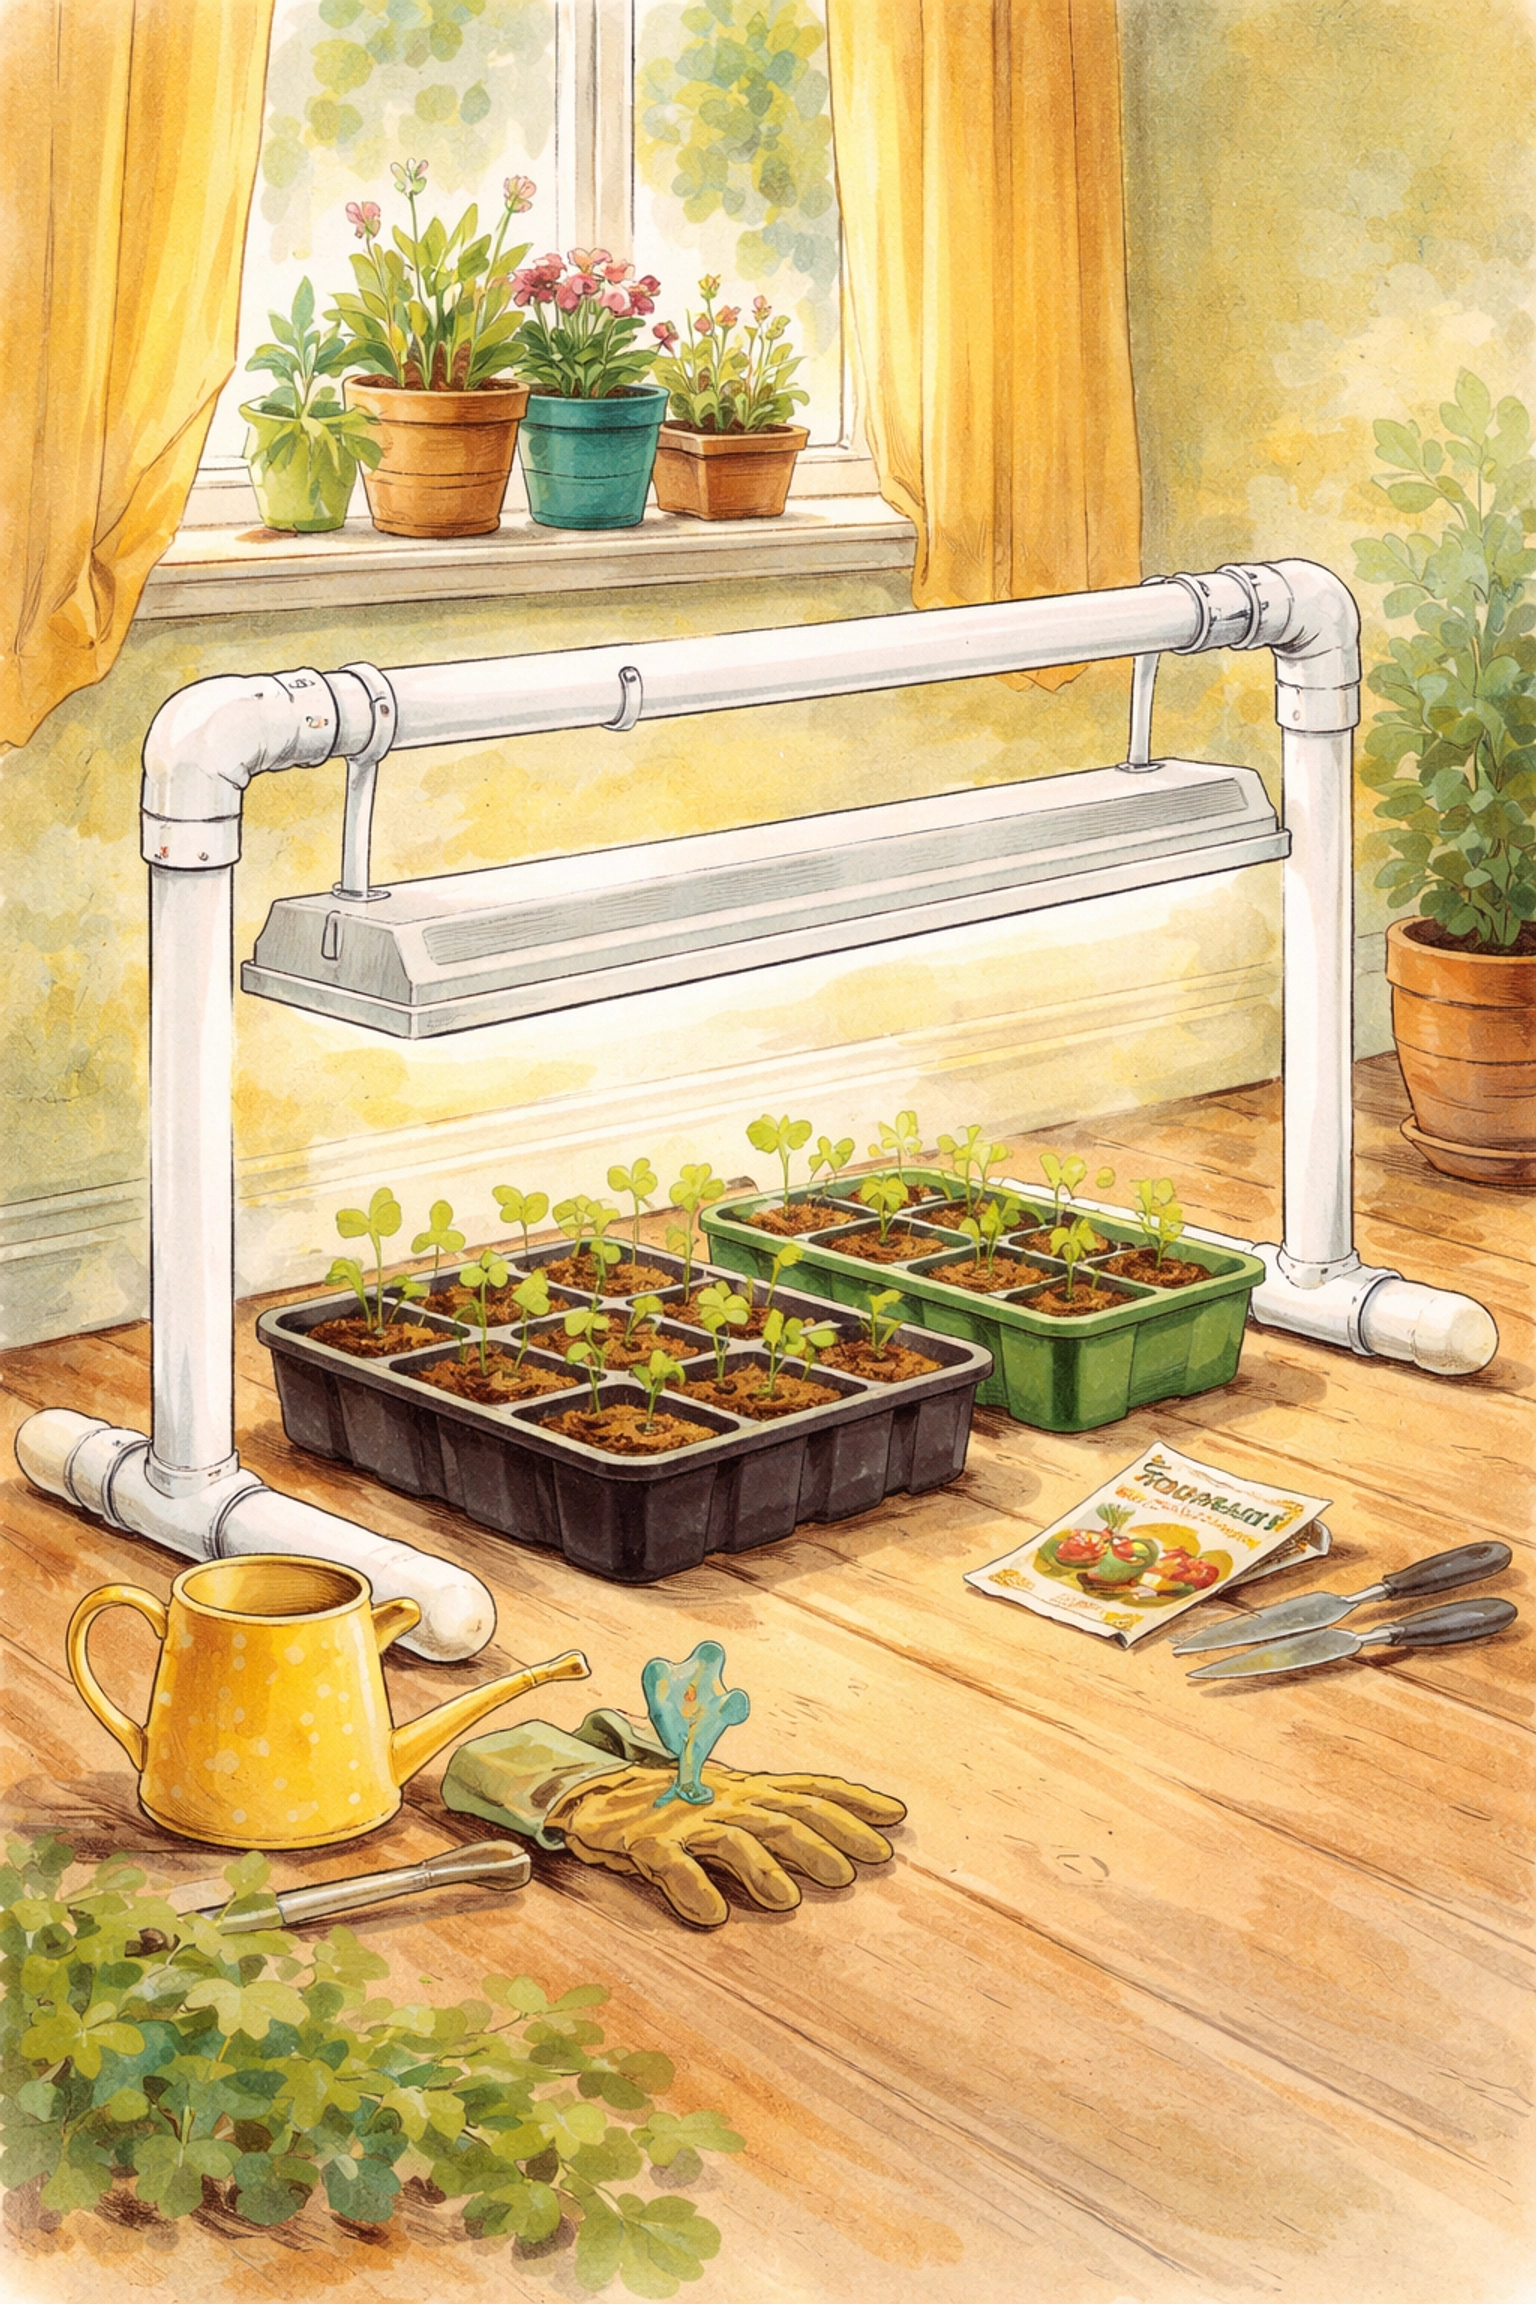
The quick answer: You can build a sturdy, adjustable plant light stand from PVC pipe by cutting a 10-foot section into feet, vertical supports, and a crossbar, then assembling them with T-connectors and elbow joints. Hang a shop light from the crossbar using chains and eye bolts, and you've got yourself a functional grow light setup that typically costs between $15-25 total, with the PVC frame portion often running under $10.
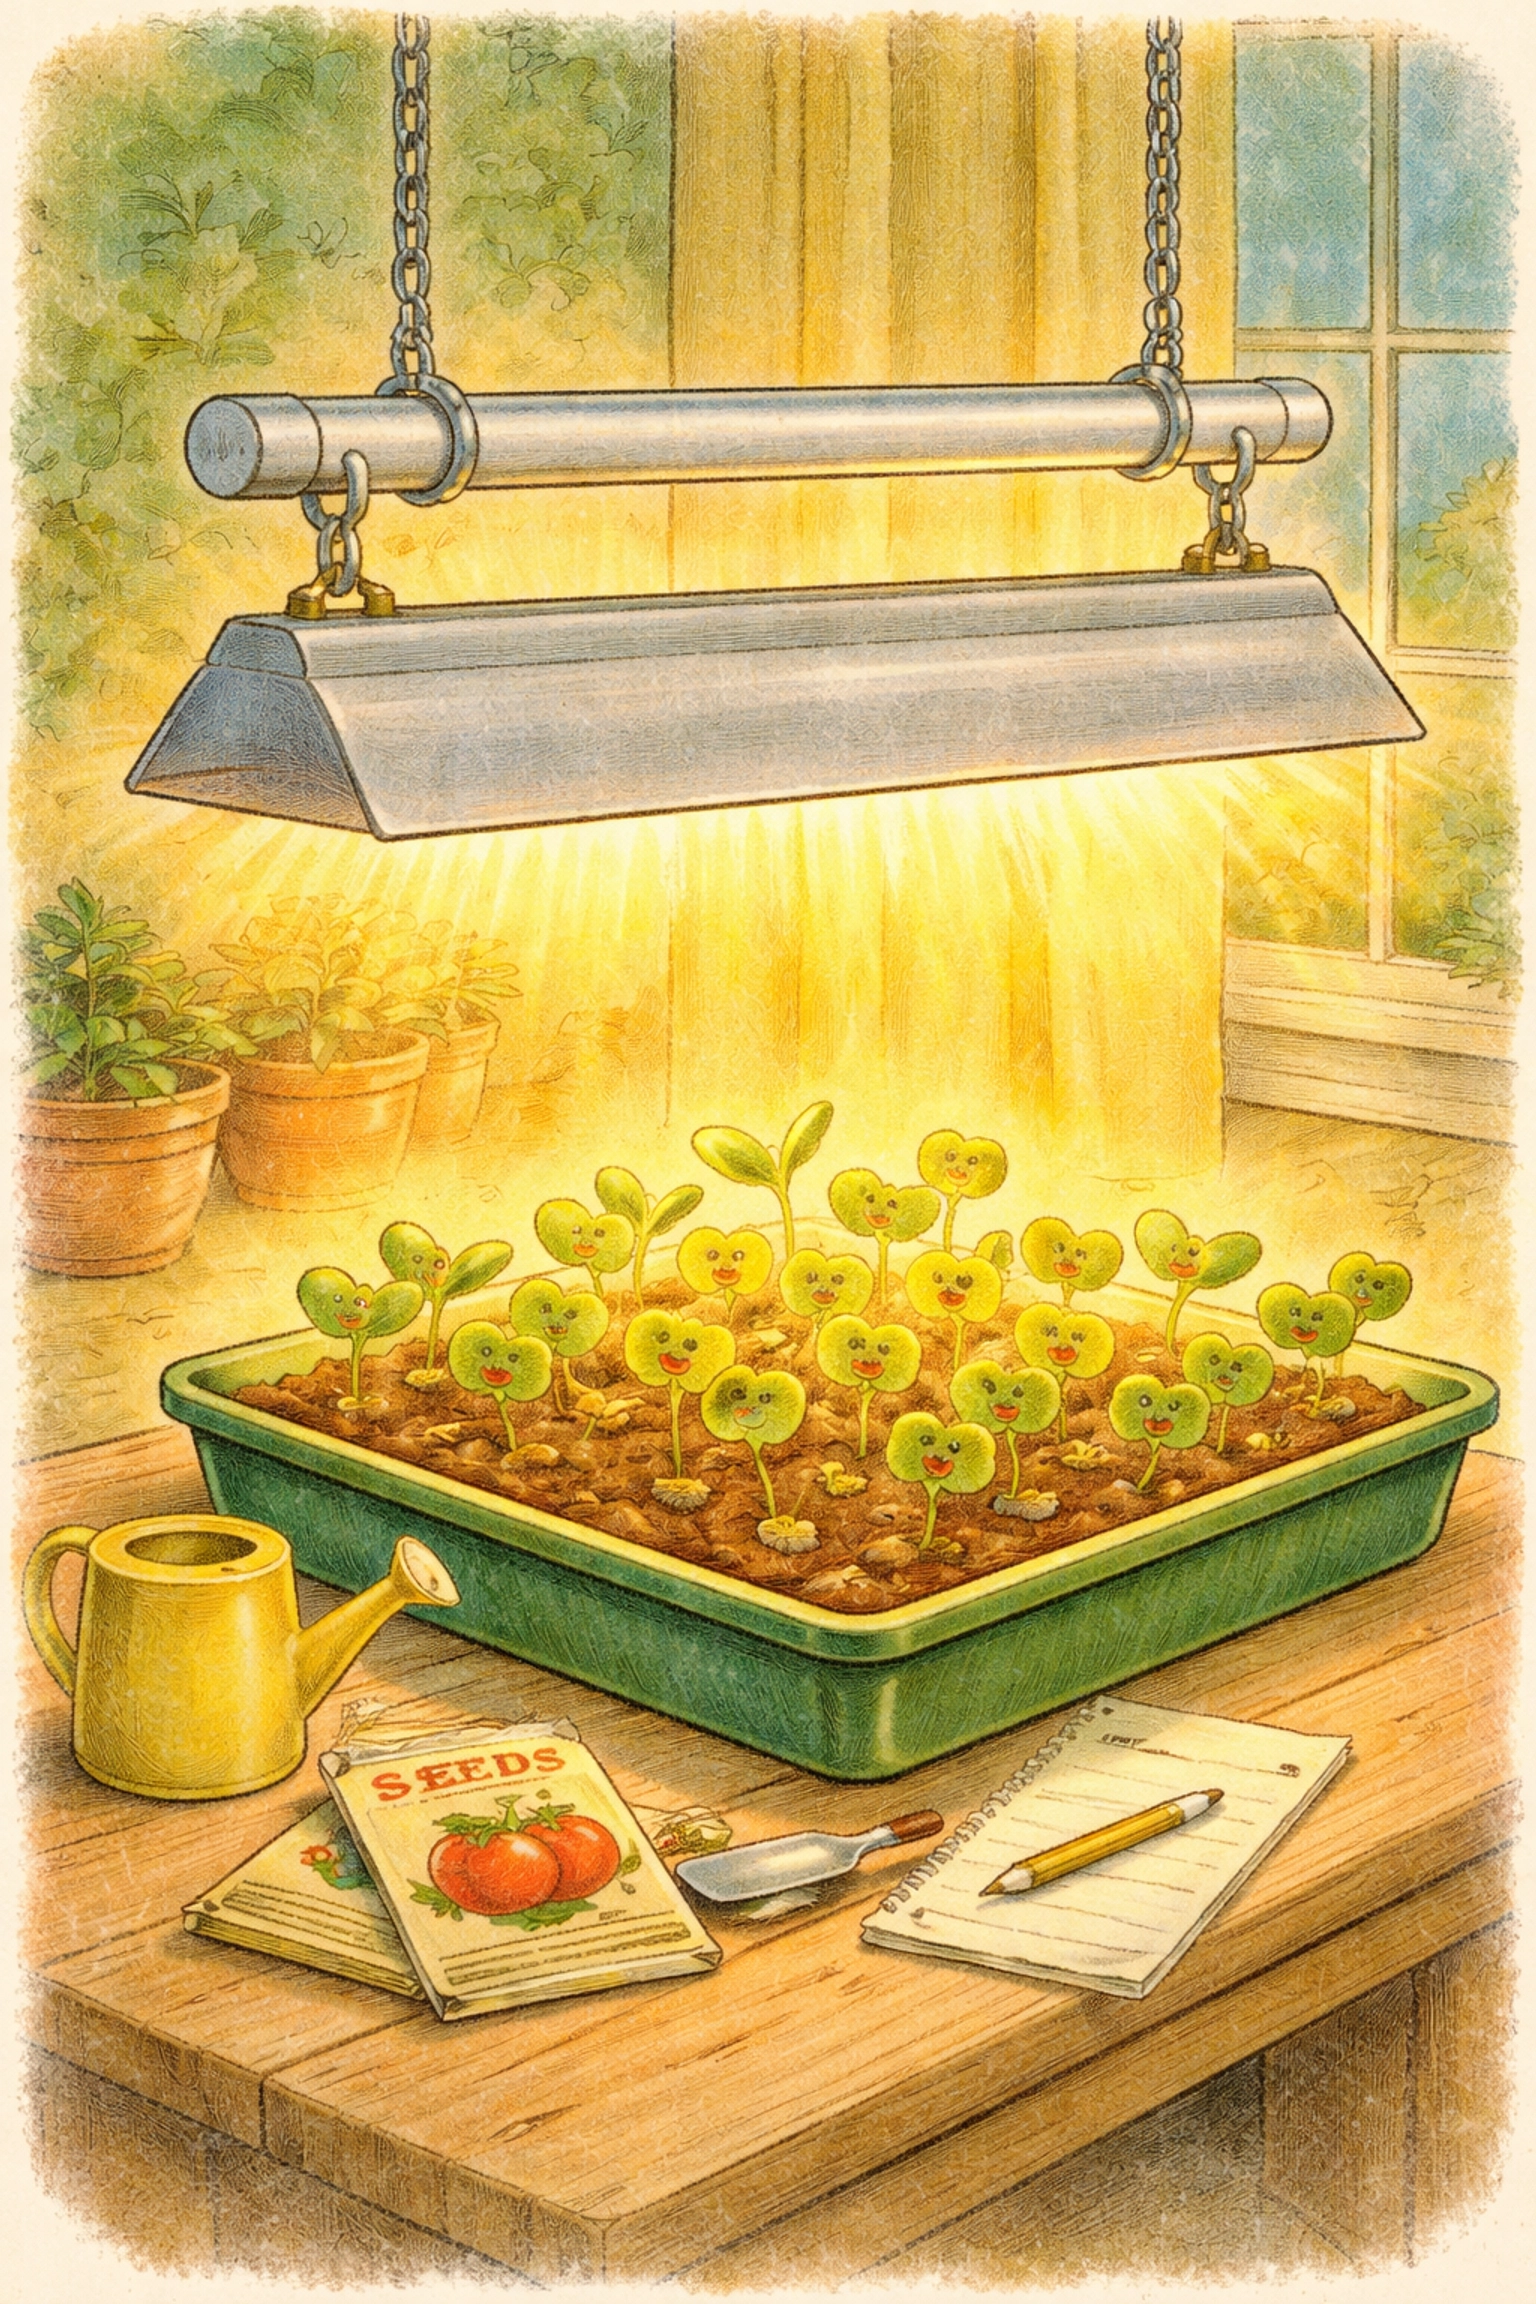
If you've ever tried starting seeds indoors, you probably know the struggle. Leggy, pale seedlings reaching desperately toward a window that just doesn't provide enough light. A proper grow light stand can change everything, and the good news is you don't need fancy equipment or a workshop full of power tools to build one.
This project is perfect for families looking to get a head start on the growing season, and it's simple enough that older kids can help with the assembly. Let's break it down step by step.
Why PVC Works So Well for This Project
PVC pipe is lightweight, inexpensive, and surprisingly sturdy for indoor gardening projects. Unlike wood, it won't warp from moisture exposure, and unlike metal, it won't rust. The best part? You don't need any glue if you don't want to use it, the friction fit of PVC connectors is usually snug enough to hold everything together, which means you can disassemble the whole stand for storage when seed-starting season wraps up.
Budget Breakdown: Keeping Costs Low
Here's what you're looking at for the PVC frame portion of this project:
| Item | Estimated Cost |
|---|---|
| 10-foot PVC pipe (1" or 1¼") | $3 – $5 |
| 2 T-shaped connectors | $1 – $2 |
| 2 L-shaped (90°) elbows | $1 – $2 |
| 4 end caps | $1 – $2 |
| 2 eye bolts with nuts | $1 – $2 |
| Frame Total | $7 – $13 |
The shop light fixture and chains will add another $10-15 depending on where you source them, but if you've got an old fluorescent shop light gathering dust in the garage, you're already ahead of the game. Thrift stores and yard sales can be goldmines for these.
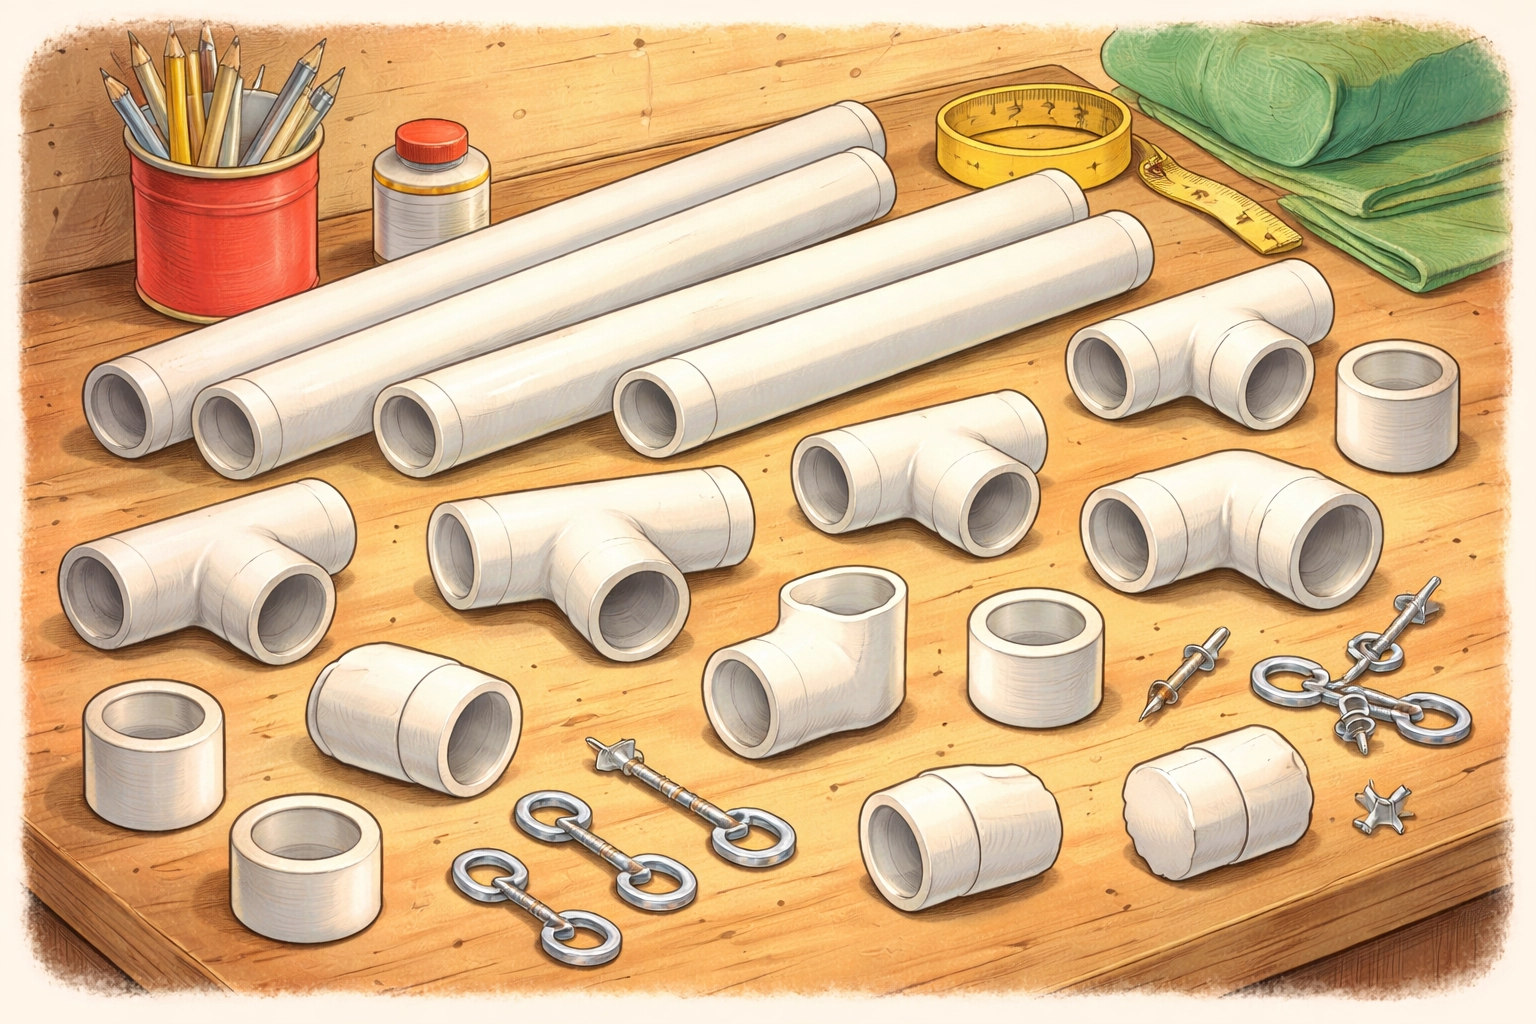
Materials You'll Need
For the PVC frame:
- One 10-foot length of 1" or 1¼" PVC pipe
- Two T-shaped PVC connectors
- Two L-shaped (90-degree) elbow connectors
- Four PVC end caps
For hanging the light:
- Two ¼" eye bolts with nuts
- Two lightweight chains (about 18-24 inches each)
- S-hooks or carabiners for adjustment
For the light itself:
- One 4-foot shop light fixture (LED or fluorescent)
- Appropriate bulbs if not included
Tools You'll Need
Don't worry, nothing fancy here:
- Hacksaw, PVC cutter, or even a sturdy hand saw
- Tape measure
- Marker or pencil
- Drill with a ¼" bit
- Safety glasses (always a good idea when cutting)
If you have kids helping, the measuring and marking steps are perfect for them, while adults should handle the cutting and drilling.
Step-by-Step Assembly Instructions
Step 1: Measure and Cut Your PVC Sections
From your 10-foot pipe, you'll need to cut the following pieces:
- Four 6-inch pieces (these become the feet)
- Two 24-inch pieces (vertical supports)
- One 48-inch piece (the crossbar where your light hangs)
That adds up to 120 inches exactly, perfect use of a 10-foot pipe with minimal waste. Mark your measurements clearly before cutting, and double-check them. The old carpenter's saying "measure twice, cut once" applies here too.
Step 2: Build the Foot Assemblies
Take one T-connector and insert a 6-inch piece into each of the horizontal openings. Cap each end with an end cap. This creates a wide, stable foot that won't tip over easily.
Repeat this process to create your second foot assembly. You should now have two T-shaped feet sitting flat on the ground.
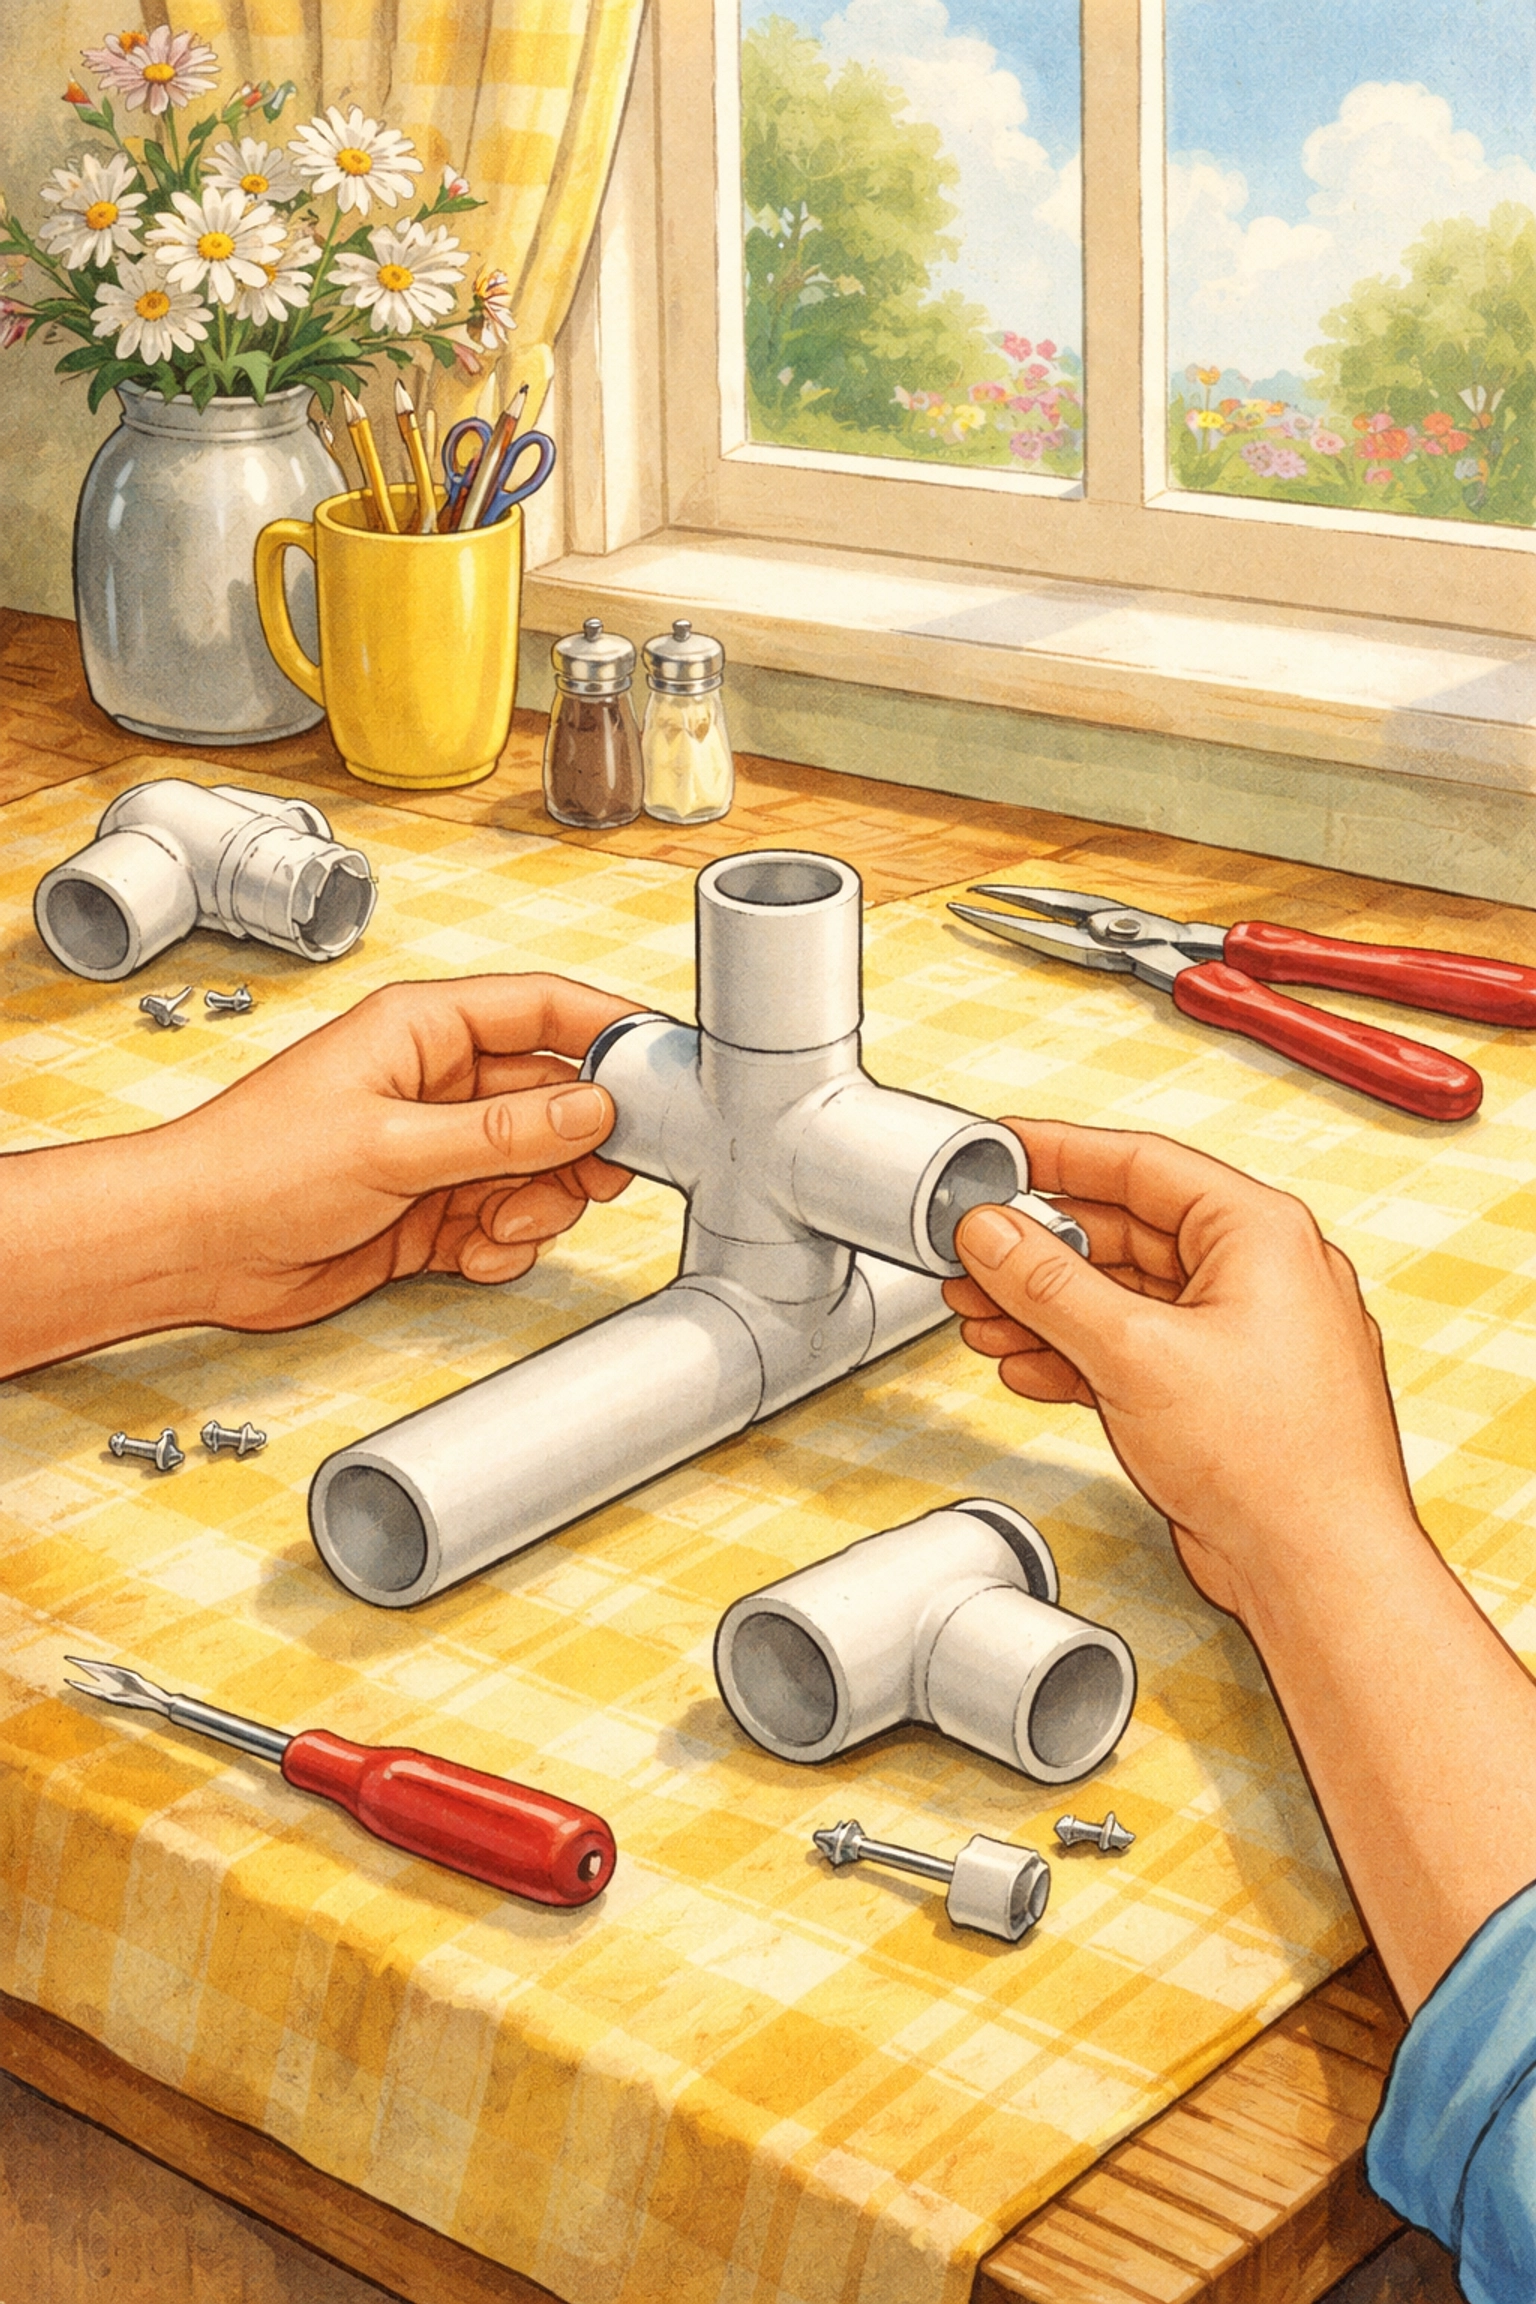
Step 3: Add the Vertical Supports
Insert one 24-inch piece into the vertical (upward-facing) opening of each T-connector foot. These are your uprights that will hold the crossbar.
Step 4: Connect the Crossbar
Place an L-shaped elbow connector on top of each vertical support. Then connect both elbows with your 48-inch crossbar piece.
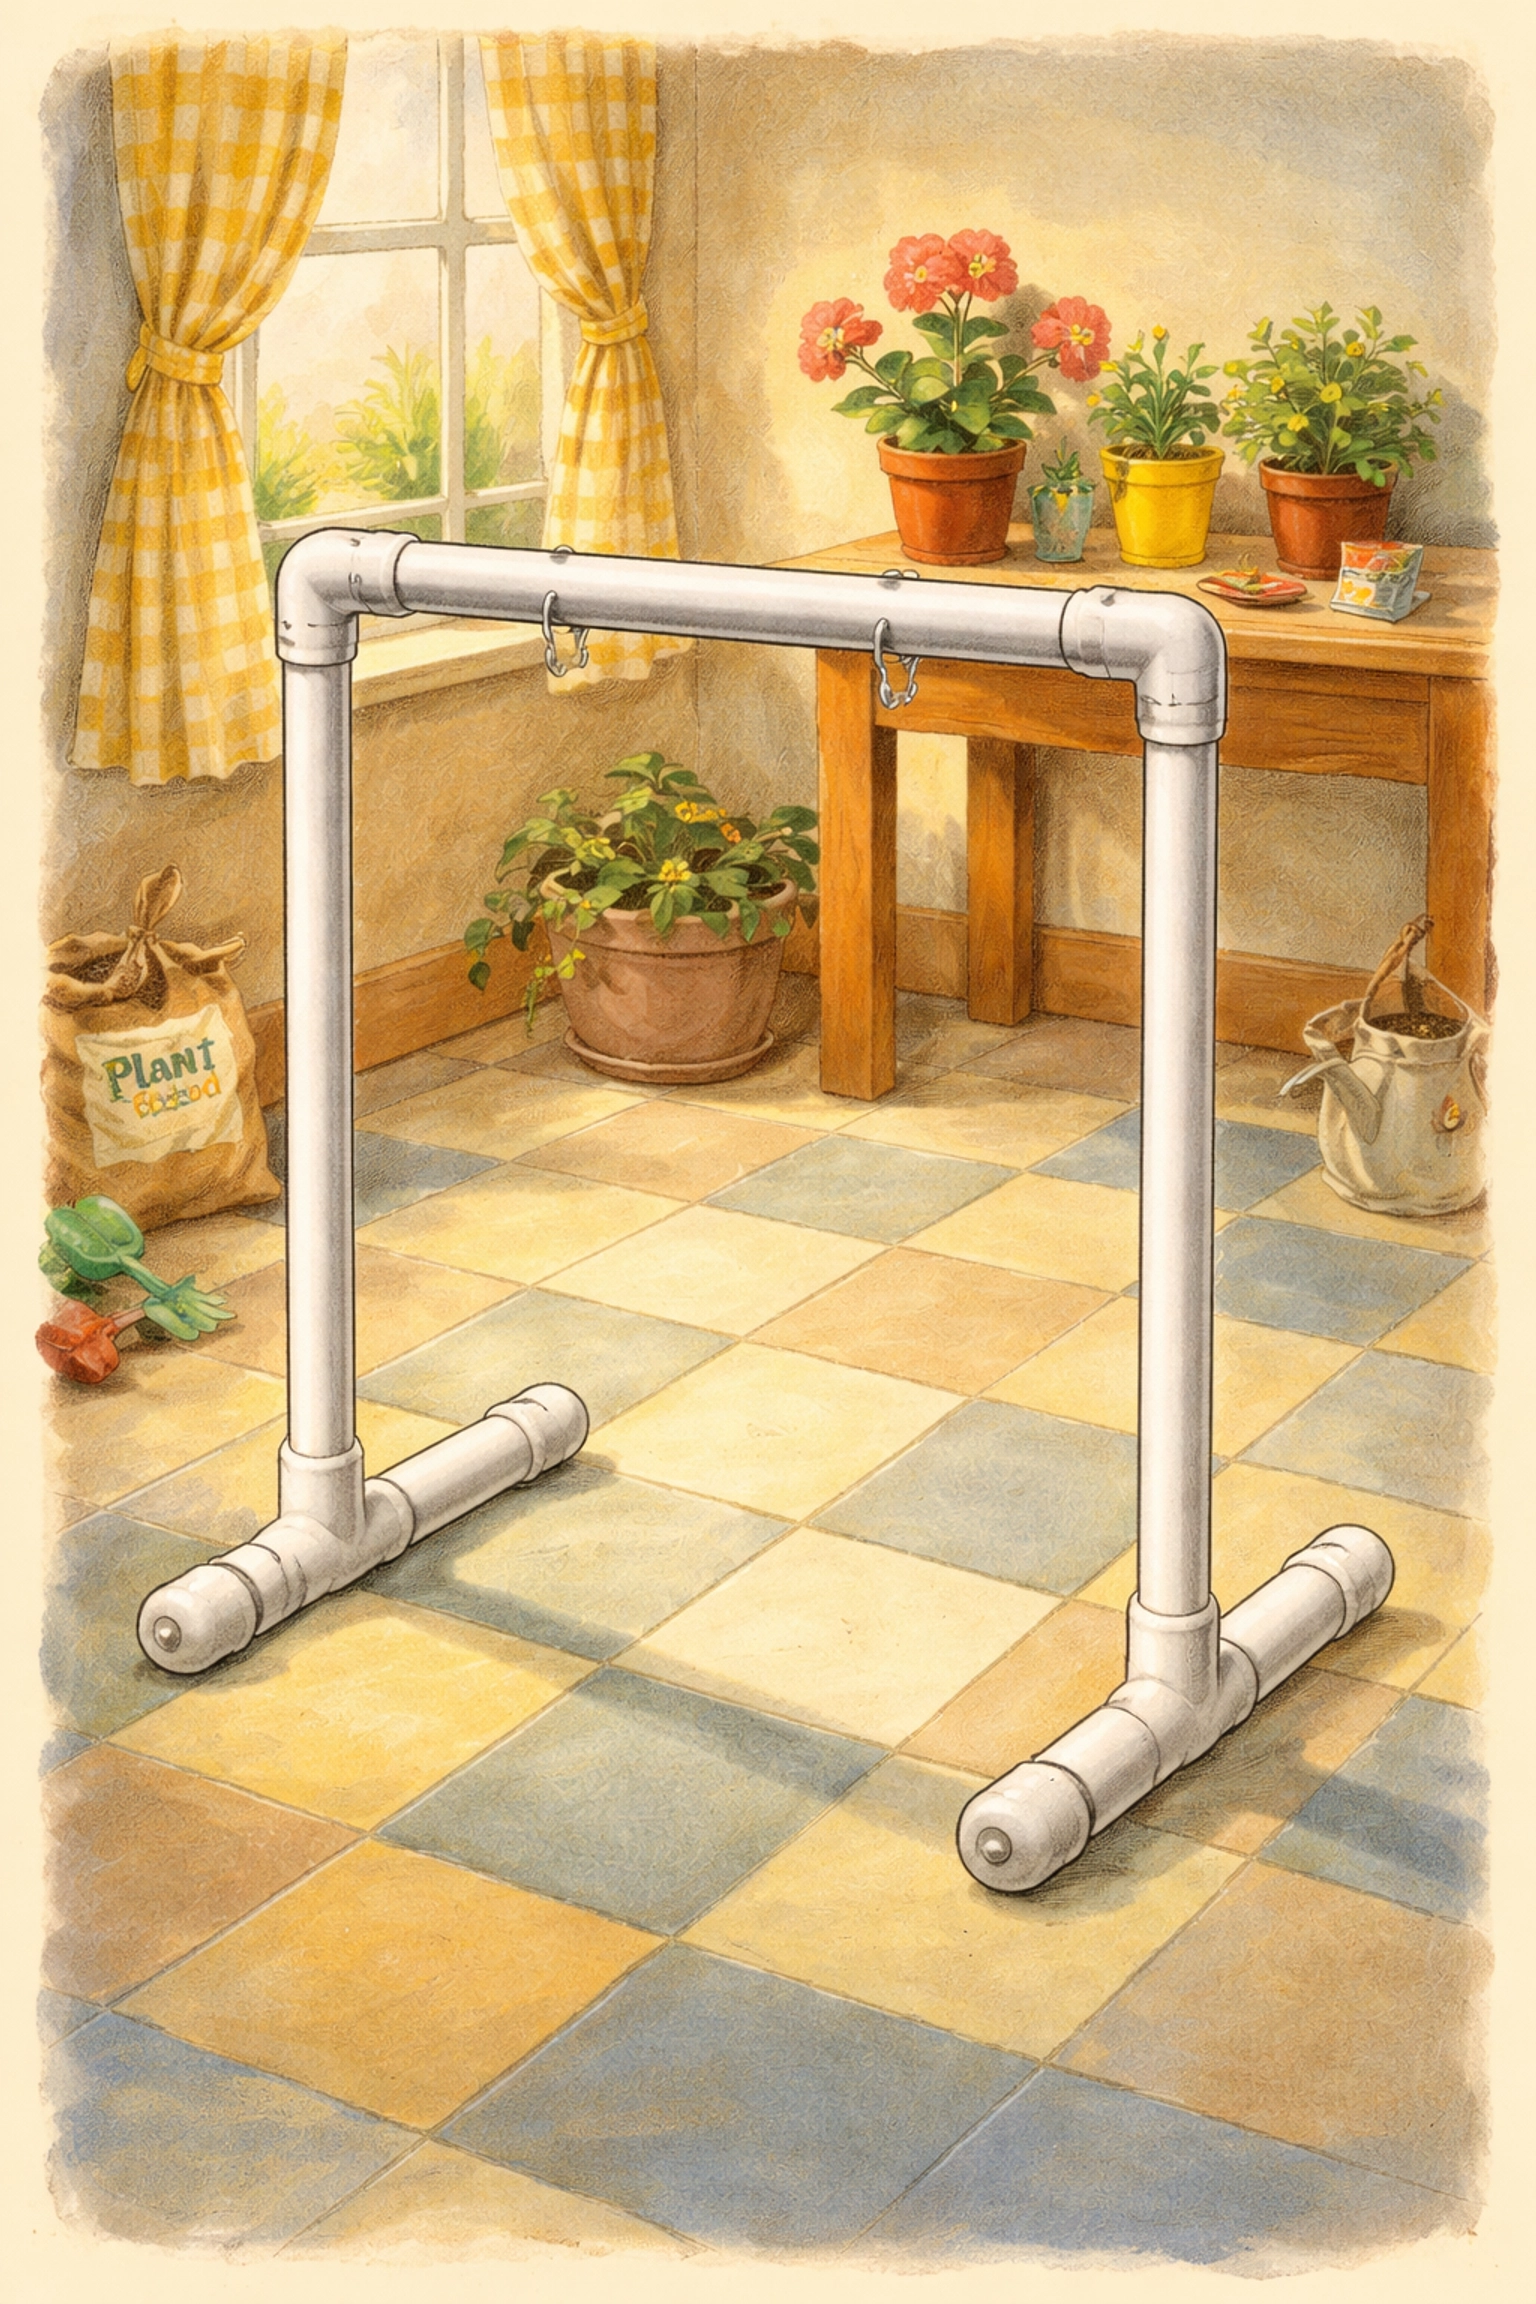
At this point, your stand should be freestanding and look like a rectangular goalpost with wide feet.
Step 5: Install the Eye Bolts
Here's where your drill comes in. Measure and mark two spots on the crossbar, position them to match the hanging hooks on your shop light fixture (usually about 36-40 inches apart for a 4-foot light).
Drill ¼" holes through the PVC at these marks. Thread an eye bolt through each hole from the top, and secure with a nut on the underside. Tighten them snugly but don't over-torque, PVC can crack under too much pressure.
Step 6: Hang Your Light
Attach your chains to the eye bolts using S-hooks or carabiners. Then hang your shop light from the chains. The beauty of using chains is the easy height adjustment, just move the S-hook to a different link to raise or lower the light as your seedlings grow.
Tips for Getting the Most Out of Your Light Stand
Light height matters. For most seedlings, you'll want the light positioned about 2-3 inches above the tops of your plants. As they grow, raise the light accordingly.
Skip the glue if you want flexibility. PVC cement creates a permanent bond. If you'd rather be able to break down the stand for off-season storage, just rely on the friction fit of the connectors. They hold surprisingly well.
Consider drilling adjustment holes. Some folks like to drill a series of holes (about 1 inch apart) along the vertical supports. This gives you another way to adjust height by repositioning where the crossbar connects.
LED shop lights run cooler. If you're concerned about heat near your plants, LED fixtures generate less warmth than traditional fluorescent bulbs and often use less electricity too.
If you're looking for more budget-friendly growing projects, check out our guide on how much space you need for a productive hydroponic garden, it pairs nicely with a setup like this.
Frequently Asked Questions
How long does it take to build this light stand?
Most people can complete this project in about 30-45 minutes, assuming you have all materials ready to go.
Can I use a different diameter PVC pipe?
Yes! Both 1-inch and 1¼-inch PVC work well. The slightly larger diameter offers a bit more stability but costs marginally more.
Will this stand hold heavier lights?
This design is intended for standard 4-foot shop lights, which are relatively lightweight. For heavier fixtures, you may want to add additional support or use thicker PVC.
Do I need to paint the PVC?
Not at all: though some gardeners like to paint theirs white to help reflect light back onto plants. If you do paint, use a plastic-compatible primer first.
How far should the light be from seedlings?
Generally, 2-3 inches above the plant tops works well for most seedlings. Watch for signs of light stress (bleaching or curling leaves) and adjust accordingly.
Can I make this stand taller or shorter?
Absolutely. Simply adjust the length of your vertical support pieces. Taller stands work well for shelving setups; shorter ones are great for tabletop use.
Is PVC safe to use around plants?
PVC is considered stable at room temperature and is commonly used in gardening applications. It doesn't leach chemicals under normal indoor conditions.
Can kids help build this?
Older children can definitely help with measuring, marking, and assembling the connectors. Adult supervision is recommended for cutting and drilling.
References
- University extension gardening resources on seed starting
- DIY home improvement guides for PVC construction
- LED grow light manufacturer recommendations for light placement
- General PVC pipe specifications and working guidelines


