


The Kratky Method is a passive hydroponic technique that lets you grow plants in nutrient-rich water without soil, electricity, pumps, or air stones. Developed by researcher B.A. Kratky at the University of Hawaii in 2009, it's often called the simplest hydroponic system in the world. You set it up once, and the plants essentially take care of themselves until harvest time. If you've ever wanted to grow fresh lettuce or herbs on your kitchen counter without any fancy equipment, this might just be your new favorite gardening trick.
Why the Kratky Method Works So Well
Here's the clever science behind it: you suspend a plant in a net cup above a container of nutrient water. The roots dip into the water at first, but as the plant drinks and grows, the water level naturally drops. This creates an air gap between the water surface and the base of the plant.
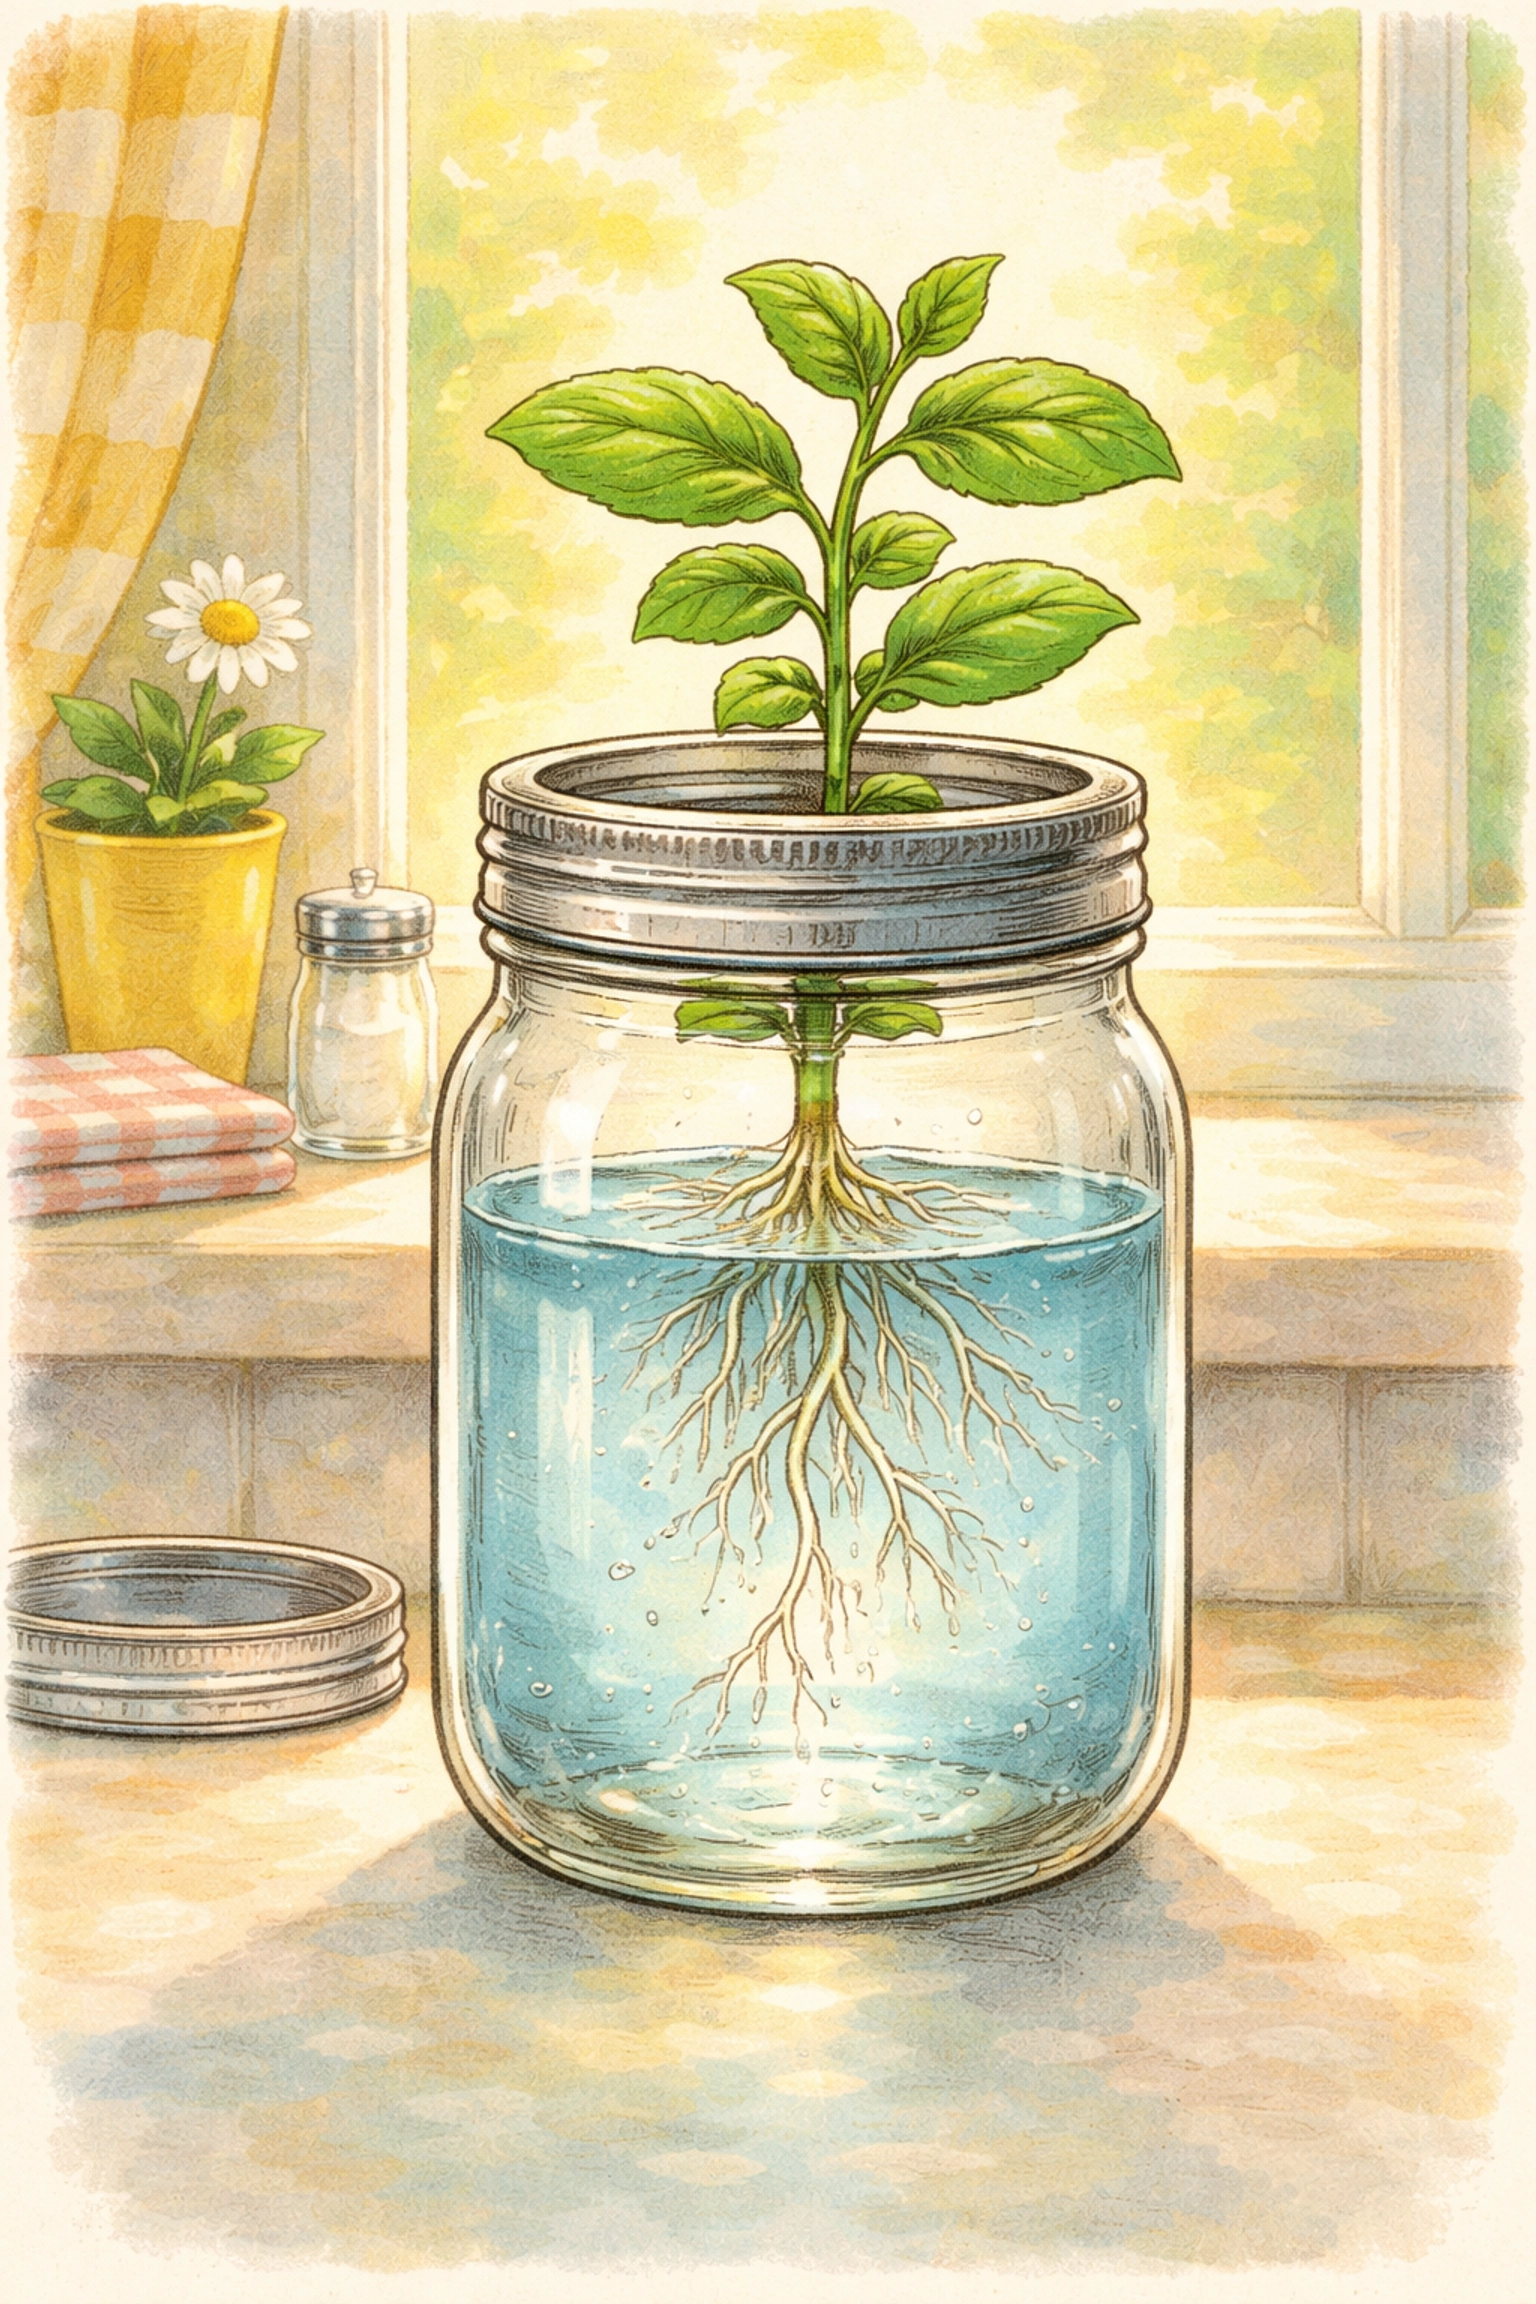
That air gap is the magic ingredient. The roots exposed to the moist air above the waterline develop into "air roots" that absorb oxygen directly from the humid space inside the container. Meanwhile, the roots still touching the water keep drinking up nutrients. By the time the reservoir runs dry, your plant is typically ready to harvest.
No pumps. No electricity. No timers. Just a container, some water, nutrients, and a little patience.
What Can You Grow with the Kratky Method?
This technique tends to work best for fast-growing leafy greens and herbs that don't guzzle enormous amounts of water. Some popular choices include:
- Lettuce (butterhead, romaine, and loose-leaf varieties)
- Basil
- Spinach
- Cilantro
- Kale
- Swiss chard
- Mint
Larger fruiting plants like tomatoes or peppers can be grown this way, but they often require bigger reservoirs and occasional nutrient top-offs, which somewhat defeats the "set it and forget it" charm.
Budget Breakdown: Kratky Setup for Under $10
One of the best things about the Kratky Method is how ridiculously affordable it can be. You likely have some of these items lying around the house already.
| Item | Estimated Cost | Notes |
|---|---|---|
| Mason jar or plastic container | $0 – $3 | Recycle a pasta sauce jar or use an old food storage container |
| Net cups (2-inch) | $1 – $2 | Often sold in packs; check dollar stores |
| Growing medium (perlite, clay pebbles, or rockwool cubes) | $2 – $4 | A small bag goes a long way |
| Hydroponic nutrients | $3 – $5 | Liquid concentrate lasts for many batches |
| Seeds or seedling | $1 – $2 | Lettuce and basil seeds are inexpensive |
| Total | $7 – $16 | Most setups land well under $10 if you reuse containers |
If you're crafty with upcycling, you can easily get your first Kratky system running for the cost of a fancy coffee.
Step-by-Step: How to Build Your First Kratky System
Ready to get your hands a little wet? Here's a simple walkthrough to build a basic Kratky setup using a mason jar.
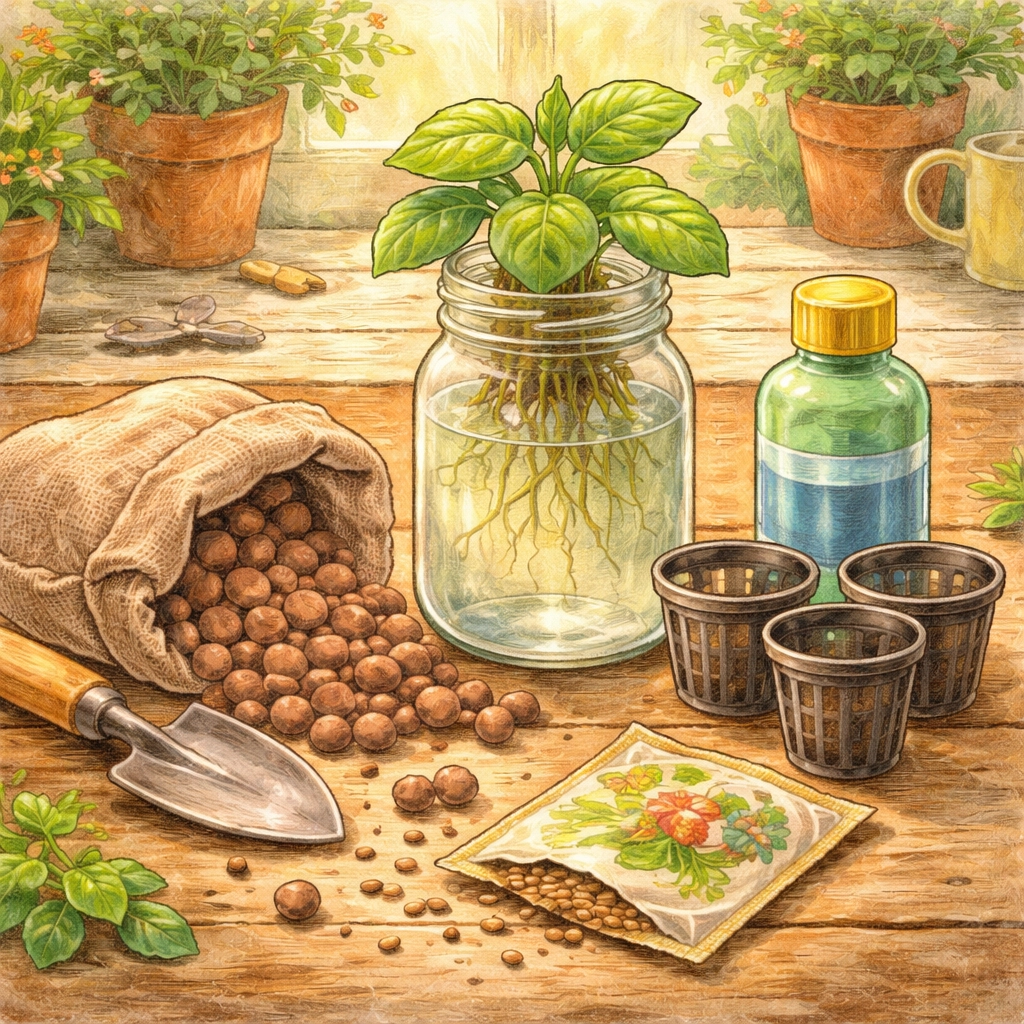
What You'll Need
- A wide-mouth mason jar (quart size works great) or similar container
- A 2-inch or 3-inch net cup
- Growing medium (perlite, hydroton clay pebbles, or rockwool)
- Hydroponic nutrient solution (mixed according to package directions)
- A seedling or seeds
- Optional: A piece of fabric or tape to block light from the jar
Instructions
Step 1: Prepare Your Container
Give your jar a good wash. If you're using a clear container, consider wrapping it in dark fabric or painting the outside to block light. Algae loves light and nutrient water, so keeping things dark helps prevent green gunk from forming.
Step 2: Fill the Jar with Nutrient Solution
Mix your hydroponic nutrients with water according to the package instructions. Fill the jar so that the water level will just barely touch the bottom of your net cup when it's placed in the opening. You want the roots to reach the water, but you don't want the stem or growing medium to be submerged.
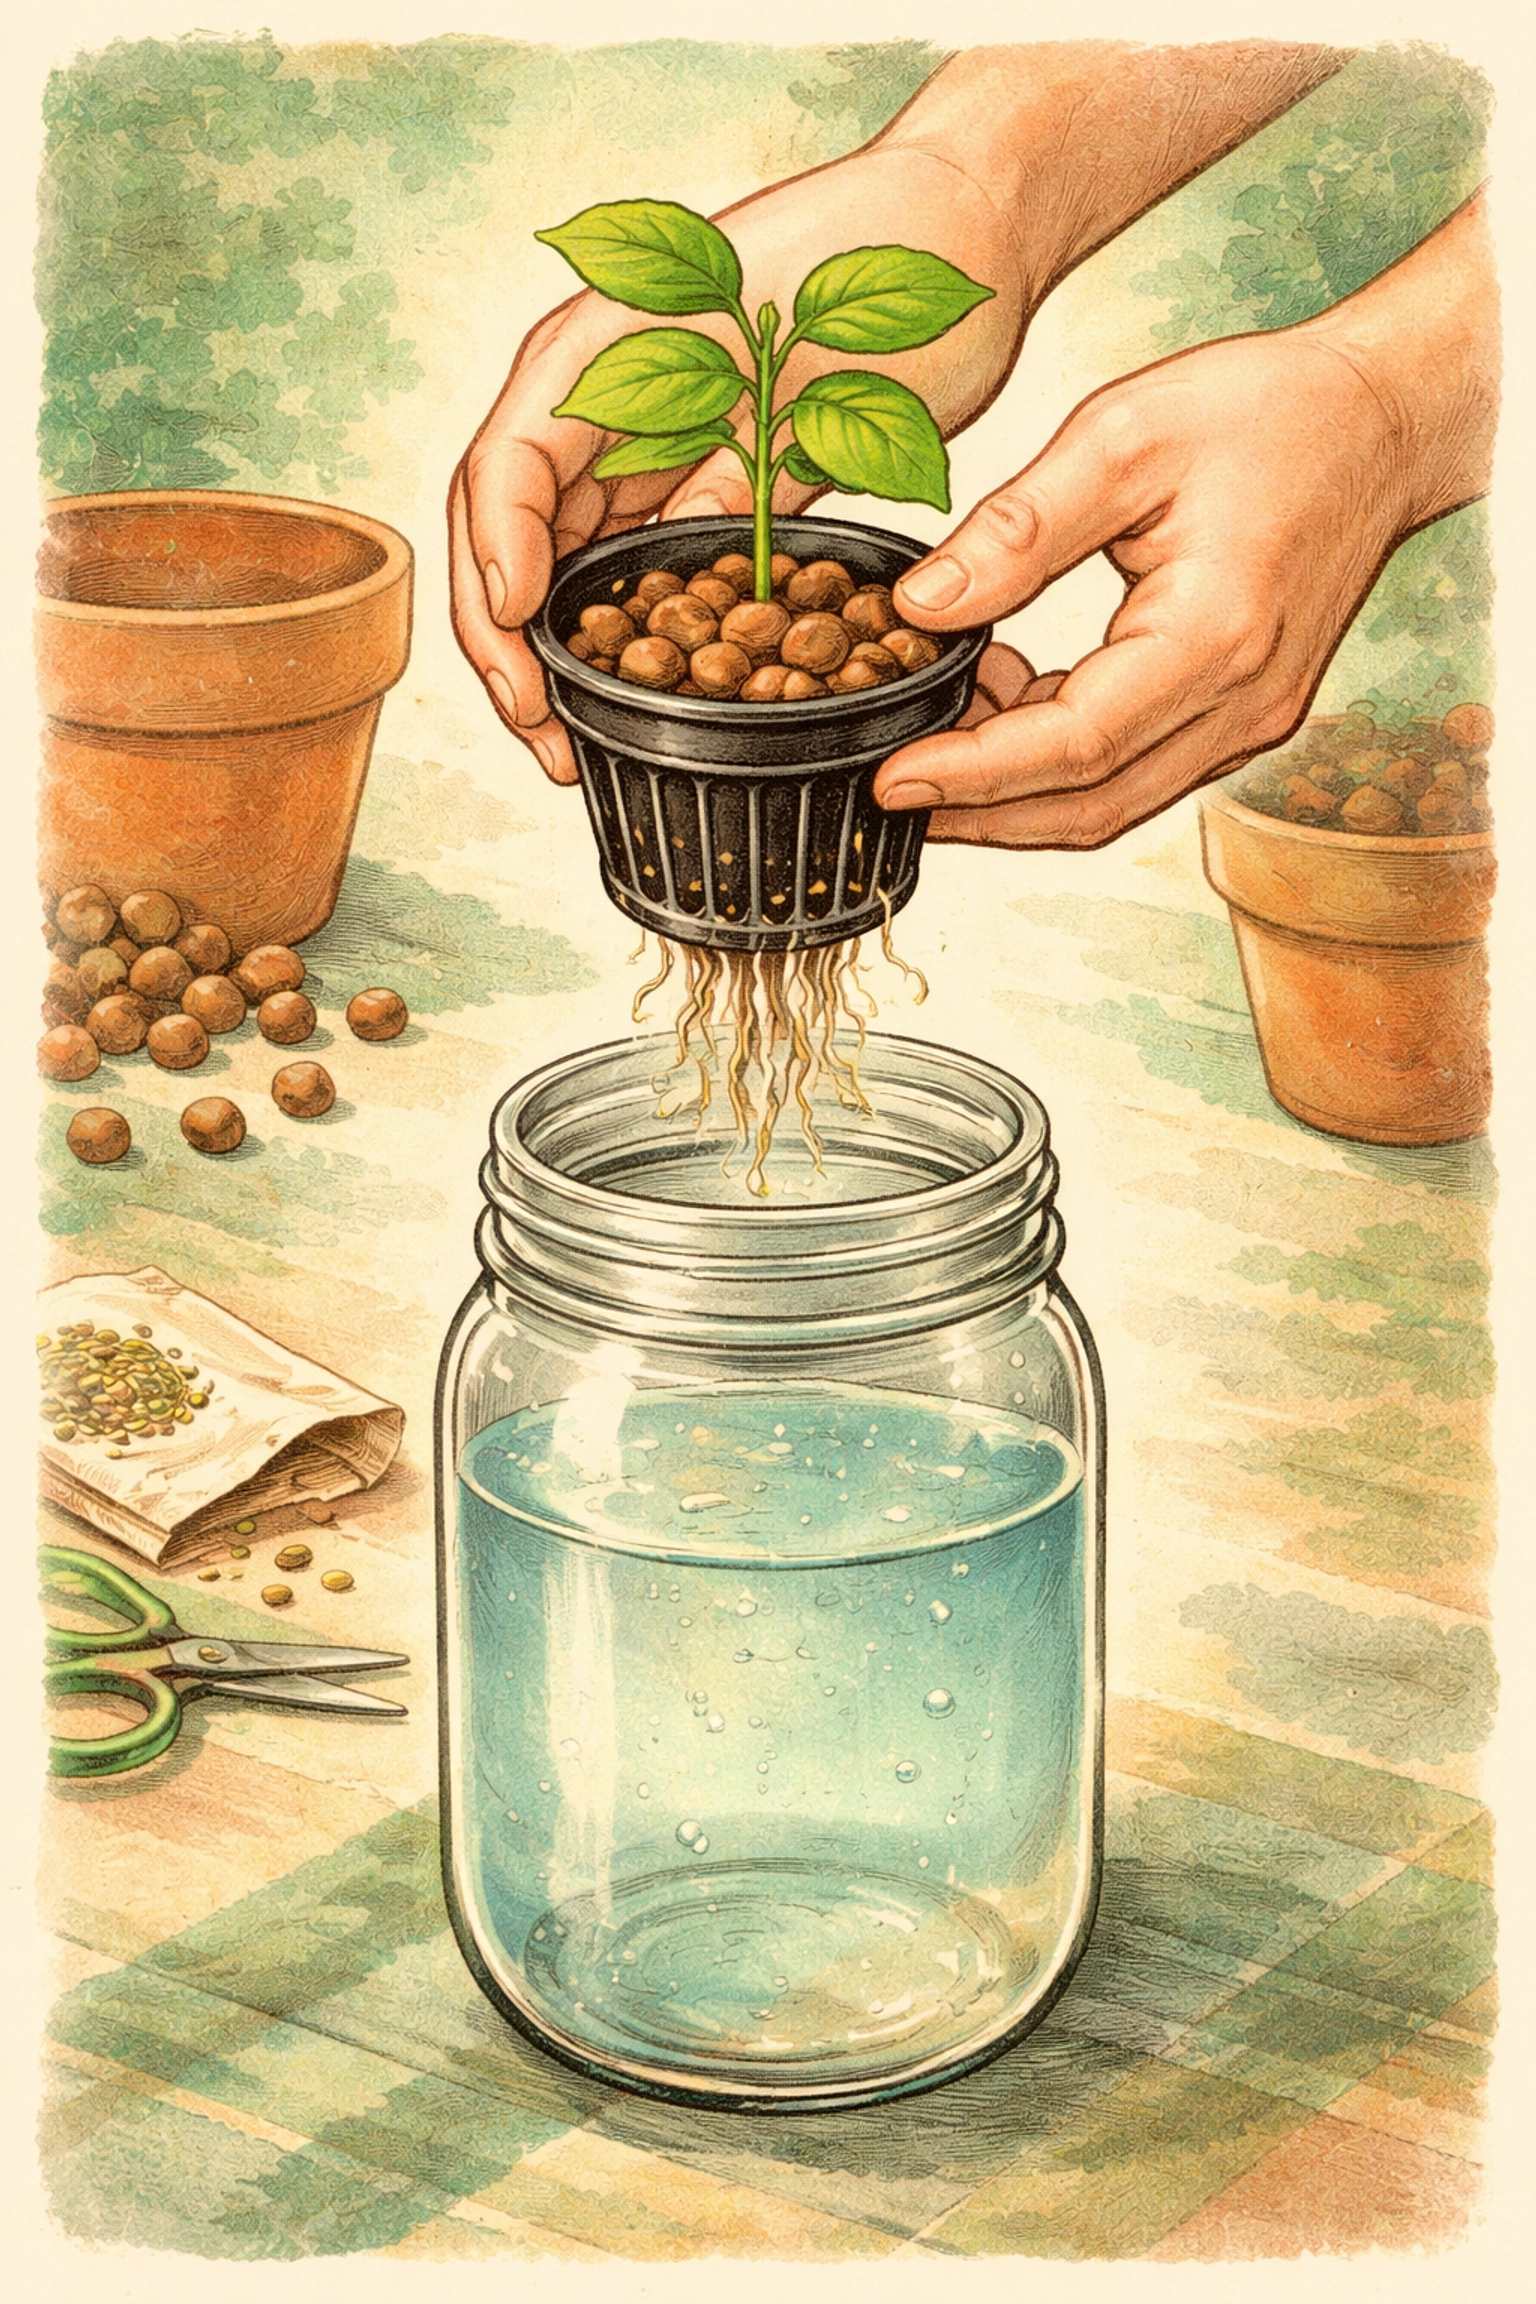
Step 3: Prep Your Net Cup
Place a small amount of your growing medium in the bottom of the net cup. If you're transplanting a seedling, gently rinse off any soil from the roots (soil and hydroponics don't mix well). Nestle the seedling into the net cup and fill around it with more growing medium to hold it steady.
Step 4: Position the Net Cup
Set the net cup into the mouth of the jar so the roots dangle down into the nutrient solution. The water should just kiss the bottom of the net cup or the very tips of the roots.
Step 5: Find a Good Spot
Place your setup near a sunny window that gets at least 6 hours of light, or under a simple grow light if you're working with a darker space. Leafy greens are pretty forgiving, but they do appreciate consistent light.
Step 6: Wait and Watch
This is the easy part. Over the next few weeks, the plant will drink the nutrient water, the level will drop, and those clever air roots will form. You generally don't need to top off the water, just let nature do its thing.
Tips for Kratky Success
- Start with lettuce or basil. These are forgiving plants that grow quickly and don't demand huge amounts of water.
- Keep light out of the reservoir. Algae growth can clog roots and compete for nutrients. Dark containers or jar covers help tremendously.
- Don't overfill. If the water level is too high, roots may rot instead of developing air roots. Leave that air gap room from the start.
- Use quality nutrients. Tap water alone won't cut it. Plants need dissolved minerals to thrive, so invest in a basic hydroponic nutrient mix.
- Check on it occasionally. While Kratky is low-maintenance, a quick peek every few days helps you catch any issues early.
If you're curious about how much space you actually need to grow hydroponic plants at home, check out our guide on how much space you need for a productive hydroponic garden.
Frequently Asked Questions
Do I need to change the water in a Kratky system?
Generally, no. The idea is that the plant uses up the water and nutrients by harvest time. For longer-growing crops, you might need to top off the reservoir, but for quick greens like lettuce, one fill is usually enough.
Can I use regular garden fertilizer for Kratky?
It's not recommended. Standard garden fertilizers are designed for soil and may not dissolve properly or provide the right nutrient balance. Hydroponic-specific nutrients are formulated to be fully water-soluble.
How long does it take to grow lettuce with the Kratky Method?
Most lettuce varieties are ready to harvest in about 4 to 6 weeks from transplanting a seedling, depending on light and temperature conditions.
Does the Kratky Method work indoors?
It can work quite well indoors, especially near a bright window or under grow lights. Many people grow herbs and greens year-round on kitchen counters using this technique.
What size container should I use?
For small herbs and lettuce, a quart-sized mason jar or similar container works nicely. Larger plants may need gallon-sized buckets or storage bins.
Can kids help with a Kratky project?
This method is a wonderful hands-on science project for families. It's simple, safe, and doesn't involve any electrical components, making it easy for curious kids to observe root growth and plant development.
Why are my roots slimy or brown?
This could indicate root rot, often caused by the water level being too high or the container getting too warm. Make sure there's an air gap and keep your setup in a reasonably cool spot away from direct heat.
Is the Kratky Method organic?
It depends on the nutrients you use. Some hydroponic nutrients are certified organic, while others are synthetic. Check the label if organic growing matters to you.
References
- Kratky, B.A. (2009). "Three Non-Circulating Hydroponic Methods for Growing Lettuce." University of Hawaii at Manoa, College of Tropical Agriculture and Human Resources.
- University of Hawaii CTAHR Extension publications on passive hydroponics.
- Various home hydroponic grower communities and educational resources.


