


To make paper bag puppets with kids, you'll need a standard brown paper lunch bag, some markers, glue, and a handful of craft supplies you likely already have at home. The fold at the bottom of the bag becomes the puppet's mouth, and your child's hand slips inside to bring the character to life. It's one of those wonderfully simple crafts that keeps little ones engaged for an hour or more: and costs next to nothing.
This project works beautifully for rainy afternoons, birthday parties, or just when you need a screen-free activity that actually holds attention. Plus, once the puppets are done, the real fun begins with imaginative play and puppet shows.
Quick Project Overview
| Detail | Info |
|---|---|
| Time to Complete | 20–45 minutes per puppet |
| Cost | Under $10 for supplies (often under $5) |
| Best Ages for Skill | 4–10 years old |
| Enjoyment Range | 2–12 years old (toddlers love watching, older kids love designing) |
| Mess Level | Low to moderate |
| Adult Help Needed | Minimal for ages 5+; scissors help for younger crafters |
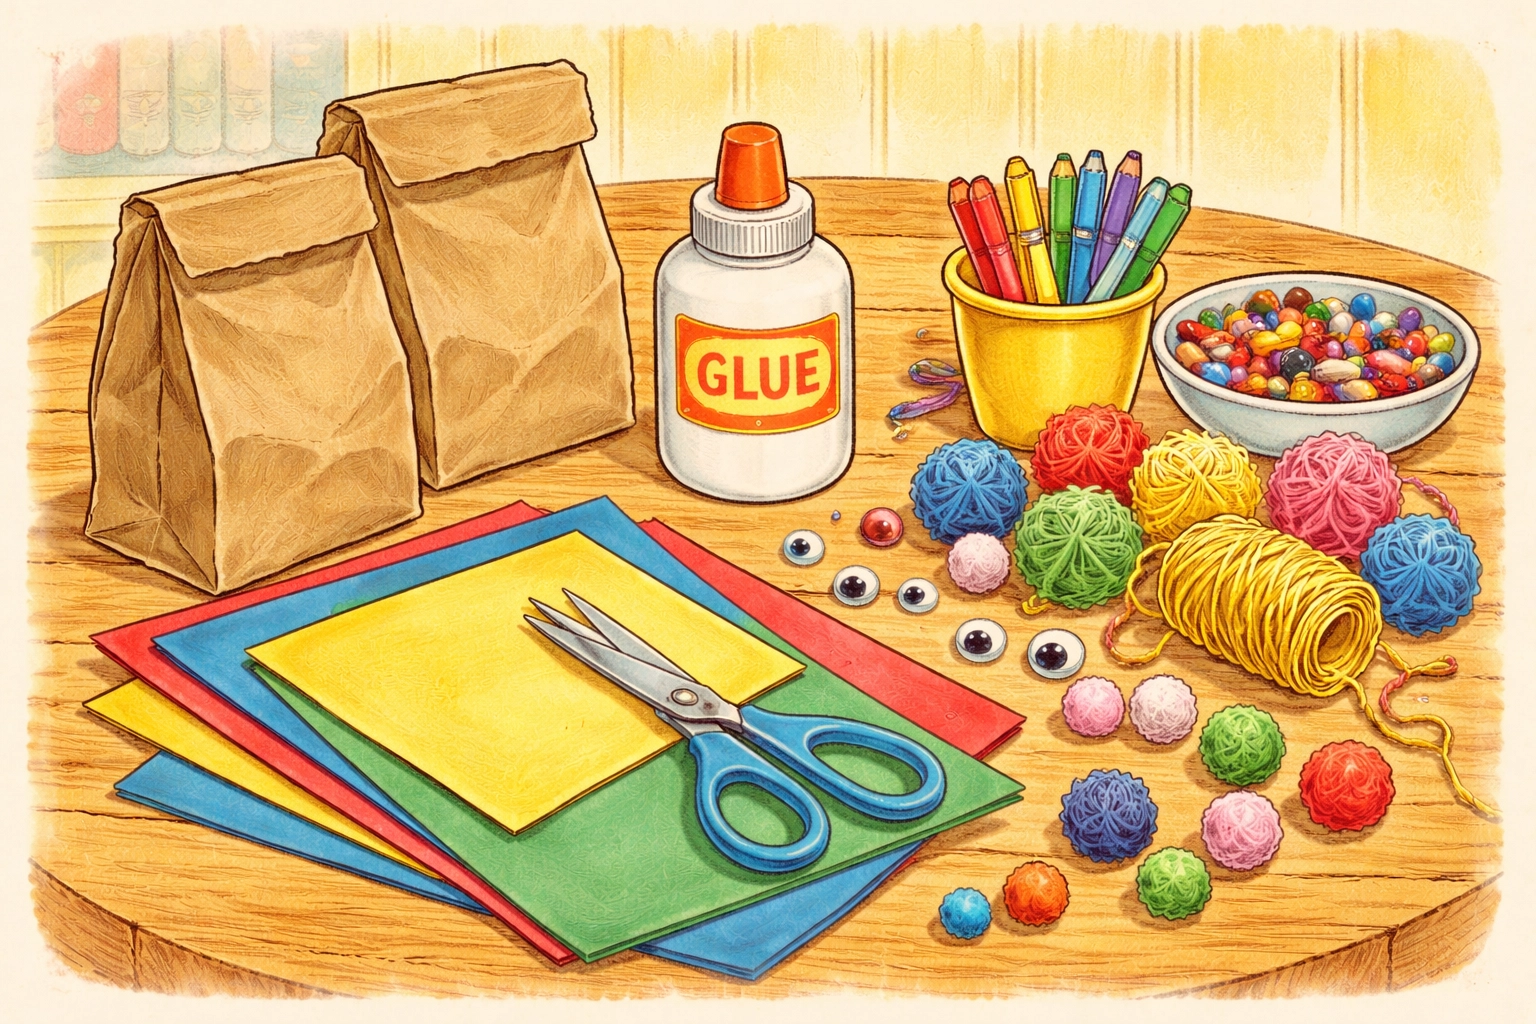
Materials You'll Need
Good news: most of these items are probably sitting in a kitchen drawer or craft bin right now.
| Material | Purpose | Estimated Cost |
|---|---|---|
| Brown paper lunch bags | The puppet base | $2–3 for a pack of 50 |
| Markers or crayons | Drawing faces and details | Already owned or $1–2 |
| Scissors | Cutting shapes and features | Already owned |
| Glue (liquid works best) | Attaching decorations | $1–2 |
| Construction paper | Ears, tongues, accessories | $1–2 for a pack |
| Googly eyes (optional) | Adding personality | $1 for a pack |
| Yarn scraps (optional) | Hair or manes | Often free from other projects |
| Pom poms (optional) | Noses and textures | $1 for a variety pack |
Pro tip: Liquid glue works much better than glue sticks when you're attaching yarn or pom poms. Glue sticks just don't grip those textured materials well.
Step-by-Step Instructions
Step 1: Understand How the Bag Works
Before diving in, take a moment to show your child how the paper bag puppet actually functions. The flat bottom of the bag (when it's folded) becomes the puppet's face and mouth area. When you slip your hand inside and curl your fingers into that fold, the "mouth" opens and closes.
Have your child practice this motion a few times. It usually clicks pretty quickly, and understanding the mechanics helps them plan where to put facial features.
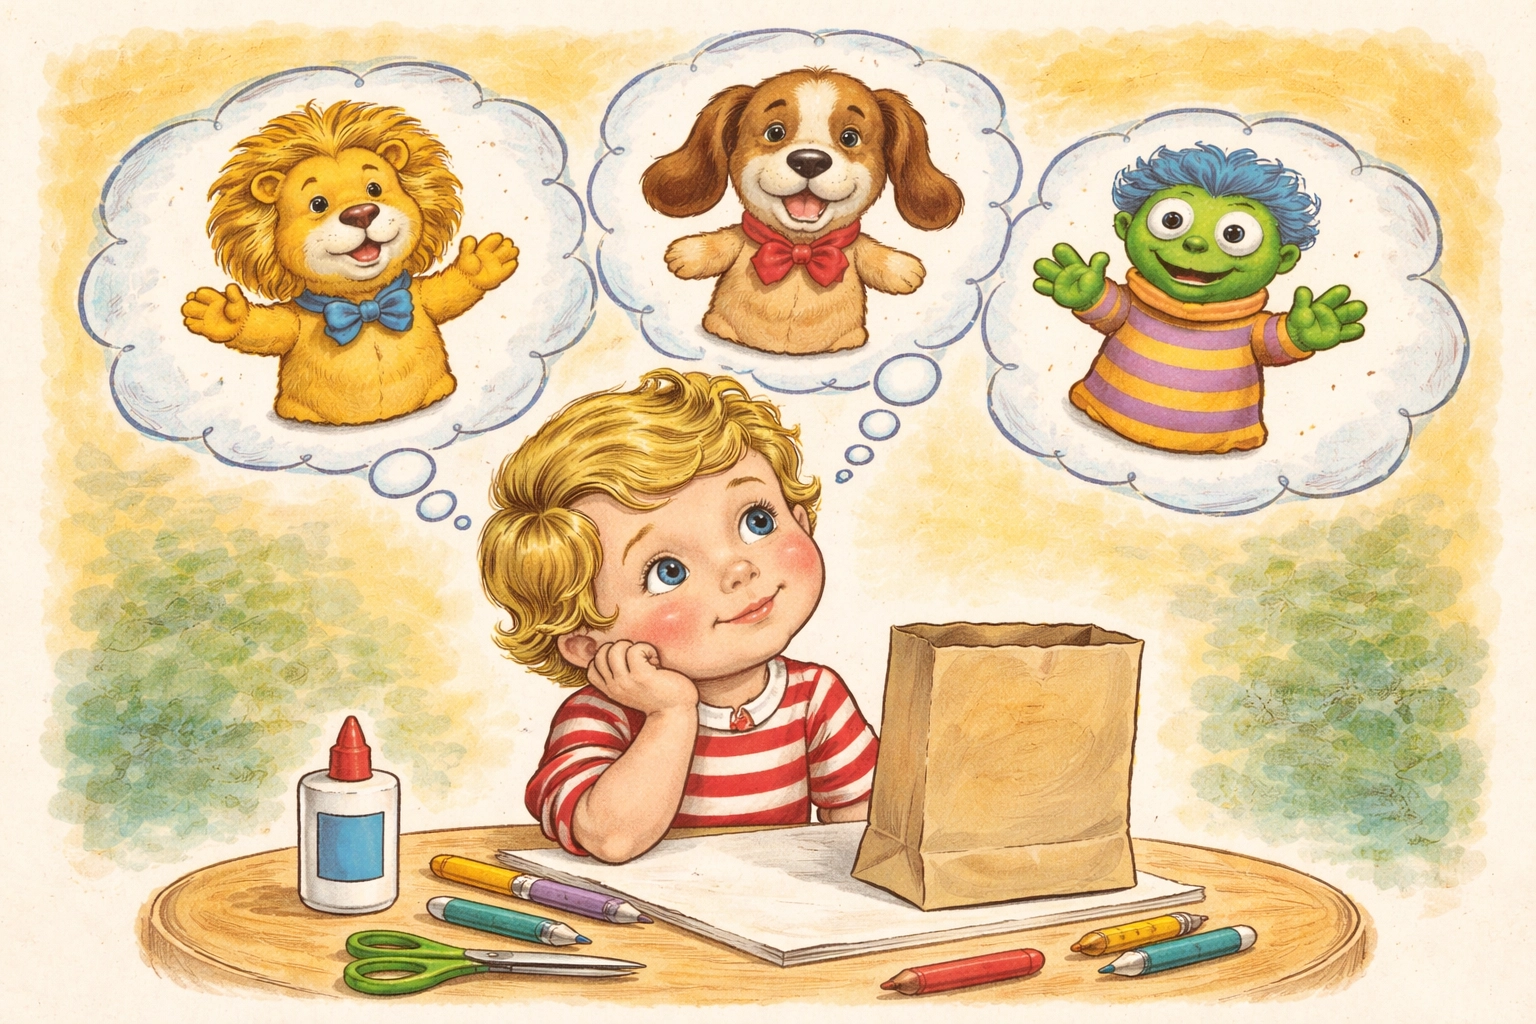
Step 2: Plan Your Character
Ask your child: "What kind of puppet do you want to make?" This is where creativity kicks in. Some popular options include:
- Farm animals (cows, pigs, chickens)
- Pets (dogs, cats, bunnies)
- Wild animals (lions, bears, owls)
- People (family members, firefighters, princesses)
- Silly monsters or made-up creatures
For younger kids, it often helps to decide on the character before grabbing supplies. Older kids might prefer to freestyle and see what emerges.
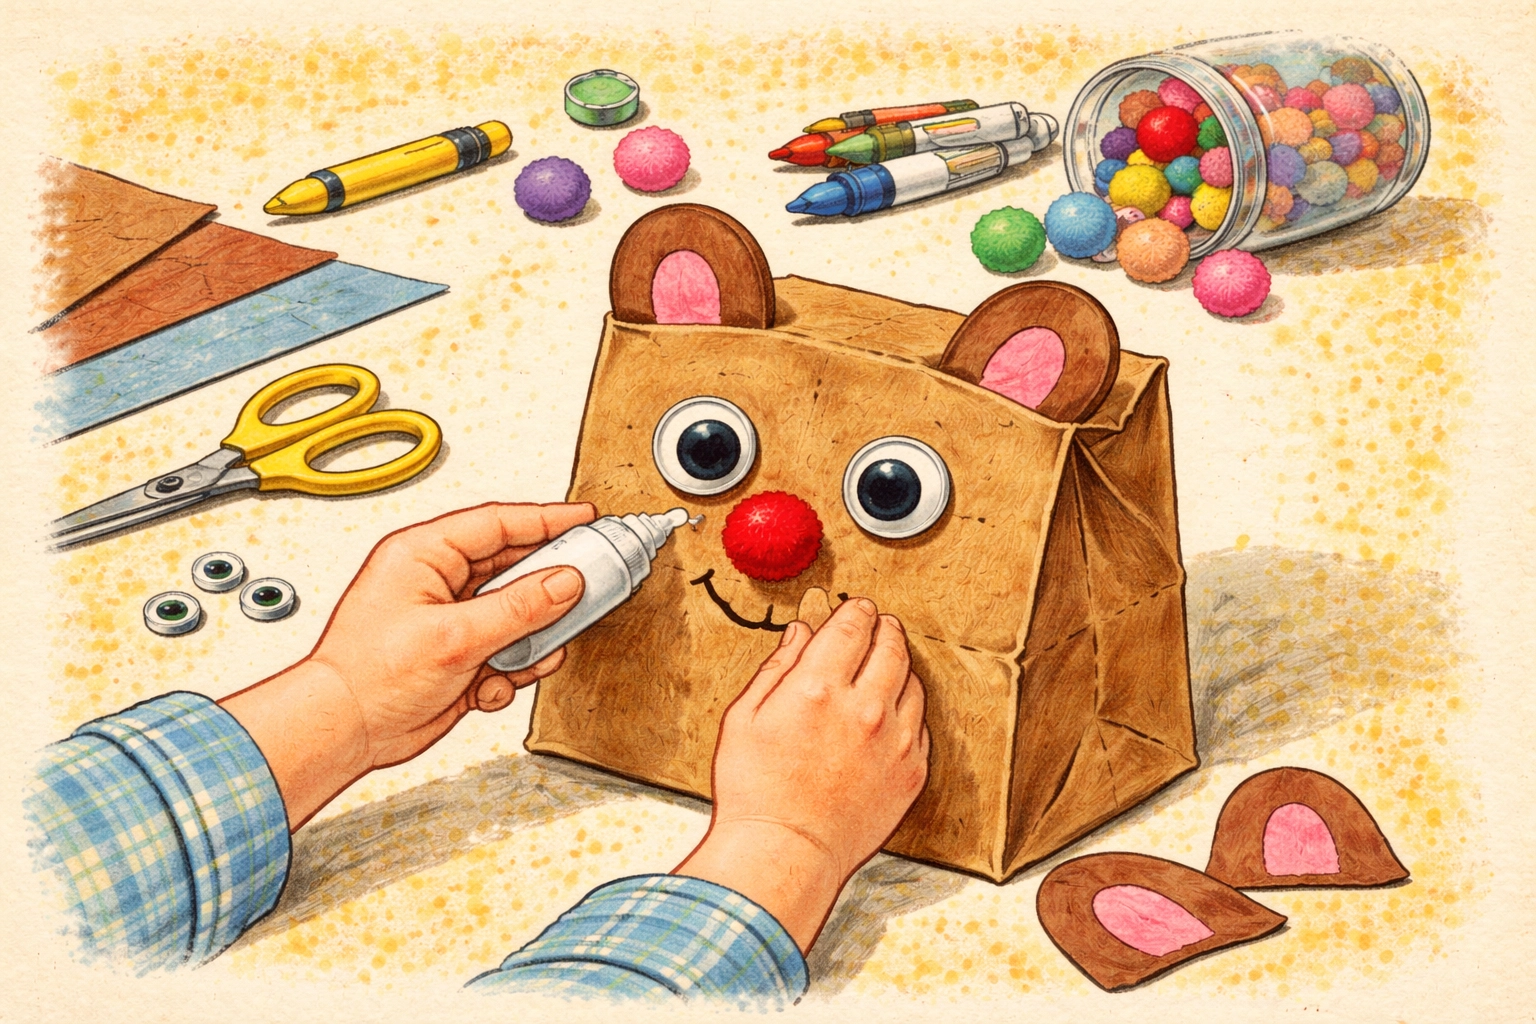
Step 3: Create the Face
This is the heart of the puppet. The bottom flap of the bag is where the main face goes.
- Draw or glue the eyes on the flat bottom portion of the bag. Googly eyes add wonderful wiggly fun, but drawn eyes work great too.
- Add a nose below the eyes. A pom pom works nicely for animal noses, or your child can draw or cut one from construction paper.
- Position the mouth so it sits right at the fold. When the puppet "talks," the fold opens to reveal the inside: which can be colored pink or red for a tongue effect.
Step 4: Add Ears and Hair
Now comes the personality.
- For ears: Cut shapes from construction paper and glue them to the top or sides of the bag. Floppy dog ears, pointed cat ears, round bear ears: the options are endless.
- For hair: Cut yarn into small pieces and glue them to the top of the bag. Curly, straight, wild: let your child decide.
- For manes or fur: Fringe-cut strips of construction paper create a lovely textured look.
Step 5: Decorate the Body
The lower portion of the bag (the part that covers your hand and wrist) becomes the puppet's body. Your child can:
- Draw clothing, patterns, or fur textures
- Glue on paper shapes for arms, paws, or wings
- Add stickers for extra flair
- Create paper bowties, collars, or accessories
Step 6: Let It Dry Completely
If you've used liquid glue, give the puppet at least 10–15 minutes to dry before playtime begins. Rushing this step usually means googly eyes rolling across the floor mid-performance.
Step 7: Put on a Show
Once dry, slip that puppet on and let the magic happen. Encourage your child to give their character a voice, a name, and a personality. Set up a "stage" behind the couch or a cardboard box, and you've got yourself a puppet theater.
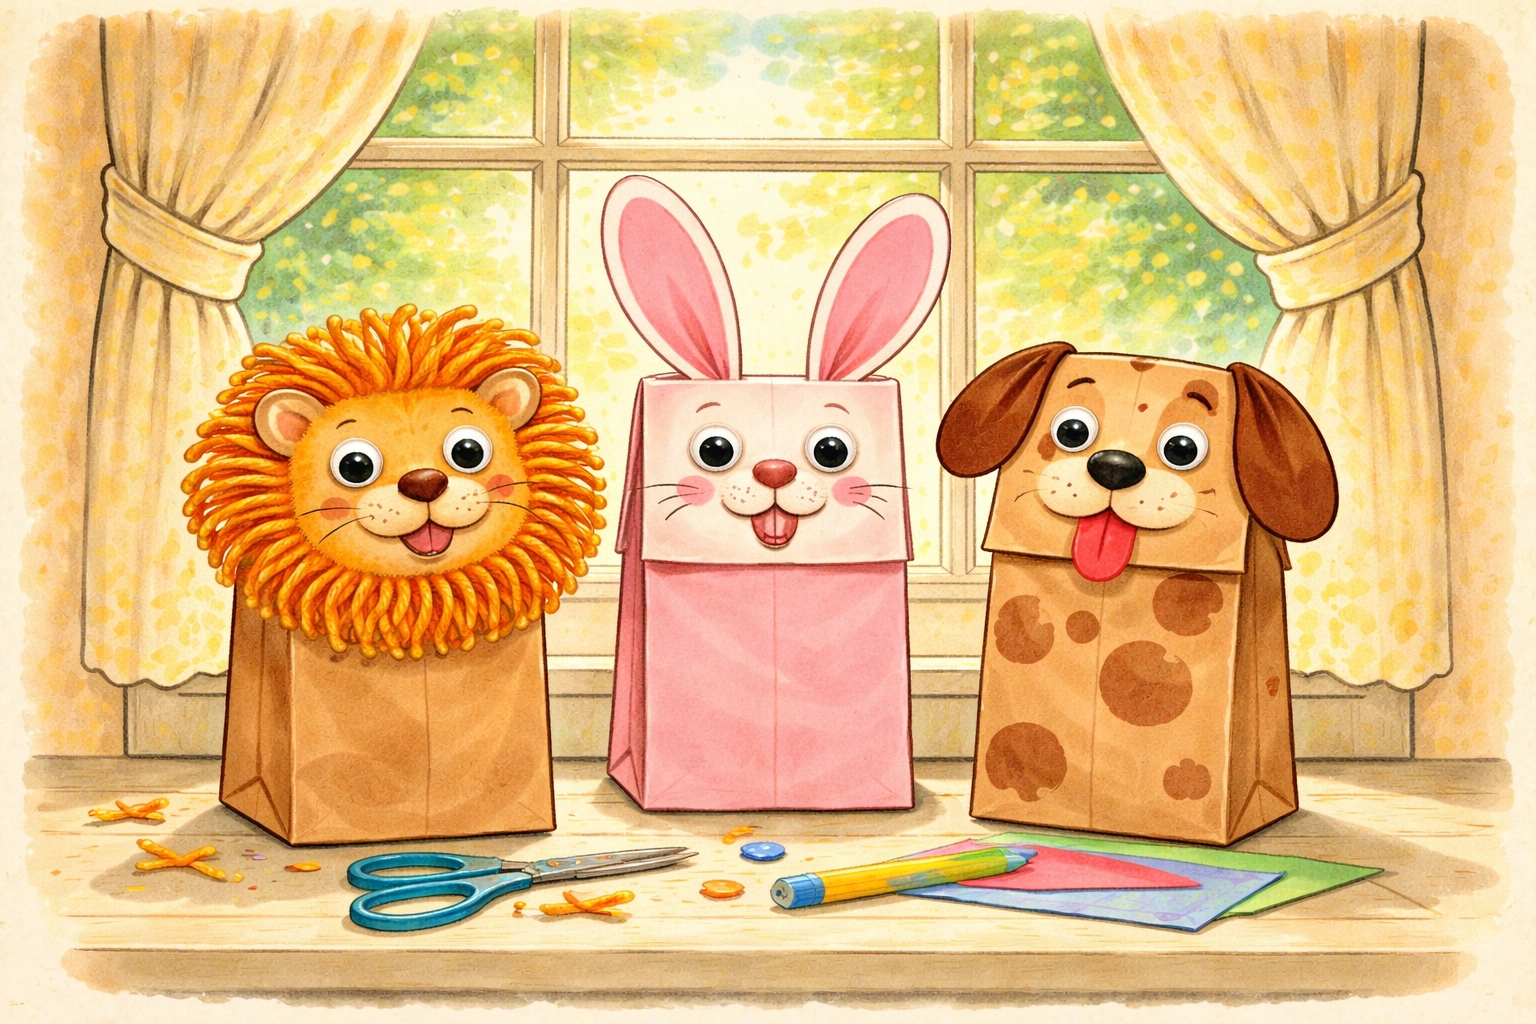
Creative Variations to Try
Once your family masters the basic puppet, here are some fun directions to explore:
Matching Sets: Create a whole family of puppets: mama bear, papa bear, baby bear: for storytelling time.
Story Characters: Make puppets based on a favorite book you're reading together, then act out scenes.
Seasonal Themes: Pumpkins for fall, snowmen for winter, bunnies for spring: paper bag puppets adapt to any holiday.
Collaborative Creatures: Have each family member decorate one section of the same puppet for a wonderfully weird group creation.
Helpful Tips for Success
- Keep extra bags handy. Mistakes happen, and sometimes a child wants to start fresh. Having backups prevents frustration.
- Embrace imperfection. A lopsided nose or mismatched eyes adds character. This isn't about Pinterest-perfect results.
- Work on a protected surface. A plastic tablecloth or old newspaper makes cleanup easier.
- Display finished puppets. Hang them on a clothesline with clips or prop them on a shelf. Kids love seeing their work celebrated.
For more hands-on projects like this one, explore our kids crafts collection for dozens of family-friendly ideas.
Frequently Asked Questions
What age is best for making paper bag puppets?
Children around 4–10 years old typically get the most out of this craft independently. Kids younger than 4 can participate with lots of help, while older kids often enjoy more complex designs.
Can I use white paper bags instead of brown?
Absolutely. White bags actually work nicely as a blank canvas, especially for painting or creating lighter-colored characters like polar bears or ghosts.
How long does this craft usually take?
Most kids finish a puppet in 20–45 minutes, depending on how elaborate the design gets. Some children happily spend an hour adding details.
What if we don't have googly eyes?
No problem at all. Draw eyes directly on the bag, or cut circles from white paper and add dots for pupils. Both approaches look charming.
Is this craft messy?
Generally, it's low-mess compared to painting projects. The main potential mess comes from glue and small paper scraps, which clean up easily.
Can toddlers participate?
Toddlers around 2–3 can help with simple tasks like placing stickers or handing supplies to an older sibling. They typically enjoy watching and playing with the finished puppets more than constructing them.
What kind of glue works best?
Liquid white glue (like Elmer's) works better than glue sticks for this project, especially when attaching yarn, pom poms, or heavier decorations.
How do I store finished puppets?
Flatten them gently and store in a large envelope or shoebox. They'll keep for months and can be brought out again for future puppet shows.
Can we make puppets from other types of bags?
Paper lunch bags work best because of their size and the natural fold. Larger grocery bags are harder for small hands to manipulate, though they could work for giant puppets with adult help.


