


A handprint family tree is a simple craft where each family member creates a colorful handprint that becomes a "leaf" on a decorative tree, resulting in a meaningful keepsake you can display for years. This project typically takes about 30-45 minutes, costs under $10 with supplies you likely already have, and works well for kids ages 2 and up with some adult assistance.
The beauty of this craft lies in its simplicity. You're essentially making paint prints, cutting them out, and attaching them to a tree shape. But what you end up with is so much more than the sum of its parts: it's a snapshot of your family at this exact moment in time, captured in colorful handprints that will only get more precious as the years go by.
Quick Project Overview
| Detail | Info |
|---|---|
| Best Ages | 2-10 years (with varying levels of help) |
| Skill Level | Beginner-friendly |
| Time Needed | 30-45 minutes (plus drying time) |
| Total Cost | Under $10 |
| Mess Factor | Moderate (paint is involved!) |
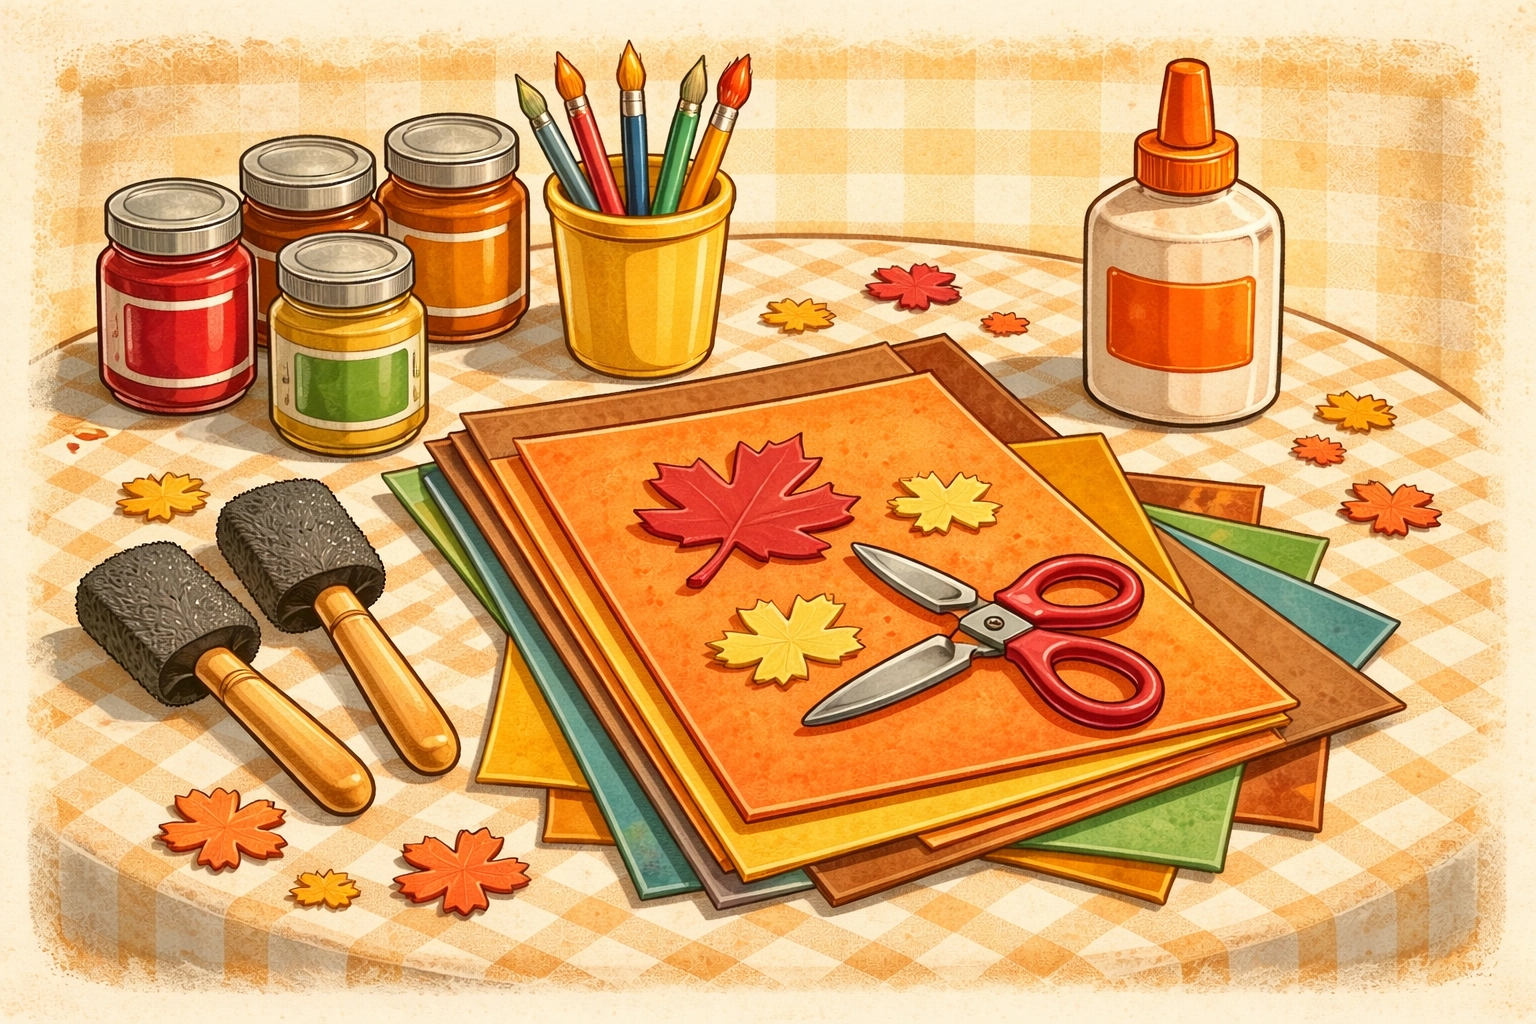
Materials You'll Need
Most families can pull this together from craft supplies already in the house. If you need to shop, here's what to grab:
| Material | Estimated Cost | Notes |
|---|---|---|
| Construction paper or cardstock (various colors) | $2-3 | Brown, green, and fall colors work great |
| Acrylic or washable tempera paint | $3-4 | Brown for trunk, assorted colors for hands |
| Foam brush or paintbrush | $1-2 | Foam brushes spread paint more evenly on hands |
| Large poster board or cardboard (for base) | $1-2 | A recycled cardboard box works perfectly |
| Scissors | On hand | Kid-safe scissors for little helpers |
| Glue stick or craft glue | $1 | White school glue works fine |
| Marker or pen | On hand | For labeling names |
| Paper towels | On hand | Trust me, you'll want these nearby |
Total: Usually under $10 (and often free if you've got a decent craft stash)
Step-by-Step Instructions
Step 1: Set Up Your Workspace
Before anyone gets paint on their hands, take two minutes to prepare. Lay down newspaper or a plastic tablecloth on your work surface. If you're working with toddlers, the kitchen counter near the sink tends to be the most practical spot: easy hand-washing access can be a lifesaver.
Pour small amounts of paint onto paper plates (one color per plate). Have paper towels and a damp cloth within arm's reach.
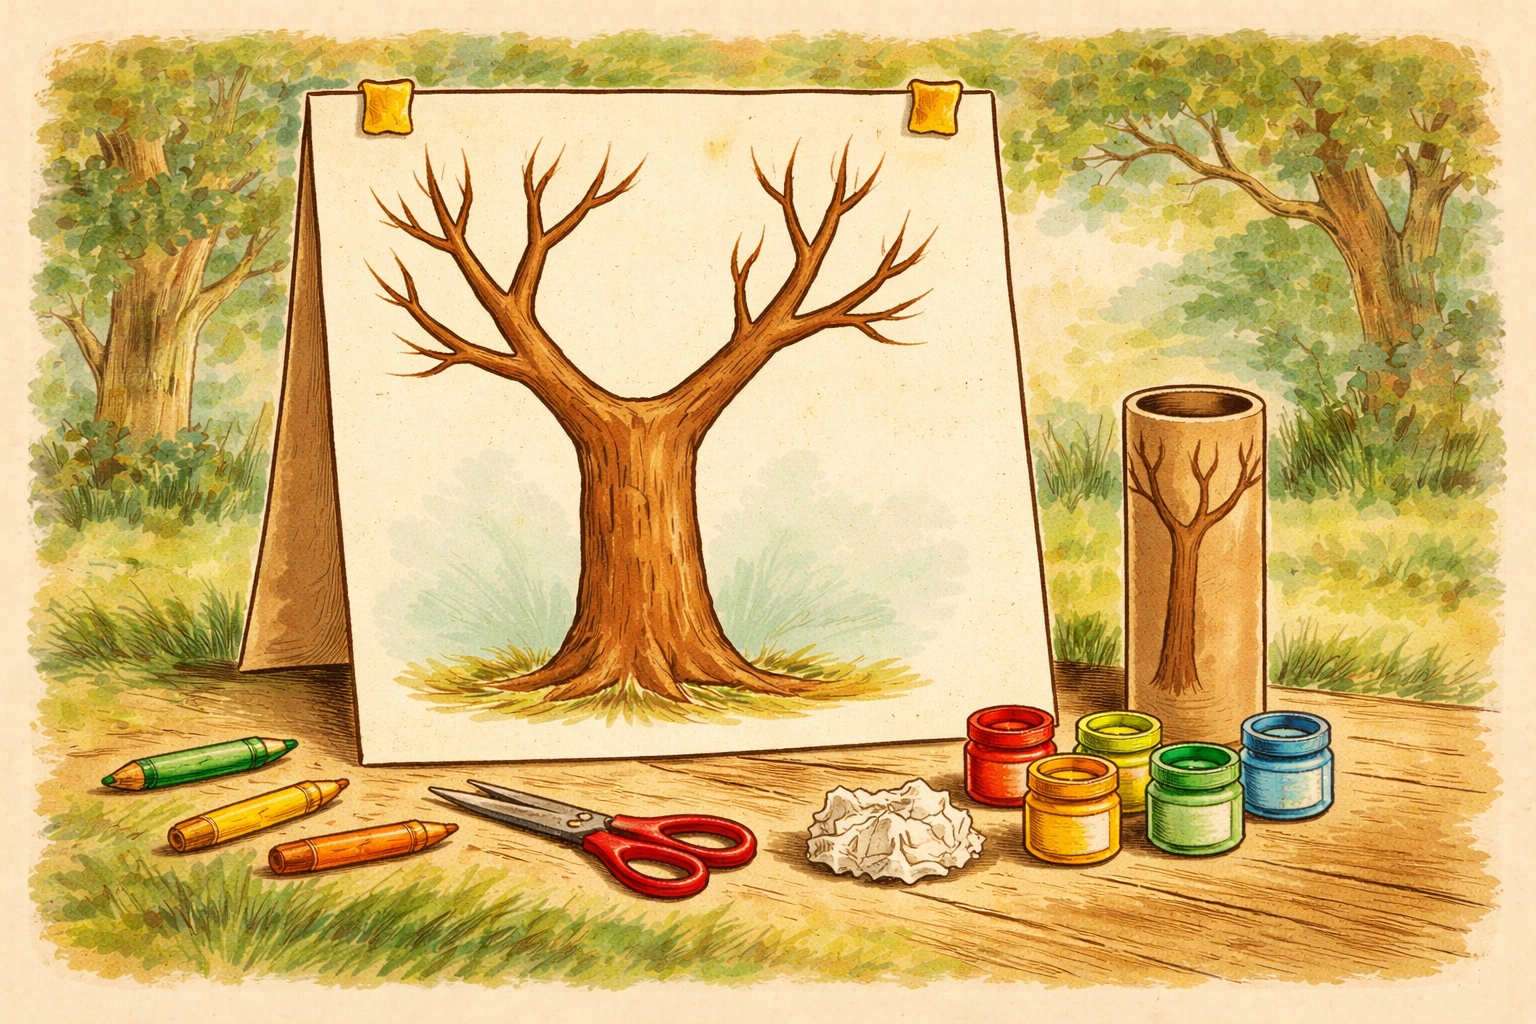
Step 2: Create Your Tree Base
You've got options here depending on what you have available:
Option A: Draw Your Own Tree
On your poster board or cardboard, sketch a simple tree trunk with bare branches extending upward. Think of it like a big "Y" shape with extra branches. Paint it brown and let it dry, or use brown construction paper cut into a trunk shape.
Option B: Paper Towel Roll Trunk
Paint an empty paper towel roll brown. Once dry, cut four small slits (about an inch deep) around one end. Bend these pieces outward and glue them to a paper plate or cardboard base so the trunk stands upright. This creates a 3D tree that's especially fun for younger kids.
Option C: Trace a Hand for the Trunk
Here's a clever trick: have an adult trace their hand and forearm on brown paper. The forearm becomes the trunk, and the spread fingers become branches. It adds another personal touch to the whole project.
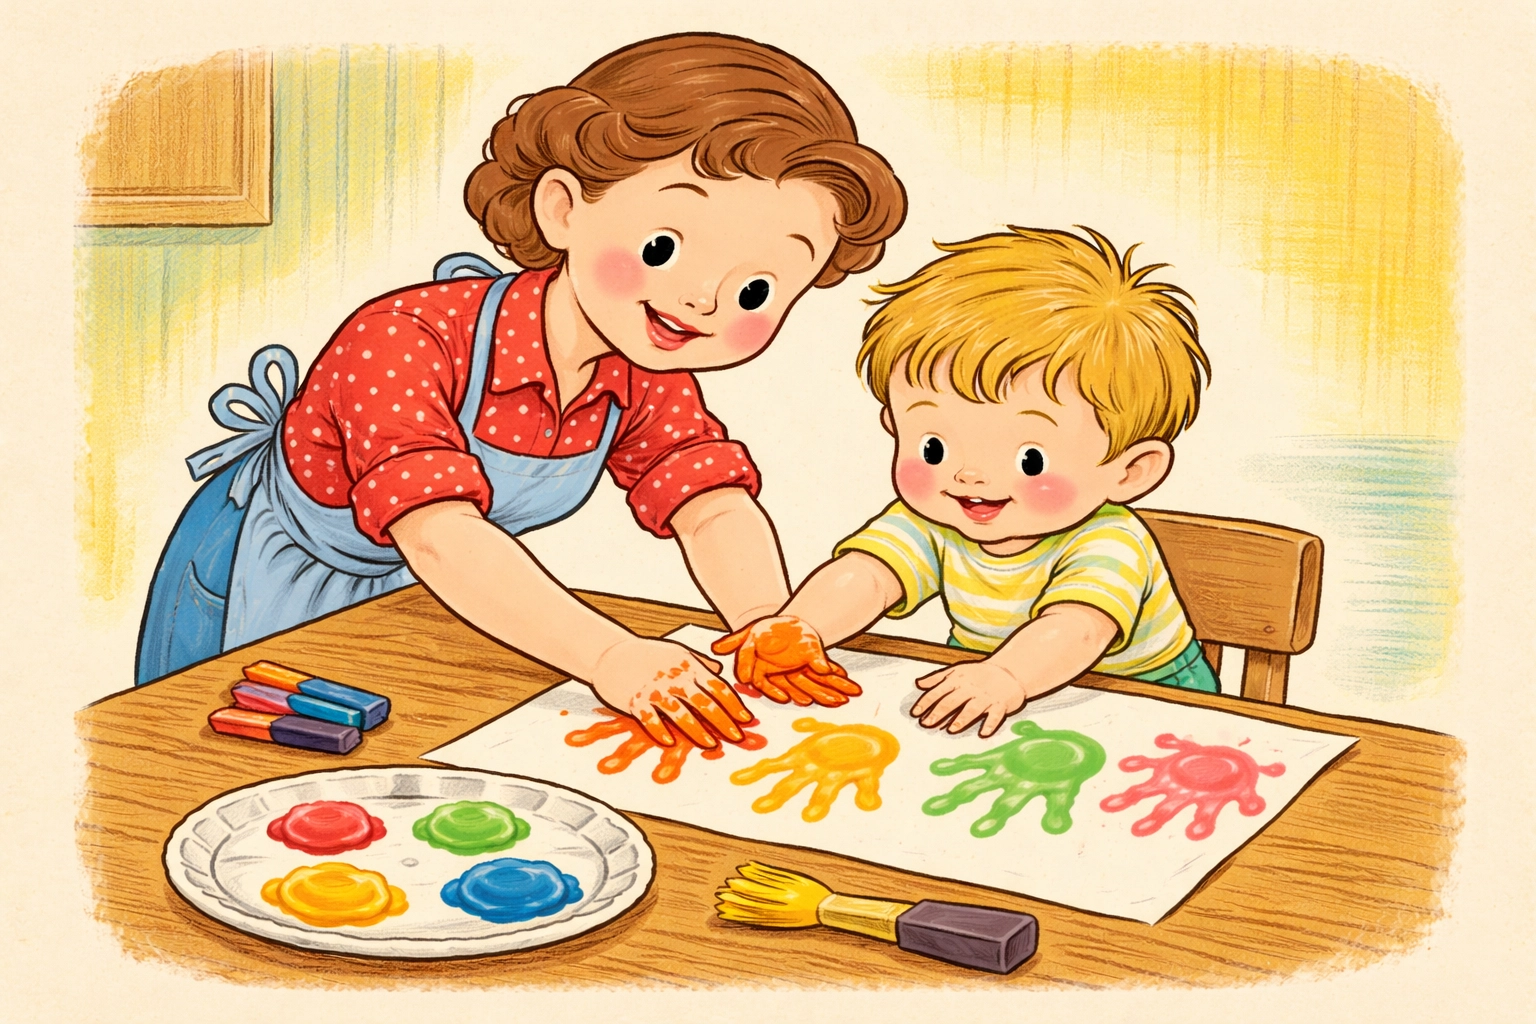
Step 3: Make the Handprints
This is the fun part: and potentially the messy part.
Choose paint colors. Each family member can pick their own color, or you can go with a theme (fall colors, rainbow gradient, shades of green).
Apply paint to hands. Use a foam brush to spread paint evenly across the palm and fingers. You want good coverage but not globs: about a quarter-sized dollop spread thin usually does the trick.
Spread those fingers. Before pressing down, remind everyone (especially little ones) to spread their fingers apart. This creates cleaner, more distinct prints.
Press firmly without sliding. Place the painted hand onto white or colored paper and press down firmly. Hold for a few seconds. The key is to avoid any sliding motion, which smears the print.
Lift straight up. Pull the hand straight off the paper.
Repeat if needed. If a print comes out too light or smudged, no problem: make another one. Better to have extras than to be short a hand.
Wash hands immediately. Especially with little ones, get to the sink before those painted fingers touch anything else in your home.
Step 4: Let the Handprints Dry
This is a good time for a snack break. Handprints typically need 15-30 minutes to dry completely, depending on how thick the paint is. Patience here prevents smeared masterpieces later.
Step 5: Cut Out the Handprints
Once everything is dry, carefully cut around each handprint. Adults should handle the scissors for younger children, while older kids can cut out their own with supervision.
Don't stress about perfect cuts: a little white border around each hand is totally fine and can actually help the prints stand out against the tree.
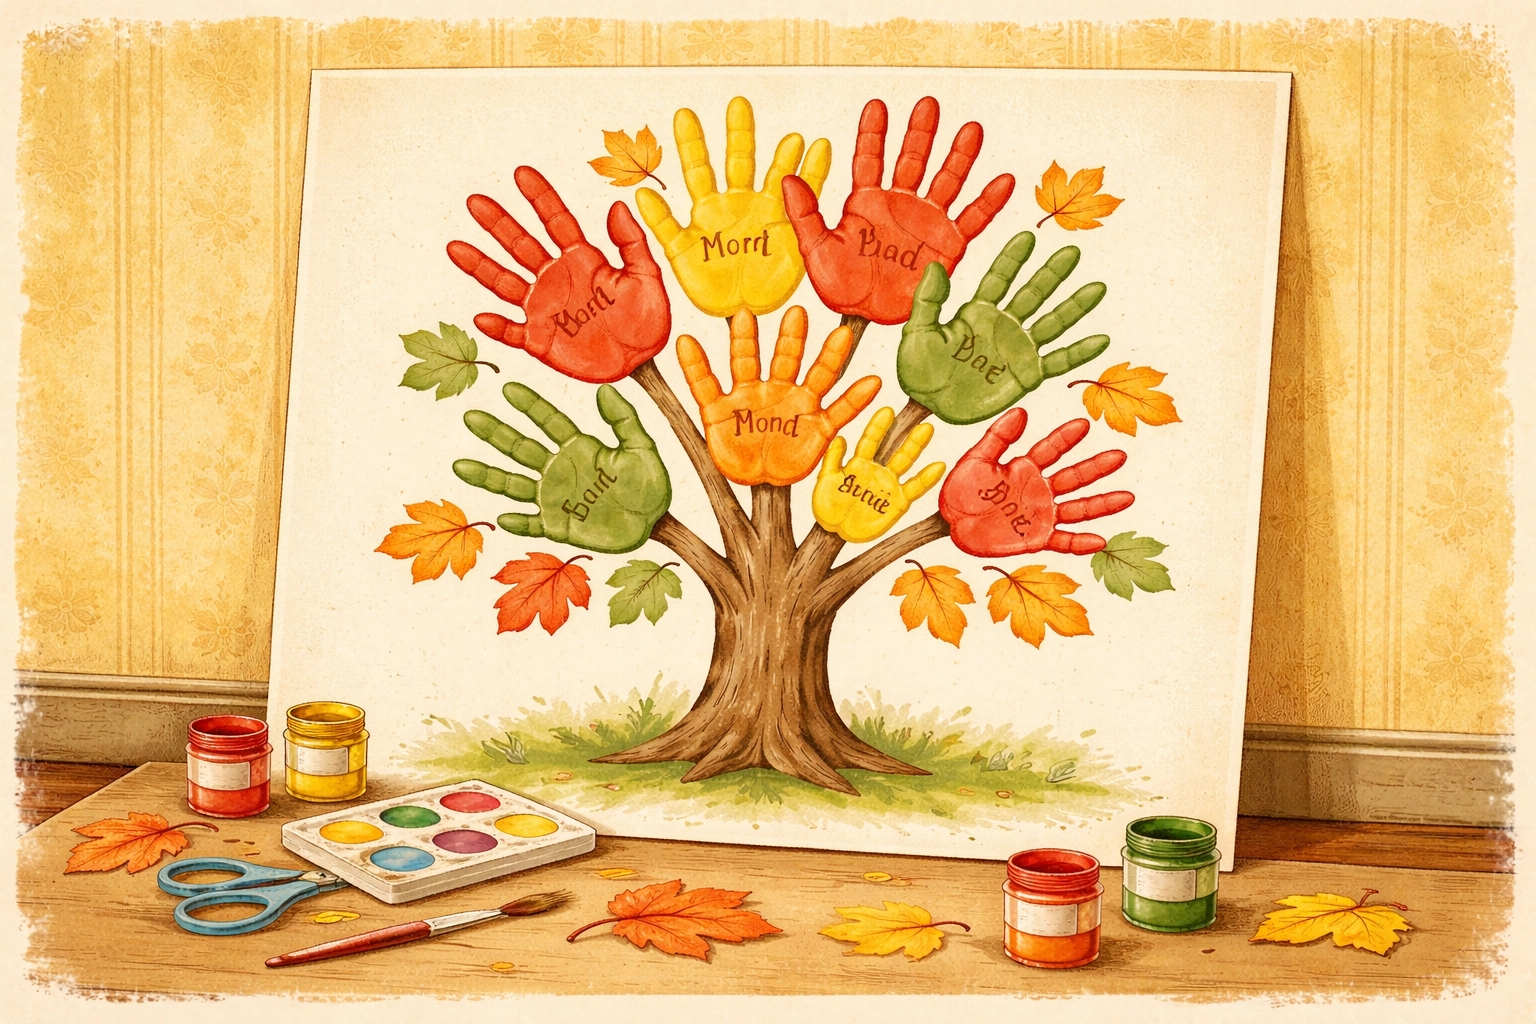
Step 6: Arrange and Glue the Handprints
Now comes the artistic part. Lay your cut-out handprints on the tree without gluing first to find an arrangement you like.
A few tips for placement:
- Put larger handprints (adults) toward the bottom or back
- Layer smaller handprints (kids) on top
- Angle the hands in different directions for a natural, leafy look
- Leave some space between prints so each one is visible
Once you're happy with the layout, glue each handprint in place. Press firmly and let dry.
Step 7: Personalize Your Tree
This step transforms the craft from cute to keepsake-worthy:
- Write names and dates on or near each handprint
- Add the year somewhere on the project
- Write what each person is thankful for on the back of their handprint (especially nice for fall/Thanksgiving)
- Include ages next to each name
Some families add photos, stickers, or other decorations. Keep it simple or go all out: it's your tree.
Tips for Success
For toddlers (ages 2-3): Expect imperfect prints, and embrace them. Their little smudged handprint will be the one you treasure most in ten years. Have an adult guide their hand during the pressing motion.
For preschoolers (ages 4-5): They can usually do the pressing themselves with some guidance. Let them help with painting their own hands (with supervision).
For school-age kids (ages 6+): They can often handle most steps independently. Consider letting them take the lead on arranging and gluing.
Keep supplies accessible: If kids love this project, it's an easy one to repeat annually. Watching how their handprints grow from year to year makes for a wonderful tradition.
Frequently Asked Questions
What type of paint works best for handprints?
Washable tempera paint is generally the safest choice for young children and cleans up easily. Acrylic paint creates more vibrant colors but stains clothing and surfaces, so use it with older kids who can be more careful.
Can we do this with babies?
You can, though it requires a gentle touch. Use non-toxic, baby-safe paint, and work quickly since babies tend to squirm. Some parents find footprints easier with infants.
How do we include family members who live far away?
Mail them a piece of paper with instructions and have them send back their handprint, or do a video call craft session where everyone makes their prints simultaneously, then mail the distant prints to be added to your tree.
What if someone's handprint gets messed up?
Make another one! It's just paint and paper. Most families end up with a few extra prints, which is totally fine.
Can we make this project more durable?
Consider using cardstock instead of regular paper, laminating the finished project, or placing it in a large frame behind glass. Some families spray a clear sealant over the finished piece.
What's the best way to display the finished tree?
A simple frame works well for flat versions. Prop 3D versions on a shelf or mantle. Some families hang their tree with removable mounting strips so it can be stored carefully after the season.
How can we turn this into a learning activity?
Use it to discuss family relationships (who's related to whom), count how many handprints you have, compare sizes and talk about growth, or discuss where different family members live.
Can we add pets to the family tree?
A paw print from a cooperative dog or cat can be a sweet addition. Use pet-safe, non-toxic paint and have treats ready for afterward.
Looking for more hands-on family crafts? Check out our Kids Crafts collection for more projects you can do together.


