


A paper plate clock is one of the simplest and most effective ways to help children learn to tell time. You'll need just a few household supplies: a paper plate, some cardstock, a marker, and a split pin: to create a hands-on teaching tool that kids can spin, adjust, and practice with for weeks. The whole project typically costs under $5 and takes about 20-30 minutes from start to finish.
This craft works wonderfully because it transforms an abstract concept (reading a clock face) into something tactile and playful. Kids get to build the clock themselves, which often helps the learning stick much better than just pointing at a wall clock and explaining.
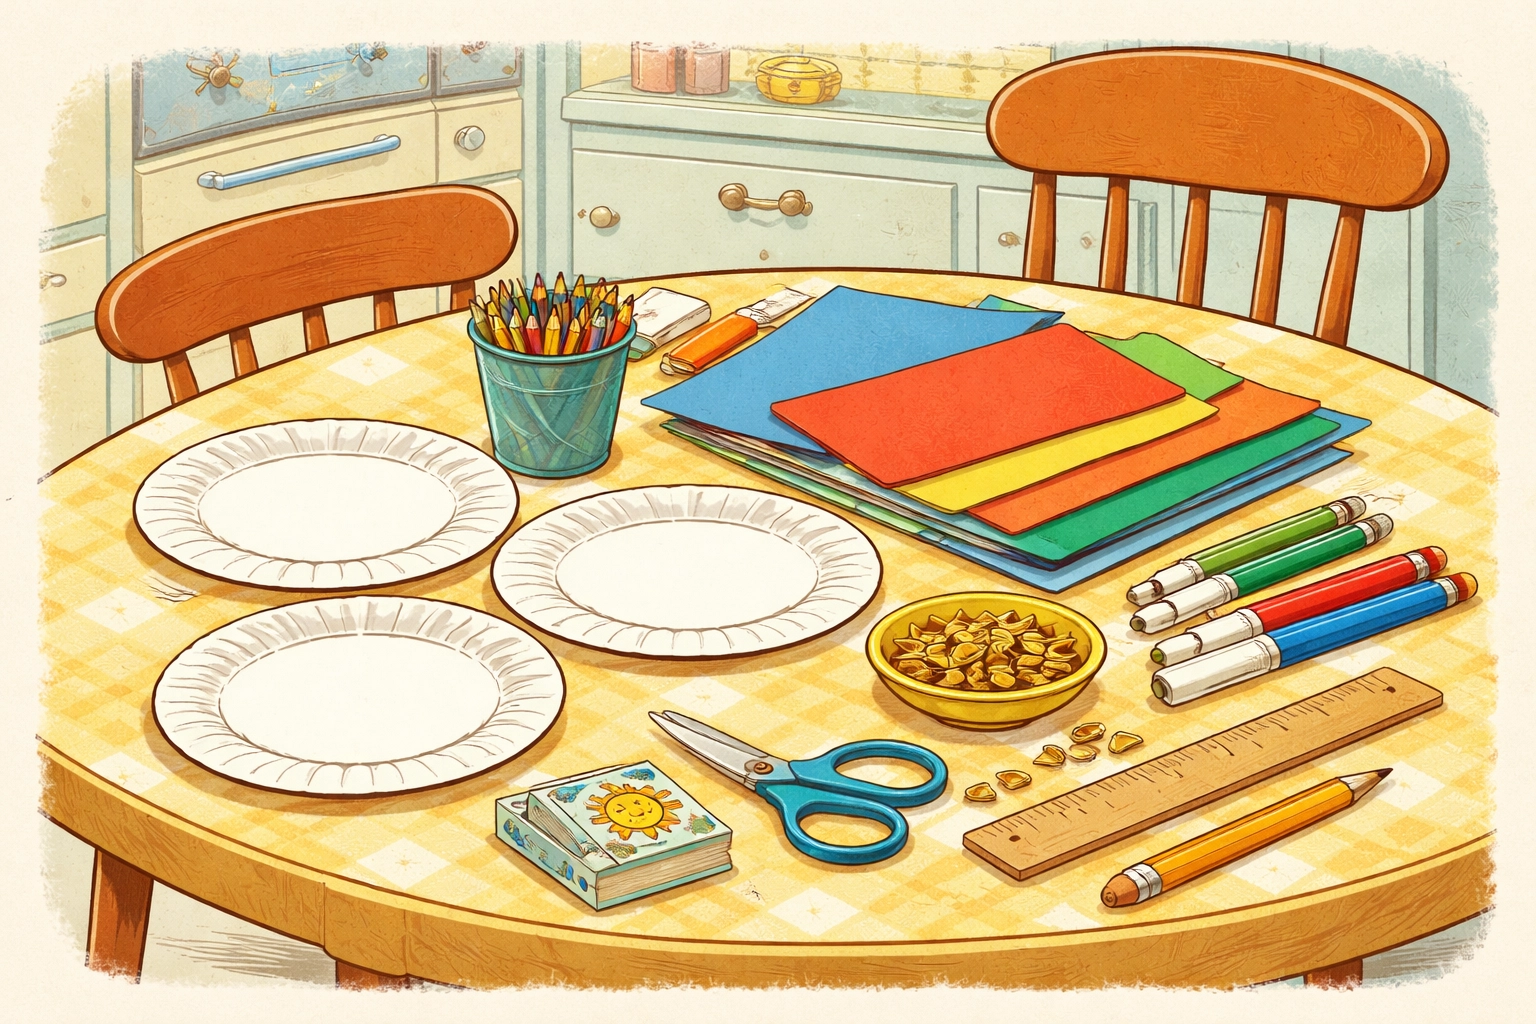
What You'll Need: Materials List
One of the best parts about this project? You likely have most of these supplies already sitting in a drawer somewhere. Here's a quick breakdown:
| Material | Estimated Cost | Notes |
|---|---|---|
| Paper plates (2) | $1-2 | White or colored both work well |
| Cardstock or construction paper | $1 | For clock hands: choose contrasting colors |
| Split pin / paper brad | $1-2 | A small pack usually contains dozens |
| Markers or crayons | $0 | Use what you have |
| Scissors | $0 | Child-safe scissors work fine |
| Pencil | $0 | For tracing and light sketching |
| Ruler (optional) | $0 | Helpful but not required |
Total estimated cost: $3-5
You can easily find split pins (also called paper brads) at dollar stores or in the office supply section of most grocery stores. If you're in a pinch, a pushpin with a small eraser on the back can work as a temporary solution.
What Ages Is This Craft Good For?
Best for ages 4-8, though kids outside this range can still have a great time with some adjustments.
- Ages 3-4: They'll enjoy decorating and spinning the hands, even if telling time is still a bit advanced. Focus on the craft experience itself.
- Ages 5-6: This is often the sweet spot. Kids are typically learning to read "o'clock" times and half-hours in school, so the clock reinforces what they're already working on.
- Ages 7-8: Older kids can add the minute markers and practice reading times down to the exact minute. You can also challenge them to set the clock to specific times.
- Ages 9+: Consider letting them lead the project for a younger sibling: teaching is one of the best ways to reinforce learning.
How Long Does This Take?
Plan for 20-30 minutes of active crafting time. If you're adding the optional minute flaps (more on that below), budget closer to 40 minutes.
Younger kids may need more time, and that's completely fine. This isn't a race: the learning happens during the making.
Step-by-Step Instructions
Step 1: Set Up Your Clock Face
Start with your paper plate face-up. If you're using two plates (recommended for the minute flap technique), set the second one aside for now.
Using a pencil, lightly mark where the 12, 3, 6, and 9 should go. Think of it like a compass: 12 at the top, 6 at the bottom, 3 on the right, 9 on the left. These anchor points make it much easier to space the remaining numbers evenly.
Once you're happy with the spacing, go over the numbers with a marker. Let your child do the writing if they're able: wobbly numbers are part of the charm, and the ownership helps with engagement.
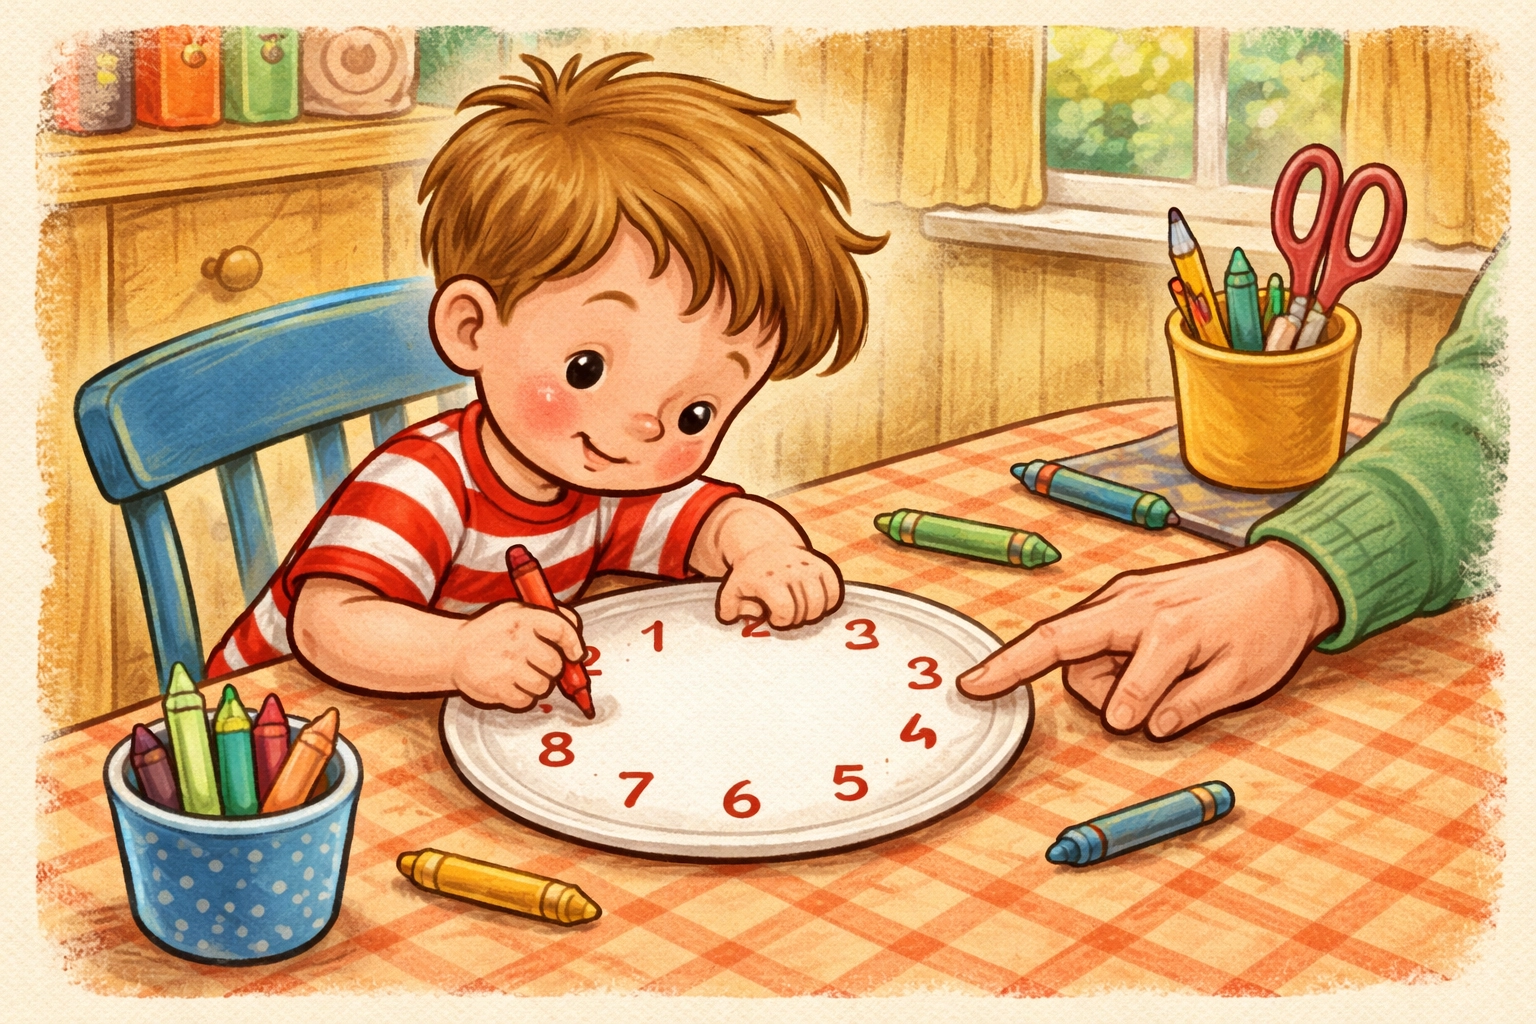
Step 2: Fill In the Remaining Numbers
Now add 1, 2, 4, 5, 7, 8, 10, and 11 in their proper spots. Having a real clock nearby for reference can be helpful, especially for younger kids who are still learning number order.
Quick tip: If your child writes a number in the wrong spot, don't stress. You can either gently correct it together or embrace the "creative interpretation." The goal is learning, not perfection.
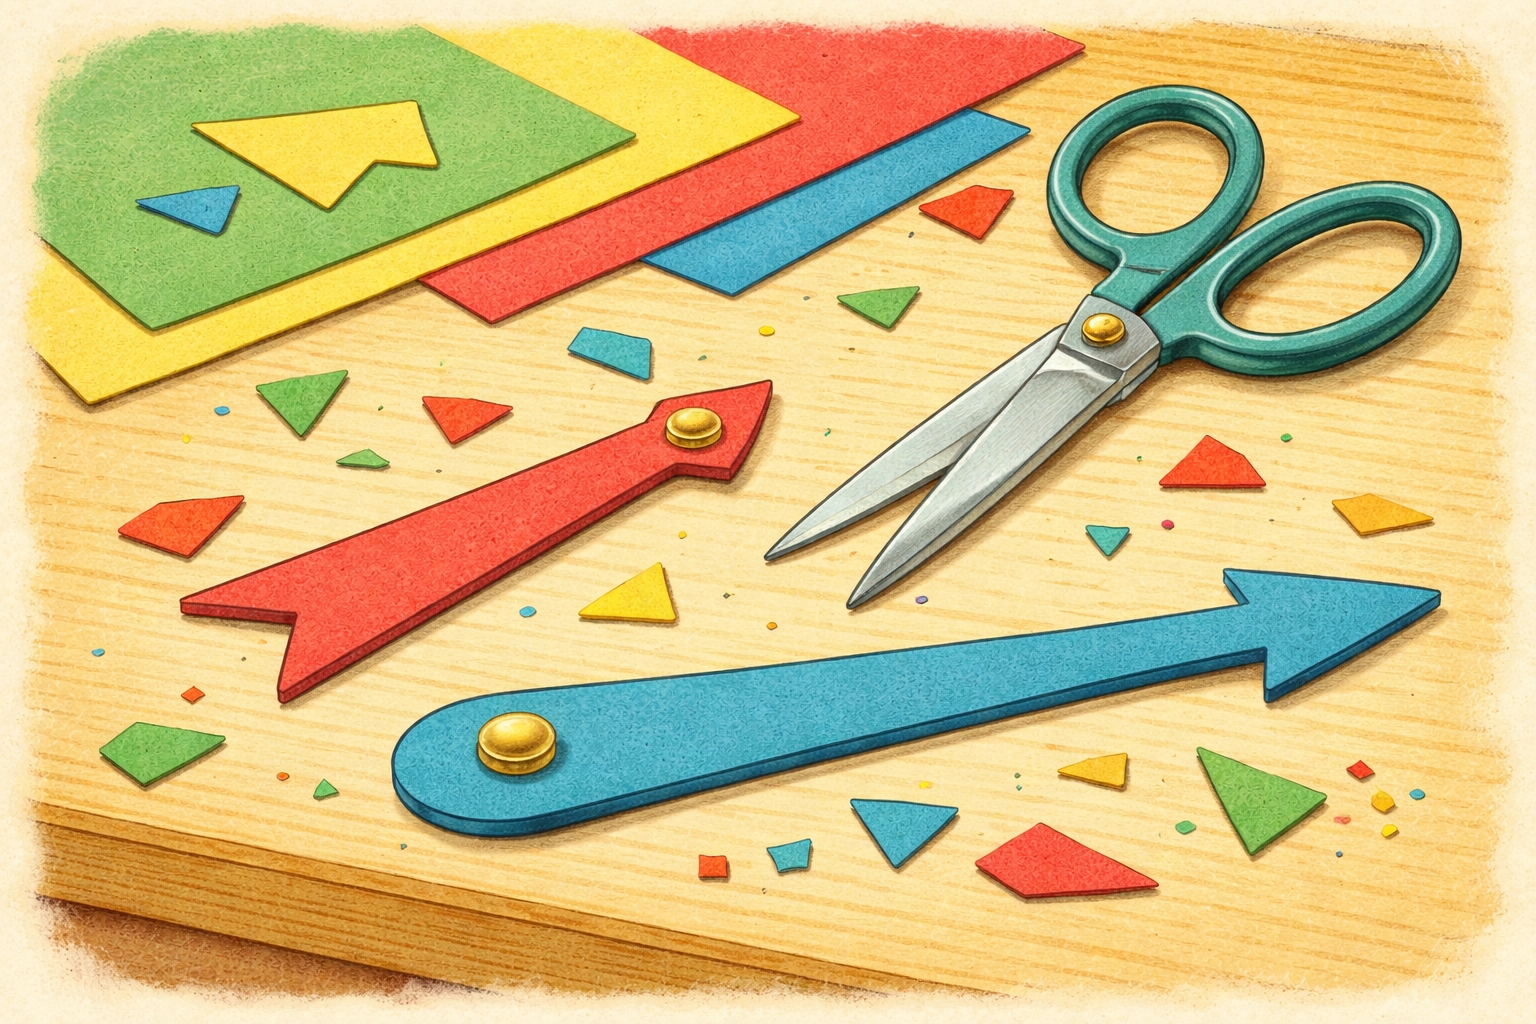
Step 3: Create the Clock Hands
Cut two rectangles from your cardstock or construction paper:
- Hour hand: Shorter and slightly wider (about 2-3 inches long)
- Minute hand: Longer and thinner (about 3-4 inches long)
Trim one end of each rectangle into a point. Using two different colors makes it easier for kids to distinguish between the hands when practicing.
Poke a small hole near the flat end of each hand. A pencil tip works well for this.
Step 4: Find and Mark the Center
Use your pencil to poke a small hole in the center of your paper plate. If you're using two plates, poke through both at the same time so the holes line up.
The center doesn't need to be mathematically precise: close enough is good enough for this project.
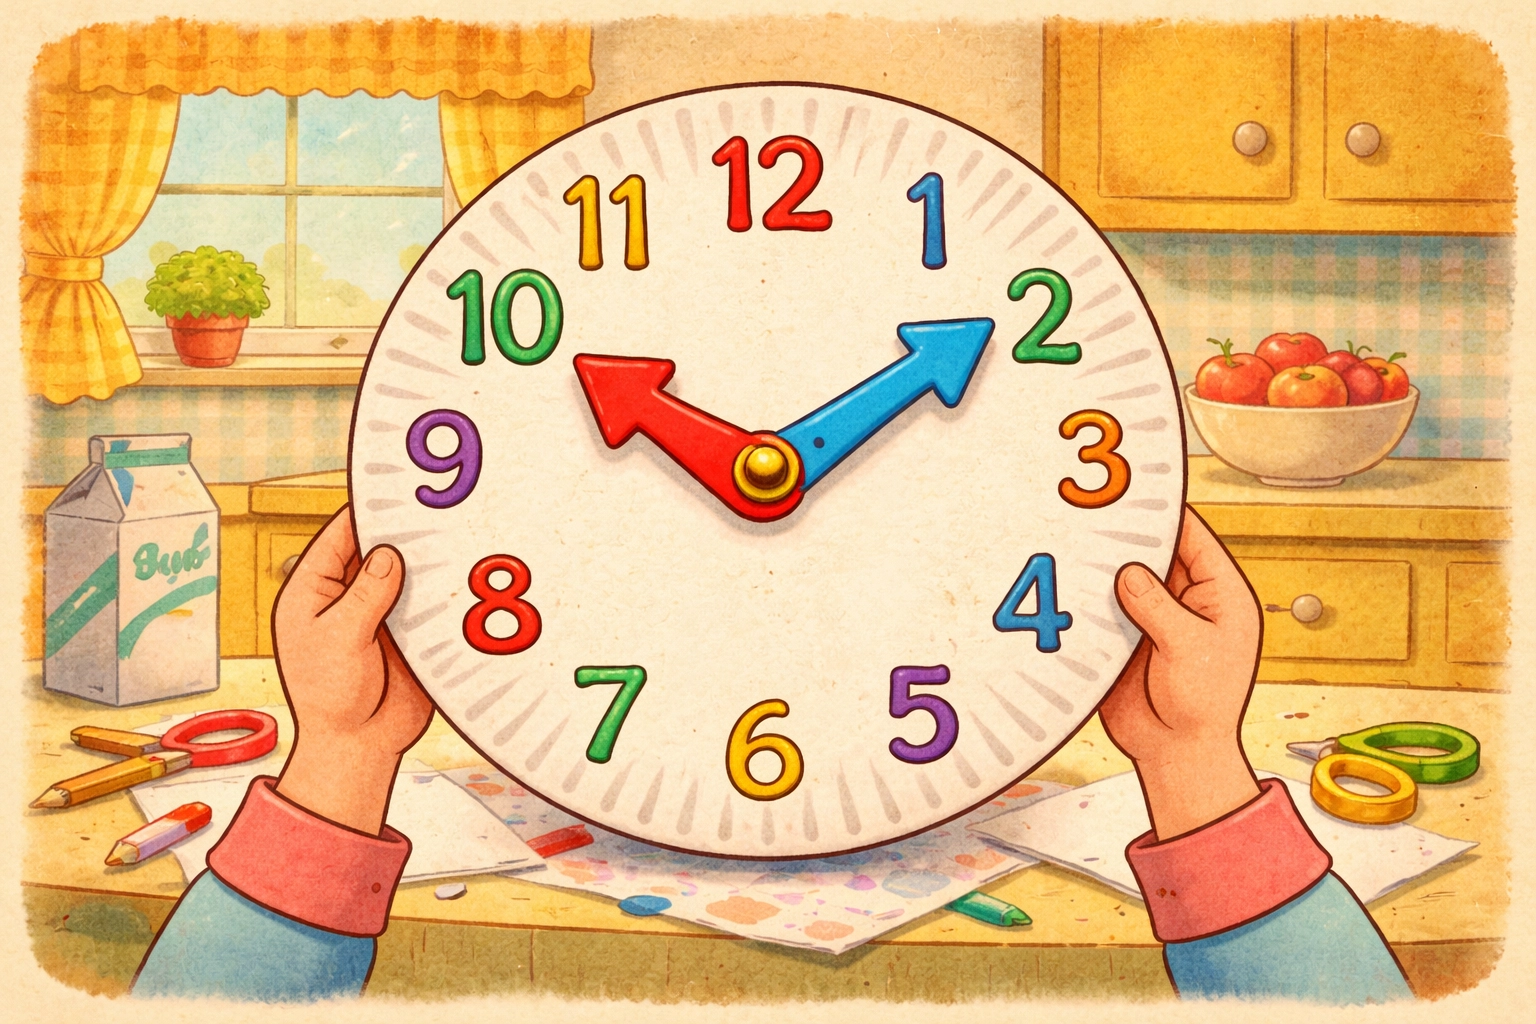
Step 5: Attach the Hands
Stack your clock hands on top of the plate, lining up all the holes. Push the split pin through the hands first, then through the plate(s).
Flip the plate over and spread the pin's legs flat against the back. The hands should now spin freely around the center point.
Give them a test spin! If they're too tight, you may need to loosen the brad slightly. If they're too loose, consider adding a small piece of tape to the back to create more friction.
Step 6: Add Minute Markers (Optional but Recommended)
This step transforms a basic clock into a more complete learning tool.
If you're using two paper plates, place the numbered plate on top. Make small cuts between each number, creating flaps that can fold down. Underneath each flap on the bottom plate, write the corresponding minutes:
- Under 1: write "05"
- Under 2: write "10"
- Under 3: write "15"
- And so on…
Now kids can lift the flaps to check their answers when practicing. It's like having built-in hints.
Ideas for Using Your Finished Clock
Once the clock is assembled, here are some ways to put it to work:
- Daily time checks: Ask your child to set the clock to match the current time several times throughout the day.
- Routine anchors: "Show me what time we eat dinner" or "What does bedtime look like on the clock?"
- Time challenges: Call out a time and see how quickly they can set the hands correctly.
- Storytelling: Create a simple story where a character does things at different times, and have your child follow along with their clock.
If you enjoy hands-on learning projects like this, you might also like our guide on how to create a DIY worm composting bin with children or explore more ideas in our kids crafts category.
Frequently Asked Questions
What if I don't have split pins?
A pushpin with a small eraser on the back can work temporarily. You can also try a twist tie threaded through the holes and twisted flat on the back, though this is less durable.
Can I use a plastic plate instead of paper?
Plastic plates are trickier to poke through and don't hold marker as well. Paper plates are generally easier to work with and more forgiving.
My child keeps mixing up the hour and minute hands. Any tips?
Using strongly contrasting colors helps. You can also add a small sun sticker to the hour hand ("the short one tells you the hour") and a moon to the minute hand as visual reminders.
Should the numbers go on the rim or inside the plate?
Either works! Numbers on the rim leave more room in the center for decorating. Numbers slightly inside the rim can be easier for smaller hands to write.
What's a good age to start teaching kids to tell time?
Most children begin learning to read "o'clock" times around age 5 or 6. By ages 7-8, many kids can read times to the nearest five minutes. Every child is different, so follow their curiosity.
Can this clock actually work like a real clock?
This is a teaching tool rather than a functional timepiece. The hands won't move on their own: kids move them manually to practice setting and reading times.
How do I make this more challenging for older kids?
Add second markers around the outside edge, or practice reading times to the exact minute. You can also work on elapsed time problems ("If it's 3:15 now and we leave in 45 minutes, what time will it be?").
What if my paper plate has a pattern or coating?
Some coated plates resist markers. Test a small spot first. If the marker beads up, try crayons or colored pencils instead, or flip the plate over and use the uncoated back as your clock face.
References
- Teaching time concepts through hands-on clock crafts
- Paper plate clock construction techniques for elementary education
- Age-appropriate time-telling milestones for children
- Craft supply recommendations for educational DIY projects


