


Spinning color wheel tops are simple DIY toys made from cardboard circles painted with different colors, then spun on a toothpick or skewer to create optical color mixing effects. This classic project combines art and science in about 20-30 minutes, costs less than a few dollars, and gives kids a hands-on way to explore how human eyes perceive color through motion. When the wheel spins fast enough, the brain blends the separate color sections together, often creating surprising new hues.
Why Color Wheel Tops Make a Great Family Activity
There's something almost magical about watching painted sections blur into entirely new colors right before your eyes. Kids get that satisfying "whoa!" moment when their red and blue wedges suddenly look purple, or when a rainbow wheel turns into a muddy brownish swirl (science doesn't always create pretty results, and that's part of the fun).
This project hits a sweet spot between creative expression and basic physics. Children practice fine motor skills while painting and cutting, learn about primary and secondary colors, and get introduced to concepts like optical illusion and persistence of vision, all without realizing they're doing anything educational.
Plus, the materials are probably sitting in your recycling bin right now.

Materials You'll Need
| Material | Estimated Cost | Notes |
|---|---|---|
| Thin cardboard (cereal box, cracker box) | Free | Recycled packaging works great |
| Washable paint (red, blue, yellow) | $3-5 | Tempera or acrylic both work |
| Toothpicks or bamboo skewers | $1-2 | One per top |
| Scissors | On hand | Kid-safe scissors for younger crafters |
| Paintbrush | $1-2 | Or use fingers for a messier approach |
| Round template (glass, can, lid) | Free | About 3-4 inches diameter works well |
| Pencil and ruler | On hand | For dividing sections |
Total estimated cost: Under $10 (and often free if you have basic craft supplies)
Recommended Age Range
Best enjoyed by ages 4-10, though older kids and adults often get pulled into the color-mixing experiments too.
- Ages 4-5: Can paint sections and spin the finished top; adults should handle cutting and hole-poking
- Ages 6-8: Can complete most steps independently with supervision during cutting
- Ages 9-10: Ready to experiment with different color combinations and section patterns on their own
Time Estimate
Active crafting time: 20-30 minutes (plus 10-15 minutes drying time for paint)
You can speed things up by using markers or crayons instead of paint, though the colors may appear less vibrant when spinning.
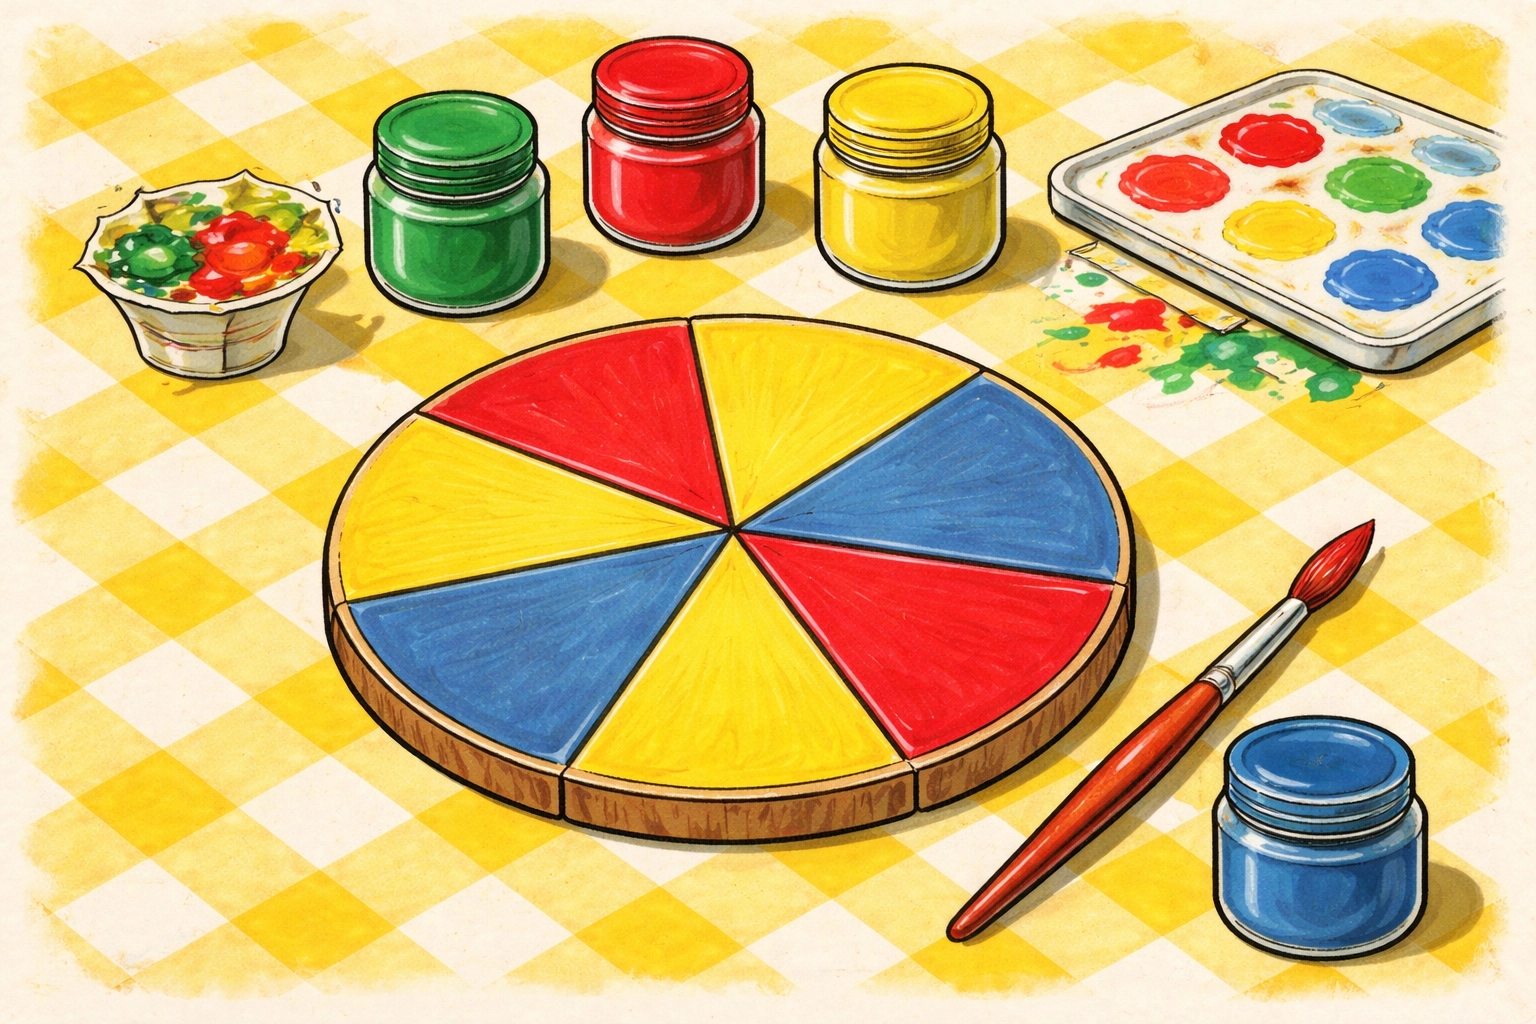
Step-by-Step Instructions
Step 1: Trace and Cut Your Circle
Place a drinking glass, jar lid, or small bowl upside down on your cardboard and trace around it with a pencil. A circle about 3-4 inches across tends to spin most smoothly.
Cut out the circle carefully. If you're working with younger kids, this is a good job for grown-up hands since cereal box cardboard can be tricky to cut neatly.
Tip: Cut a few extra circles so kids can experiment with different color patterns.
Step 2: Divide the Circle into Sections
Use a ruler to draw lines from the center of the circle outward, dividing it like pizza slices. You have options here:
- 4 sections work well for beginners and tend to create cleaner color blending
- 6 sections let you include more colors (try all three primary colors plus their secondary mixes)
- 8 sections create interesting effects but require more precise painting
The lines don't need to be perfectly measured, eyeballing works fine for this project.
Step 3: Paint Each Section
Now for the fun part. Paint each wedge a different color and let kids choose their combinations. Some suggestions to try:
- Red and blue alternating: May appear purplish when spinning
- Yellow and blue alternating: Often creates a greenish effect
- All primary colors: Watch them blend into surprising brownish tones
- Rainbow pattern: Creates a grayish or off-white blur at high speeds
Apply paint generously so the colors are bold and saturated. Thin, watery paint doesn't show up as dramatically during spinning.

Step 4: Let the Paint Dry Completely
This is the hardest part for eager kids. Spinning a wet color wheel creates a spectacular mess (ask me how I know), so patience pays off here.
Set the painted circles somewhere safe to dry for 10-15 minutes, or longer if you applied thick layers. Use this time to clean up or read about why color mixing happens.
Step 5: Poke the Center Hole
Once the paint is fully dry, carefully poke a small hole through the exact center of the circle. A sharp pencil point, paper clip, or the tip of scissors works well.
Important: Adults should handle this step for younger children. The hole should be just big enough for your toothpick or skewer to fit snugly.
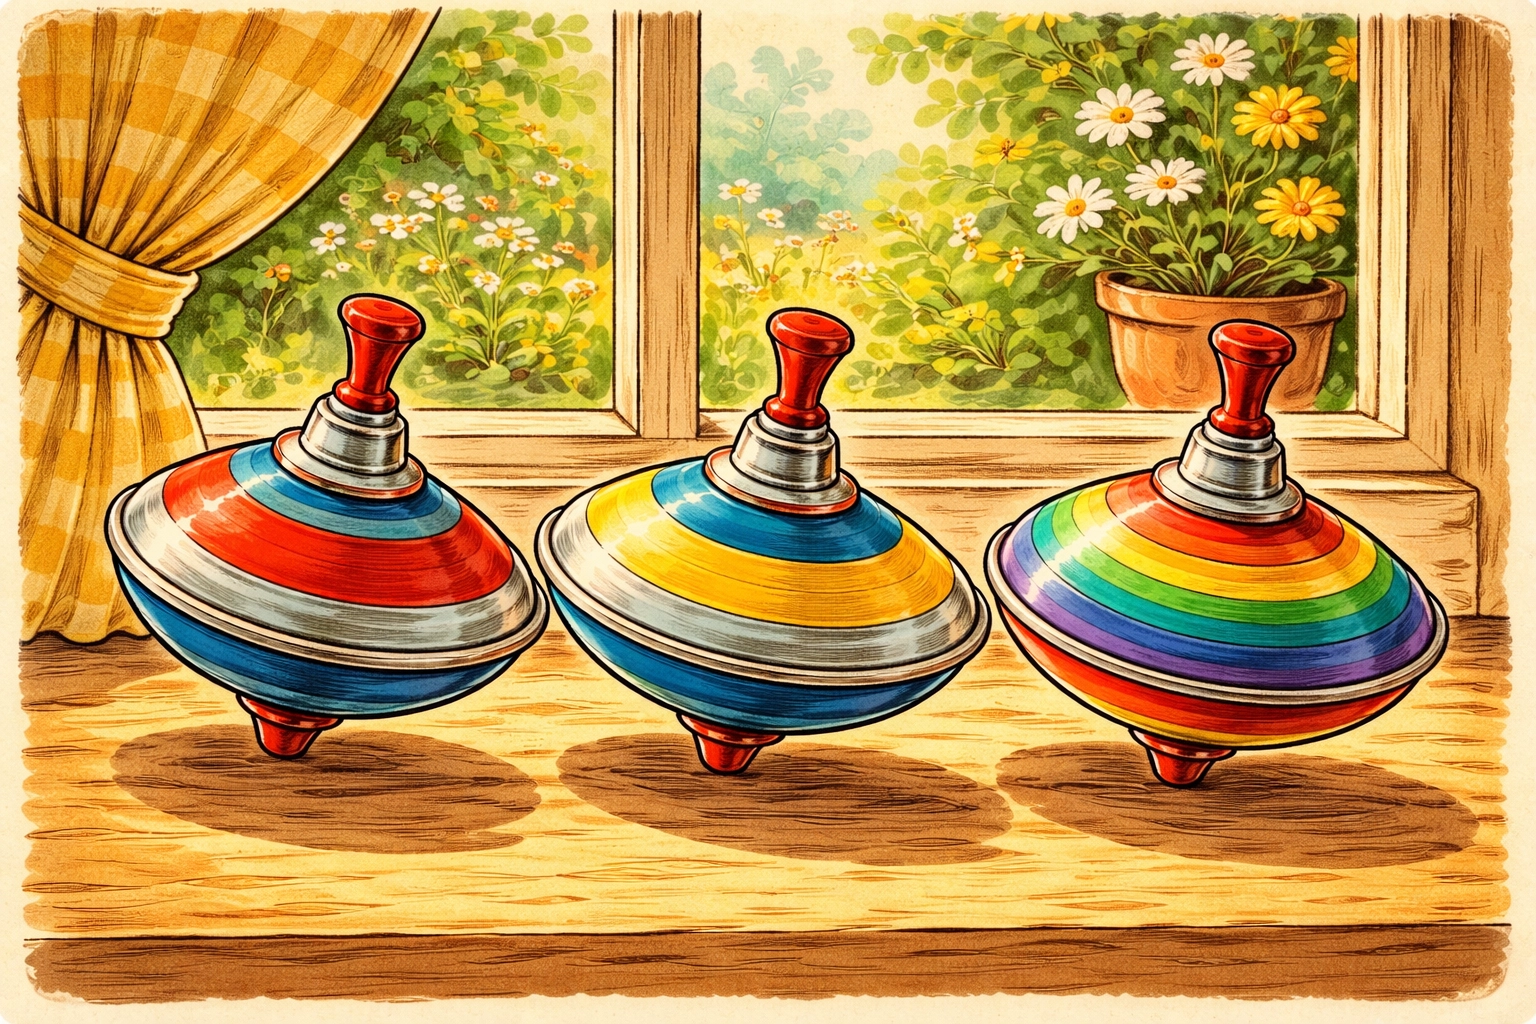
Step 6: Insert the Spinning Stick
Push a toothpick or bamboo skewer through the center hole. The cardboard should sit roughly in the middle of the stick, with enough length below to act as the spinning point and enough above to grip and twist.
If the fit is too loose and the wheel wobbles, add a tiny dot of glue or wrap a small piece of tape around the stick where it meets the cardboard.
Step 7: Spin and Observe
Hold the top of the stick between your palms or fingers, give it a quick twist, and release onto a flat surface. Watch the colors blur together as the wheel spins.
Try spinning at different speeds and notice how the color effects change. Faster spins generally create more complete color blending.
The Science Behind the Magic
When your color wheel spins quickly, your eyes can't process each individual color fast enough. Instead, your brain averages them together into a single perceived color. This phenomenon is called optical color mixing or additive color mixing.
It's the same principle that makes TV and computer screens work, tiny red, green, and blue pixels blend together to create every color you see on screen.
Kids often expect red and blue to make a perfect purple or yellow and blue to make bright green. In reality, the results are usually muddier and less saturated than mixing paint directly. That "failed" expectation is actually a valuable lesson about the difference between mixing pigments and mixing light perception.
Variations to Try
Black and white spiral: Draw a spiral pattern instead of colored wedges. When spinning, it may create optical illusions of movement or depth.
Glitter addition: Mix a little glitter into the paint for sparkly spinning effects.
Different shapes: Try cutting squares or hexagons instead of circles and see how they spin differently.
Size experiments: Make tiny tops and large tops to compare how size affects spinning speed and color blending.
Frequently Asked Questions
What's the best cardboard thickness for spinning tops?
Cereal box cardboard tends to work well, sturdy enough to hold shape but thin enough to spin smoothly. Corrugated cardboard from shipping boxes is usually too thick and makes wobbly tops.
Can I use markers or crayons instead of paint?
Yes, though the colors may appear less vibrant during spinning. Bold, saturated markers work better than lighter shades.
Why do my colors turn brown instead of blending nicely?
When you combine all primary colors through optical mixing, brown or grayish tones are actually the scientifically expected result. Try using just two complementary colors for cleaner blending effects.
How do I make the top spin longer?
A perfectly centered hole, a snug-fitting stick, and a smooth spinning surface all help. Heavier cardboard or adding a small coin to the center can also increase spin time.
Is this activity safe for toddlers?
The spinning and painting parts can work for supervised toddlers, but toothpicks and skewers present a poking hazard. Consider using shorter sticks or thicker dowels for very young children.
What age group enjoys this project most?
Kids around 5-8 years old often find this activity most engaging. They're old enough to appreciate the color science but still delighted by the "magic" of spinning colors.
Can I make these tops without paint?
Absolutely. Try coloring with crayons, gluing colored paper wedges, or using colored tape to create your sections.
Why doesn't my top stand up when spinning?
The hole may be off-center, or the cardboard might be warped. Try making a new circle with a more precisely centered hole.
For more hands-on family projects, explore our kids crafts collection for ideas that combine creativity with learning.


