


Can You Really Grow Plants in a Soda Bottle?
Yes—you can grow plants in a 2-liter soda bottle using a simple hydroponic wick system, and it’s one of the fastest indoor gardening projects for winter. A cotton wick slowly pulls nutrient water up to the roots (no pumps, no electricity), so kids can see the science in action and harvest greens in about 3–4 weeks.
Quick answer (what you need + what happens):
- Build time: ~20 minutes
- Materials: 1 bottle, cotton string, perlite/gravel, seeds, water, hydroponic nutrients
- How it works: the wick uses capillary action to move nutrient water up to the roots
- When you’ll see sprouts: ~5–7 days (often sooner with lettuce)
- When you can harvest: ~3–4 weeks for leafy greens
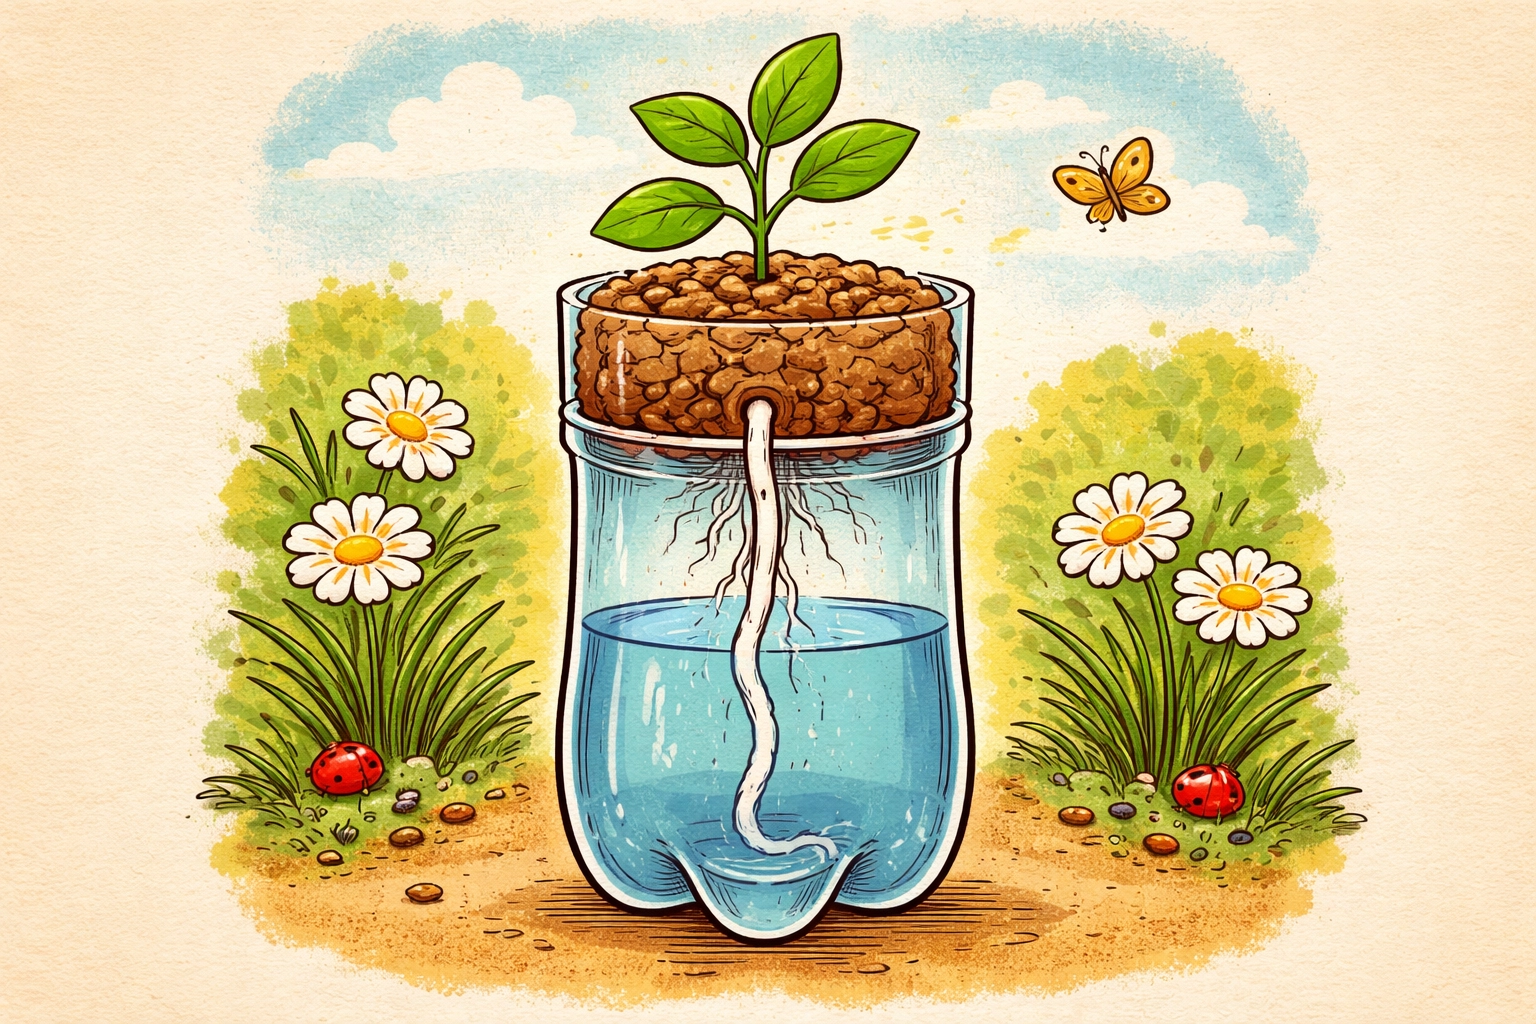
You can make a hydroponic garden out of a soda bottle! It uses a "wick" system to pull water up to the roots—no pumps, no electricity, no fancy equipment. Just one recycled bottle, some cotton string, and a handful of perlite or gravel.
This is one of the simplest hydroponic projects we know, and it's absolutely perfect for curious kids between ages 4 and 10. The science is visible, the results are fast, and the whole setup costs less than a gallon of milk.
What Is a Wick Hydroponic System?
Before we grab scissors, let's talk about what makes this little garden tick.
In traditional gardening, soil does two important jobs: it holds the plant upright, and it delivers water and nutrients to the roots. But here's the thing, plants don't actually need soil. They need what's in the soil.
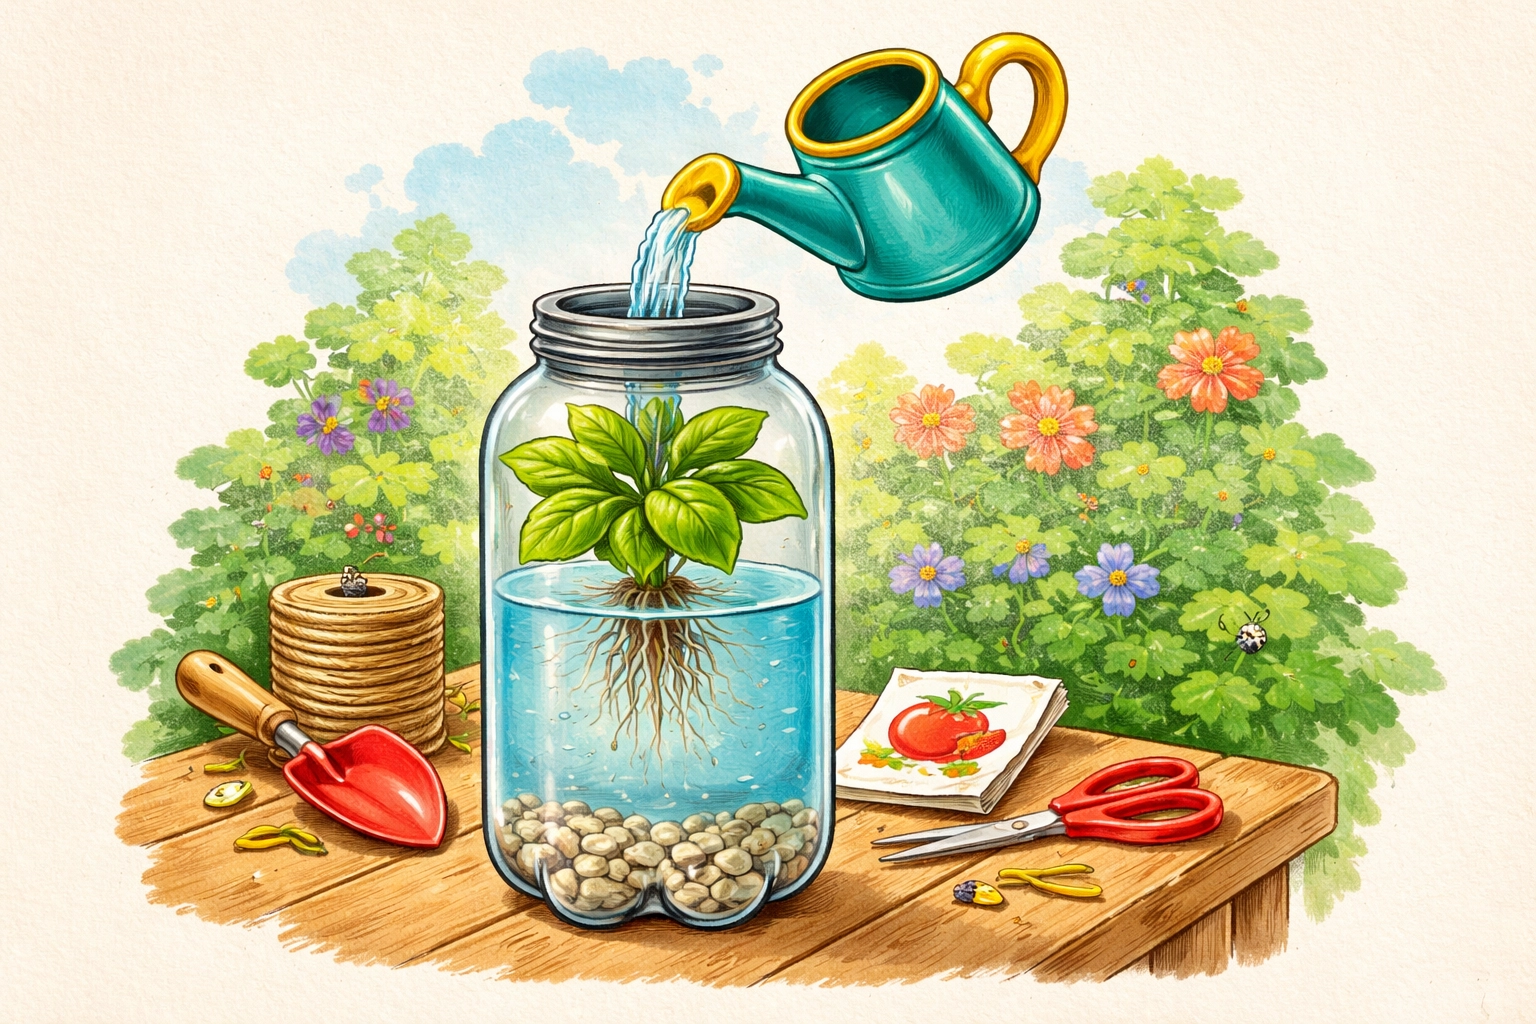
A wick system replaces soil with a simple cotton string. One end of the string sits in nutrient-rich water at the bottom of the bottle. The other end reaches up into the growing area where your plant lives. Through a process called capillary action, the string slowly pulls water upward, like a paper towel soaking up a spill.
Your plant's roots wrap around that damp wick and drink whenever they're thirsty. No overwatering. No underwatering. The wick does the thinking for you.
This is the same principle that makes oil lamps work, and it's been understood for centuries. But for kids, watching that string deliver water to a growing plant feels like pure magic.
What You'll Need
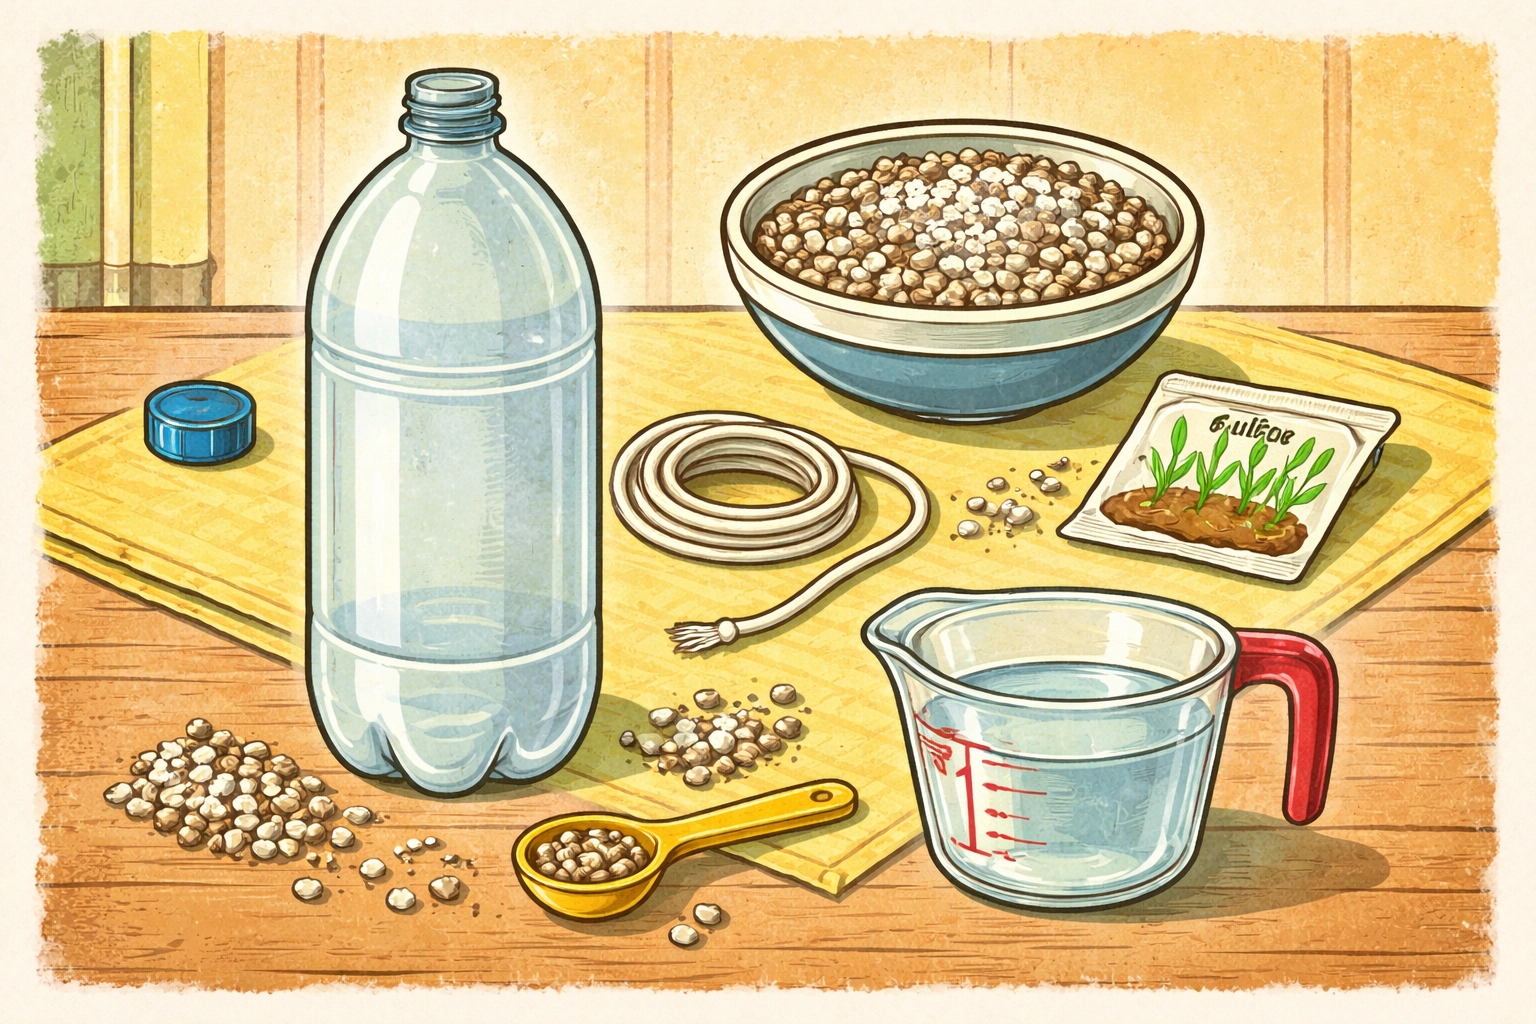
Here's your complete supply list. Most families already have these items at home:
The Essentials:
- 1 clean 2-liter soda bottle (label removed)
- Cotton string, cotton shoelace, or a strip of old cotton t-shirt (about 8-10 inches)
- Perlite, gravel, or clean aquarium rocks
- Seeds (lettuce and basil work beautifully)
- Water
- Hydroponic nutrient solution (available at garden centers or online)
Helpful But Optional:
- Aluminum foil (to block light from the reservoir)
- Permanent marker
- Sharp scissors or craft knife (adult use only)
Cost Estimate: If you already have a bottle and string, expect to spend under $10 for perlite and nutrients, supplies that will last through many projects.
Step-by-Step: Building Your Bottle Garden
This project takes about 20 minutes to assemble. Kids can handle most steps with adult supervision on the cutting.
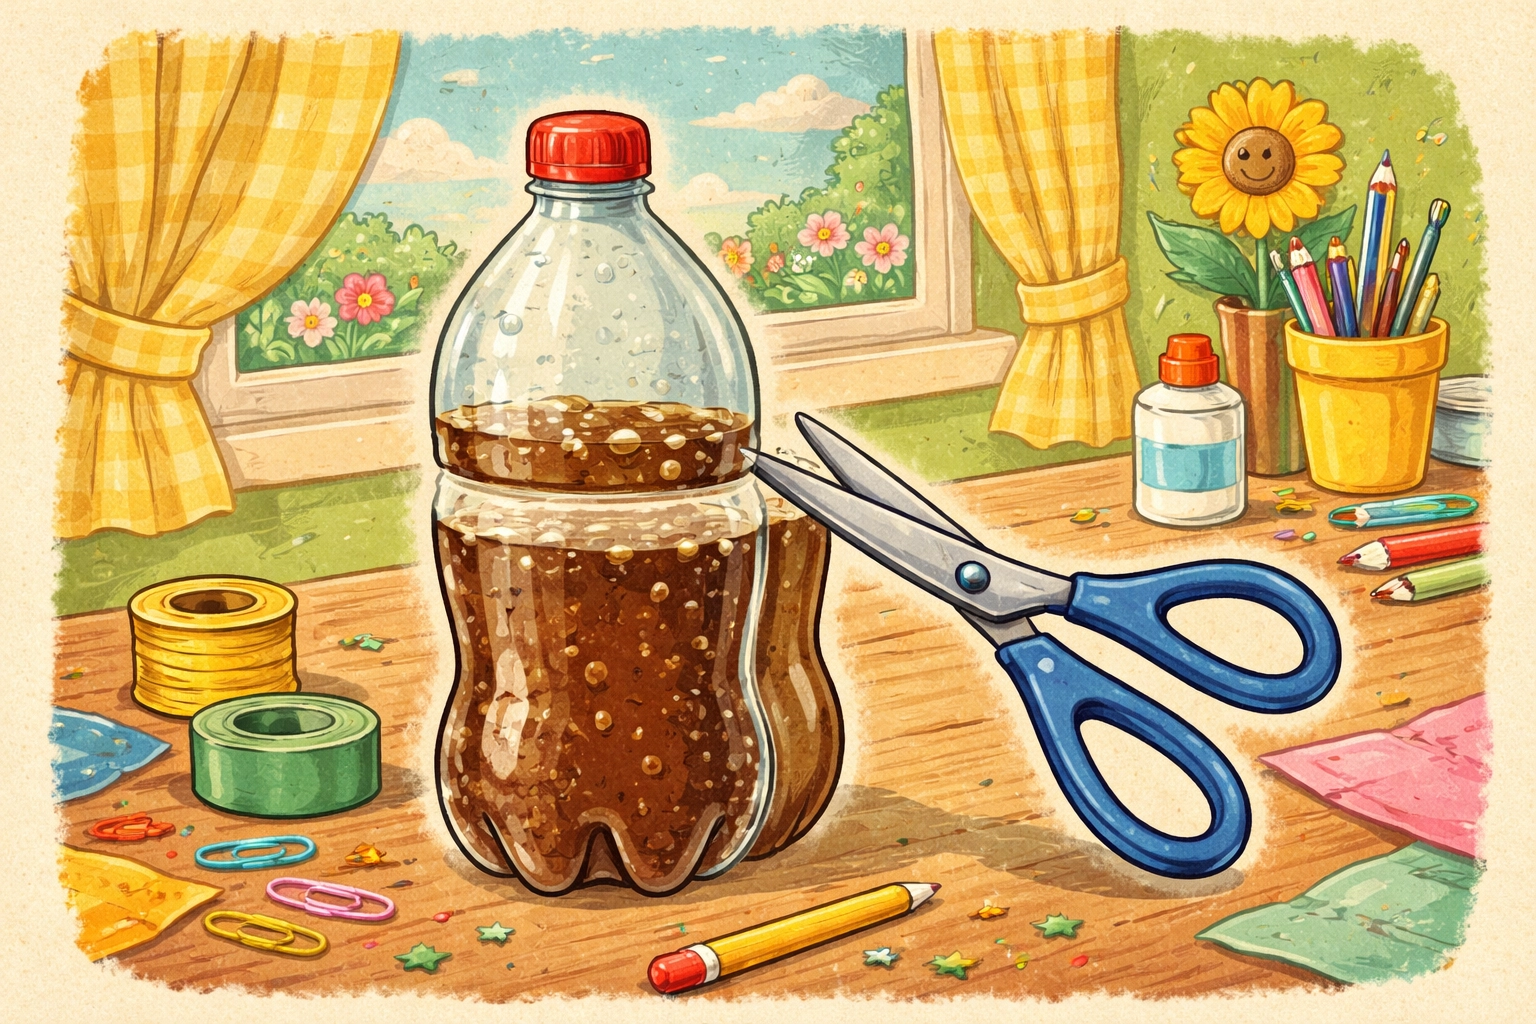
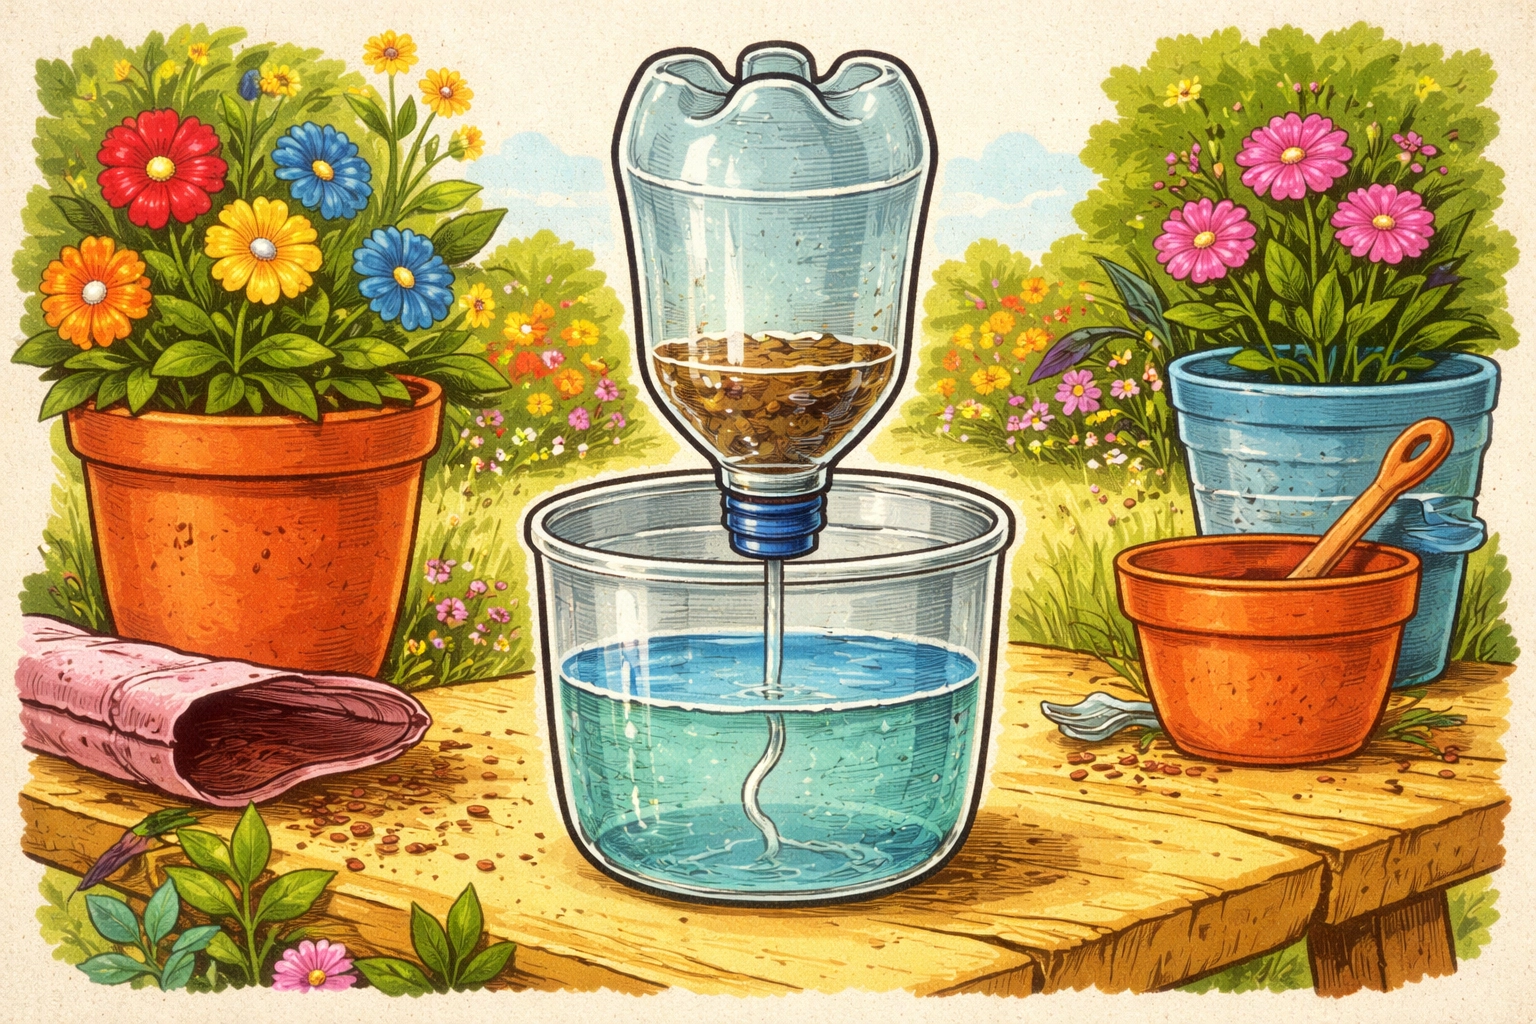
Step 1: Mark and Cut the Bottle
Find the spot where the curved shoulder of the bottle straightens into the main cylinder. Draw a line around the bottle at this point with a permanent marker.
Adults: Use sharp scissors or a craft knife to cut along this line. You'll end up with two pieces, a bottom reservoir and a top funnel shape.
Step 2: Prepare Your Wick
Cut your cotton string to about 8-10 inches long. Thread it through the bottle cap opening so that 2-3 inches hang below the cap and the rest stays above.

If the cap hole is too small, you can remove the cap entirely and just let the wick dangle through the bottle opening. The growing medium will hold it in place.
Junior Engineer Tip: The wick needs to be cotton or another absorbent natural fiber. Nylon rope won't work, it doesn't pull water the same way.
Step 3: Fill the Reservoir
Pour water into the bottom half of your bottle until it's about 2/3 full. This is where you'll add your hydroponic nutrients.
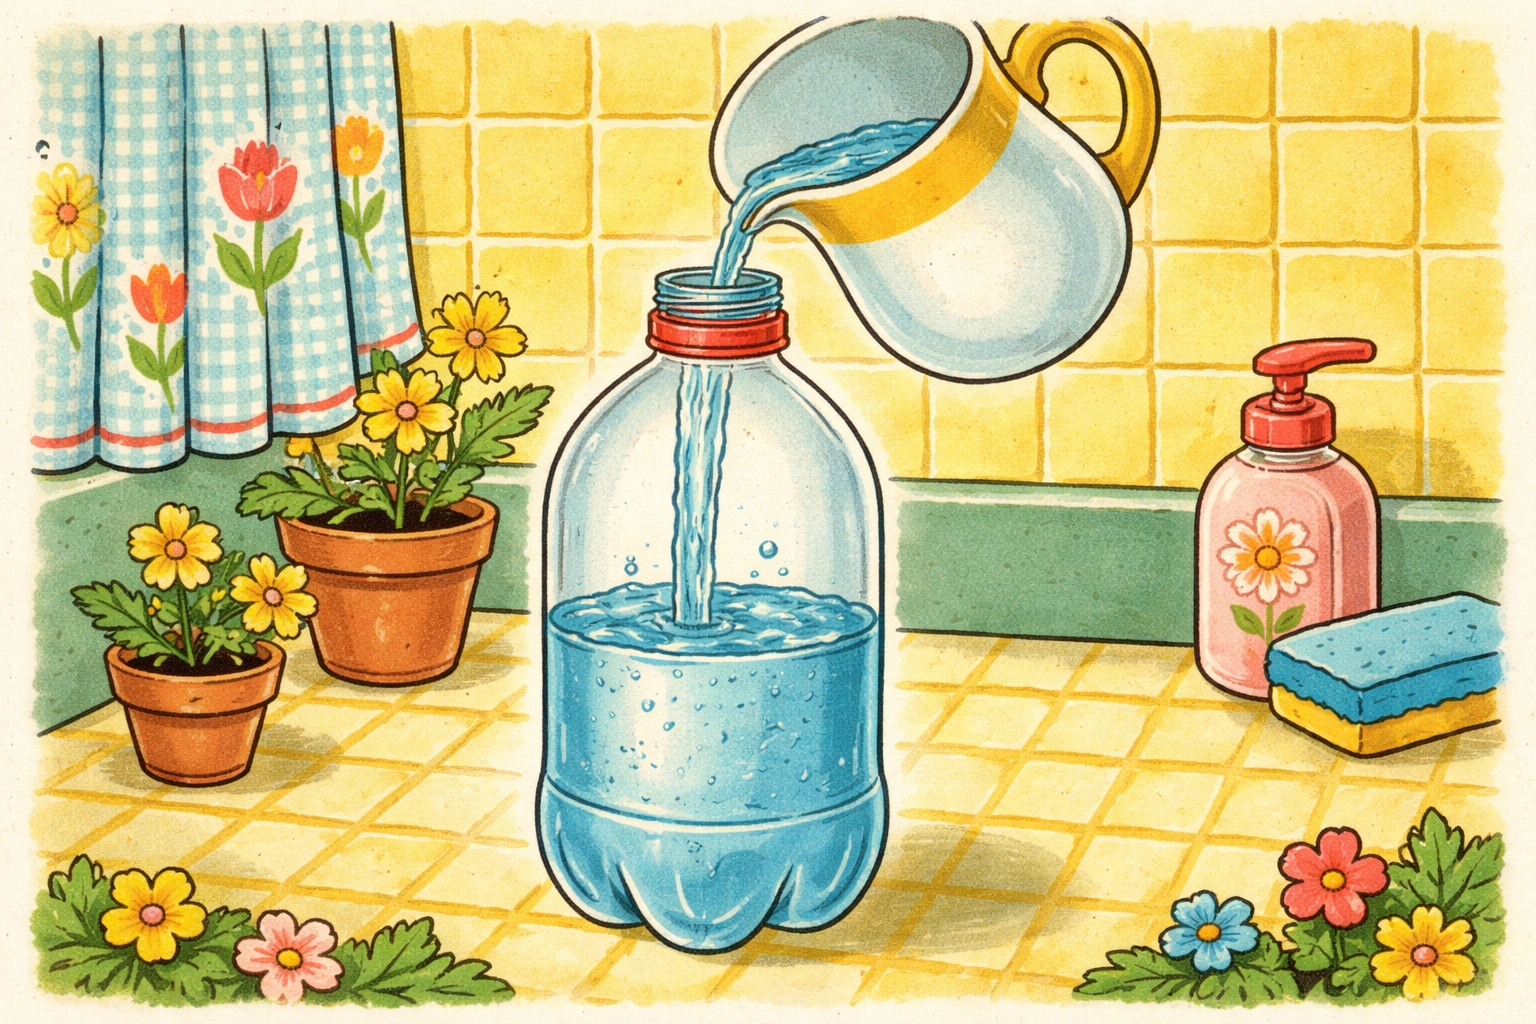
Follow the instructions on your nutrient solution. For seedlings, you'll typically use about ¼ teaspoon per quart of water. Mix well.
Science Note: Regular plant fertilizer won't work here. Hydroponic nutrients are specially designed to dissolve completely in water so roots can absorb them directly. Soil fertilizers rely on microbes to break them down first.
Step 4: Assemble the System
Flip the top portion of the bottle upside down (so the cap points downward) and nestle it into the bottom reservoir. The wick should dangle down into the nutrient water, at least 1-2 inches submerged.
The two bottle halves should fit together snugly, creating a self-contained growing unit.
Step 5: Add Growing Medium
Fill the top chamber with perlite, gravel, or aquarium rocks. Leave about an inch of space at the top.
Make sure the wick extends up through the medium so it can deliver water to wherever your seeds will be.
Step 6: Plant Your Seeds
Make a small indentation in the growing medium and drop in 2-3 seeds. Cover lightly with more perlite.
Give the top a gentle spray with plain water to settle everything. From here on, the wick takes over.
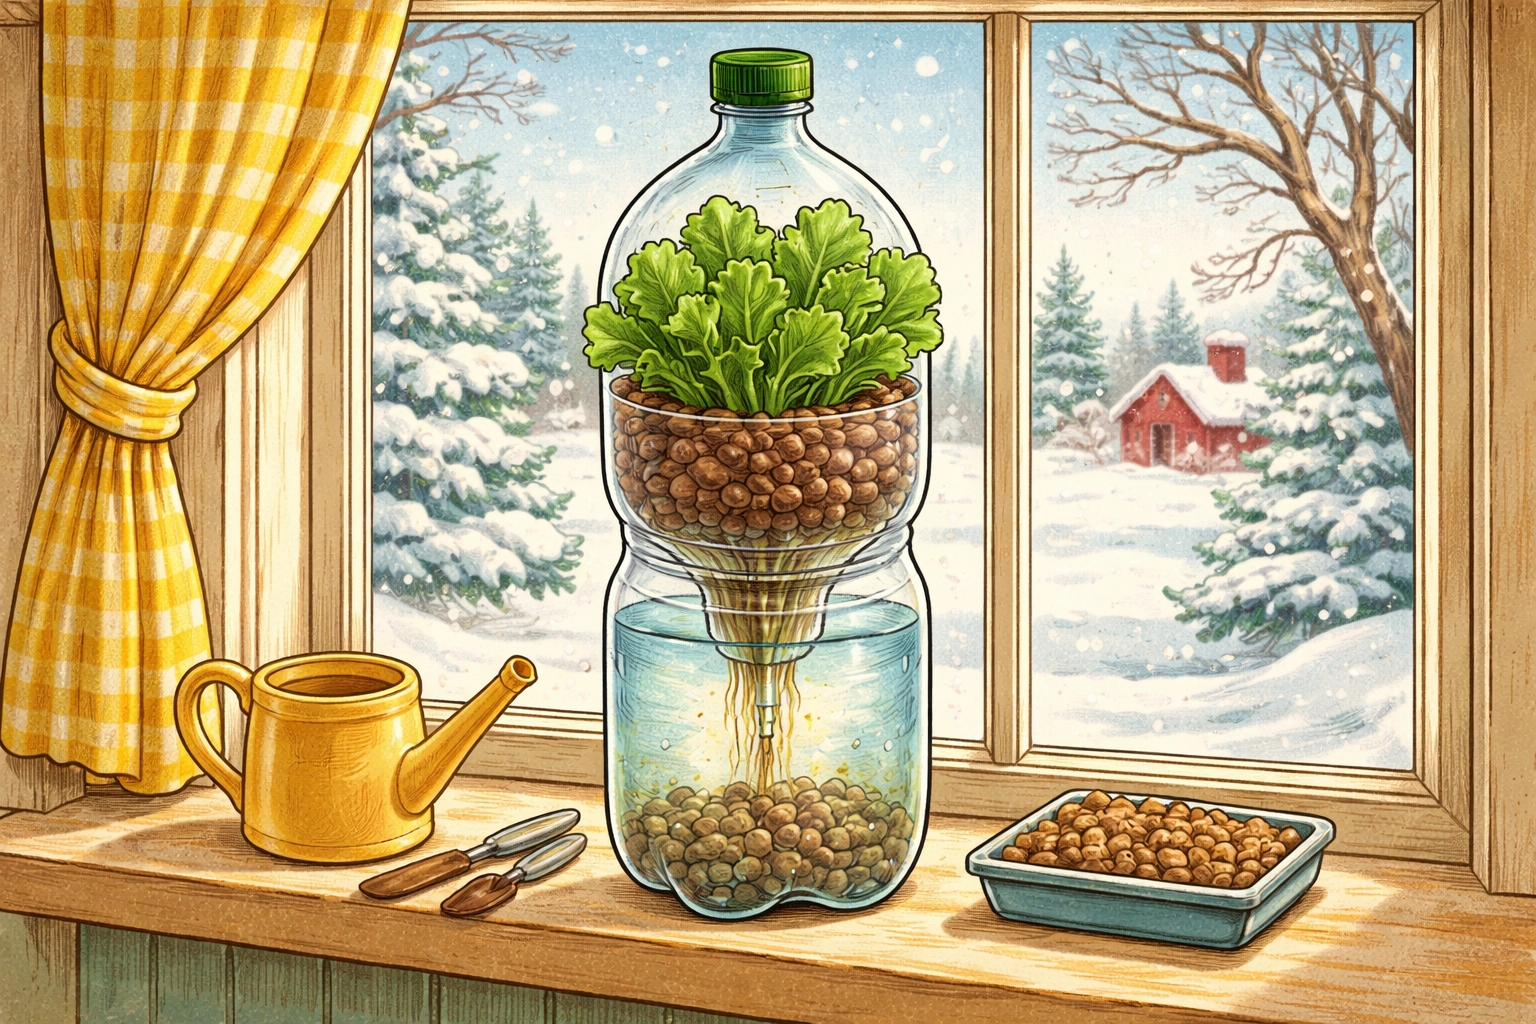
Step 7: Find the Right Spot
Place your bottle garden in a sunny window, south-facing is ideal in winter. Lettuce and herbs want 6-8 hours of light daily.
No sunny window? A simple desk lamp with a daylight bulb positioned a few inches above the plants works surprisingly well.
What Should You Grow First?
For your first bottle garden, we recommend lettuce or basil. Here's why:
Lettuce germinates quickly (5-7 days), grows fast, and doesn't need much vertical space. Varieties like butterhead, romaine, and loose-leaf all thrive in bottle systems. You can start harvesting outer leaves in 3-4 weeks.
Basil is slightly slower but incredibly rewarding. Kids love rubbing the leaves and smelling that fresh herb scent. Plus, homegrown basil tastes dramatically better than store-bought.
Other good options include cilantro, spinach, and small herbs like chives or parsley.
Skip for now: Tomatoes, peppers, and other fruiting plants need more root space and support than a bottle can provide.
Caring for Your Bottle Garden
One of the best things about wick hydroponics? It practically runs itself.
Check the water level every few days. When the reservoir gets low (you'll see it through the bottle), add more nutrient solution. Most families refill once every 1-2 weeks.
Watch for algae. If you notice green growth in the water, wrap the reservoir portion with aluminum foil to block light. Algae isn't harmful, but it competes with your plants for nutrients.
Rotate the bottle a quarter turn every couple of days so your plant grows straight instead of leaning toward the light.
That's really it. The wick keeps moisture levels perfect automatically.
Timeline: From Seed to Salad
Here's what to expect over the first month:
| Week | What's Happening |
|---|---|
| Week 1 | Seeds germinate, tiny sprouts emerge |
| Week 2 | First true leaves appear, roots reaching toward wick |
| Week 3 | Rapid leaf growth, plant visibly larger each day |
| Week 4 | Harvest time! Snip outer leaves and let the center keep growing |
With lettuce, you can practice "cut and come again" harvesting, take the outer leaves while leaving the inner ones to continue developing. One bottle can provide fresh greens for weeks.
Frequently Asked Questions
What's the cheapest indoor gardening project for families in winter?
This 2-liter bottle hydroponic garden is one of the most affordable options. Using recycled materials and basic supplies, most families can get started for under $10.
How long does it take to see results?
Seeds typically sprout within 5-7 days. You'll have harvestable lettuce in 3-4 weeks, fast enough to keep kids engaged and excited.
Can kids do this project themselves?
Children ages 6 and up can handle most steps independently. Adults should do the bottle cutting and supervise nutrient mixing. Younger kids can plant seeds, check water levels, and track growth.
What if my seeds don't sprout?
Check three things: Are the seeds fresh? Is the wick staying damp? Is there enough light? Old seeds lose viability, dry wicks can't deliver water, and dark corners won't support growth.
Can I use tap water?
Yes, for most families tap water works fine. If your water is heavily chlorinated, let it sit in an open container overnight before using.
Tierney Family Farms Disclaimer
Growing food with kids is wonderful, messy, educational fun: but a quick note from our family to yours: This blog post is meant to inspire and inform, not replace common-sense safety. Always supervise children with scissors, nutrient solutions, and small parts. Every family's situation is different. We're sharing what works for us at Tierney Family Farms, but you know your kids best. When in doubt, ask questions, do your research, and trust your parenting instincts.
Keep the Winter Learning Going
This 2-liter bottle garden is just one piece of your indoor winter farm. Once your kids see how hydroponics works at this small scale, they'll be ready for bigger adventures.
If you're looking to expand your indoor growing projects, check out our guide on how much space you need for a productive hydroponic garden for the next hands-on science step.
Happy growing, Junior Engineers. 🌱
Peer-Reviewed References
- https://doi.org/10.1093/aob/mcg038 (Taiz & Zeiger / plant physiology context on water movement and transport)
- https://doi.org/10.1016/j.scienta.2012.06.006 (Review-style research on soilless culture / hydroponic production in horticulture)
- https://doi.org/10.1016/S0304-4238(03)00085-1 (Soilless cultivation and nutrient solution management research in horticultural systems)


