

Can Kids Grow Vegetables Indoors Year-Round?
Yes, absolutely! Kids can grow vegetables indoors year-round with the right setup, plant choices, and a little planning. The secret is picking vegetables that thrive without intense sunlight: like leafy greens, microgreens, and herbs: and using simple grow lights when natural light isn't enough. It's a fantastic way to teach food security, patience, and basic science while keeping little hands busy no matter the season.
Let's dig into how your family can make it happen with easy, budget-friendly projects.
Why Grow Vegetables Indoors With Kids?
Indoor vegetable gardening is more than just a rainy-day activity. It gives kids:
- Year-round learning opportunities (no waiting for spring!)
- Hands-on science lessons about plant life cycles, light, and nutrition
- A sense of responsibility caring for living things
- Fresh, healthy food they grew themselves (picky eaters often try veggies they helped grow!)
Plus, indoor gardens don't require a big yard, fancy equipment, or a green thumb. A sunny windowsill or a basic grow light setup is all you need to get started.
Best Vegetables for Kids to Grow Indoors
Not all vegetables love indoor life. Here are the easiest winners for families:
Leafy Greens
Lettuce, spinach, arugula, and Swiss chard grow quickly, tolerate lower light, and can be harvested multiple times. Kids love snipping leaves for dinner salads!
Microgreens
These tiny powerhouses (think baby broccoli, radish, or sunflower greens) sprout in just 7–14 days. They're perfect for impatient gardeners and pack a nutritional punch.
Herbs
Basil, cilantro, chives, and parsley do well on sunny windowsills or under lights. Bonus: they make the kitchen smell amazing.
Radishes
One of the fastest root vegetables, radishes can be ready in about 25–30 days. They work well in deeper containers indoors.
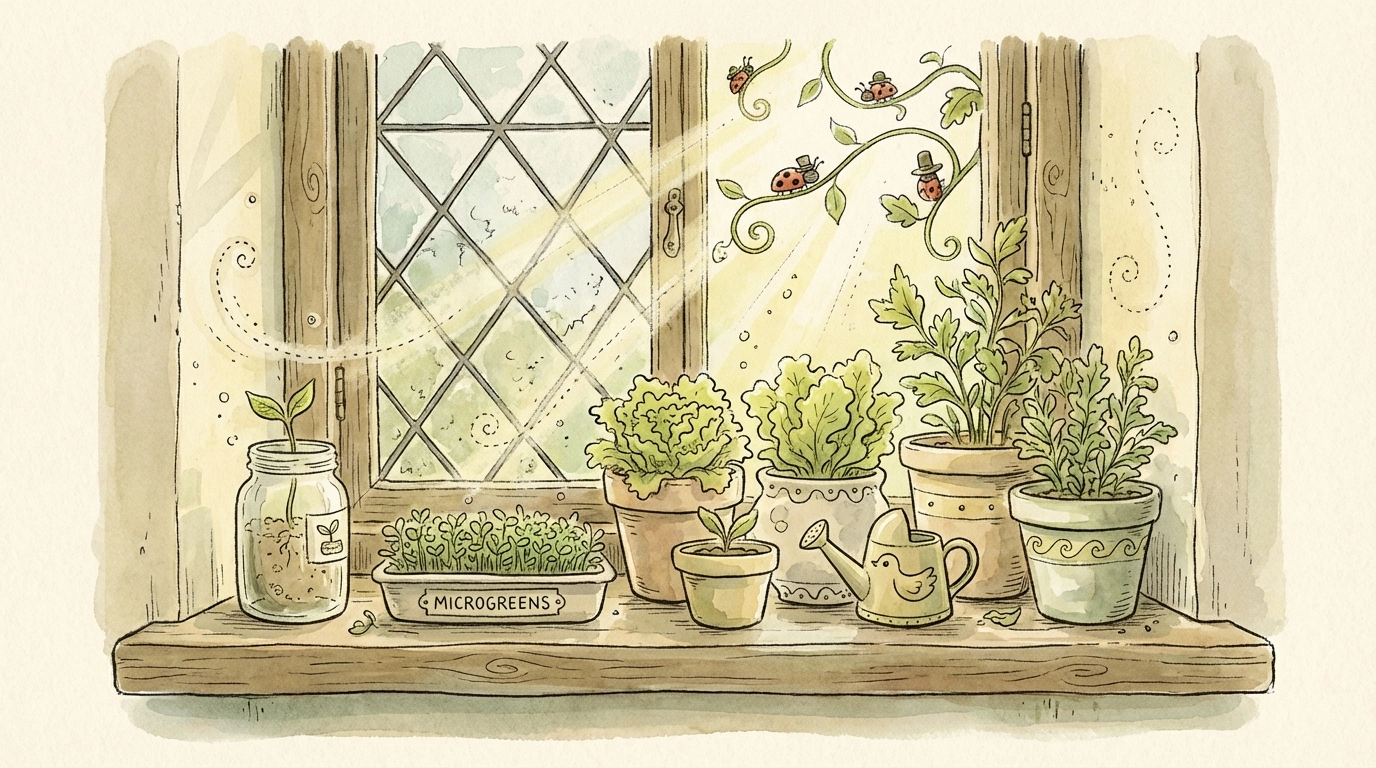
Project 1: Windowsill Lettuce Garden
Age Range: 4–10 years
Estimated Cost: $0–$10 (using upcycled containers and leftover seeds)
What You'll Need:
- Shallow container (yogurt cups, takeout containers, or an old baking dish)
- Potting soil or seed-starting mix
- Lettuce seeds (loose-leaf varieties work best)
- Spray bottle for watering
- Sunny windowsill (south-facing is ideal)
Step-by-Step Instructions:
-
Prep your container. Poke a few drainage holes in the bottom if there aren't any. Place a small tray or plate underneath to catch water.
-
Fill with soil. Add 2–3 inches of moist potting soil, leaving about half an inch of space at the top.
-
Plant the seeds. Sprinkle lettuce seeds lightly across the surface. Gently press them into the soil but don't bury them deep: lettuce seeds need light to germinate.
-
Mist with water. Use a spray bottle to dampen the soil without washing away the seeds.
-
Find a sunny spot. Place your container on a windowsill that gets at least 4–6 hours of sunlight daily.
-
Watch and water. Keep soil moist (not soggy). Seedlings should appear in 7–10 days.
-
Harvest! Once leaves are 3–4 inches tall, snip what you need with scissors and let the plant keep growing.
Challenge Tip: In winter, windowsill light may not be enough. Move to Project 2 for a grow light solution!
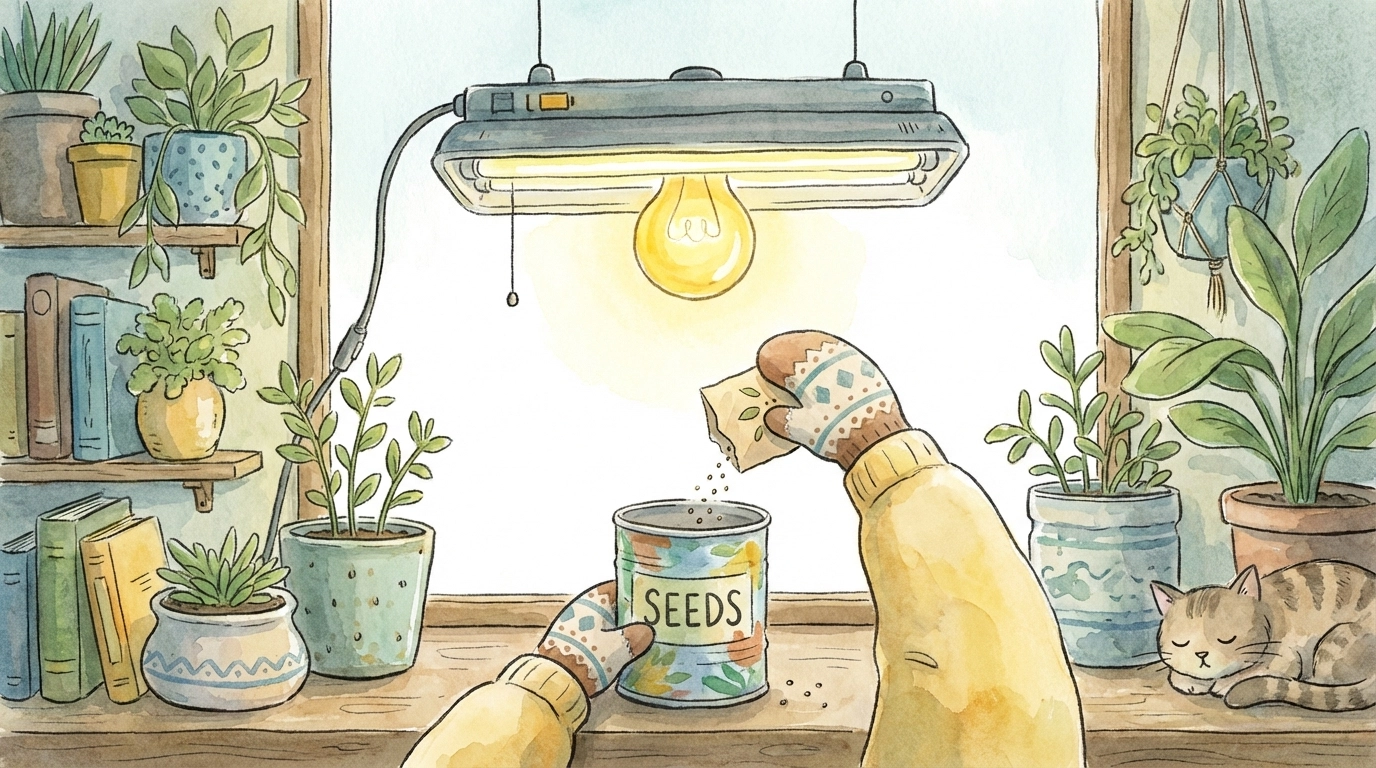
Project 2: DIY Grow Light Microgreens Station
Age Range: 6–12 years
Estimated Cost: $15–$35 (using a basic LED shop light and household supplies)
Microgreens are the ultimate instant-gratification crop for kids. They're ready to eat in under two weeks!
What You'll Need:
- Shallow tray (upcycled produce containers work great)
- Potting soil or coconut coir
- Microgreen seeds (broccoli, radish, sunflower, or pea shoots)
- LED shop light or clip-on grow light
- Timer (optional but helpful)
- Spray bottle
Step-by-Step Instructions:
-
Set up your tray. Fill a shallow container with 1–2 inches of moist soil or coconut coir.
-
Spread seeds densely. Microgreens grow close together! Scatter seeds generously across the surface and press lightly.
-
Cover and mist. Place a damp paper towel or another tray on top to keep seeds dark and moist for the first 2–3 days.
-
Uncover and add light. Once seeds sprout, remove the cover. Position your grow light 2–4 inches above the tray.
-
Set your timer. Microgreens need 12–16 hours of light daily. A timer makes this hands-off.
-
Mist daily. Keep soil moist but not waterlogged.
-
Harvest in 7–14 days. When greens are 2–3 inches tall with their first true leaves, snip just above the soil line. Toss them on sandwiches, salads, or smoothies!
Pro Tip: Start a new tray every week for continuous harvests all year long. This is called "succession planting" and it's how real farmers keep food coming!
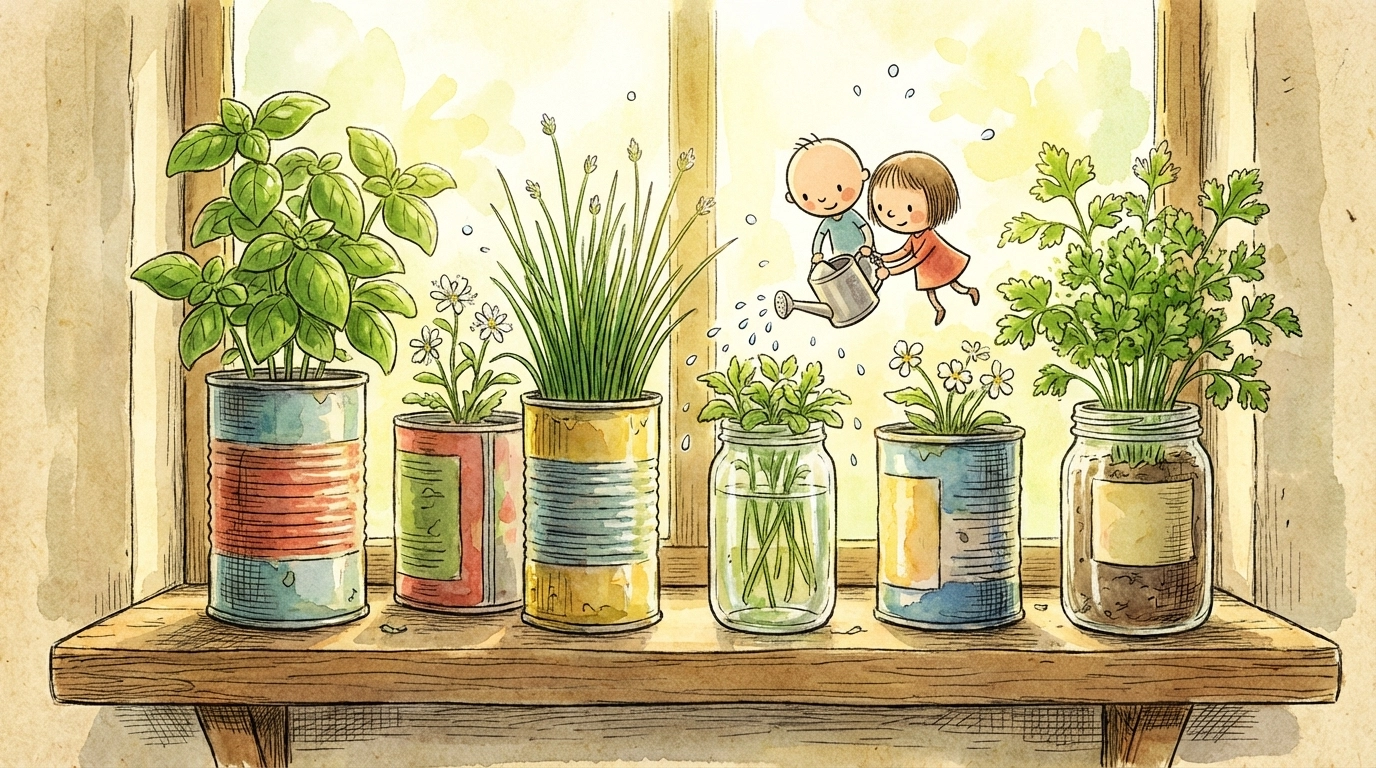
Project 3: Upcycled Herb Planter
Age Range: 5–12 years
Estimated Cost: $0–$8 (if you have seeds and recycled containers)
Herbs are forgiving, smell great, and teach kids that food comes from plants: not just grocery store packages.
What You'll Need:
- Clean tin cans, mason jars, or plastic bottles (cut to size)
- Small rocks or pebbles for drainage
- Potting soil
- Herb seeds or starter plants (basil, chives, parsley, or mint)
- Sunny window or grow light
Step-by-Step Instructions:
-
Prep your containers. Make sure they're clean and have drainage holes. Add a layer of pebbles at the bottom.
-
Add soil. Fill containers with potting mix, leaving an inch at the top.
-
Plant seeds or starters. If using seeds, plant according to packet directions (usually ¼ inch deep). If using starter plants, dig a small hole and nestle the roots in.
-
Water gently. Moisten soil thoroughly but don't flood it.
-
Place in bright light. Herbs want 6+ hours of light. Rotate containers every few days so plants grow evenly.
-
Harvest often. Pinching off leaves encourages bushier growth. Use fresh herbs in family meals!
Budget Hack: Ask friends or neighbors for herb cuttings: many herbs root easily in water before transplanting to soil.
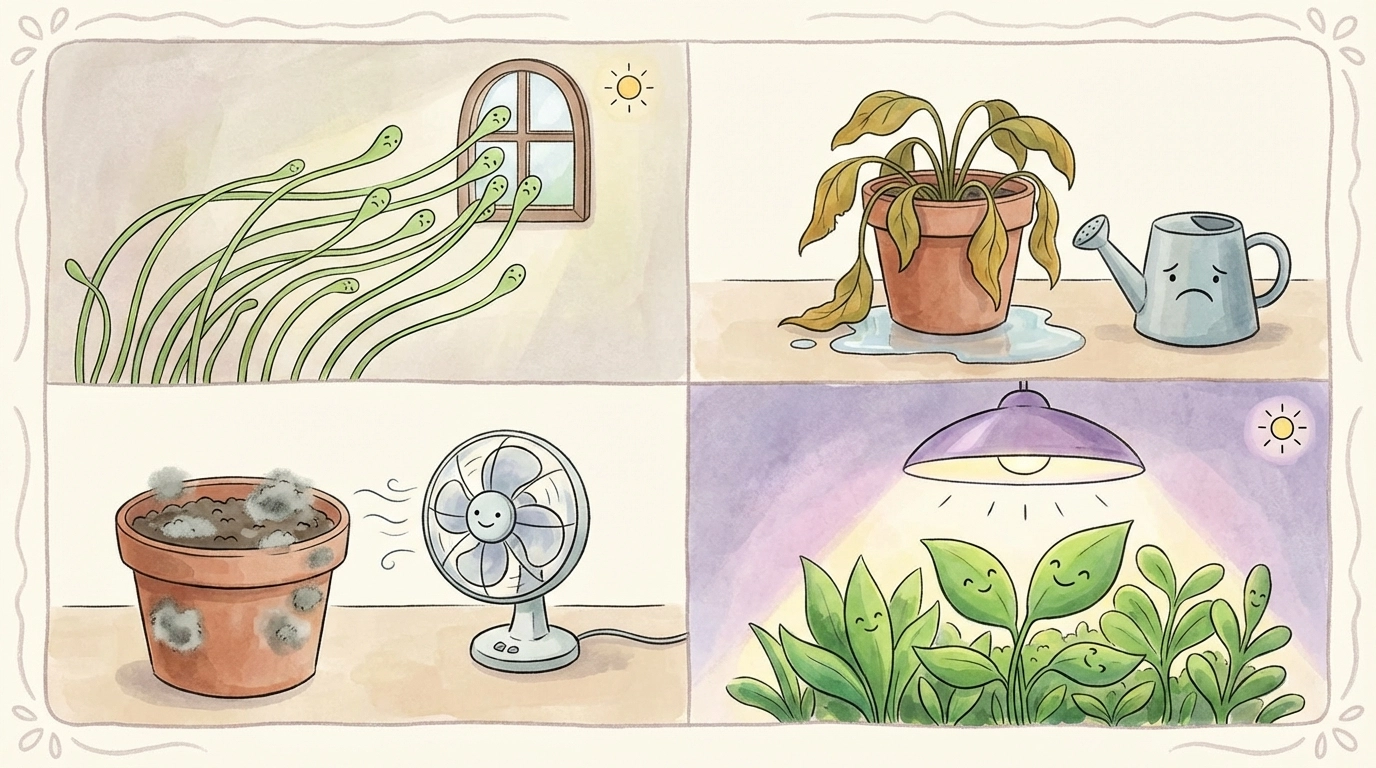
Common Challenges (And How to Beat Them)
Indoor gardening isn't always smooth sailing. Here's how to troubleshoot the most common hiccups:
| Challenge | Cause | Solution |
|---|---|---|
| Leggy, stretched seedlings | Not enough light | Move closer to window or add a grow light |
| Yellowing leaves | Overwatering or poor drainage | Let soil dry slightly between waterings; check drainage holes |
| Seeds won't sprout | Old seeds or planted too deep | Use fresh seeds; follow planting depth on packet |
| Mold on soil surface | Too much moisture, poor airflow | Reduce watering; add a small fan nearby |
| Plants bolt (flower and go bitter) | Too warm or plant is mature | Harvest earlier; start new seeds for succession planting |
Tips for Year-Round Indoor Gardening Success
-
Use succession planting. Start new seeds every 2 weeks so you always have fresh greens coming up as older plants finish.
-
Invest in a simple grow light. Natural winter light usually isn't enough. A $15–$25 LED light pays for itself in happy plants.
-
Let kids own the process. Give them their own containers, let them choose seeds, and celebrate every tiny sprout.
-
Keep a garden journal. Track planting dates, growth, and what worked. It's a great way to add writing and observation skills!
-
Start small. One lettuce container or microgreen tray is plenty for beginners. Scale up as confidence grows.
What's the Real Cost of Indoor Vegetable Gardening?
Here's a quick breakdown so you can plan:
| Project | Age Range | Estimated Cost |
|---|---|---|
| Windowsill Lettuce Garden | 4–10 years | $0–$10 |
| DIY Grow Light Microgreens | 6–12 years | $15–$35 |
| Upcycled Herb Planter | 5–12 years | $0–$8 |
Most supplies can be upcycled from your recycling bin or found around the house. Seeds are inexpensive, and one packet often lasts multiple planting cycles.
Ready to Grow?
Indoor vegetable gardening with kids is one of the most rewarding family projects you can try: and it works in any season, any climate, and any size home. Start with one simple project this week, watch those first sprouts pop up, and enjoy the magic of growing food together as a family.
For more hands-on family gardening ideas, visit Tierney Family Farms and explore our full library of kid-friendly projects!
FAQ
- Which vegetables grow best indoors in the winter? Leafy greens like spinach and kale, as well as herbs and even small cherry tomatoes (if you have enough light), can grow beautifully indoors all year long.
- Is it expensive to grow food indoors year-round? It doesn't have to be! Using seeds instead of buying plants and recycling containers keeps costs very low. The main cost might be a simple grow light if your windows aren't sunny enough.
- What is the most important thing for indoor plants in winter? Light and humidity. Winter air can be dry, so misting your plants or placing them near a bowl of water can help them stay happy and green.
References:
- University extension resources on indoor vegetable gardening
- Seed packet guidelines for lettuce, microgreens, and herbs
- LED grow light manufacturer recommendations for leafy greens