

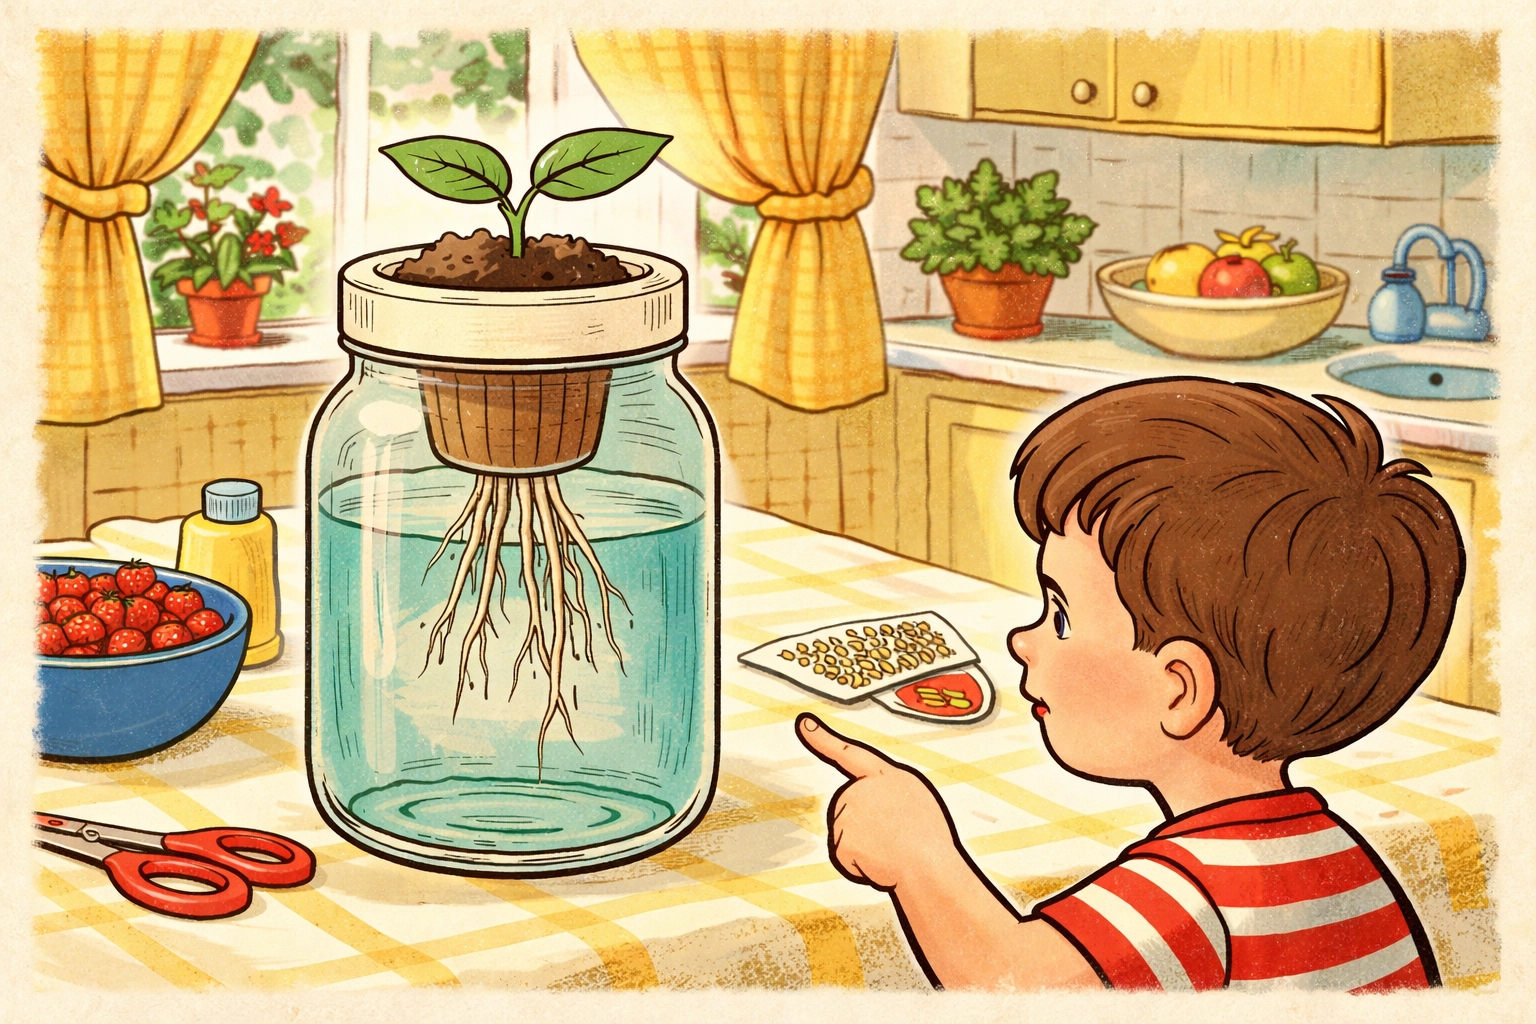
How Do You Grow Plants Without Dirt? (DIY $10 Hydroponics for Kids)
TL:DR; You grow plants in water mixed with liquid nutrients instead of soil. The roots dangle directly into the solution, slurping up everything they need to grow big and healthy. It's called hydroponics, and yes: your kids can absolutely build a working system for under ten bucks.
This is one of our favorite rainy-day STEM projects because it checks all the boxes: it's cheap, it's hands-on, it actually works, and it opens up a great conversation about how plants eat and drink. Plus, watching roots grow through a clear jar? Pure magic for curious kids.
Let's build one.
What Is the Kratky Method (And Why Is It Perfect for Kids)?
The Kratky method is the laziest, most beginner-friendly version of hydroponics out there. And I mean "lazy" as a compliment.
Here's the deal: most hydroponic systems use pumps and timers to keep water moving and oxygenated. The Kratky method skips all of that. You fill a container with nutrient water, suspend your plant above it so the roots can reach down, and then... you just leave it alone.
As the plant drinks, the water level drops. That gap between the water surface and the base of the plant creates an "air zone" where roots can breathe. No electricity. No pumps. No daily fussing.
It was developed by a researcher in Hawaii named B.A. Kratky (hence the name), and it's genuinely brilliant for home and classroom use. If your kid can fill a jar with water and drop in a plant, they can do this.
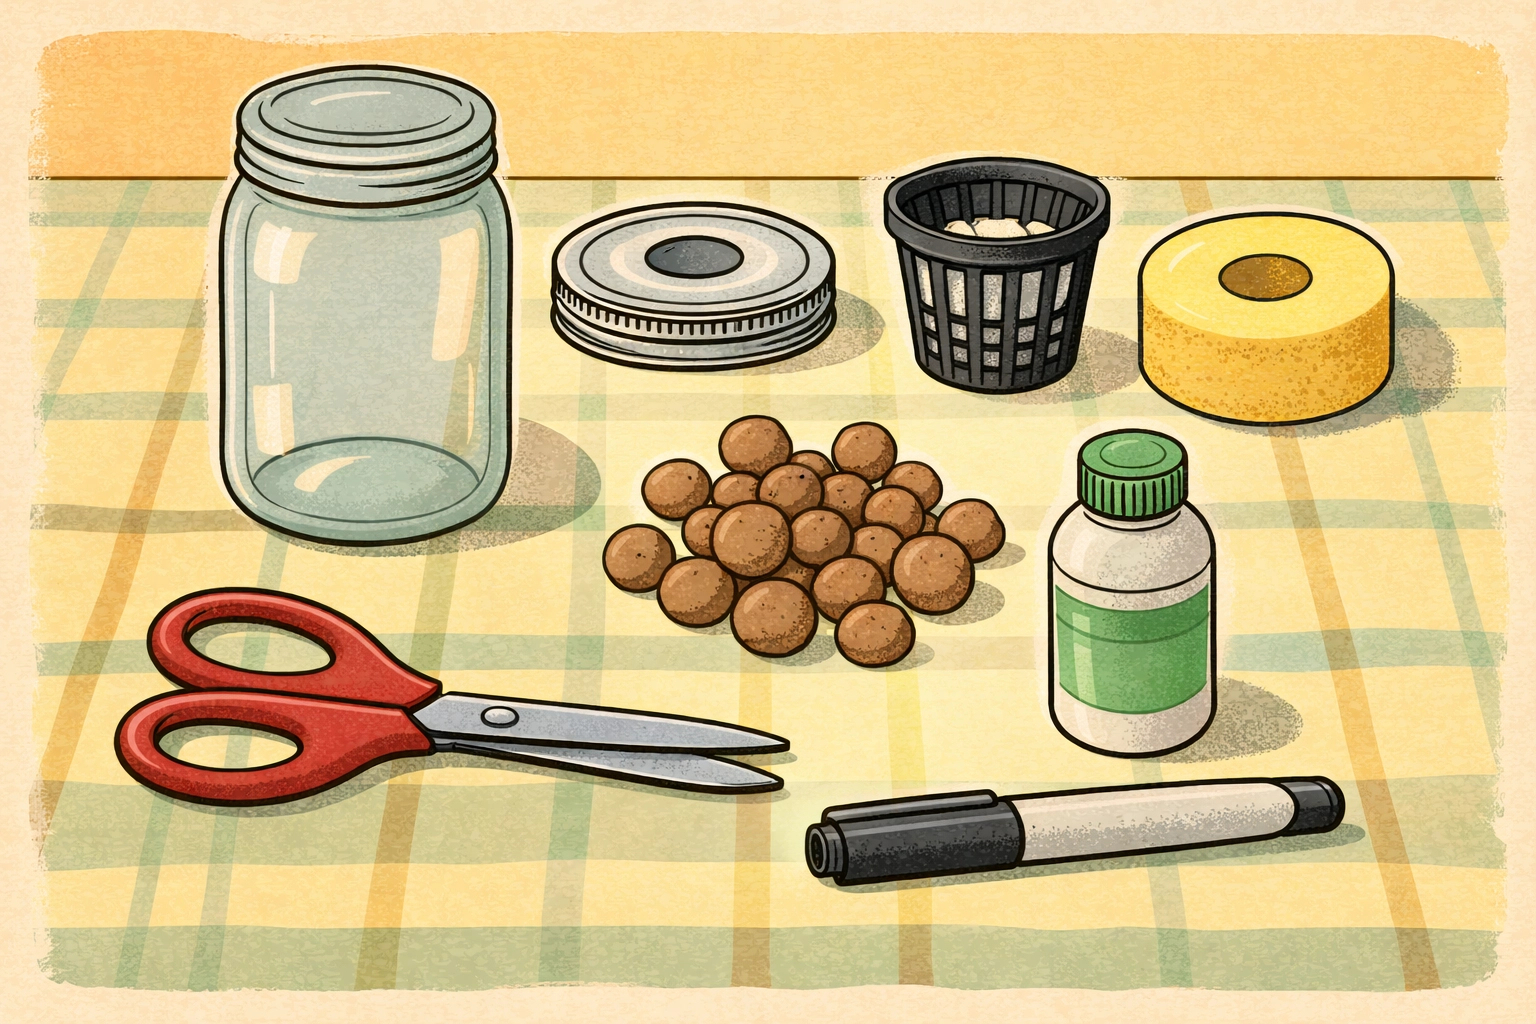
Your $10 Shopping List
Here's everything you need. Most of it you probably already have lying around.
| Item | Where to Find It | Estimated Cost |
|---|---|---|
| Quart-sized mason jar (or clean plastic container) | Kitchen cabinet or dollar store | $1–$2 |
| Net pot OR a yogurt cup with holes poked in the bottom | Garden center or DIY | $0.50–$1 |
| Pool noodle slice OR clay pebbles OR clean gravel | Dollar store / garden center | $1–$2 |
| Hydroponic nutrient solution (small bottle) | Garden center or online | $5–$6 |
| Seeds or a small seedling | Garden center or pantry | $1–$2 |
| Water | Your tap | Free |
Total cost: Around $8–$10, and most of those supplies will last you through multiple projects.
A few notes:
- Net pots are those little mesh cups that let roots grow through. If you can't find one, a single-serve yogurt cup with 8–10 holes punched in the bottom works great.
- Pool noodles make surprisingly good growing media. Cut a slice, poke a hole in the center, and use it to hold your seedling upright. Clay pebbles work too, but they cost a bit more.
- Nutrient solution is the one thing you really do need to buy. Regular water alone won't cut it: plants need dissolved minerals to survive. Look for a bottle labeled "hydroponic nutrients" and follow the dilution instructions on the back.
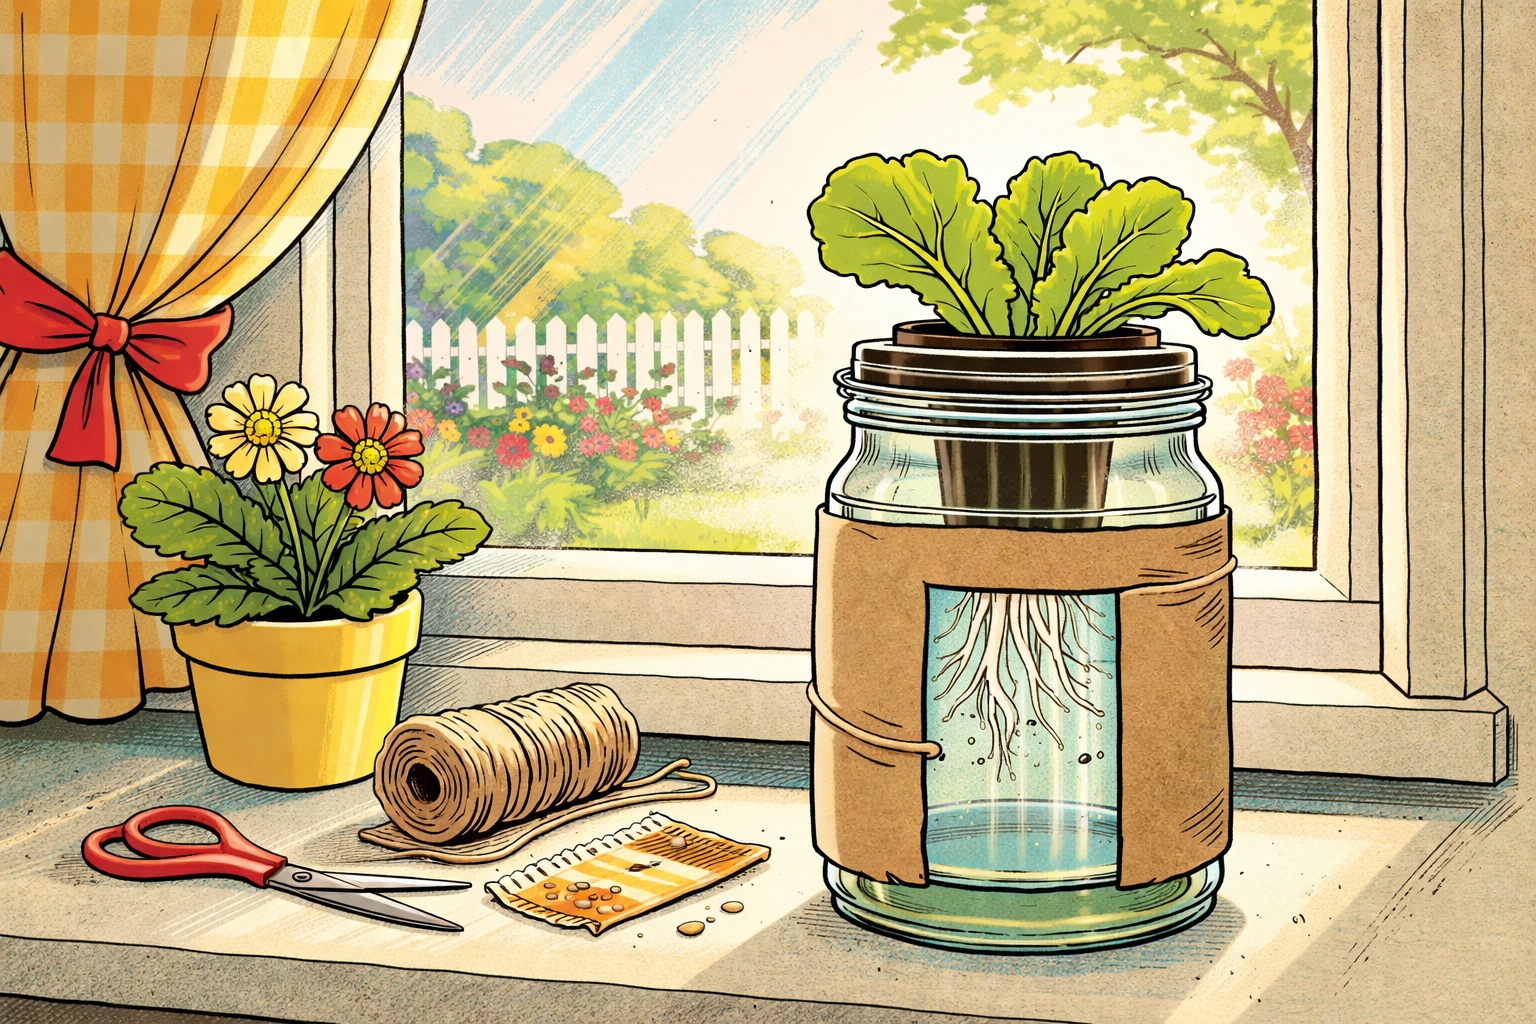
Step-by-Step: Building Your Kratky Jar
This takes about 15 minutes. Perfect for a weekend morning or an after-school project.
Step 1: Prep Your Container
Grab your mason jar or plastic tub. If you're using a clear container (recommended: kids love watching the roots), you may want to wrap the outside with paper or paint it to block light. Algae loves light, and you don't want green slime competing with your plant.
Leave a small "window" uncovered so you can peek at the water level and root growth.
Step 2: Make Your Lid Setup
If you're using a mason jar, trace the inner lid circle onto a piece of plastic or cardboard. Cut a hole in the center just big enough for your net pot or yogurt cup to sit in without falling through.
The goal: the cup hangs down into the jar, but doesn't touch the bottom.
Step 3: Add Your Growing Media
Drop your pool noodle slice or clay pebbles into the net pot. This stuff doesn't feed the plant: it just holds the seedling upright and keeps it stable.
If you're using a pool noodle, slice a piece about 1 inch thick, then cut a small slit or hole in the center for the stem.
Step 4: Mix Your Nutrient Water
Fill the jar with water, leaving about an inch of space at the top. Add your hydroponic nutrients according to the package directions. Most recommend about 1–2 teaspoons per gallon, so scale down for a quart jar (roughly ¼ to ½ teaspoon).
Stir it up.
Step 5: Plant Your Seedling
If you're starting from seed, tuck 2–3 seeds into the growing media and keep the water level high enough to touch the bottom of the net pot. Seeds need consistent moisture to germinate.
If you're transplanting a small seedling, gently rinse the soil off the roots (soil can introduce bacteria and clog things up), then nestle it into your net pot with the roots dangling below.
Step 6: Set It and (Mostly) Forget It
Place your jar near a sunny window: plants need at least 5–6 hours of light per day. A south-facing window works best in most homes.
Top off the water every week or so, and add a splash more nutrient solution when you do. As the plant grows, you'll see roots stretching down into the jar. That's when you know it's working.
The Science Part: How Do Plants Eat Without Dirt?
Here's the cool thing to explain to your kids: dirt isn't actually food.
Soil is more like a storage locker. It holds onto water and dissolved minerals (like nitrogen, phosphorus, and potassium) until plant roots come along and soak them up. The plant doesn't eat the dirt itself: it eats what's in the dirt.
Hydroponics skips the middleman. We dissolve those same nutrients directly into water, so the roots can absorb them immediately. No digging required.
This is why hydroponic plants often grow faster: up to 30% faster in some studies. They're not wasting energy searching for food. It's all right there, ready to drink.
Ask your kid: "If you had to hunt for your dinner every night versus having it delivered to your table, which would give you more energy to play?" Same idea.
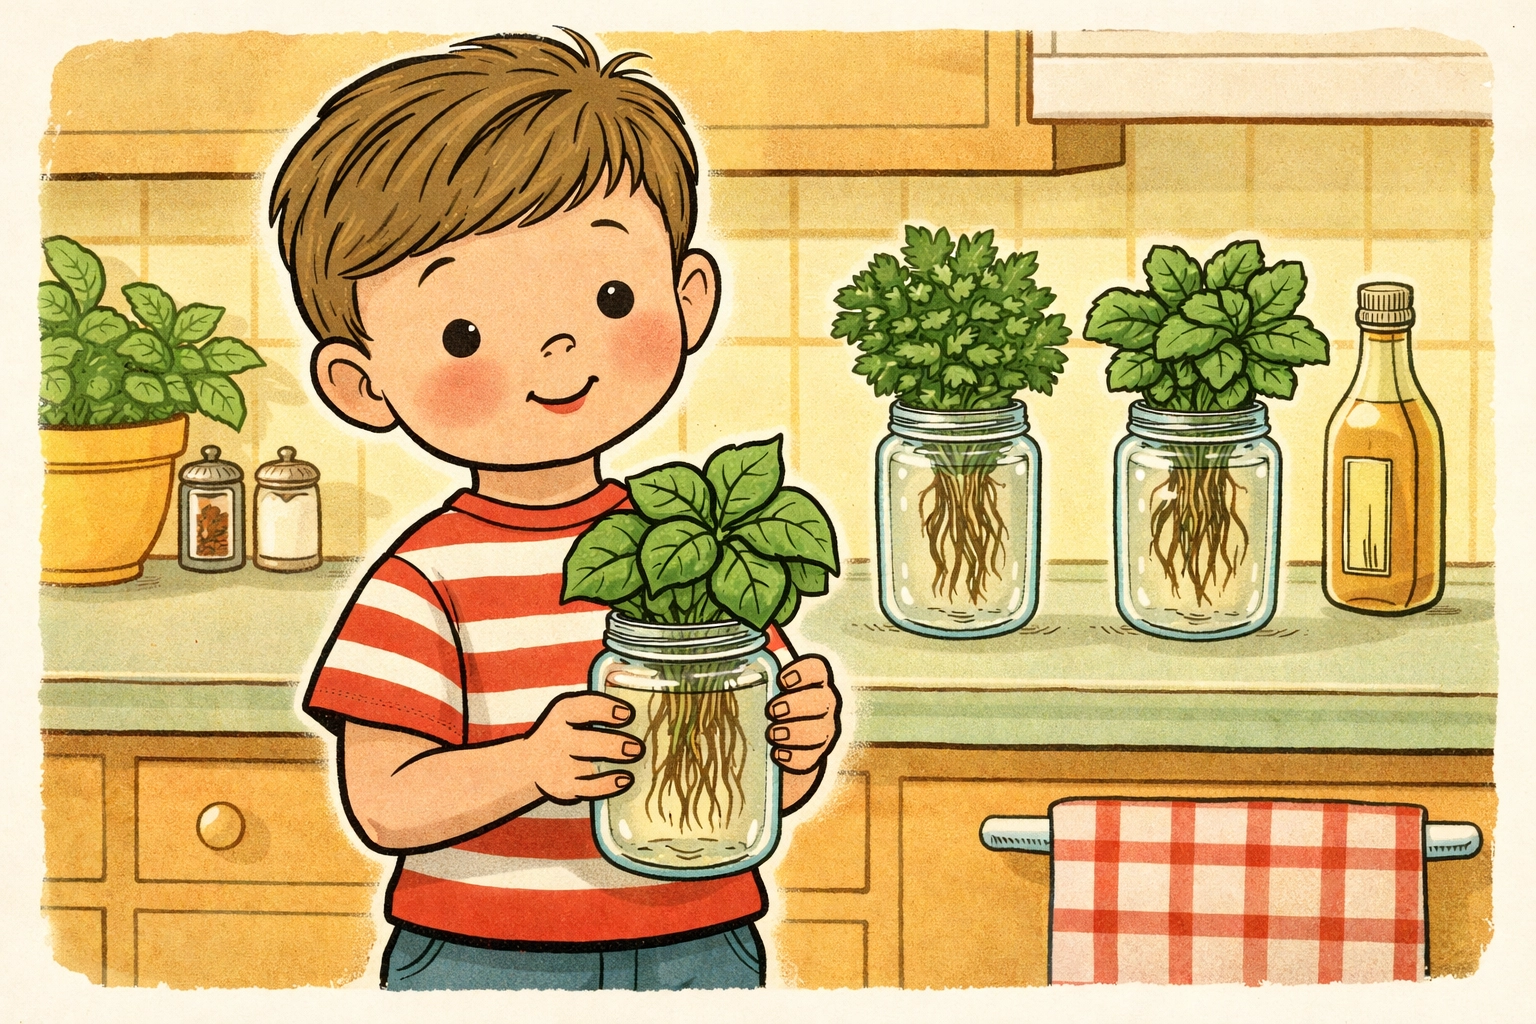
What Should You Grow First?
Stick with fast, forgiving plants for your first round. Save the tomatoes and peppers for later.
Best beginner picks:
- Lettuce – The undisputed champion of beginner hydroponics. Grows quickly, doesn't need much light, and you can start harvesting outer leaves in about 4 weeks.
- Basil – Smells amazing, grows fast, and makes kids feel like real chefs when they snip it for dinner.
- Mint – Almost impossible to kill. Grows like crazy.
- Spinach – Another easy leafy green that tolerates beginner mistakes.
Start with one jar per plant. Once your family gets the hang of it, you can scale up to a plastic tub with multiple net pots for a mini salad factory.
Troubleshooting: When Things Get Weird
Yellowing leaves? Usually means the nutrients are too weak or the pH is off. Try mixing a fresh batch of nutrient water.
Slimy roots? Root rot from too little oxygen. Make sure your water level has dropped enough to leave an air gap. If it hasn't, pour some out.
Algae growing in the jar? Too much light hitting the water. Wrap the jar with paper or paint the outside.
Nothing's happening? Be patient. Seeds can take 7–14 days to sprout, and growth is slow at first. If you're past three weeks with zero action, start fresh.
Why This Project Matters
Look, we love a good craft project. But this one teaches something real.
Your kids will learn that plants don't need dirt: they need nutrients, water, light, and air. They'll learn that science isn't just something in a textbook; it's something you can build on your kitchen counter. And they'll learn that growing food doesn't require a backyard or a green thumb. Just a jar, some water, and a little curiosity.
For under ten bucks, that's a pretty solid lesson.
References
- Kratky, B.A. "A Suspended Pot, Non-Circulating Hydroponic Method." University of Hawaii.
- University of Minnesota Extension. "Hydroponics: Growing Plants Without Soil."
- USDA. "Hydroponic and Aquaponic Systems."