

The $10 Lesson: The Paper Towel Test (Do These Old Seeds Still Grow?)
Yes, you can absolutely test whether old seeds will still grow, and it only takes a damp paper towel, a plastic bag, and about ten days of patience. This simple experiment is called the paper towel germination test, and it's the same method farmers, teachers, and gardeners have used for generations. Best of all, kids can do it themselves with just a few dollars' worth of supplies.
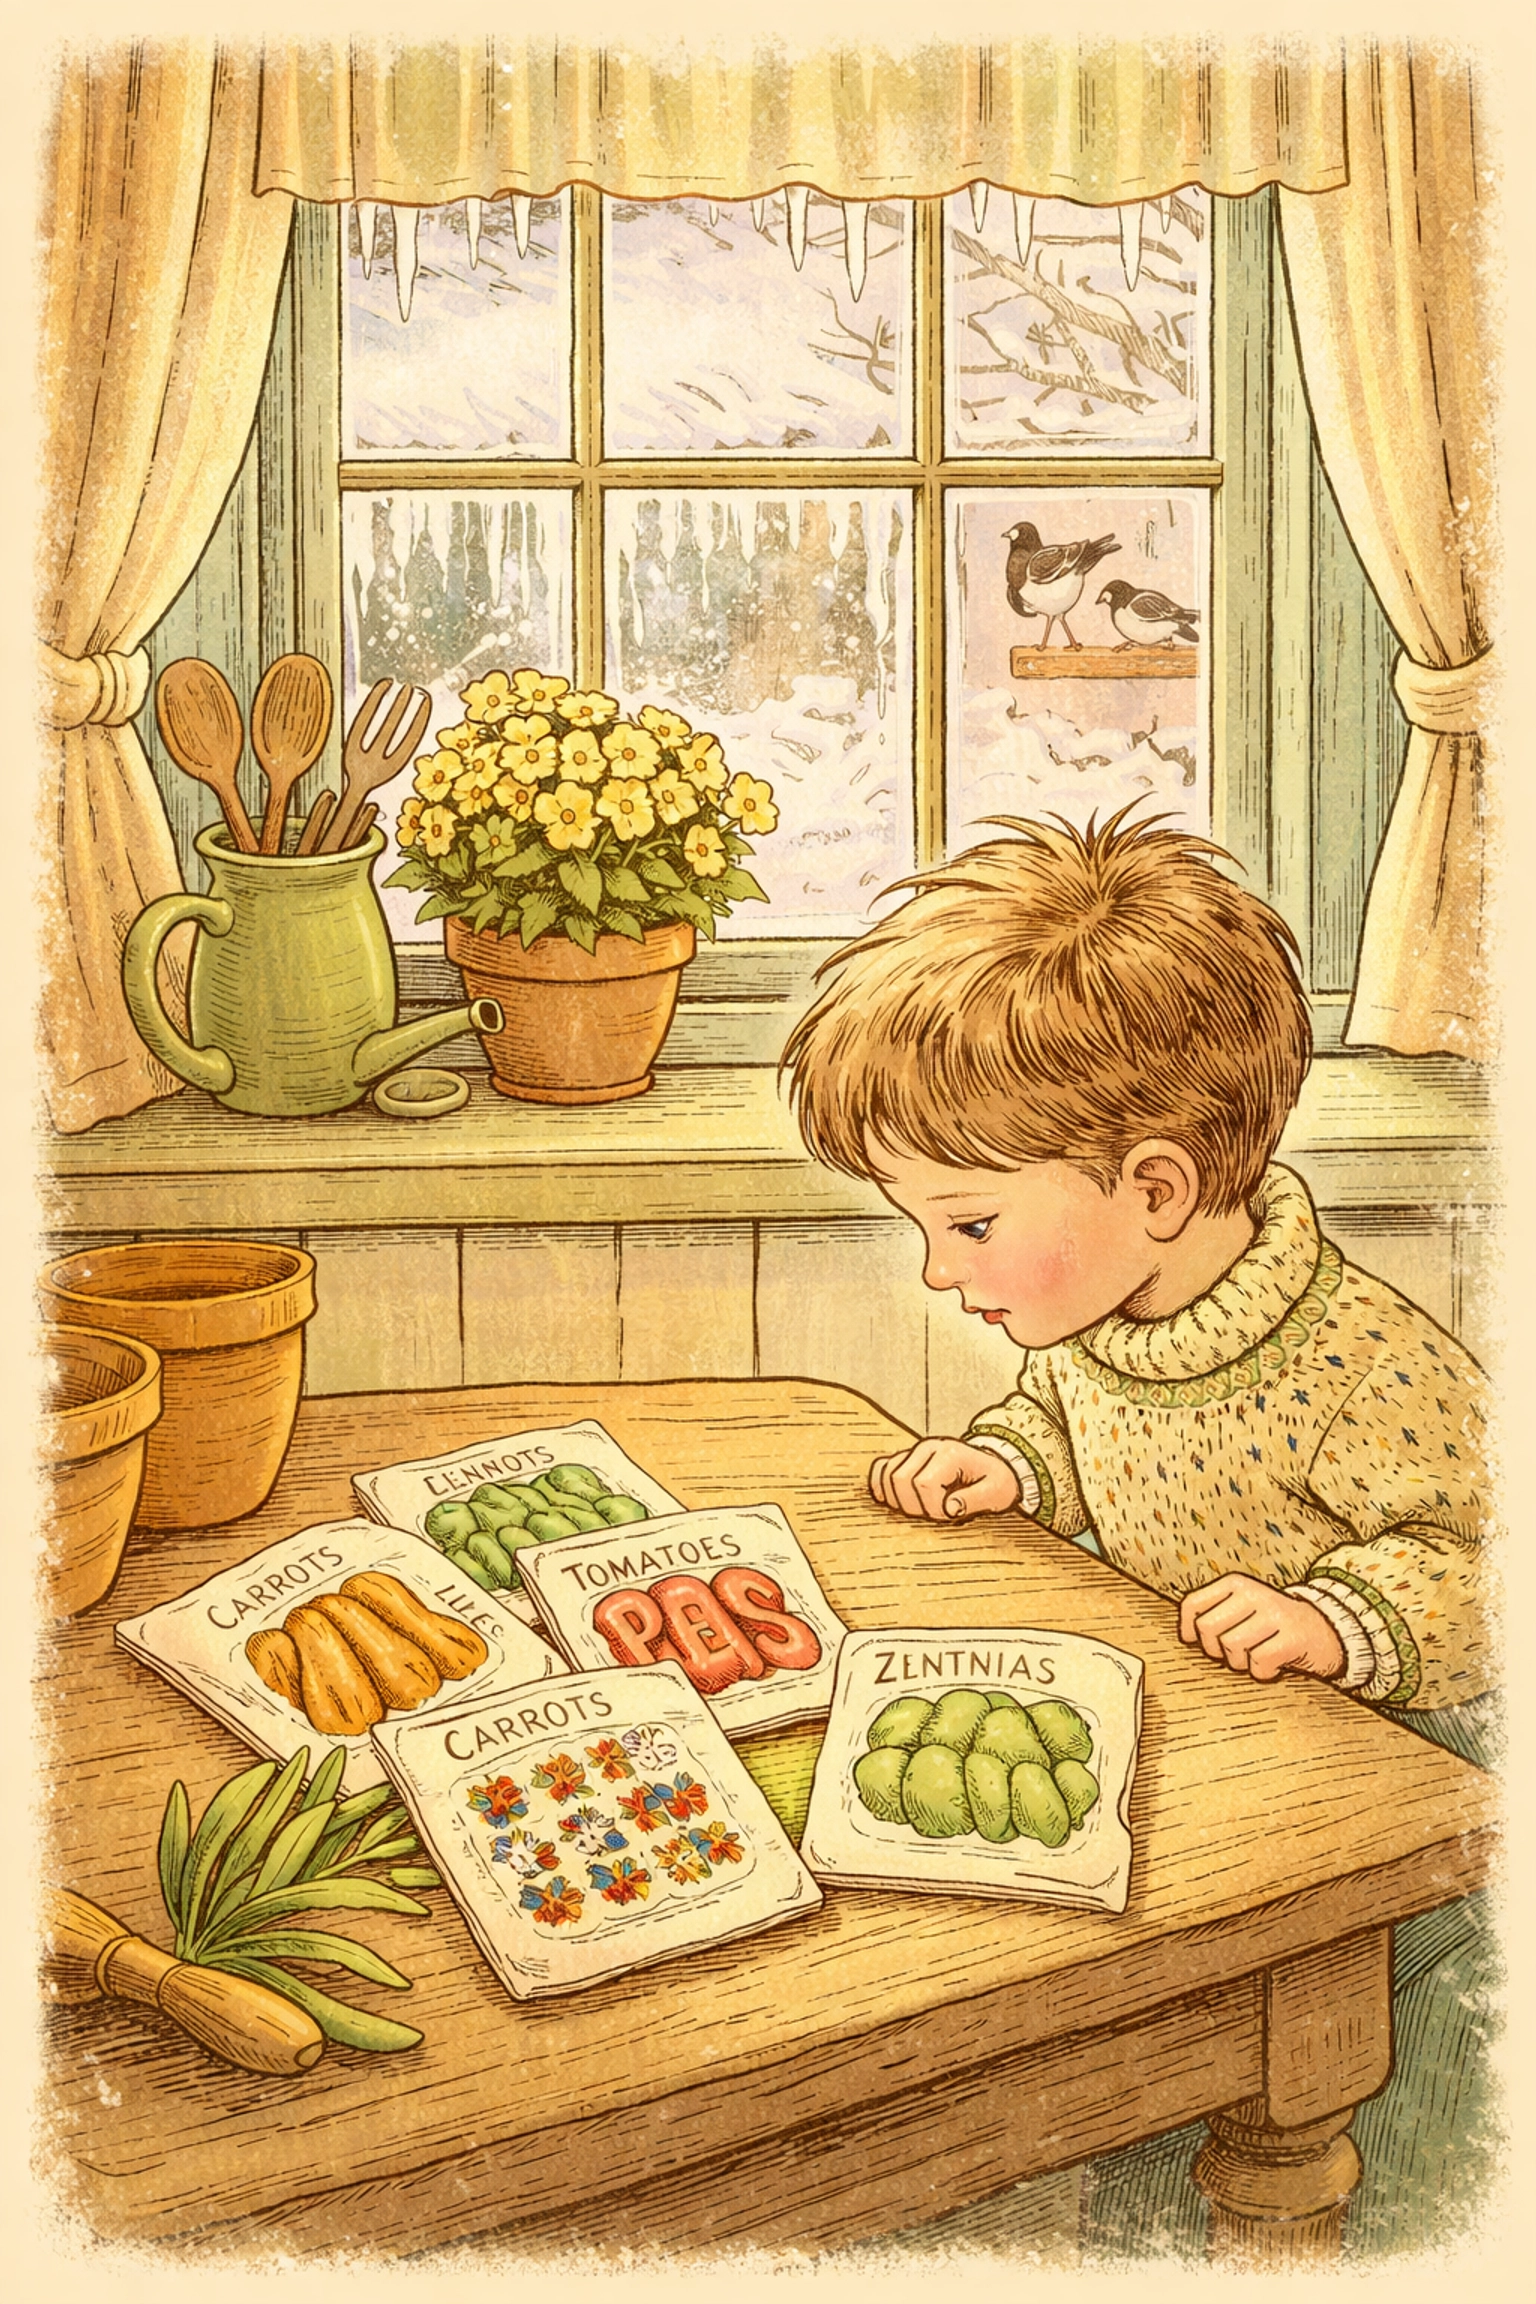
Before you toss that dusty seed packet from the back of the junk drawer, let's find out if those little seeds still have life in them.
Why Should You Test Old Seeds Before Planting?
Here's the thing: seeds don't come with expiration dates like milk cartons. They don't suddenly "go bad" on a specific day. But over time, their ability to sprout, called their germination rate, slowly drops.
Some seeds stay strong for years. Others lose their spark after just one season. Testing before you plant means:
- No wasted garden space on seeds that won't grow
- No wasted time waiting for sprouts that never come
- More confidence when planting day arrives
For families in Zone 6, late winter (around February) is actually the perfect time to run this test. Why? Because you're getting ready to start seeds indoors before the last frost. Testing now means you'll know exactly which seeds are ready to grow: and which ones need replacing: before your indoor seed-starting window opens.
What You'll Need (All Under $10!)
This experiment is wonderfully cheap. You probably have most of these supplies at home already.
| Item | Estimated Cost |
|---|---|
| Paper towels | $1–2 (or free from home) |
| Plastic zip-top bags (sandwich size) | $1–2 |
| Permanent marker or masking tape + pen | $1 (or free from home) |
| Old seed packets (the stars of the show!) | Free |
| Spray bottle with water (optional) | $1–2 |
| Total | Under $5 in most cases |
Grown-up note: If you need to buy supplies, a single roll of paper towels and a box of zip bags will last you dozens of tests across multiple seed types.
How Do You Do the Paper Towel Germination Test? (Step-by-Step)
This is where the fun begins. Follow these steps carefully, and you'll have real scientific data in about a week.
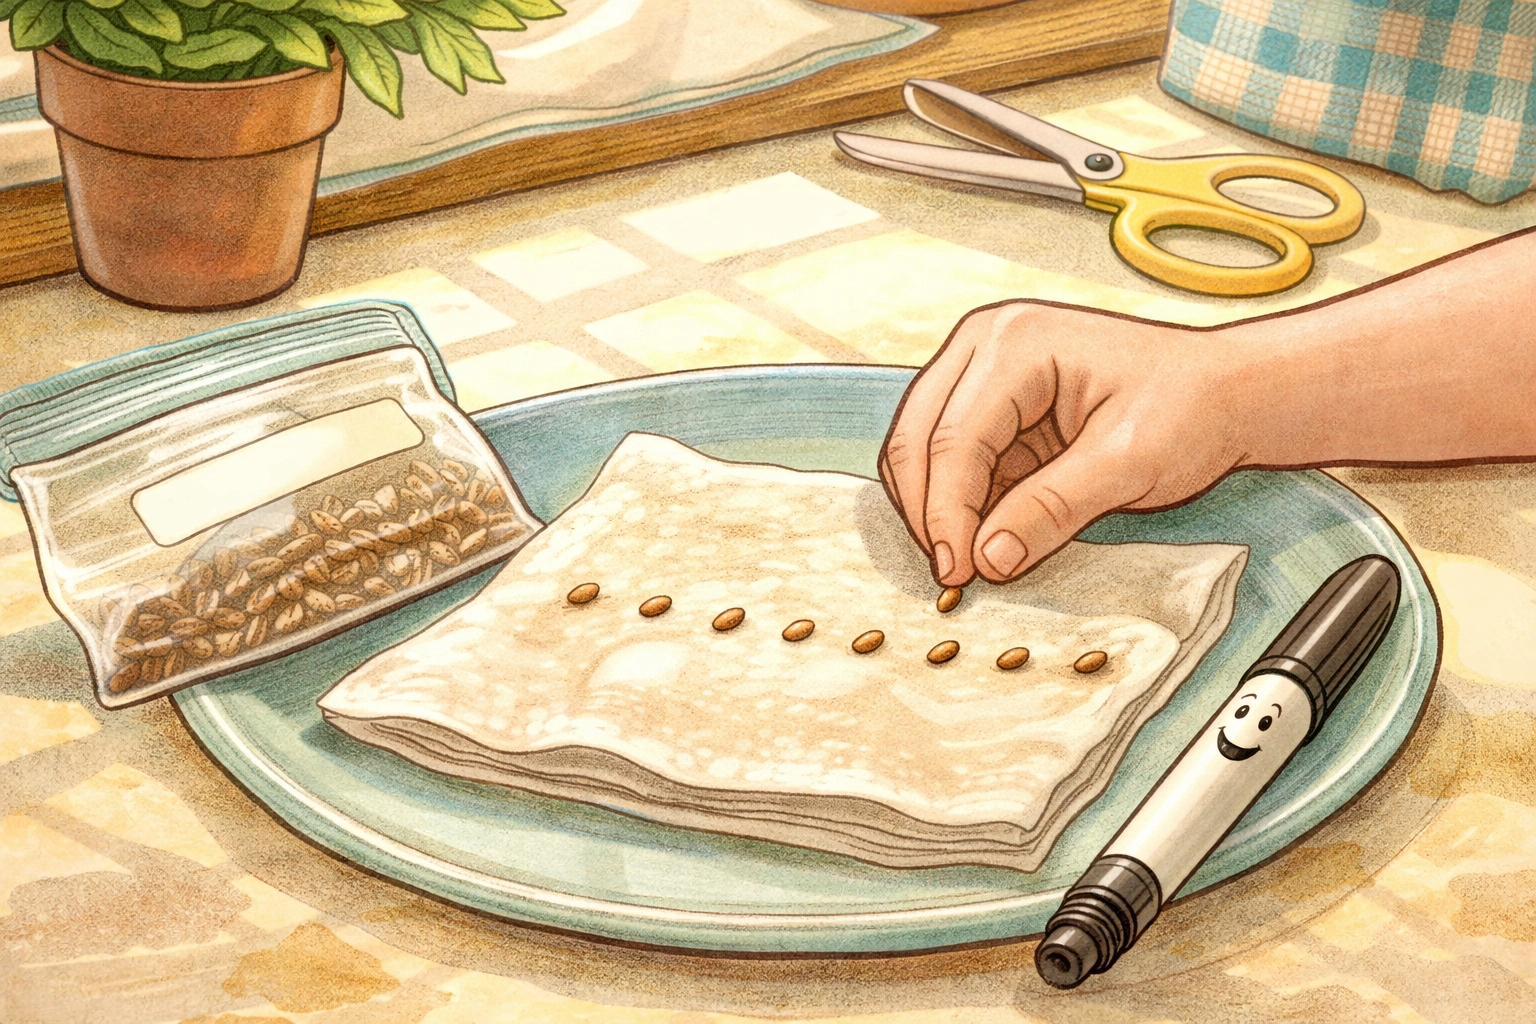
Step 1: Dampen Your Paper Towel
Fold a paper towel in half, then wet it until it's evenly damp: like a wrung-out sponge. It should be moist but not dripping.
Step 2: Count Out Your Seeds
Place exactly 10 seeds from one packet onto the damp towel. Space them out in a neat row so you can see each one clearly. (Ten seeds makes the math easy later!)
Step 3: Fold and Seal
Fold the paper towel gently over the seeds, then slide the whole thing into a plastic zip-top bag. Seal it most of the way, leaving a tiny gap for air.
Step 4: Label Everything
Use a marker to write the seed type and today's date on the bag. Trust us: after a few days with multiple bags, you'll forget which is which!
Step 5: Find a Warm Spot
Place your bag somewhere warm: around 70°F is ideal. A sunny windowsill, the top of the refrigerator, or near (not on!) a heating vent all work great.
Step 6: Check Daily
Peek at your seeds once a day. If the towel looks dry, open the bag and mist it lightly with water. You want consistent dampness, not a puddle.
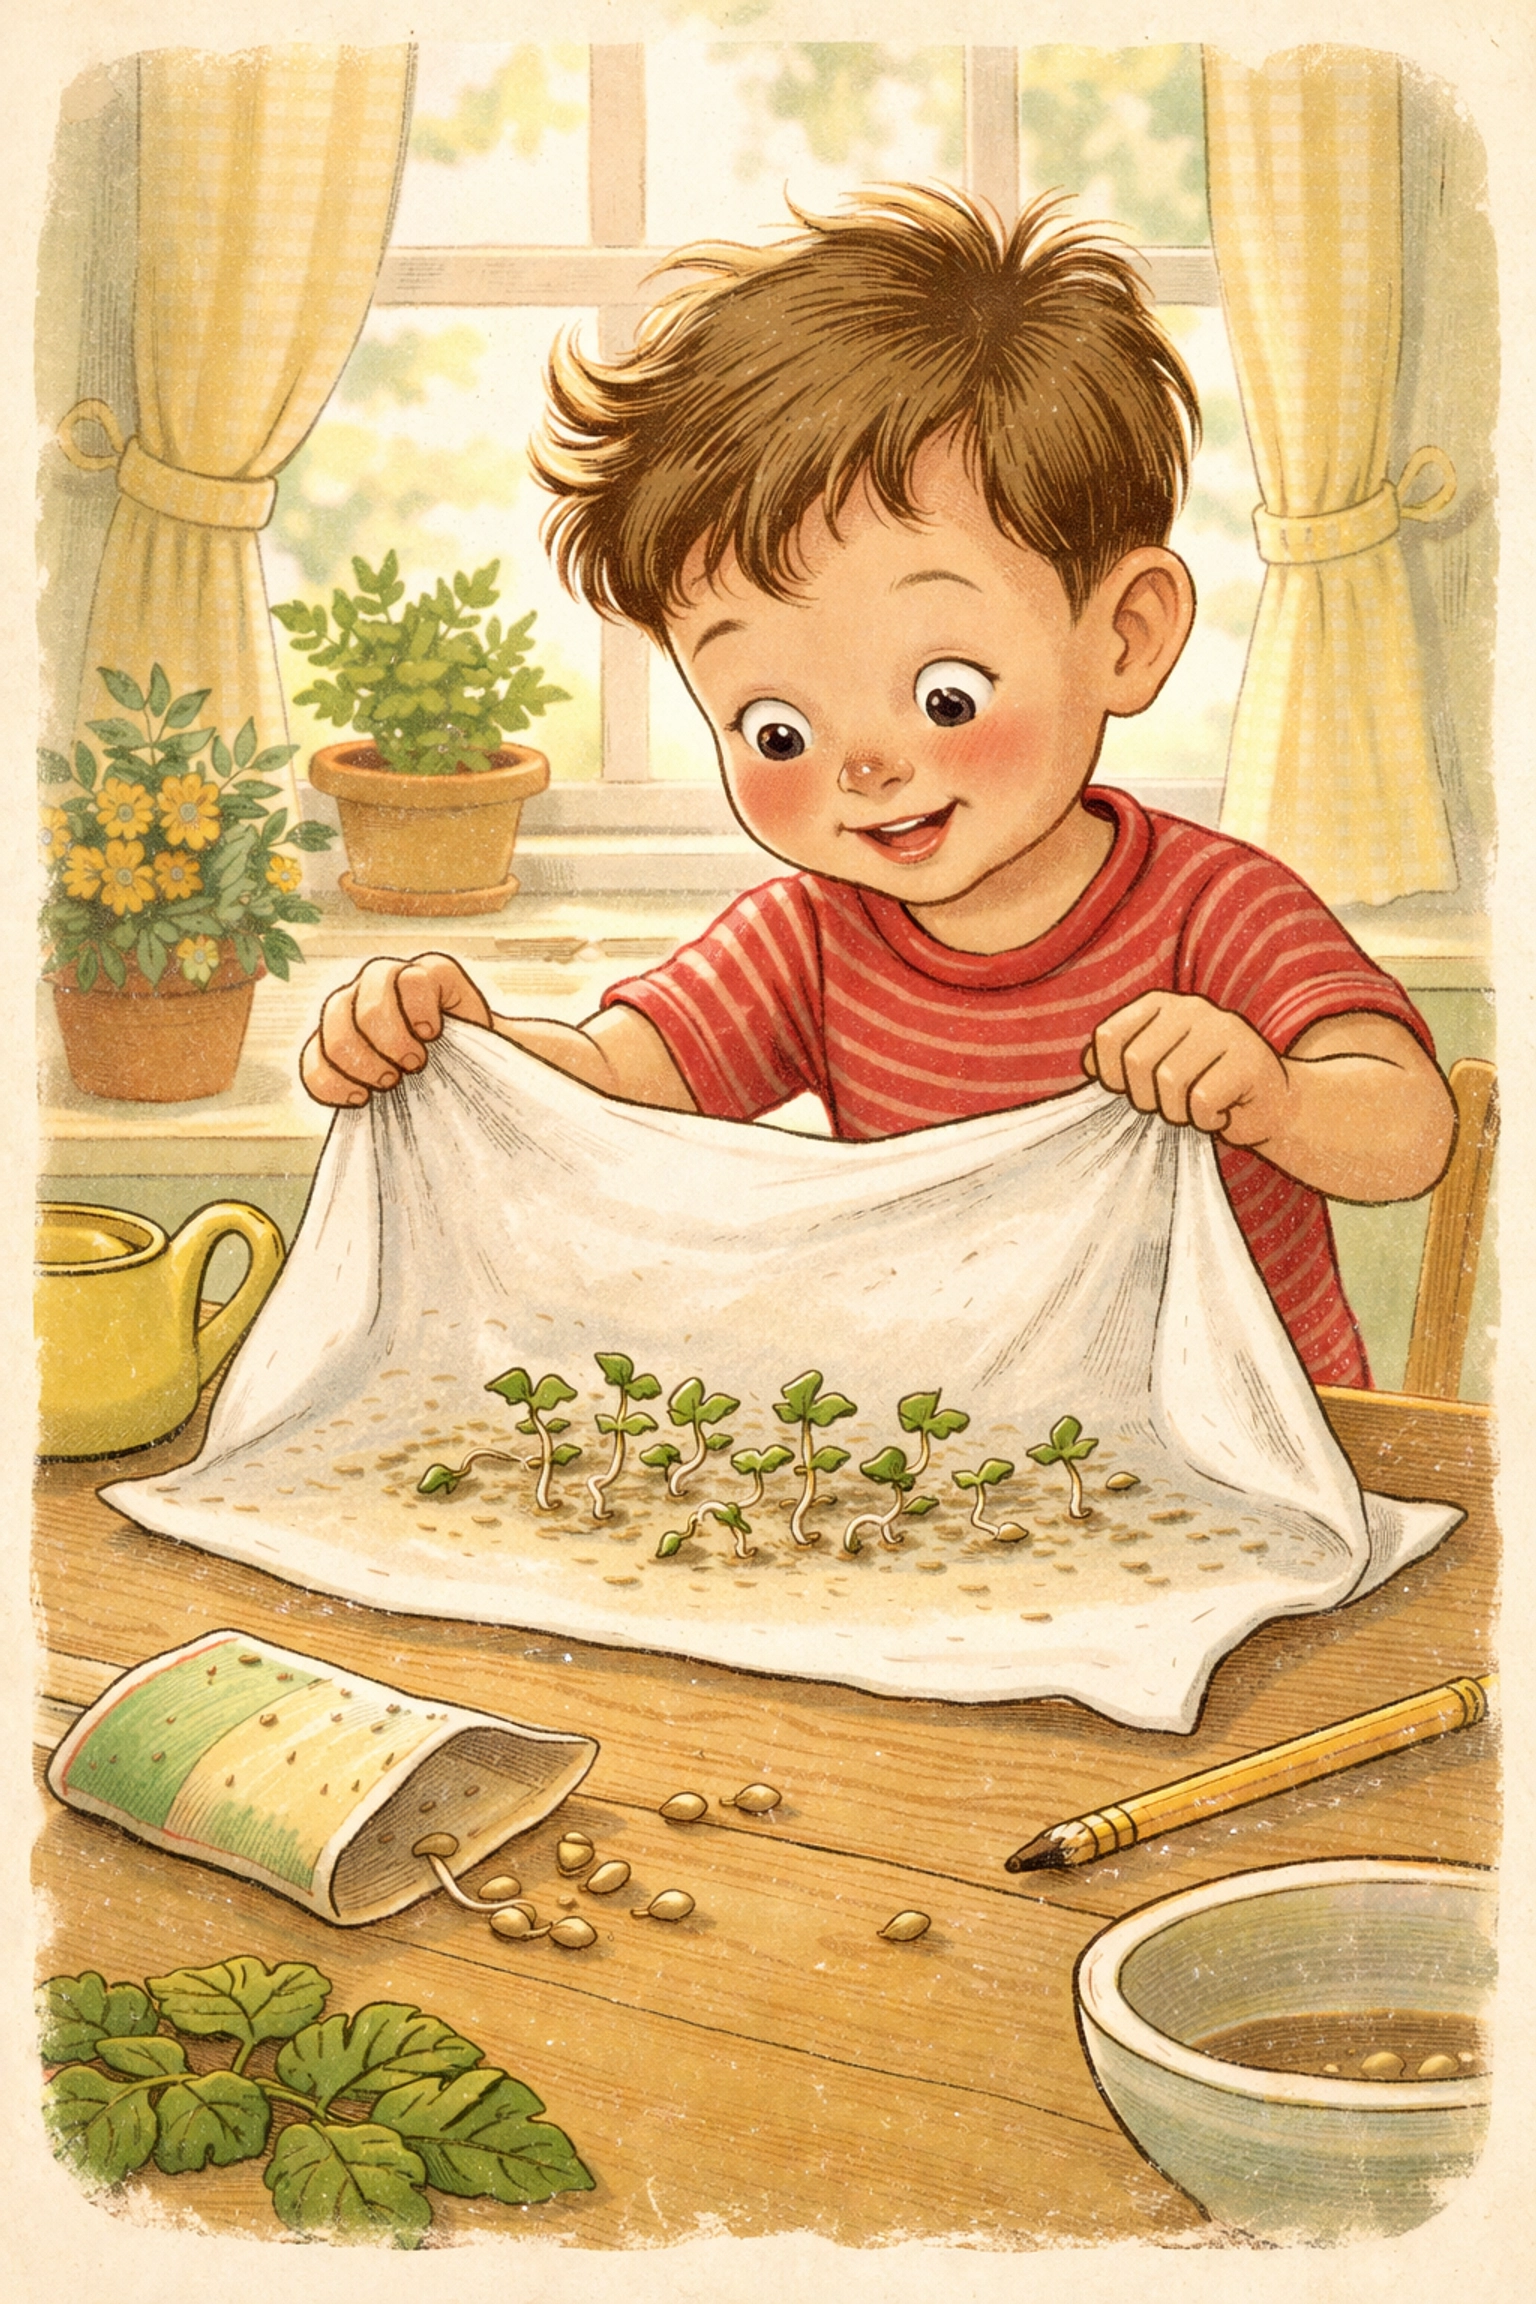
Step 7: Count Your Sprouts (Days 7–10)
After about a week, carefully unfold your paper towel. Count how many seeds have sprouted: look for tiny white roots or green shoots poking out.
How to Read Your Results (The Easy Math)
Here's where kids get to be real scientists. You're calculating your germination rate: the percentage of seeds that sprouted.
The formula: Sprouted seeds ÷ 10 = Germination rate
So if 7 out of 10 seeds sprouted, your germination rate is 70% (or 7 ÷ 10 = 0.70).
| Germination Rate | What It Means | What to Do |
|---|---|---|
| 80–100% | Excellent! Seeds are healthy. | Plant as directed on the packet. |
| 50–79% | Still usable, but weaker. | Plant extra seeds to make up for lower sprouting. |
| Below 50% | Time to retire these seeds. | Recycle the packet and get fresh seeds. |
Safety Notes for Families
This project is very low-risk, but a few quick reminders:
- Wash hands after handling seeds: some are treated with coatings.
- Keep bags away from pets and very young children: plastic bags can be a suffocation hazard.
- Don't eat the seeds or sprouts from this test. This is for observation, not snacking!
- Supervise marker use with younger kids to avoid accidental artwork on furniture.
What Can This Experiment Teach Kids? (The Bigger Lesson)
Beyond the science, the paper towel test is a quiet little teacher of life skills.
Patience: You can't rush a seed. Checking every day and waiting for change teaches kids that good things take time.
Observation: Noticing small differences: a tiny root tip, a seed that swelled but didn't crack: sharpens attention to detail.
Handling disappointment: Sometimes seeds don't sprout. And that's okay! Learning that failure is just information (not the end of the world) is a powerful lesson for young gardeners.
Ask your child: "How did it feel to wait? What surprised you? What will you do differently next time?"
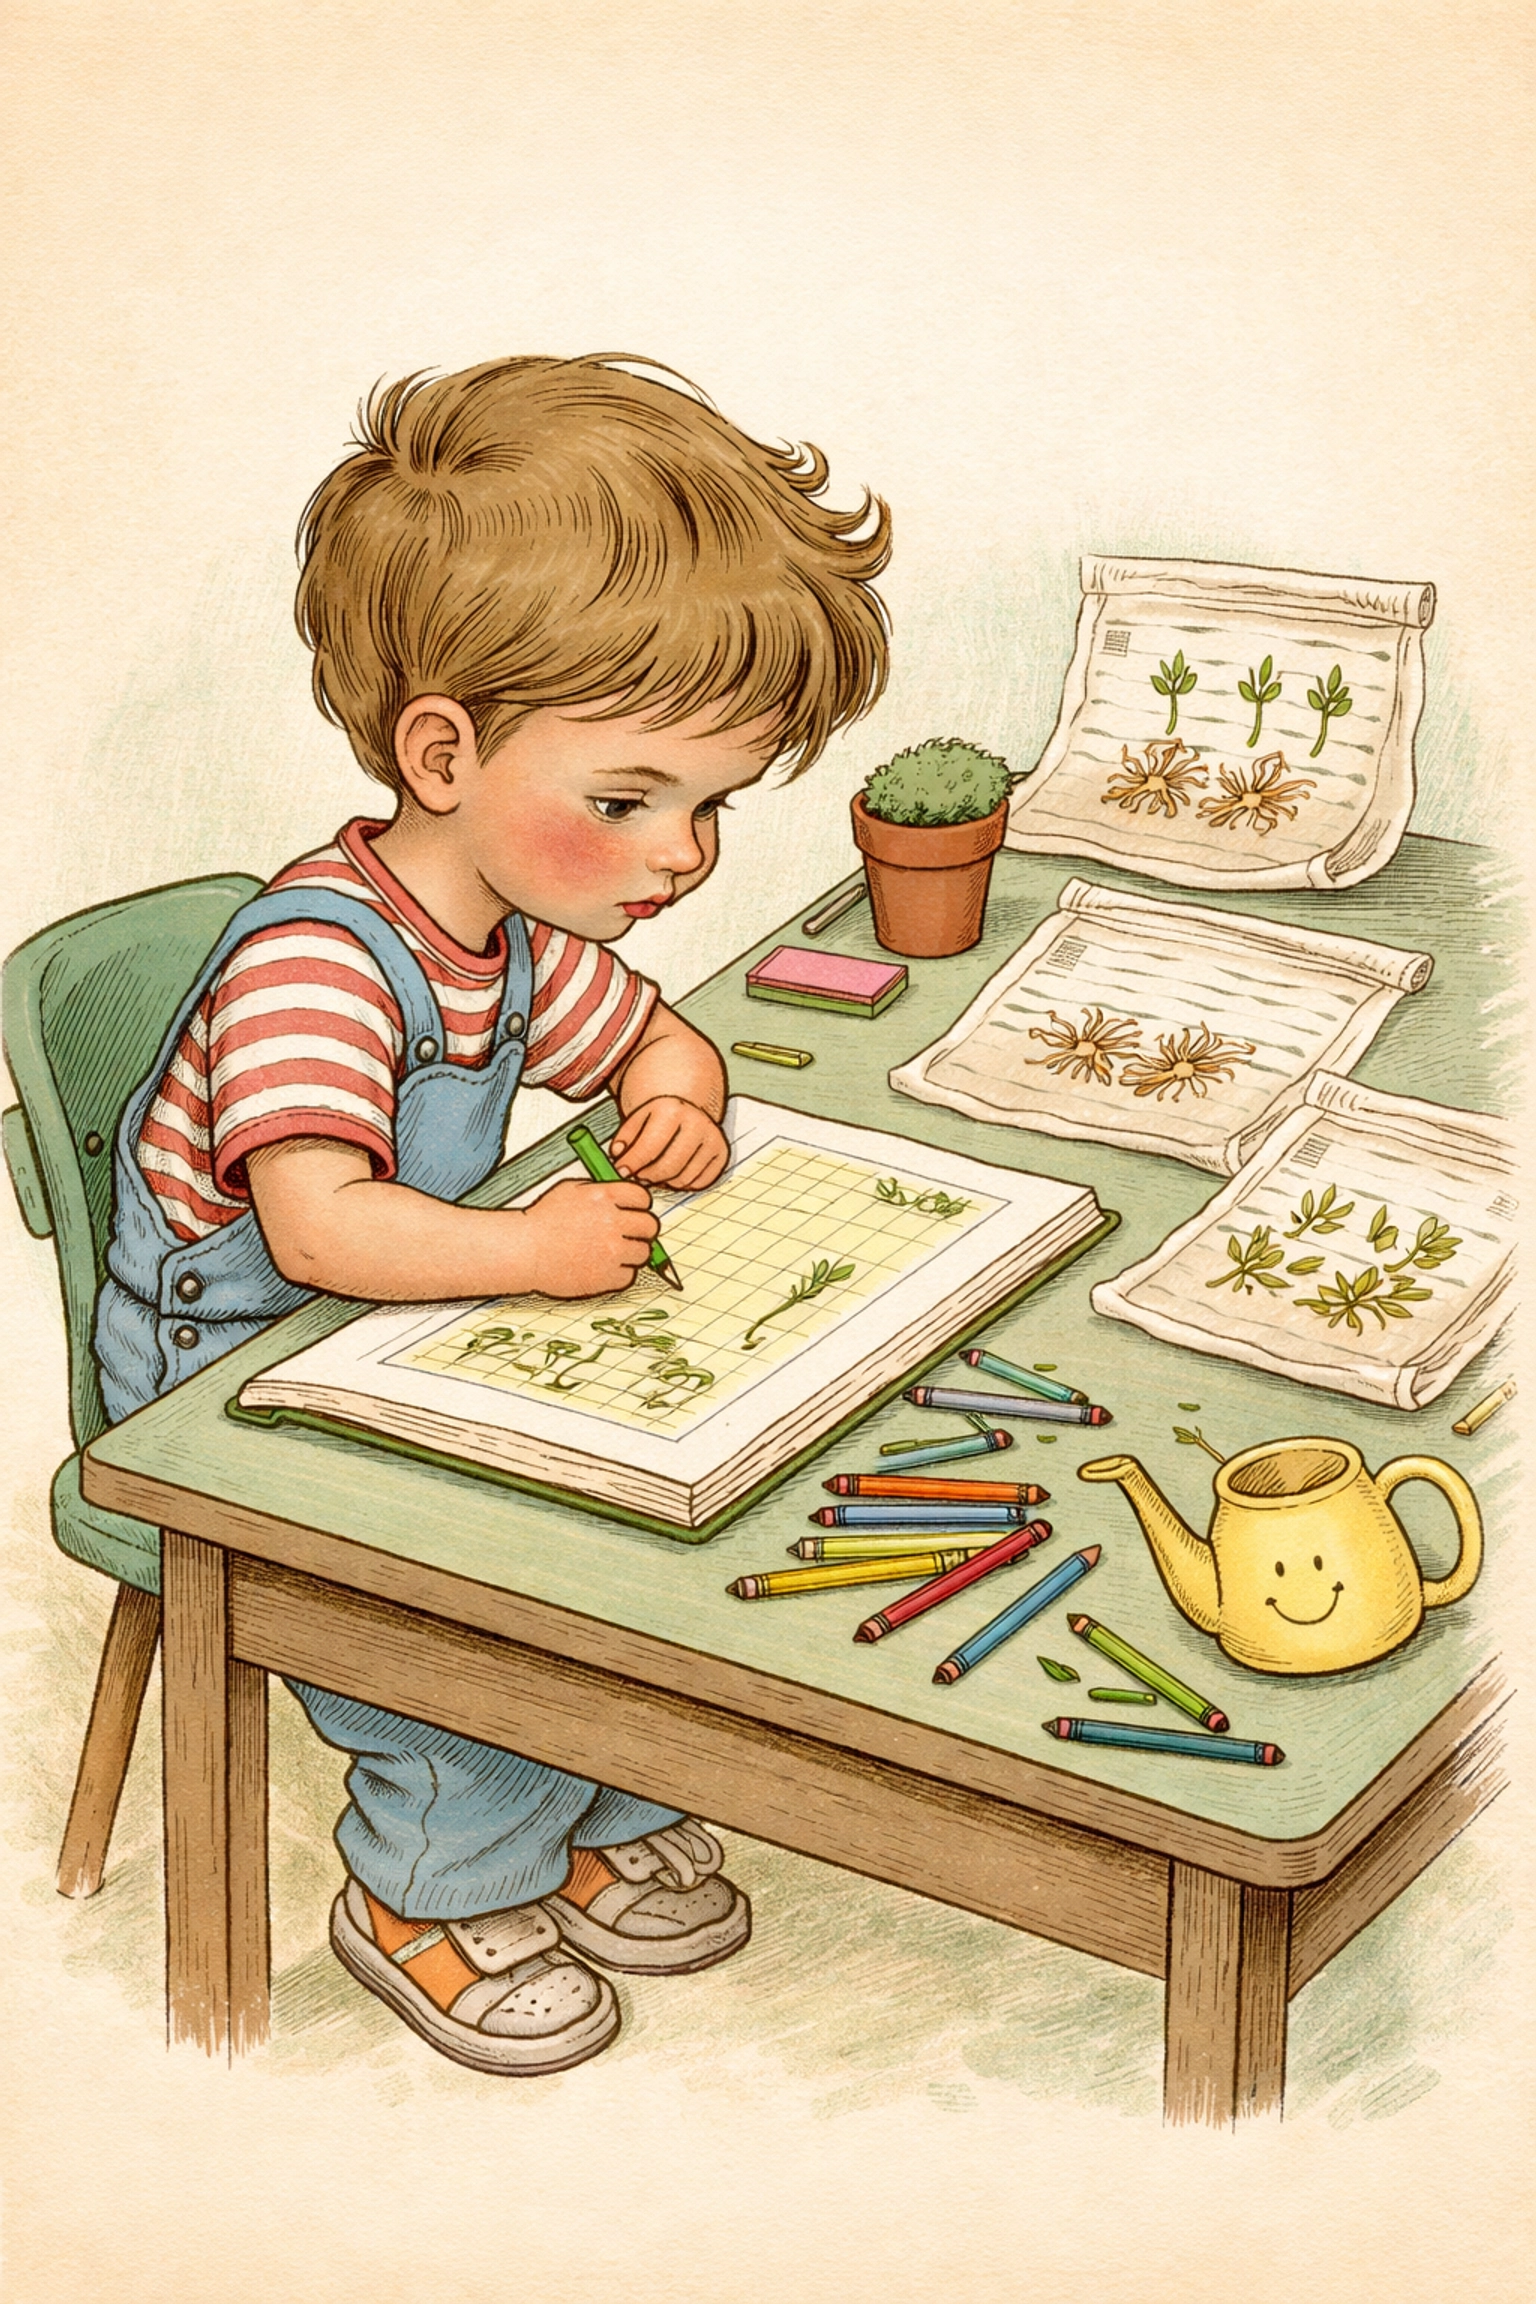
Printable Mini Worksheet: My Seed Test Data Sheet
Have your child copy or print this simple chart to track their experiment. Drawing it by hand is part of the fun!
My Paper Towel Seed Test
Scientist Name: ____________________
Date Started: ____________________
| Seed Type | Number Planted | Number Sprouted | Germination Rate |
|---|---|---|---|
| _________ | 10 | _____ | _____% |
| _________ | 10 | _____ | _____% |
| _________ | 10 | _____ | _____% |
My Observations:
What I Learned:
Would I plant these seeds? (Circle one): YES / PLANT EXTRA / NO, GET NEW SEEDS
Frequently Asked Questions
How long does the paper towel test take?
Most seeds will show results within 7 to 10 days. Some fast germinators (like radishes or beans) may sprout in just 3–5 days, while slower seeds (like peppers or parsley) can take up to two weeks.
Can I plant the sprouted seeds from the paper towel?
Yes! If a seed sprouts during your test, you can carefully transplant it into soil. Just be very gentle with the tiny root: it's fragile.
What's the best time of year to do this test?
For Zone 6 families, late January through February is ideal. You'll have results before your indoor seed-starting season begins, so you can plan your garden with confidence.
Does this test work for all types of seeds?
It works for most vegetable, herb, and flower seeds. Very tiny seeds (like carrots or lettuce) can be trickier to handle, but it's still possible with tweezers and patience.
Ready to Test Your Seeds?
Grab those old packets, round up the kids, and turn a rainy afternoon into a real science experiment. You'll save money, learn something new, and start your growing season with seeds you know are ready to sprout.
Happy testing!