


Quick Answer: You can create stunning tie-dye style art using just coffee filters, washable markers, and a little water from the tap. The colors spread and blend like magic when water hits the ink, and the whole project takes about 10 minutes of active time. No craft store run required, everything you need is likely already in your kitchen.
The snow is piling up, the roads are a mess, and your kids just announced they're "sooooo bored" for the fourteenth time today. Sound familiar?
Here's the good news: you've probably got everything you need for this activity sitting in your pantry right now. Coffee filters aren't just for your morning brew, they're secretly one of the best canvases for mess-free art. The paper is thin enough that colors spread beautifully, but sturdy enough that it won't fall apart when wet.
Let's turn that cabin fever into creative energy.
What Supplies Do You Need for Coffee Filter Art?
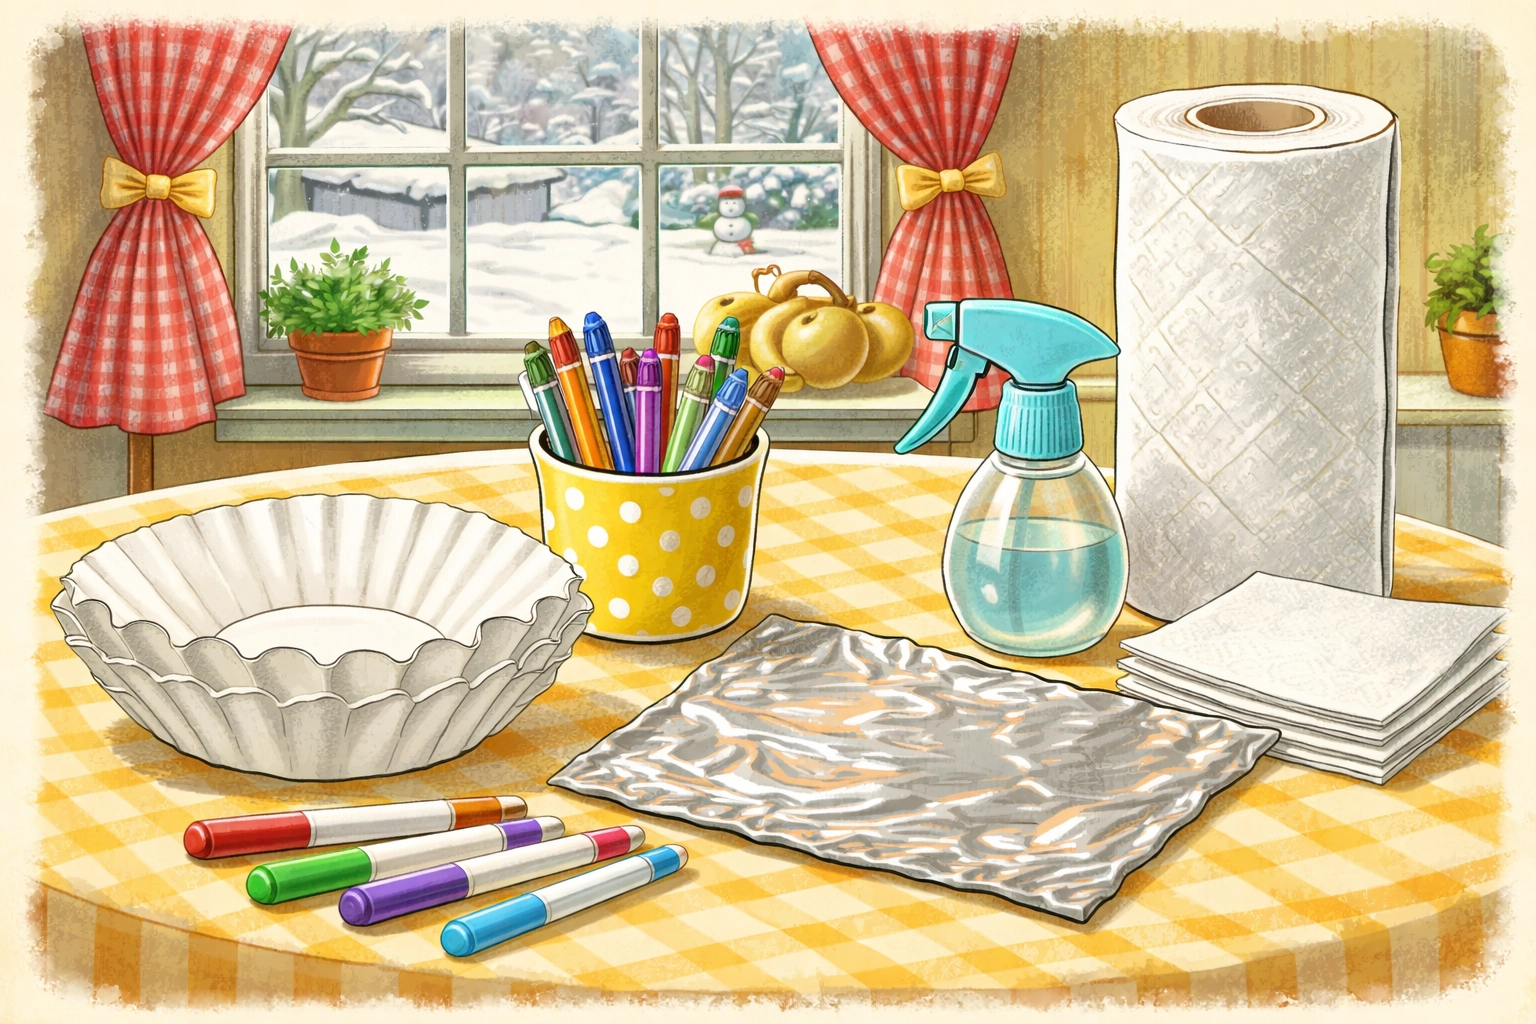
Before you start digging through drawers, here's what you're working with. Chances are you won't need to brave the snow for any of it.
| Material | Where to Find It | Notes |
|---|---|---|
| Coffee filters | Kitchen pantry | Cone or basket style both work |
| Washable markers | Kid's art supplies or junk drawer | Water-based markers like Crayola work best |
| Water | Your tap | Room temperature is fine |
| Spray bottle, paintbrush, or eyedropper | Kitchen or bathroom | Any method to apply water works |
| Aluminum foil or newspaper | Kitchen drawer | For protecting your work surface |
| Paper towels | Pantry | Optional, for drying hands |
Don't have a spray bottle? No problem. A paintbrush dipped in water, an eyedropper, or even wet fingers work just fine. This is snow day crafting, we improvise.
How Do You Make Coffee Filter Color Pop Art Step by Step?
This project is simple enough for toddlers but satisfying enough for older kids (and let's be honest, adults too). Here's how to do it:
Step 1: Set Up Your Mess-Free Zone
Lay down a sheet of aluminum foil on your work surface. This is the secret to keeping things tidy, foil catches any water drips and prevents marker colors from bleeding onto your table. No foil? Newspaper works too, though colors may transfer a bit.
Step 2: Flatten Your Coffee Filter
Take a coffee filter and flatten it out. You can leave it as a circle or fold it in half, quarters, or even accordion-style for different effects. Each folding method creates unique patterns when the colors spread.
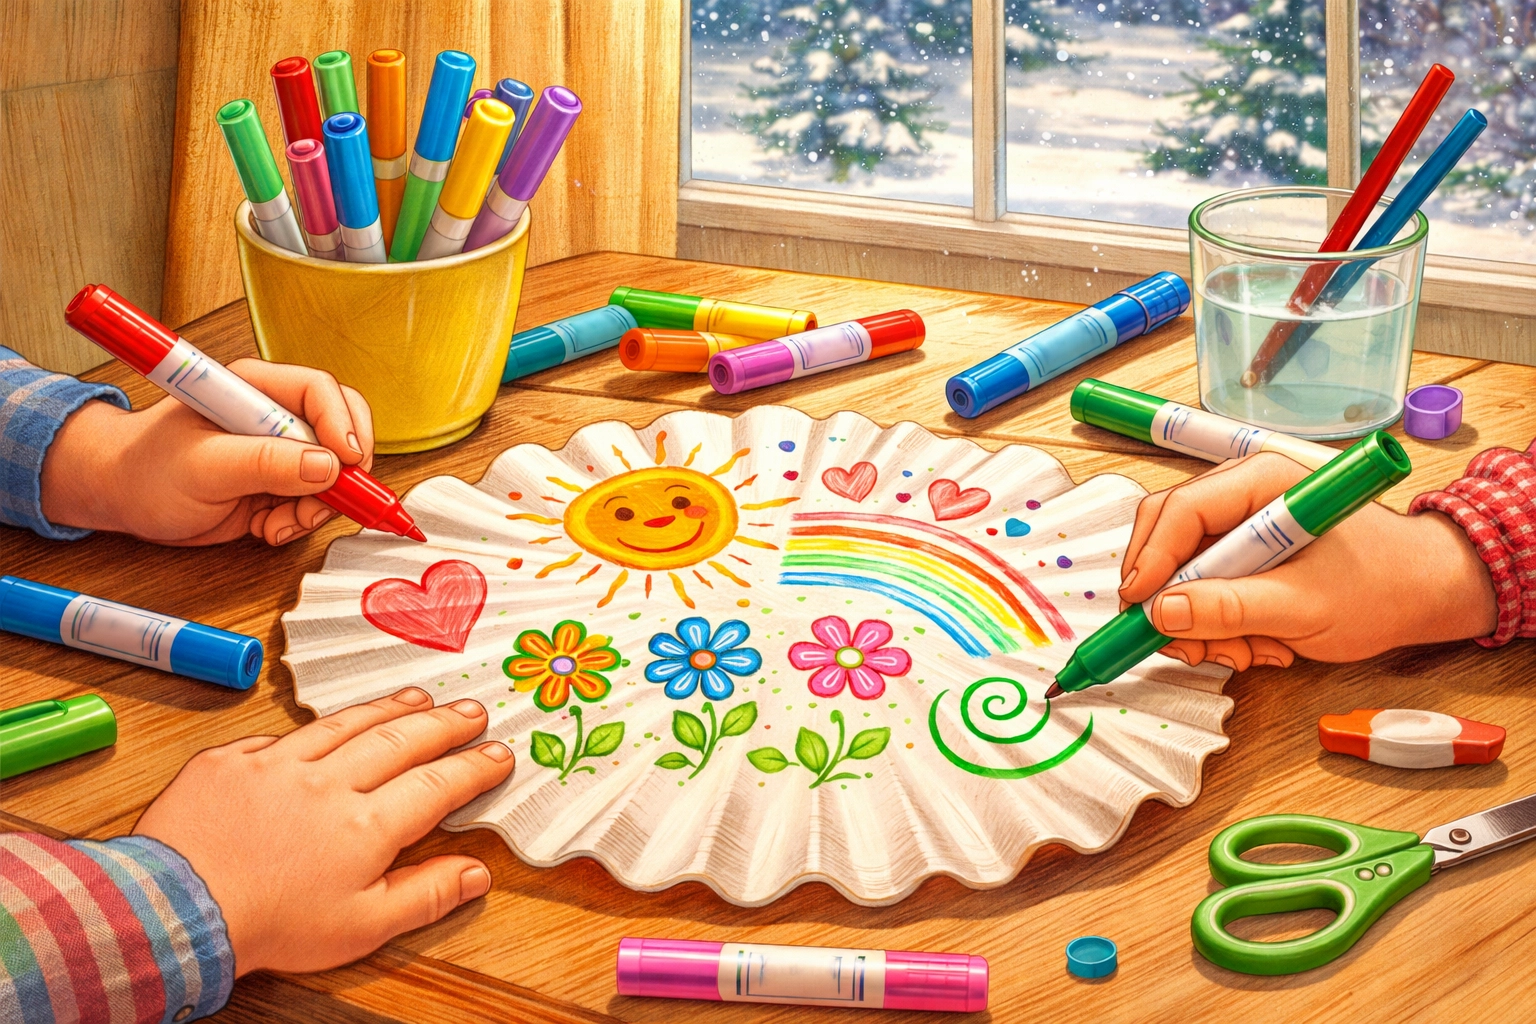
Step 3: Go Wild with the Markers
Hand over the washable markers and let your kids draw whatever they want. Dots, swirls, lines, scribbles, it all works. A few tips that help:
- Press and hold the marker tip on the filter for a few seconds to deposit more ink
- Focus colors near the center if you want them to spread outward
- Layer different colors close together to see them blend into new shades
- Leave some white space, you don't need to color every inch
This is the fun part. There's no wrong way to do it.
Step 4: Add Water and Watch the Magic
Here's where the "color pop" happens. Using your spray bottle, paintbrush, or eyedropper, add water to the coffee filter. You want to saturate it completely, not dripping wet, but thoroughly damp.
As the water spreads through the filter, it carries the marker ink with it. Colors will bleed, blend, and swirl together. Blue and yellow might meet to create green. Red and blue might make purple. It's a mini science lesson wrapped in art.
Pro tip: Add water slowly and watch as each section transforms. Kids love seeing the colors "walk" across the paper in real time.
Step 5: Let It Dry Completely
Place your finished filter flat on the foil or newspaper and let it dry. This typically takes about 20-30 minutes depending on how wet it got. Don't rush this step, picking up a wet filter can tear it or smudge your design.
Once dry, you've got a beautiful, one-of-a-kind piece of art.
What Can You Make with Finished Coffee Filter Art?
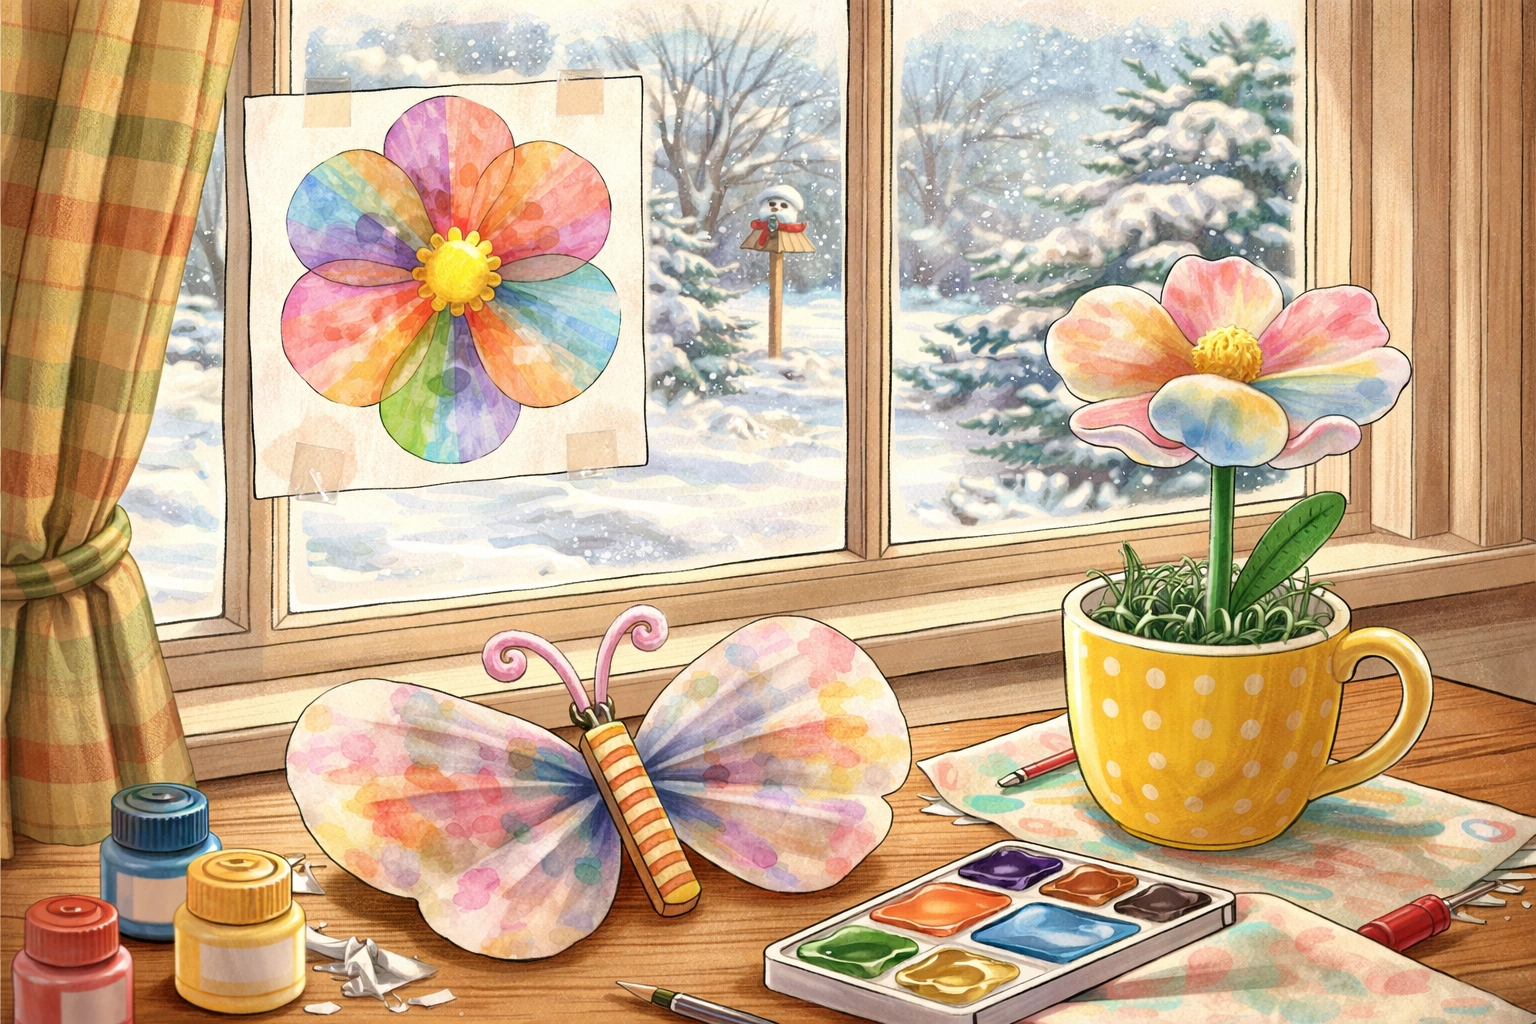
Here's where this craft really earns its keep. Those dried filters can become:
- Window decorations (tape them up and watch the light shine through)
- Flowers (scrunch the center and attach to a pipe cleaner or straw stem)
- Butterflies (pinch the middle with a clothespin for the body)
- Garlands (string several together for a colorful snow day banner)
- Gift wrap accents (glue onto packages for homemade flair)
One activity, multiple projects. That's the kind of mileage you need when you're snowed in.

Why Do the Colors Spread Like That?
If your kids ask "how does this work?" (and they probably will), here's a simple explanation:
The water acts like a tiny river flowing through the coffee filter paper. As it moves, it picks up the marker ink and carries it along. Different colors travel at different speeds depending on what's in the ink, which is why you see them separate and blend in interesting ways.
This process is called chromatography, and scientists actually use a similar technique to separate and analyze mixtures. So yes, your snow day craft is basically a science experiment. Feel free to drop that knowledge casually.
Tips for Keeping This Activity Truly Mess-Free
Snow days are chaotic enough. Here's how to keep the cleanup minimal:
- Aluminum foil is your best friend, it catches everything and can be tossed when you're done
- Use washable markers only, permanent markers won't spread the same way and create actual messes
- Keep paper towels nearby for wet hands
- Work one filter at a time to avoid a soggy pile-up
- Designate a drying zone away from foot traffic
This is genuinely one of the lowest-mess art projects out there. The water stays contained, the markers are washable, and the filters don't shed or crumble.
Frequently Asked Questions
Can you use regular paper instead of coffee filters?
You can try it, but regular paper doesn't absorb water the same way. Coffee filters are designed to let liquid pass through, which is exactly what makes the colors spread so beautifully.
Do permanent markers work for this project?
Not really. Permanent markers are oil-based and won't dissolve in water the same way. Stick with washable, water-based markers for the best color diffusion.
What age is this activity good for?
Kids as young as two can scribble on filters and watch colors spread. Older kids can experiment with folding techniques and color theory. It scales well.
How long does the whole project take?
Active time is about 10 minutes per filter. Drying takes another 20-30 minutes. You can easily fill an hour making several filters.
Can you speed up the drying time?
You can use a hairdryer on low heat, but air drying gives the best results without risking tears or warping.
What if we don't have coffee filters?
Paper towels or white napkins can work in a pinch, though the results will look different. Coffee filters really do work best for this technique.
Is this activity safe for toddlers?
Yes, as long as you're using non-toxic washable markers and supervising the water portion. No small parts, no dangerous materials.
Can you reuse the aluminum foil?
If it's not too wet or stained, sure! Otherwise, it can be recycled with your regular aluminum.
References
- Crayola: Coffee Filter Flowers Activity
- Steve Spangler Science: Chromatography Experiments
Tierney Family Farms provides educational content for families. We're not scientists, just folks who love a good snow day project. Always supervise children during crafts and use materials as intended by their manufacturers.


