Project Objective:
Learn how to grow fast, low-mess indoor Microgreens in under 20 minutes.
Ideal DYI Project for: families and classrooms who want to have fun learning about indoor gardening.
Time & Budget: 20 minutes to set up • 7–14 days to harvest • About $10–15 in basic supplies
Project Summary: Kids love wins they can see. Microgreens are tiny vegetable seedlings you harvest when they’re 1–3 inches tall. They grow fast, taste great, and don’t need a backyard. You can start them today on a windowsill or under a small light. In this guide, you’ll set up a simple tray, sow seeds, and learn the science behind these baby greens so your family understands why the steps work. We’ll keep it practical, affordable, and fun. Microgreens really can be ready in about a week for some varieties, and most are harvestable in 7–21 days depending on the crop.
Why microgreens are perfect for families and classrooms
- Quick payoff. Many brassicas like broccoli and radish are ready in 8–10 days; peas and kale follow soon after. Kids see results fast, which keeps them engaged.
- Small space. A sunny window or a simple LED shop light works. Schools and apartments are fine.
- Teachable science. Seeds don’t need light to germinate; they need warmth, water, and air. After sprouting, they need strong light to grow sturdy and green.
- Food skills. Learn safe handling, harvest, and storage habits that translate to growing larger crops later.
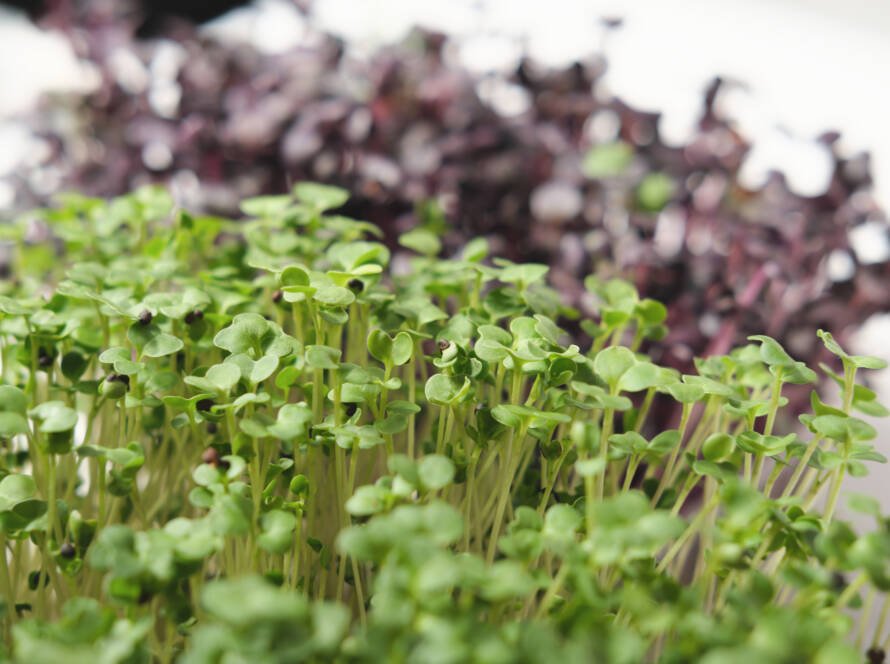
What are microgreens, exactly?
They are young, edible greens harvested just as the first “true leaves” appear, usually between 7 and 21 days after germination. They’re grown in a thin layer of soilless mix or fine potting medium.
The plan you’ll follow
You’ll start one tray with an easy “starter trio” that behaves well indoors: sunflower, pea, and radish. These have similar germination speeds, bold flavor, and kid-friendly textures. Expect the earliest harvests in about a week for radish and sunflower, with peas soon after.
Supply list (affordable and “shoppable”)
- One shallow tray with drainage holes, about 10×10 or 10×20 inches. Repurpose a produce clamshell if needed.
- One matching solid tray or baking sheet to catch water.
- Soilless seed-starting mix or fine potting mix, 1–2 quarts.
- Seeds labeled for microgreens: sunflower (black oil), radish, pea.
- Spray bottle for misting.
- Plastic cover: clear lid, plastic wrap, or a second tray to “blackout” for germination.
- Light source: sunny window, or a basic LED shop light with an outlet timer.
- Scissors for harvest.
- Paper towels and a salad spinner for washing and drying at harvest.
If you’re setting up a small classroom shelf, add a $10–$15 outlet timer so lights turn on and off without daily reminders. 14–16 hours of light per day is a common range used for leafy seedlings; some extension sources suggest as little as 6–8 hours by a bright south window, so use more light if plants look pale or “leggy.”
Step-by-step (10 steps, kid-ready)
- Prep the tray
Fill your tray with 1–1.5 inches of slightly damp soilless mix. Level the surface without packing it down. Bottom-water once so the medium is evenly moist. - Label and plan
Divide the surface into thirds. Label “sunflower,” “pea,” and “radish.” Kids can predict which will sprout first and record daily observations. - Sow seeds densely, not piled
Scatter seeds in a single layer, almost edge-to-edge. Press gently with a clean hand or card so each seed contacts the surface. - Mist and cover (“blackout”)
Mist the surface, then cover to create a humid “mini-greenhouse.” Darkness during the first 2–3 days supports even germination and keeps moisture in. - Create gentle pressure for big seeds
Stack an empty tray or a light book on top for sunflowers and peas. That weight helps big seeds shed hulls and sprout evenly. Remove weight once most seeds have popped. - Check daily
Lift the cover to mist if the surface looks dry. You want moist, not soggy. Good airflow prevents mold. A small fan on low helps. - Add light after sprouting
When you see white root hairs and bent “hooks,” remove the cover. Move the tray to a bright window or under a light about 4–6 inches above the greens. Keep lights on many hours per day; with windows only, aim for the sunniest spot you have. Increase light if stems look thin and stretched. - Water from below
Pour a half-inch of water into the bottom tray and let the medium wick it up for 10–15 minutes. Dump any leftover. Bottom watering reduces splashing and keeps stems clean. - Harvest on time
Cut just above the medium when greens are 1–3 inches tall and have their first true leaves. Many radish, broccoli, and sunflower microgreens hit this stage around days 8–12; peas are often 10–15. - Wash, dry, store
Rinse harvest gently, spin or pat dry, and store in a vented container in the fridge. Most microgreens keep about 5–6 days when dry and cool.
Teaching moments: the simple science
- Germination basics. Seeds need water, warmth, and oxygen; light comes later. That’s why the first days happen under a cover.
- Light and “leggy” stems. After sprouting, plants need a lot of light to build chlorophyll and stay compact. If they lean, raise the light intensity or move them closer. Extension guidance for leafy seedlings often uses 14–16 hours of light on a timer; classrooms with bright south windows can succeed with fewer hours, but growth may be slower.
- Bottom watering = cleaner greens. Watering from below keeps the canopy dry and reduces splashing, which helps appearance and food handling.
- Microgreens vs sprouts. Sprouts are grown and eaten with seeds and roots in water; microgreens grow in a medium, and you only eat the above-ground stems and leaves. This matters for food handling.
How much will you harvest?
Home yields vary, but university extension sources report average 2-week yields for common trays grown without supplemental light. Your smaller home tray will scale down from those benchmarks. Use this as a learning target, not a test.
Pro tips
- Use seeds sold for microgreens. They’re cleaned and labeled for this purpose.
- Keep a simple log. Kids can track sow date, sprout date, first true leaves, and harvest.
- Trim hulls. If sunflower hulls cling, a light fingertip rub usually removes them.
- Rotate trays near windows. Turn 180 degrees daily for even light.
- Timer = sanity. Set 14–16 hours on, 8–10 hours off for consistent results under lights.
Common mistakes
- Too little light after sprouting. Stretched, pale stems mean you need brighter or longer light. Move the lamp closer or extend the hours.
- Overwatering from above. Splashing invites mess and lodging. Bottom water instead.
- Harvesting too late. Flavor turns stronger and stems toughen if you wait long after true leaves. Use the 1–3 inch cue.
- Food safety mix-ups with sprouts. Sprouts have different risks; microgreens still need clean tools, washed hands, and a rinse before eating.
FAQ
How many hours of light do microgreens need?
For indoor lights, many guides suggest around 14–16 hours per day on a timer. In a bright, south-facing window, 6–8 hours can work, but growth may be slower or leggier. Adjust based on plant look.
Can I regrow microgreens after cutting?
A few, like peas, sometimes regrow once. Most are one-and-done. Quality drops on regrowth, so it’s better to reseed a fresh tray.
How soon can we eat them?
Radish, broccoli, and sunflower often harvest in 8–12 days; peas take about 10–15 days; some herbs need longer.
How should we store them?
Rinse, dry well, and refrigerate in a ventilated container. Expect 5–6 days of good quality.
Are microgreens safe for kids?
Yes, with normal kitchen hygiene: clean hands, tools, containers, and rinse before eating. Remember that sprouts are a different product with higher contamination risk; we’re growing microgreens.
Disclaimer
This content is for entertainment and educational purposes only and does not constitute medical advice.
It is not written by licensed medical professionals.
References may change or be removed by their owners.
Information is believed accurate at posting, but errors may occur; verify independently.
Affiliate links may appear and commissions may be earned.
Portions may be AI-generated; accuracy not guaranteed. Use at your own risk.