


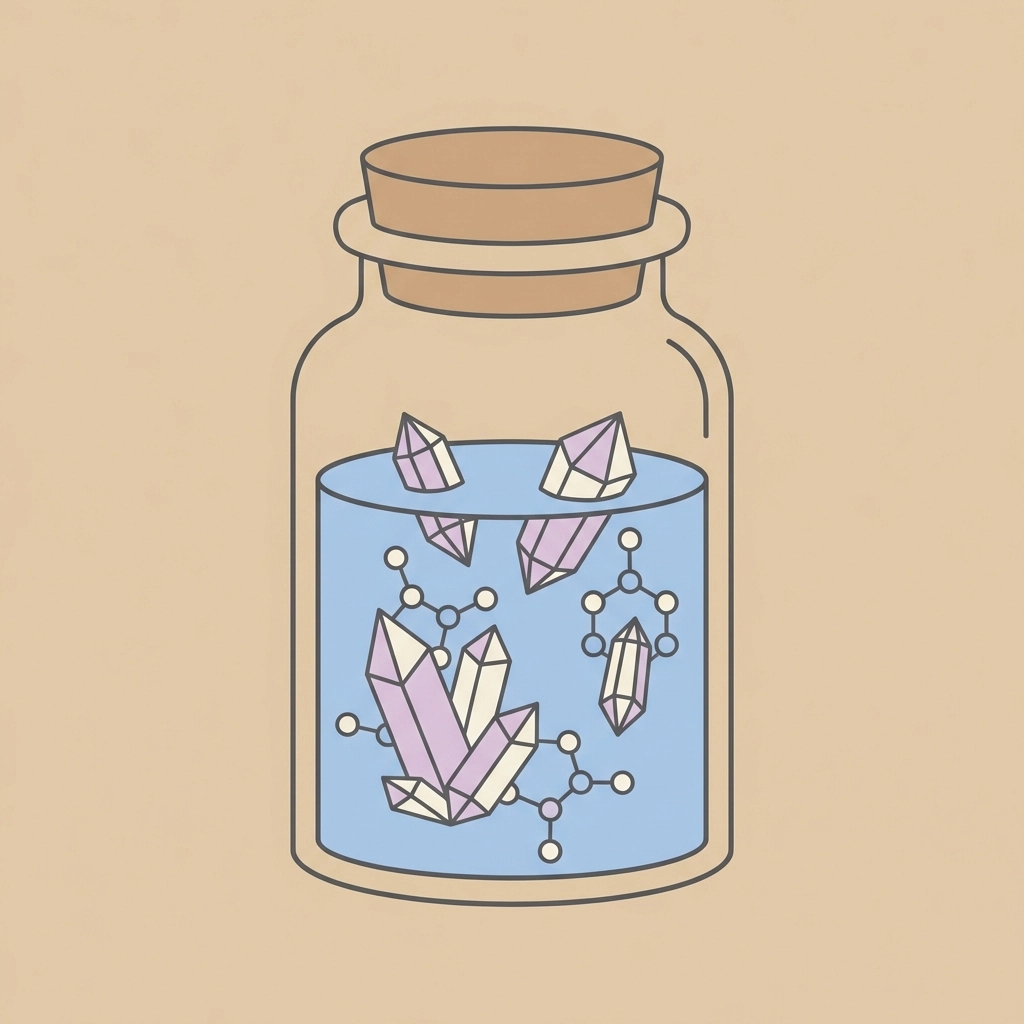
Yes: kids can grow real crystals at home using sugar, salt, borax, or alum dissolved in hot water. The process takes anywhere from a few hours to a week depending on the method. No special equipment required. Just patience, a jar, and basic kitchen supplies.
Crystal growing combines chemistry, observation, and hands-on learning into one satisfying project. The results are tangible. Kids watch molecules arrange themselves into geometric structures right before their eyes.
This guide covers four proven methods ranked by difficulty and visual payoff.
What Makes Crystals Form in the First Place?
Crystals form when dissolved substances come out of solution in an organized pattern.
Hot water holds more dissolved material than cold water. As the solution cools, excess molecules have nowhere to go. They attach to each other in repeating geometric arrangements.
This is called supersaturation.
The slower the cooling, the larger the crystals. Fast cooling produces many small crystals. Slow cooling produces fewer, larger ones.
Every crystal-growing experiment follows this same principle.
Method 1: Rock Candy (Sugar Crystals)
Best for: Beginners, younger children, edible results
Time required: 5–7 days
Difficulty: Easy
Rock candy uses only sugar and water. The crystals are safe to eat. This makes it ideal for kitchens with curious taste-testers.
Materials Needed
- 3 cups granulated sugar
- 1 cup water
- Glass jar (clean, heat-safe)
- Wooden skewer or cotton string
- Pencil or chopstick
- Clothespin (optional)
- Food coloring (optional)
Step-by-Step Instructions
- Boil 1 cup of water in a saucepan.
- Add sugar one cup at a time, stirring until fully dissolved.
- Remove from heat once all sugar dissolves and the solution looks clear.
- Let it cool for 15–20 minutes.
- Dip the wooden skewer in water, then roll it in granulated sugar.
- Let the coated skewer dry completely: at least 2 hours.
- Pour the cooled sugar solution into the glass jar.
- Add 2–3 drops of food coloring if desired.
- Lower the sugar-coated skewer into the jar.
- Rest the pencil across the jar’s mouth to suspend the skewer in the center.
- Cover loosely with a paper towel.
- Place in a location where it will not be disturbed.
Crystals appear within 2–3 days. Full growth takes about one week.
The sugar coating on the skewer acts as a seed. It gives the dissolved sugar molecules a starting point for attachment.
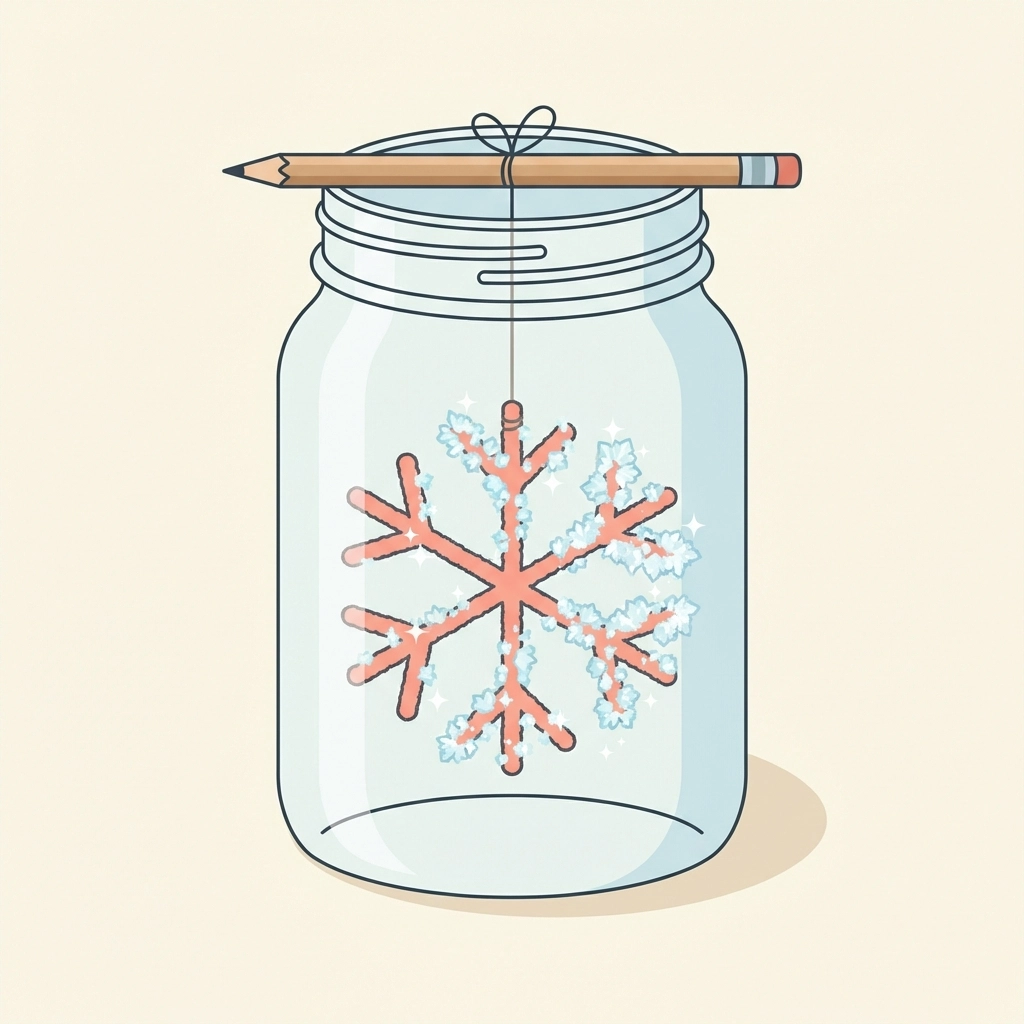
Method 2: Borax Crystals (Snowflakes and Shapes)
Best for: Decorative projects, science fair displays, older children
Time required: 12–24 hours
Difficulty: Moderate
Borax crystals grow faster than sugar crystals. They also form on shaped frameworks, allowing for creative designs.
Note: Borax is NOT edible. Adult supervision required.
Materials Needed
- 3 tablespoons borax powder (found in laundry aisle)
- 1 cup boiling water
- Pipe cleaners
- Glass jar (wide mouth)
- Pencil
- String
- Food coloring (optional)
Step-by-Step Instructions
- Bend pipe cleaners into a desired shape: star, snowflake, heart, or initial.
- Tie string to the pipe cleaner shape.
- Tie the other end of the string to a pencil.
- Boil 1 cup of water.
- Pour boiling water into the jar.
- Add 3 tablespoons of borax powder.
- Stir until the borax dissolves completely.
- Add food coloring if desired.
- Lower the pipe cleaner shape into the solution.
- Rest the pencil across the jar’s opening so the shape hangs freely.
- The shape should not touch the bottom or sides of the jar.
- Leave undisturbed overnight.
By morning, the pipe cleaner will be covered in sparkling crystals.
The borax solution supersaturates quickly as it cools. Crystals deposit onto the textured pipe cleaner surface within hours.
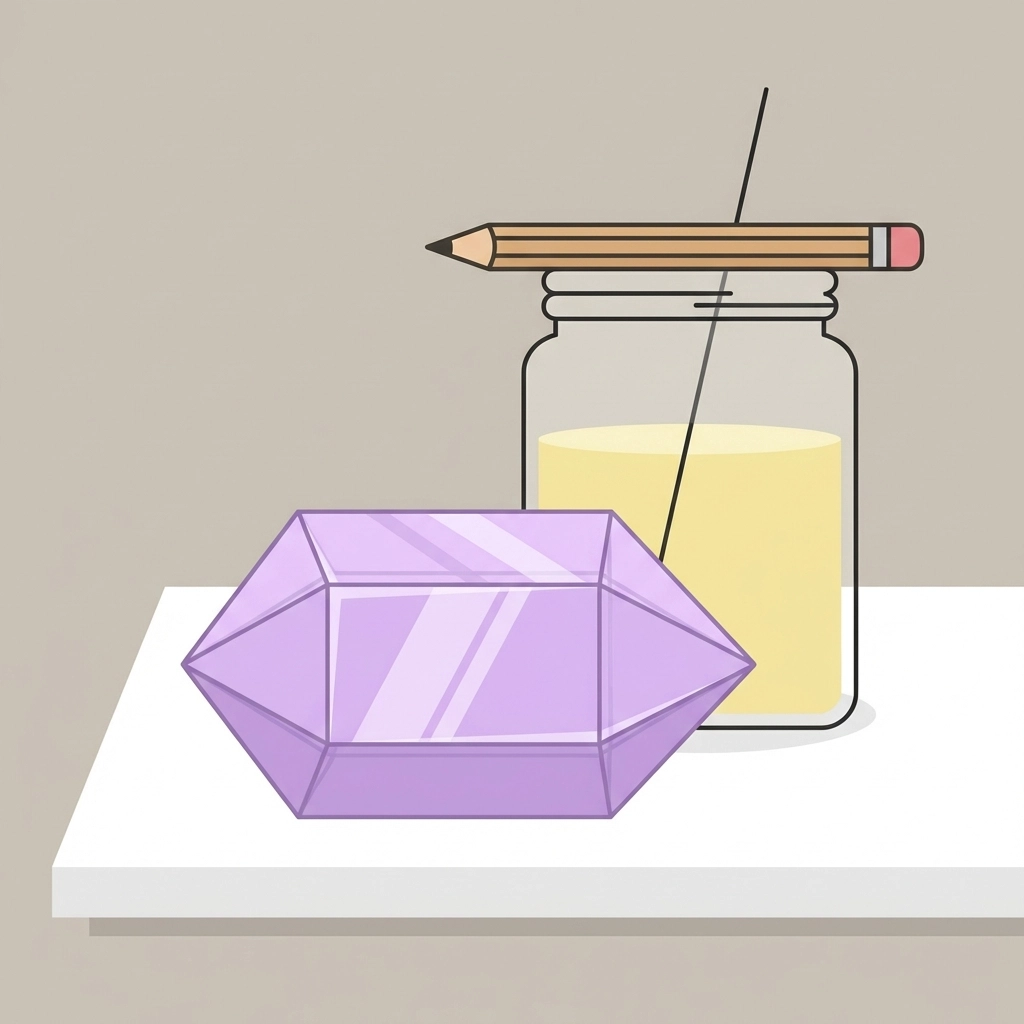
Method 3: Alum Crystals (Large Single Crystals)
Best for: Older kids, multi-day science projects, impressive specimens
Note: Alum Crystals are NOT edible. Adult supervision required.
Time required: 1–2 weeks
Difficulty: Advanced
Alum produces the largest, clearest crystals of any household method. The process requires patience and a two-stage approach.
Materials Needed
- 2.5 tablespoons alum powder (found in spice aisle)
- 1/2 cup hot water
- 2 clean glass jars
- Fishing line or nylon thread
- Pencil
- Coffee filter
- Spoon
Step-by-Step Instructions
Stage 1: Grow Seed Crystals
- Heat 1/2 cup of water until very hot but not boiling.
- Add 2.5 tablespoons of alum powder.
- Stir until completely dissolved.
- Pour solution into a clean jar.
- Cover loosely with a coffee filter.
- Leave undisturbed for 24 hours.
Small crystals will form on the bottom of the jar. Select the largest, most well-formed crystal. This is the seed crystal.
Stage 2: Grow the Large Crystal
- Prepare a fresh alum solution using the same proportions.
- Let it cool to room temperature.
- Tie the seed crystal to fishing line.
- Tie the other end to a pencil.
- Suspend the seed crystal in the new solution.
- The crystal should hang in the middle, not touching any surface.
- Cover loosely and leave undisturbed.
- Check daily. The crystal will grow larger each day.
After one week, the crystal can reach marble size or larger. Some growers continue the process for several weeks, transferring to fresh solutions as needed.
Method 4: Salt Crystals (Quick Results)
Best for: Same-day projects, classrooms, very young children
Note: Salt Crystals are NOT recommended for eating. Adult supervision required.
Time required: 1–3 hours for initial crystals; overnight for better results
Difficulty: Easy
Salt crystals form faster than sugar but remain small. This method works well when time is limited.
Materials Needed
- 1/2 cup table salt
- 1 cup hot water
- Shallow dish or plate
- Dark construction paper (optional)
- Magnifying glass (optional)
Step-by-Step Instructions
- Heat 1 cup of water until steaming.
- Add salt gradually, stirring constantly.
- Continue adding salt until no more dissolves.
- Pour a thin layer of solution into a shallow dish.
- For better visibility, place dark construction paper in the dish first.
- Set the dish in a sunny window or warm location.
- Wait.
As water evaporates, salt crystals form on the surface and edges. A magnifying glass reveals the cubic structure of each crystal.
This method demonstrates evaporation as well as crystallization.
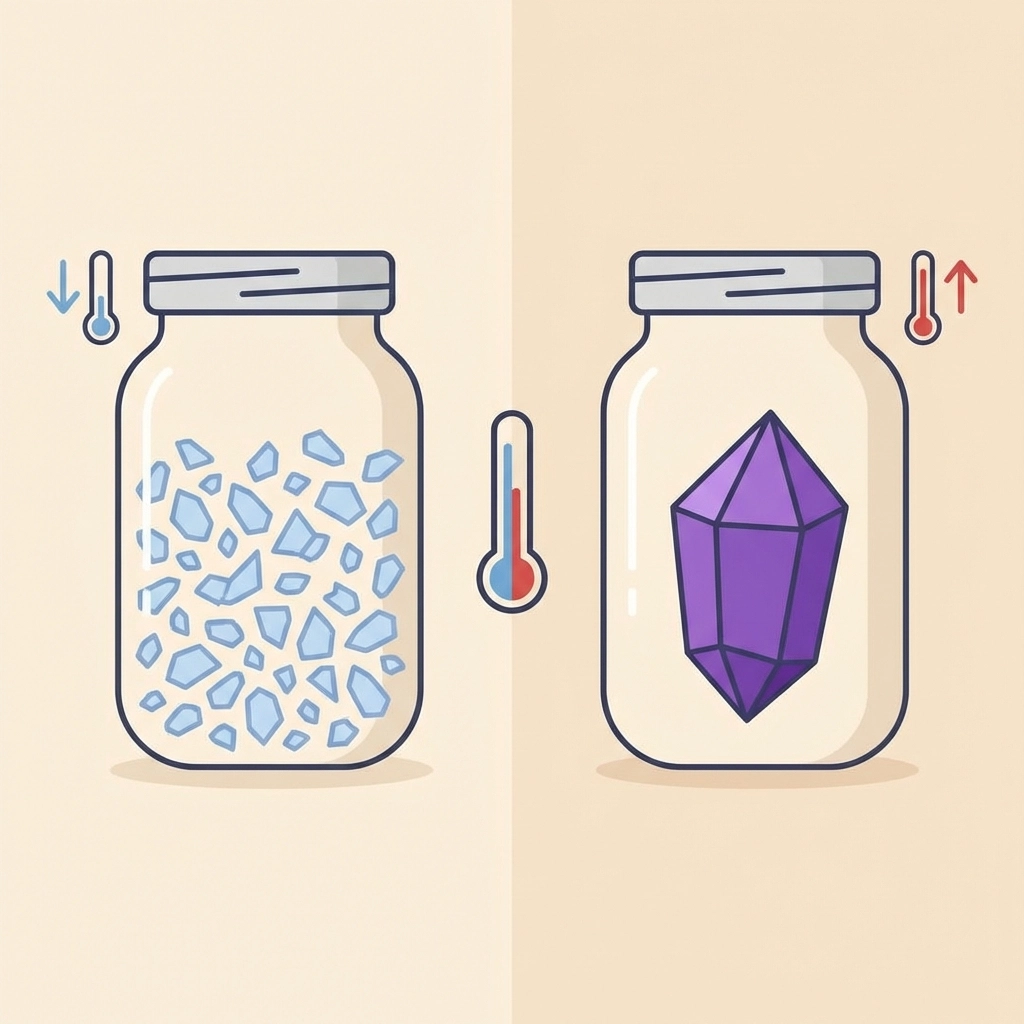
What Factors Affect Crystal Size?
Several variables influence final crystal size and quality.
- Cooling speed. Slower cooling = larger crystals.
- Solution concentration. More dissolved material = more crystal growth potential.
- Vibration. Movement disrupts crystal formation. Keep jars still.
- Dust and debris. Particles in the solution create multiple small crystals instead of fewer large ones.
- Container cleanliness. Residue provides unwanted nucleation sites.
Optimal conditions: a clean jar, a fully saturated solution, a stable surface away from foot traffic, and consistent room temperature.
Safety Considerations
- Borax and alum are not edible. Label jars clearly. Store away from food.
- Hot water causes burns. Adults should handle boiling water.
- Glass jars can crack. Use heat-safe containers. Pour hot liquids slowly.
- Supervise young children throughout the process.
Crystal growing teaches responsibility alongside science.
Why This Project Works for Families and Classrooms
Crystal growing requires minimal materials. The wait time builds anticipation. The results are visually rewarding.
Kids observe a chemical process in real time. They learn patience. They practice following instructions precisely.
The project scales easily. One jar or twenty jars: the process remains the same.
Teachers use crystal growing to introduce concepts like saturation, molecular structure, and states of matter. Homeschool families incorporate it into chemistry units. Parents use it as a weekend activity that continues through the week.
The crystals themselves become keepsakes. Rock candy gets eaten. Borax snowflakes hang in windows. Alum specimens sit on shelves.
Science made tangible. Learning made visible.


