


Color. Spray. Fold. Twist.
That's the entire process.
Coffee filter butterflies take about 20-30 minutes from start to finish. The key variable is drying time. Sunny days speed this up. Indoor projects require planning ahead.
Total cost sits under $5 for most families. Many homes already have the supplies.
This craft works for ages 3 and up. Younger children need help with folding. Older kids can complete every step independently.
What Supplies Are Needed for Coffee Filter Butterflies?
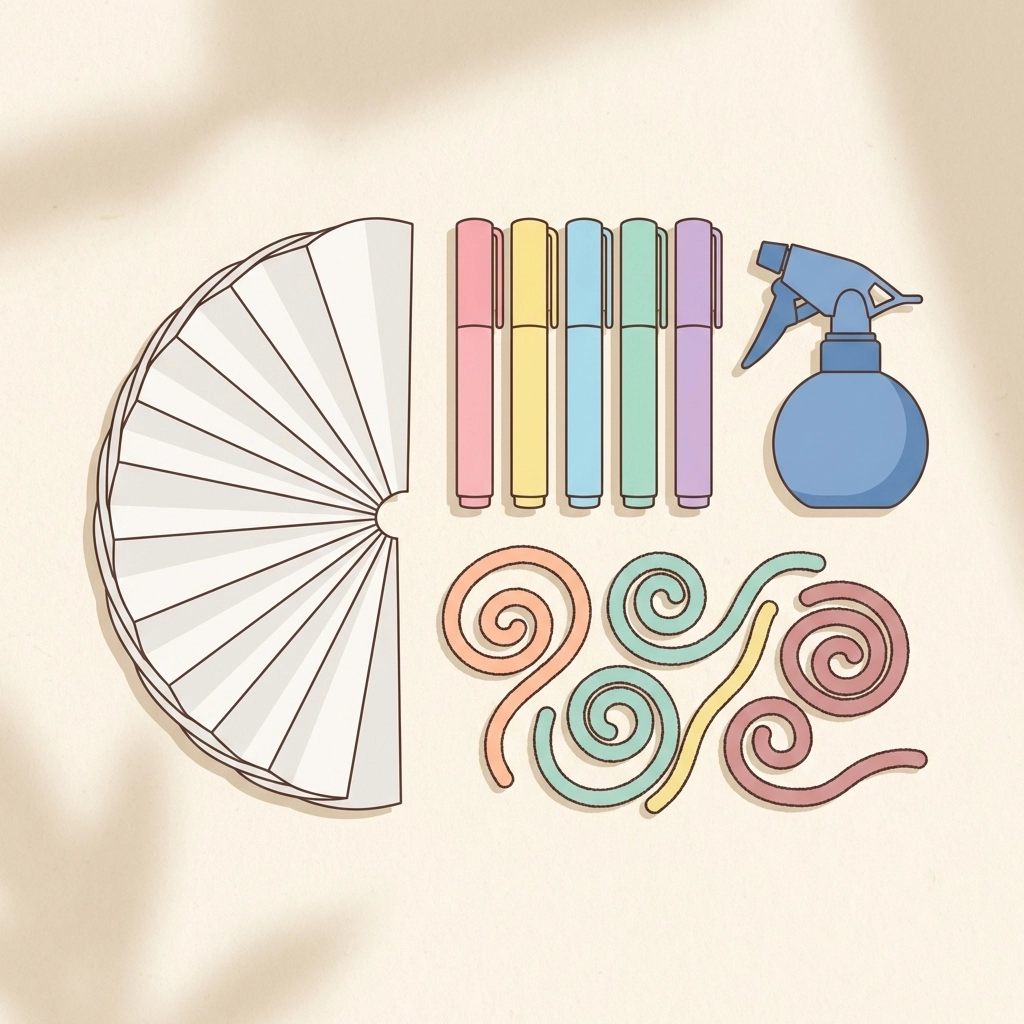
Gather these items before starting:
- White coffee filters (basket-style, flat-bottom)
- Washable markers (multiple colors)
- Spray bottle filled with water
- Pipe cleaners (one per butterfly)
- Paper towels or newspaper (for the workspace)
Optional additions:
- Glitter glue
- Googly eyes
- String for hanging
Most dollar stores carry all essential materials. A pack of 100 coffee filters costs around $1. Pipe cleaners come in packs of 50-100 for $2-3. Washable markers are a household staple.
Total investment: $3-5 for supplies that make dozens of butterflies.
How Does the Coloring Process Work?
Lay a coffee filter flat on newspaper or paper towels.
The filter absorbs moisture. Newspaper prevents marker bleed onto tables or counters.
Coloring technique matters.
Draw thick lines radiating from the center outward. Create circles, dots, spirals, or random patterns. Heavy marker application produces more vibrant results after water activation.
Color combinations to try:
- Red + yellow + orange (warm sunset wings)
- Blue + purple + pink (cool gradient effect)
- Green + yellow + blue (nature-inspired palette)
- Rainbow spectrum from edge to edge
Leave some white space between colors. Water will spread the ink and fill gaps naturally.
Dark colors dominate light colors when they bleed together. Purple overtakes yellow. Blue overwhelms pink. Plan color placement accordingly.
Two filters per butterfly creates fuller wings.
Color both filters. Stack them together before the water step. The layering adds dimension to the finished piece.
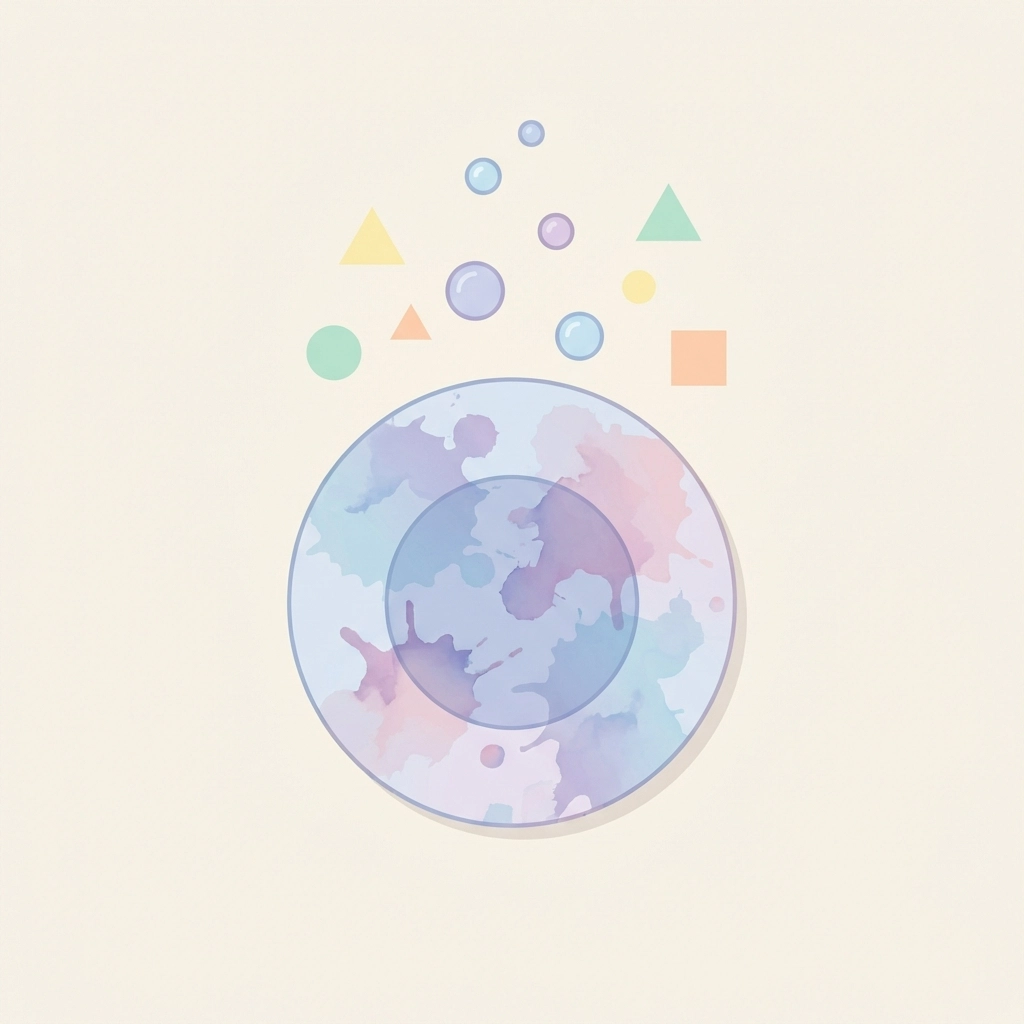
What Happens When Water Hits the Colored Filter?
This step creates the magic.
Fill a spray bottle with plain tap water. Mist the colored filter evenly. Spray until the entire surface is damp, not dripping, not barely wet.
The water activates the washable marker ink. Colors spread outward. They blend at edges. New shades emerge where two colors meet.
The transformation is immediate and visible.
Red and yellow become orange. Blue and red create purple. Random patterns turn into watercolor-style art.
Over-spraying causes colors to muddy together into brown or gray. Under-spraying leaves harsh lines and unblended sections.
Three to five sprays usually achieves the right saturation.
How Long Does Drying Take?
Drying time determines total project length.
Outdoor drying in direct sunlight: 20-30 minutes.
Indoor drying near a sunny window: 1-2 hours.
Indoor drying without sun: 3+ hours or overnight.
For a true 30-minute project, work outside on a sunny day. Lay wet filters on a clean surface in direct light. The combination of warmth and airflow speeds evaporation.
Alternative fast-drying methods:
- Place filters on a baking sheet near (not in) a warm oven
- Use a hairdryer on low heat setting
- Position near a fan for increased airflow
Pre-colored filters eliminate drying time entirely. Color filters the night before. Store them flat. Assembly then takes only 5 minutes.
This approach works well for classroom settings or birthday parties where time is limited.
What Are the Folding Steps?
Dry filters are ready for transformation.
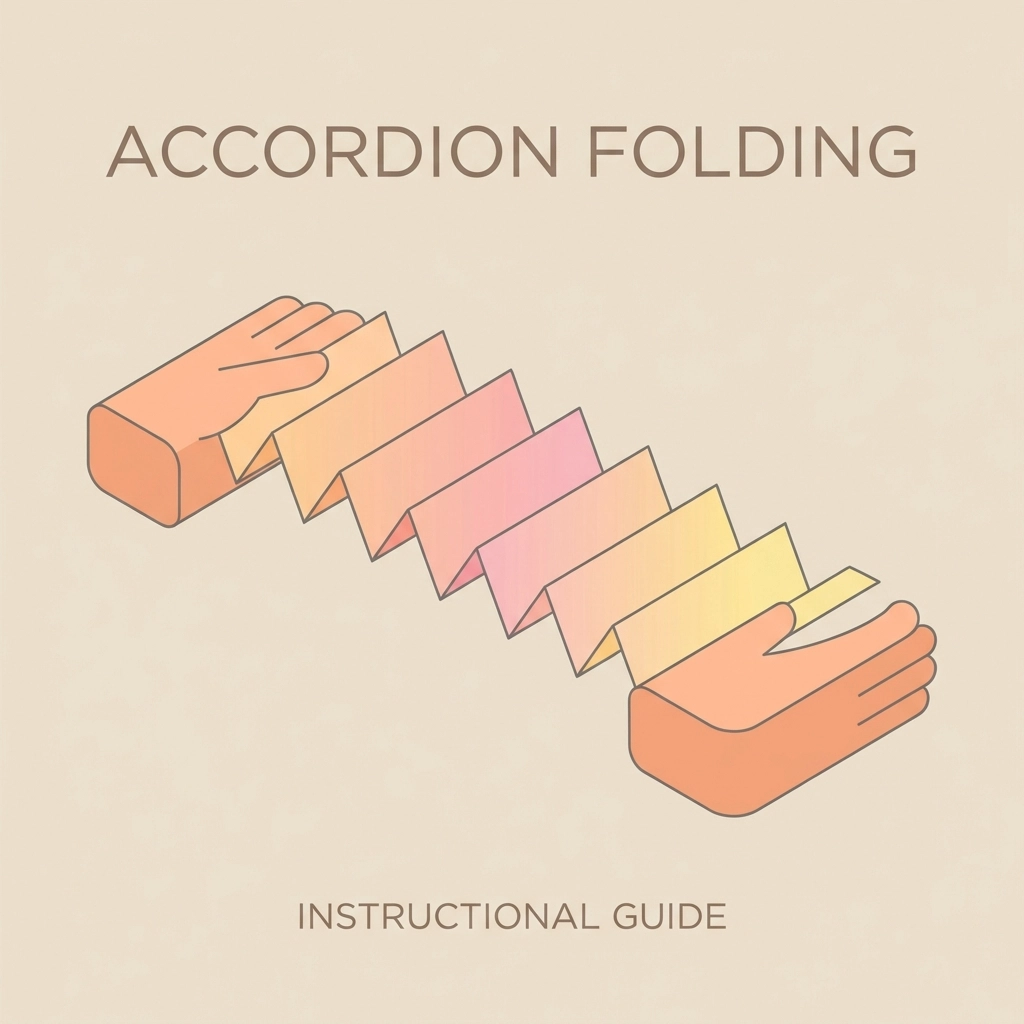
Step 1: Create accordion folds.
Start at one edge. Fold approximately ½ inch of filter forward. Flip and fold ½ inch backward. Continue this zigzag pattern across the entire filter.
The result resembles a paper fan.
Younger children may need guidance here. Demonstrate the back-and-forth motion. Perfect folds are not required. Imperfect folds add character.
Step 2: Stack folded filters.
Place both accordion-folded filters on top of each other. Align the center points. This creates a four-wing butterfly shape.
Step 3: Pinch the center.
Hold both folded strips together at the midpoint. Squeeze firmly. This creates the butterfly's body section.
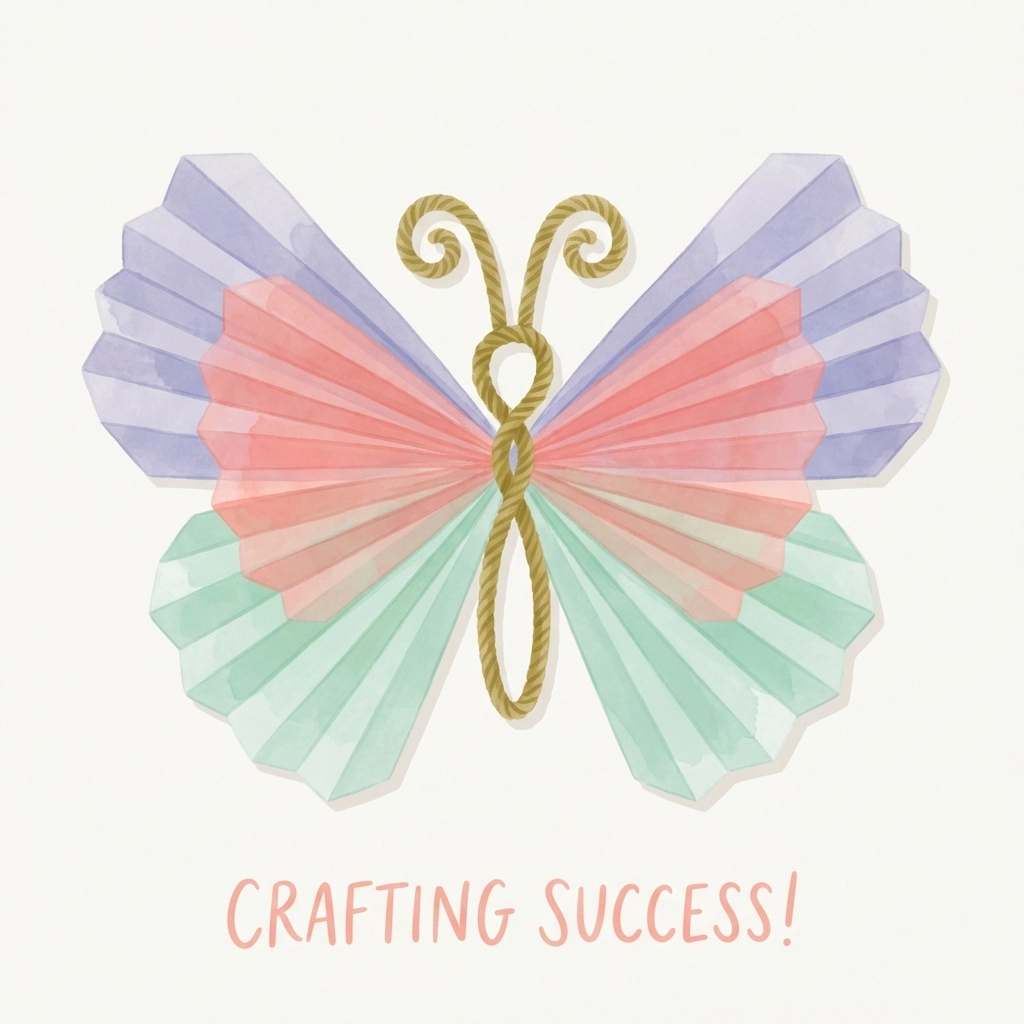
How Do Pipe Cleaners Become the Body and Antennae?
One pipe cleaner completes the butterfly.
Wrap the pipe cleaner around the pinched center of the stacked filters. Twist it tightly, two or three rotations secure the filters in place.
Both pipe cleaner ends now point upward.
Creating antennae:
- Bend each end outward slightly at the top
- Curl the tips into small spirals using a finger or pencil
- Adjust the angle so antennae form a "V" shape
The twisted section becomes the butterfly's body. Tighter twists create a more defined body shape.
Final shaping:
Gently pull apart the accordion folds. Fan them outward. Separate the top wings from the bottom wings. Fluff and adjust until the butterfly looks full and dimensional.
The butterfly is complete.
What Display Ideas Work Best?
Finished butterflies deserve showcasing.
Hanging displays:
- Thread fishing line through the body twist
- Hang from ceiling hooks or light fixtures
- Create a mobile with multiple butterflies at varying heights
- Attach to curtain rods for window decoration
Wall displays:
- Use removable adhesive strips
- Pin to cork boards
- Tape to refrigerators or mirrors
- Arrange in flight formation patterns
Wearable options:
- Attach safety pins to create brooches
- Clip to hair accessories
- Add to headbands
- Pin to backpacks or jackets
Garden integration:
- Attach to wooden skewers
- Place in potted plants
- Add to outdoor flower beds
- Decorate patio spaces
What Variations Extend This Project?
The basic technique adapts to multiple themes.
Seasonal butterflies:
- Orange and black for Halloween
- Red and pink for Valentine's Day
- Pastels for Easter
- Red, white, and blue for July 4th
Science integration:
- Research real butterfly species
- Match colors to monarch, swallowtail, or morpho butterflies
- Label wing parts on finished projects
- Discuss butterfly life cycles
Material swaps:
- Use paper towels instead of coffee filters
- Try tissue paper for different texture
- Experiment with food coloring instead of markers
- Test liquid watercolors for bolder pigments
Structural variations:
- Use clothespins instead of pipe cleaners for the body
- Add pom-pom heads with googly eyes
- Create caterpillars from the same colored filters
- Make flowers using identical folding techniques
What Makes This Craft Effective for Young Children?
Several factors contribute to success with ages 3 and up.
Low precision requirements.
No cutting on lines. No exact measurements. Random coloring produces beautiful results. Imperfect folds look intentional.
Immediate visual feedback.
Water transforms colors instantly. Children see cause and effect in real time. The "wow" moment happens within seconds.
Sensory engagement.
Marker textures on paper. Water spray mist. Folding motions. Pipe cleaner bending. Multiple senses activate throughout.
Completion satisfaction.
Start to finish in one session. No waiting for paint to dry between steps (except the main drying period). Tangible finished product to hold and display.
Repeatability.
Low supply cost allows multiple attempts. Children refine techniques across iterations. Each butterfly looks different from the last.
The coffee filter butterfly remains a classic craft for good reason. Simple materials. Quick execution. Reliable results. Universal appeal across age groups.
Gather supplies. Set up the workspace. Watch colorful wings take shape in under 30 minutes.


