


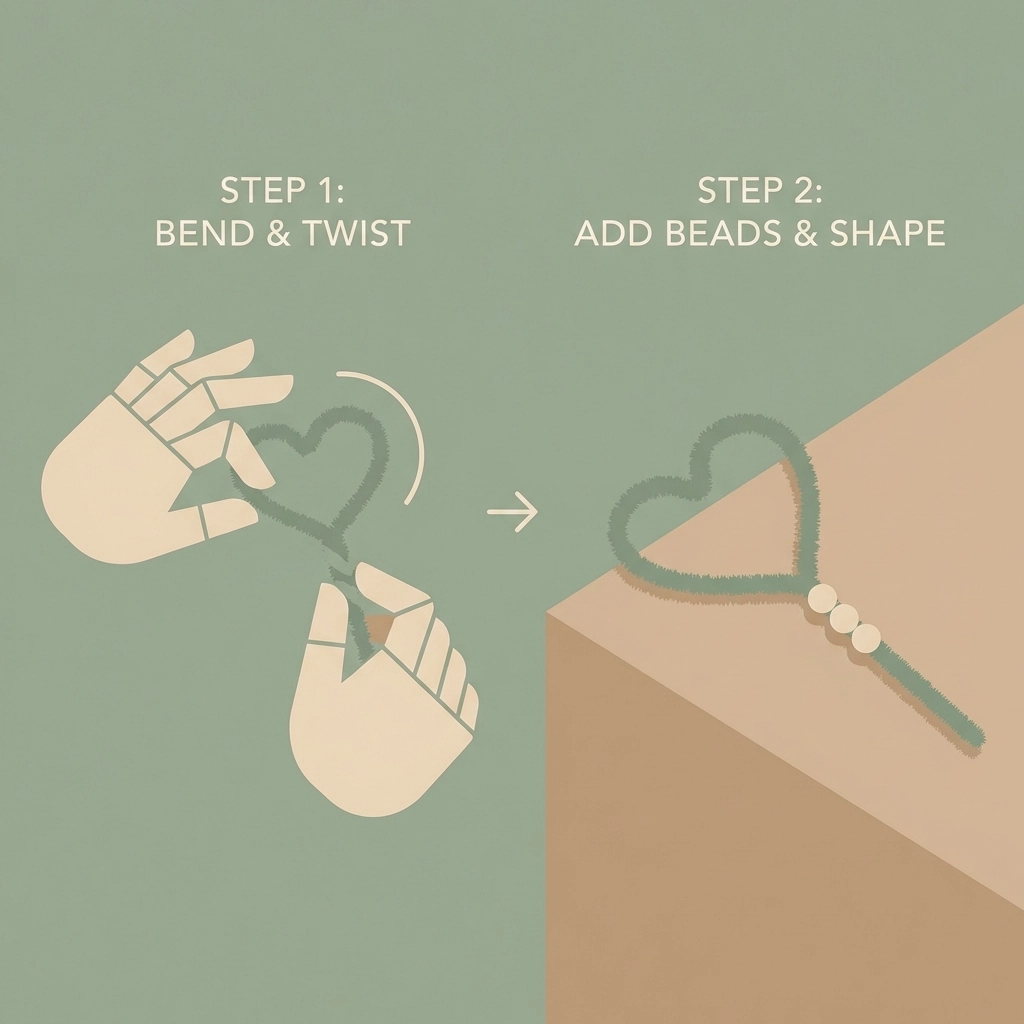
Twist a pipe cleaner into a loop shape.
Attach a handle.
Dip into soap solution.
A functional bubble wand takes less than five minutes to build.
The remaining time goes toward mixing the bubble solution and heading outside.
Total cost stays under $5.
Suitable for ages 3 and up with adult supervision.
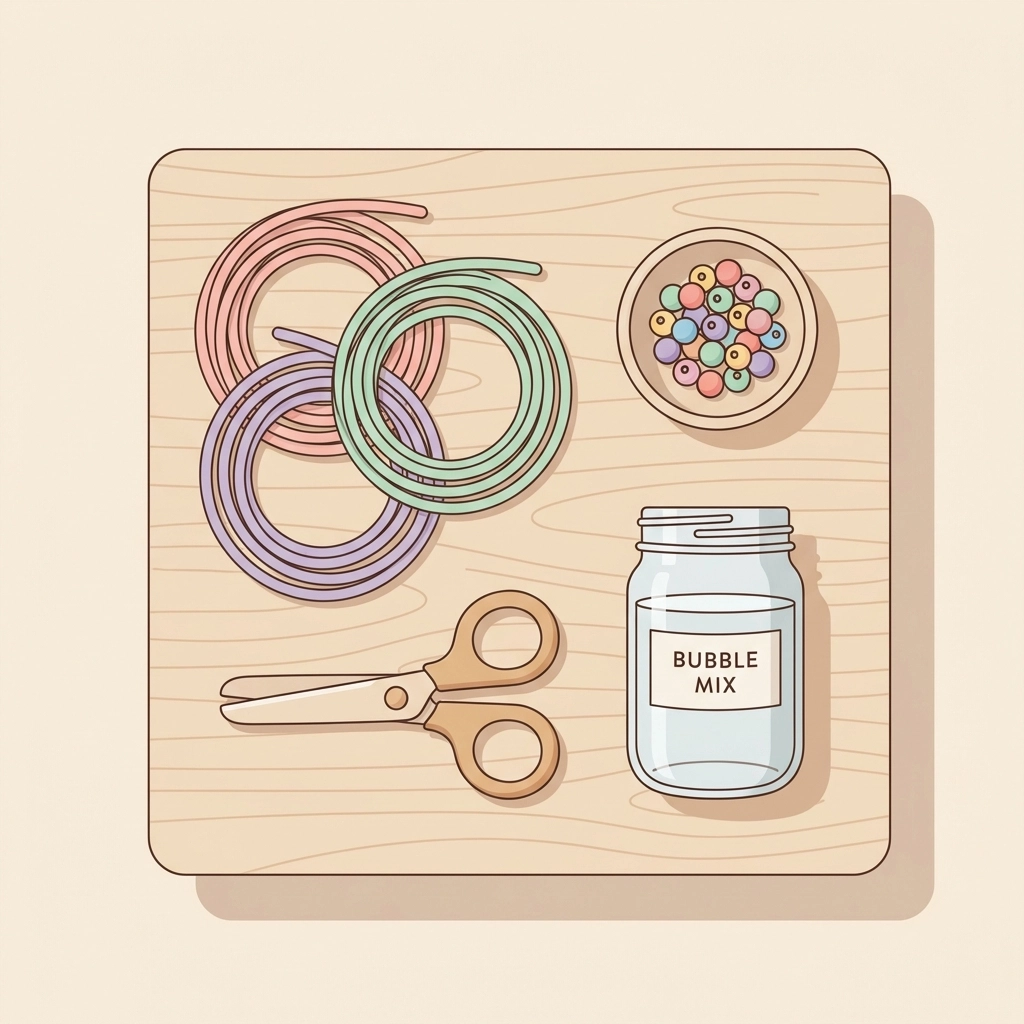
What Supplies Are Needed for Homemade Bubble Wands?
Most materials exist in the average household already.
A quick trip to a dollar store fills any gaps.
Essential supplies:
- Pipe cleaners (3-4 per wand)
- Plastic straws (optional alternative)
- Beads for decoration (optional)
- Scissors
- A shallow container for dipping
For the bubble solution:
- Dish soap (Dawn or Joy work best)
- Water
- Glycerin or corn syrup (optional, improves bubble strength)
- A mixing bowl or jar
Total material cost ranges from $2 to $5.
Pipe cleaners come in packs of 50 or more for around $1-2.
Dish soap is a kitchen staple.
What Is the Fastest Way to Make a Pipe Cleaner Bubble Wand?
The cookie cutter method.
A 2-inch cookie cutter serves as a shaping guide.
No cookie cutter available?
Form the shape freehand.
Circles, stars, and hearts all produce bubbles.
Step-by-step instructions:
- Select one pipe cleaner for the wand head.
- Wrap it around a cookie cutter or form a loop approximately 2-3 inches in diameter.
- Twist the ends together tightly at the base.
- Trim excess pipe cleaner with scissors.
- Take a second pipe cleaner.
- Loop it around the twisted base of the first.
- Twist to secure.
- Pull the remaining length straight down to form the handle.
- Add beads to the handle for grip and decoration (optional).
- Fold the end of the handle pipe cleaner upward to keep beads in place.
Construction time: 3-5 minutes.
The twisted joint must be secure.
Loose twists cause the wand head to wobble or detach.
How Does the Wire Method Differ from Pipe Cleaners?
Wire creates sturdier wands.
Thinner craft wire bends easily.
Thicker wire holds its shape longer.
Wire wand construction:
- Cut a piece of wire approximately 12 inches long.
- Form one end into a circle about 3 inches in diameter.
- Twist the wire back onto itself to close the loop.
- Leave the remaining wire as the handle.
- Snip sharp ends with wire cutters.
- String beads onto the handle for decoration.
- Twist the bottom end to secure beads.
Wire wands last longer than pipe cleaner versions.
The trade-off: sharper edges require closer adult supervision.
Best for children ages 5 and up.
Can Bubble Wands Be Made from Straws?
Straws work for a different bubble experience.
Instead of waving, the user blows through the straw.
Single straw method:
- Cut four small slits (about 1 inch) into one end of a straw.
- Bend the cut sections outward to form a star shape.
- Dip the cut end into bubble solution.
- Blow gently through the other end.
Multi-straw method for giant bubbles:
- Thread string through two straws.
- Tie the string ends together to form a loop.
- Hold both straws as handles.
- Dip the string loop into a wide, shallow container of solution.
- Lift slowly and walk backward to create large bubbles.
Straw wands cost almost nothing.
Most households have straws available.
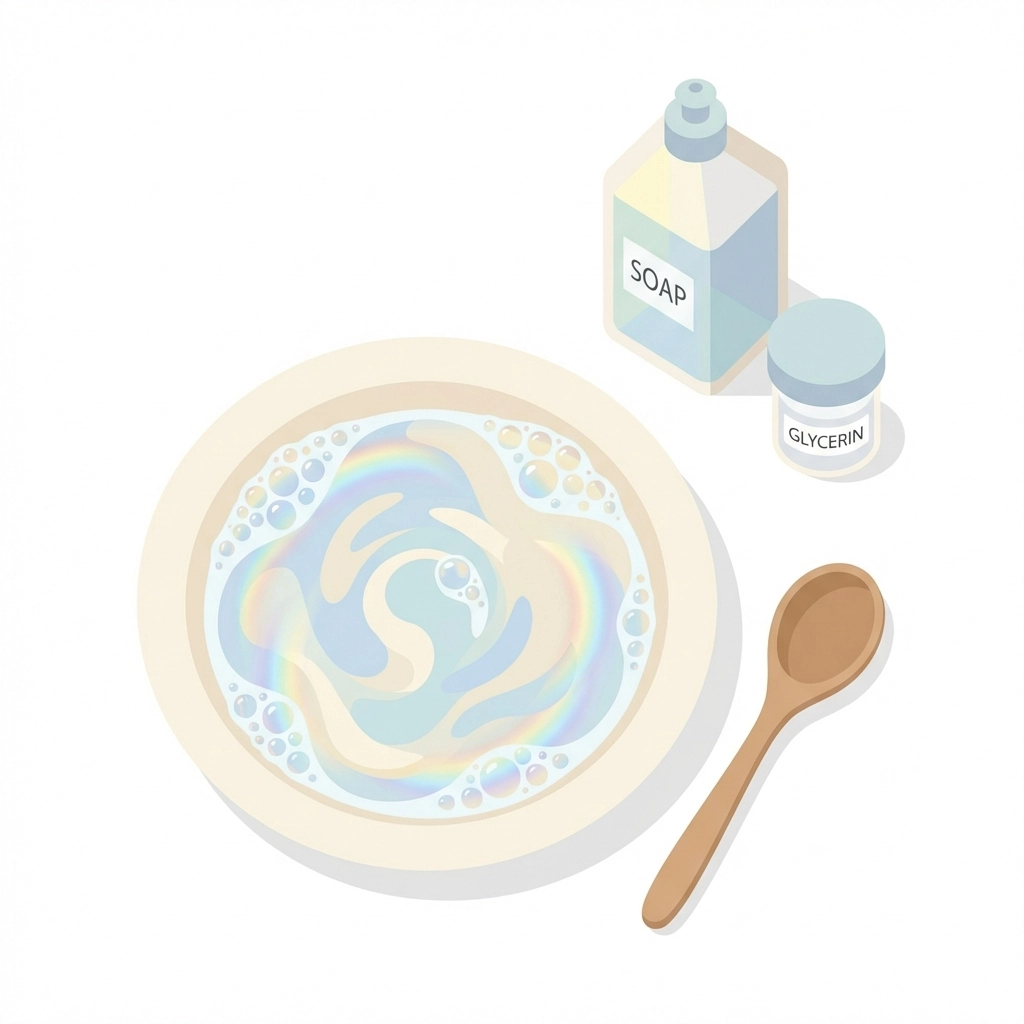
What Is the Best Homemade Bubble Solution Recipe?
Commercial bubble solutions contain stabilizers.
Homemade versions work well with the right ratios.
Basic bubble solution:
- 1 cup water
- 2 tablespoons dish soap
- 1 tablespoon glycerin or corn syrup
Mixing instructions:
- Pour water into a bowl or jar.
- Add dish soap slowly.
- Stir gently to avoid creating foam.
- Add glycerin or corn syrup.
- Stir again.
- Let the solution rest for a few minutes before use.
Foam weakens bubbles.
Gentle stirring prevents foam formation.
Glycerin strengthens the bubble membrane.
Corn syrup serves as a substitute when glycerin is unavailable.
Why Do Some Bubbles Pop Immediately?
Three common causes.
Dry wands: Soak the wand in solution for 10-15 seconds before the first use.
Thin solution: Add more dish soap or glycerin.
Wind: Strong gusts pop bubbles before they form fully.
Calm conditions produce the best results.
Early morning and late afternoon often have less wind.
Humid days create longer-lasting bubbles than dry days.
What Safety Considerations Apply to This Activity?
Bubble solution causes eye irritation.
Wash hands after play.
Keep solution away from mouths and eyes.
Age-specific notes:
- Ages 3-4: Adult handles all cutting and twisting. Child decorates with beads.
- Ages 5-7: Child forms simple shapes with supervision. Adult handles scissors.
- Ages 8+: Child completes all steps independently with minimal oversight.
Slippery surfaces develop where bubbles pop repeatedly.
Grass or dirt areas are safer than patios or decks.
Wire wands have sharp ends.
File down any points before handing to children.
How Can This Activity Encourage Outdoor Play?
Bubbles require open space.
Indoor bubble play creates sticky residue on furniture and floors.
Outdoor play is the natural choice.
Ways to extend the activity:
- Create multiple wand shapes and compare bubble results
- Time how long each bubble lasts before popping
- Experiment with different solution ratios
- Build a bubble station with several containers and wands
- Chase and pop bubbles for physical activity

The activity combines crafting with active play.
Construction happens at a table.
Testing happens in the yard.
Both phases engage different skills.
What Variations Keep the Activity Fresh?
Shape experimentation extends engagement.
Different wand shapes produce different bubble forms.
Shape ideas:
- Hearts
- Stars
- Triangles
- Squares
- Figure eights (produce two connected bubbles)
Color the solution with food coloring for tinted bubbles.
Results vary.
Some food colorings stain hands and clothing.
Test on a small scale first.
Glow-in-the-dark bubbles:
Add glow stick liquid to the solution.
Use at dusk for a visual effect.
Avoid breaking glow sticks near young children.
The liquid irritates skin and eyes.
How Does This Project Support Family Togetherness?
Shared activities build connection.
Bubble wand construction requires minimal skill.
All ages participate meaningfully.
Young children add beads and decorations.
Older children handle more complex construction.
Adults supervise and assist.
The activity scales to available time.
Fifteen minutes covers basic construction and initial play.
An hour allows for experimentation with shapes, solutions, and outdoor games.
No screens involved.
Direct interaction between participants.
Low cost removes financial barriers.
Repeat the activity multiple times without budget strain.
What Happens After the Bubbles Are Gone?
Store remaining solution in a sealed container.
Homemade solutions last 1-2 weeks.
Shake gently before reuse.
Pipe cleaner wands lose shape after multiple uses.
Build new ones as needed.
Materials remain inexpensive.
Wire wands store indefinitely.
Rinse with water after use to remove soap residue.
The bubble solution recipe scales up easily.
Double or triple the quantities for larger groups or extended play sessions.
Quick Reference Summary
Time required: 15 minutes total (5 minutes construction, 10 minutes solution and play)
Cost: Under $5
Ages: 3 and up with supervision
Core materials: Pipe cleaners, dish soap, water
Best conditions: Calm, humid days; outdoor spaces with room to move
Bubble wands rank among the simplest DIY projects for children.
Low investment.
High engagement.
Repeatable without additional spending.
A reliable option for unplanned afternoon activities.


