


Three ingredients. One bucket. About fifteen minutes. That’s all it takes.
Mix equal parts peat moss (or coconut coir), vermiculite, and perlite in a large bucket or bin. Add water until the mixture feels like a wrung-out sponge. Fill recycled containers with the mix. Plant seeds. Done.
Total cost: around $8 for enough mix to start hundreds of seeds across multiple seasons.
The best part? Kids can do almost every step themselves. Scooping. Pouring. Mixing. Getting their hands dirty. This project feels more like play than gardening: and that’s exactly the point.
What supplies do you need for a DIY seed starter under $10?
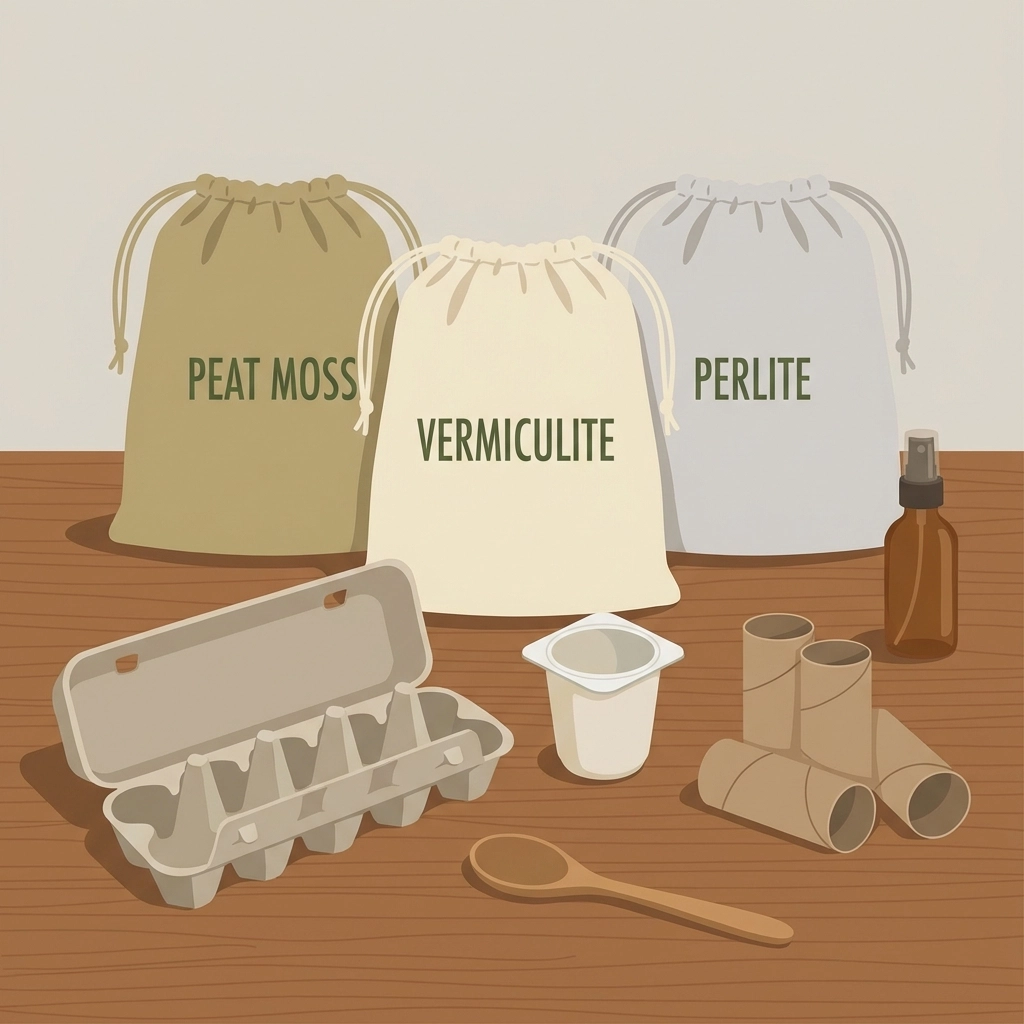
Here’s the full shopping list:
For the seed starting mix:
- Peat moss or coconut coir (about $4-5 for a compressed brick)
- Vermiculite (about $3-4 for a small bag)
- Perlite (about $3-4 for a small bag)
For containers (free from your recycling bin):
- Egg cartons
- Yogurt cups
- Toilet paper rolls
- Plastic fruit containers with clear lids
- Empty K-cups
Tools you probably already have:
- A large bucket or storage bin for mixing
- A spray bottle or watering can
- A spoon or small trowel
- Masking tape and a marker for labels
The mix ingredients come from any garden center, hardware store, or big box retailer. One purchase of each ingredient lasts for years. That $8 investment stretches across multiple growing seasons.
No need to buy fancy seed trays. Recycled containers work just as well: sometimes better.
Why make your own seed starting mix instead of buying it?
Store-bought seed starting mix costs around $20 per cubic foot.
Homemade mix costs around $8 per cubic foot.
Same results. Less than half the price.
Commercial mixes often contain fertilizers that young seedlings don’t need yet. A simple three-ingredient mix gives seeds exactly what they need for germination: moisture retention, drainage, and air pockets for root development.
Plus, making the mix is half the fun. Kids get to measure, pour, and combine ingredients like little scientists. The tactile experience sticks with them longer than just poking seeds into pre-made dirt.
How do you mix the seed starting ingredients?
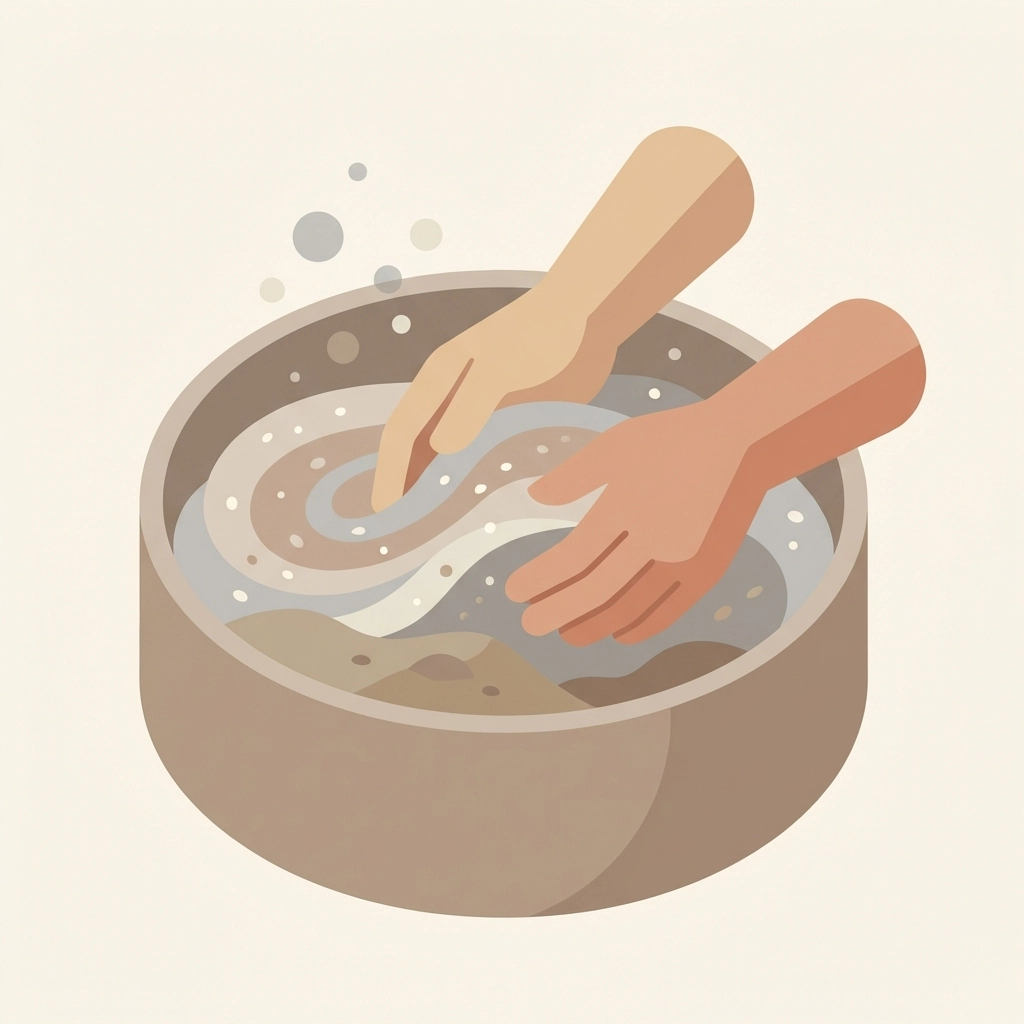
This is the messy part. Embrace it.
Step 1: Set up the mixing station
Lay out a tarp, old sheet, or do this outside. The ingredients are dusty: especially the perlite. A surgical mask or bandana over noses and mouths helps if anyone is sensitive to dust.
Pour all three ingredients into a large bucket or plastic storage bin.
Step 2: Let the kids mix
Hands work better than tools here. Kids can squeeze, stir, and blend the ingredients until everything looks uniform. No streaks of one ingredient. No clumps.
This takes about five minutes of enthusiastic mixing.
Step 3: Add water slowly
Spray or drizzle water into the mix while stirring. Keep adding until the mixture holds together when squeezed but doesn’t drip water.
Think damp, not wet. A wrung-out sponge is the perfect comparison.
Too dry? Seeds won’t germinate.
Too wet? Seeds rot.
Finding that sweet spot is a great lesson in patience and observation.
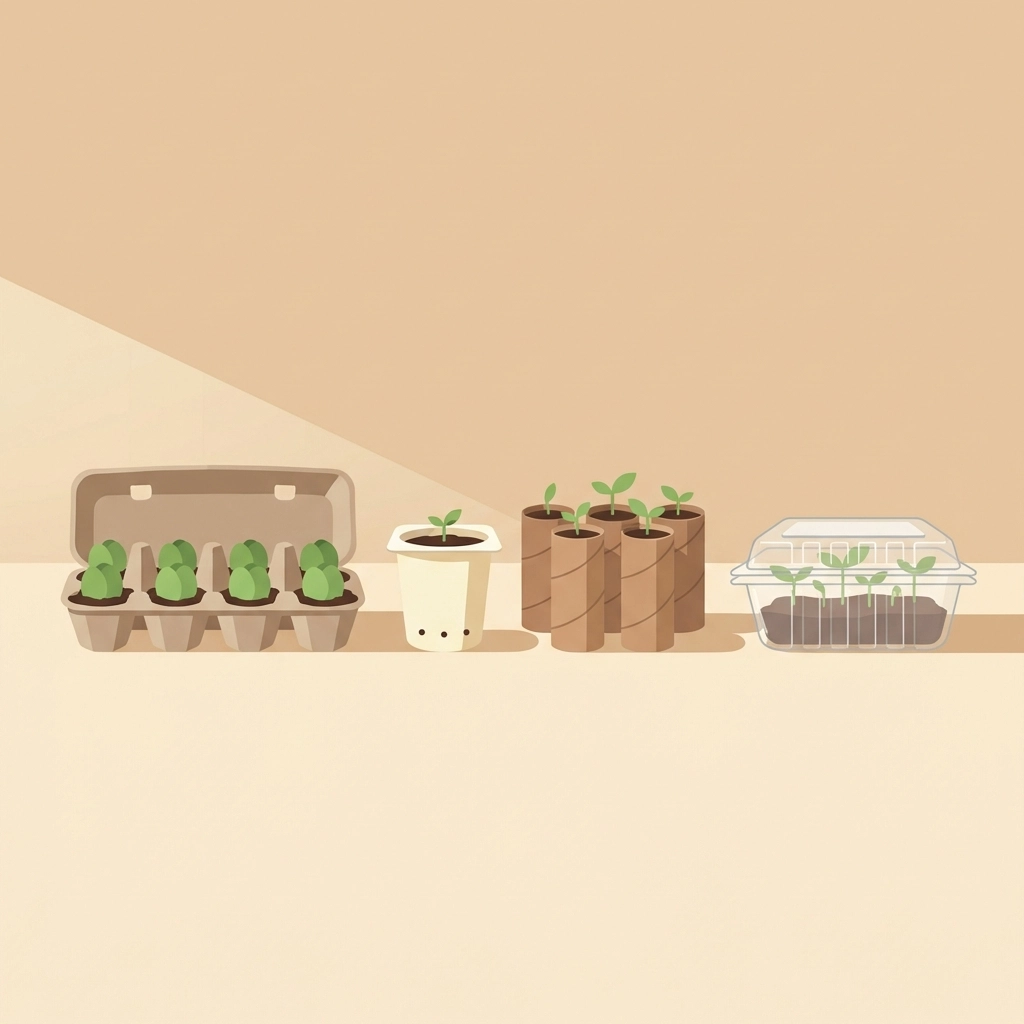
What containers work best for starting seeds with kids?
Anything that holds dirt and has drainage holes works.
Egg cartons are perfect for small seeds. Each cell becomes its own tiny pot. Cardboard cartons can go directly into the ground when transplanting: they decompose naturally.
Yogurt cups work great for larger seedlings that need more root room. Poke three or four holes in the bottom with a thumbtack or small nail.
Toilet paper rolls stand upright and decompose when planted. Cut them in half for shorter pots. Fold the bottom edges inward to create a base.
Plastic fruit containers (the kind strawberries come in) make instant mini greenhouses. The clear lid traps humidity while seeds germinate.
Tip: Let kids decorate the containers with stickers or markers before filling. Ownership makes them more invested in checking on “their” plants every day.
How do you plant the seeds?
Keep it simple. Keep it fun.
Step 1: Fill containers
Scoop the seed starting mix into each container. Leave about half an inch of space at the top. Press down gently: firm but not packed tight.
Step 2: Make seed holes
Use a finger, pencil eraser, or chopstick to poke small holes. Depth depends on seed size:
- Tiny seeds (lettuce, basil): barely covered, almost on the surface
- Medium seeds (tomatoes, peppers): about ¼ inch deep
- Larger seeds (beans, squash): about ½ to 1 inch deep
Step 3: Drop and cover
Let kids place one or two seeds in each hole. Cover lightly with mix. Press down gently.
Step 4: Water carefully
A spray bottle works best. Mist the surface until evenly moist. Pouring water can displace tiny seeds or compact the soil.
Step 5: Label everything
This matters more than anyone thinks. In two weeks, all seedlings look identical. Masking tape and a marker solve future confusion.
Write the plant name and the date planted on each container.
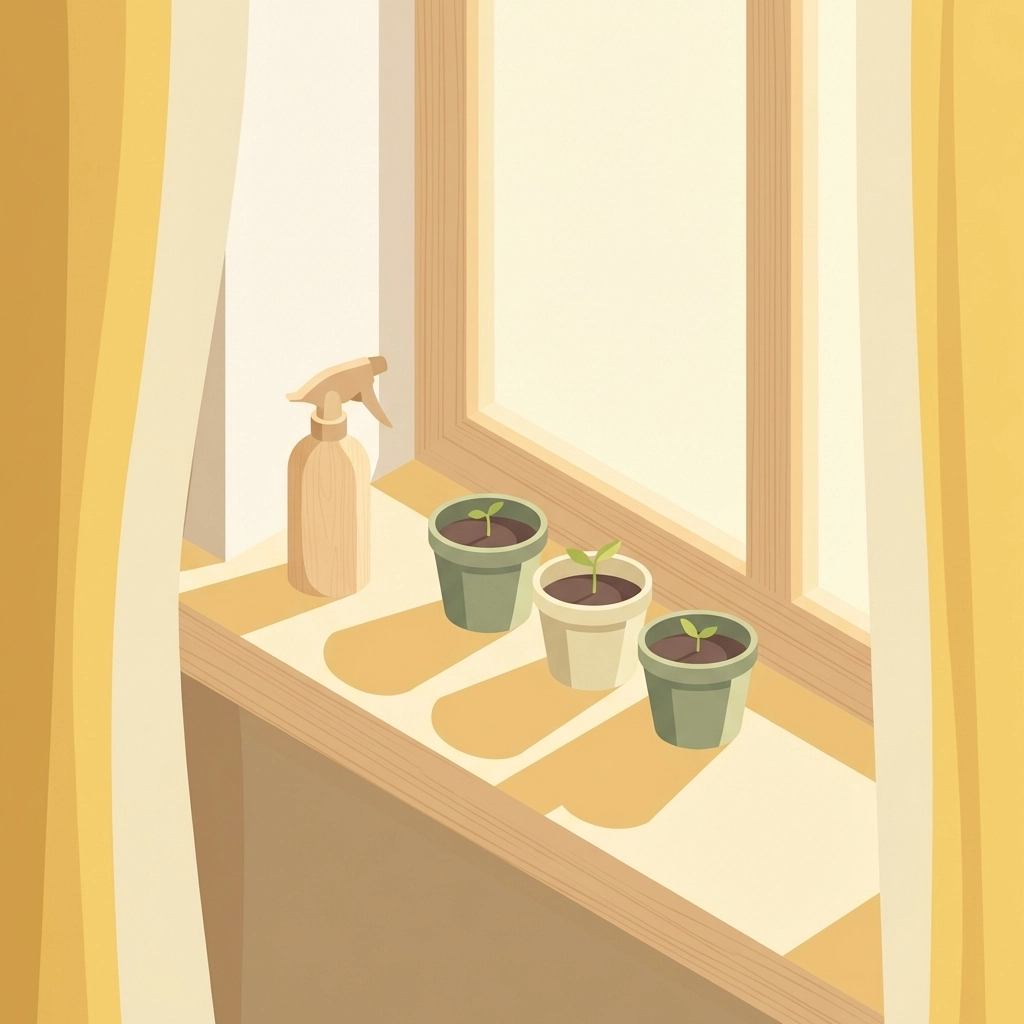
Where should the seed starters go?
Warmth matters more than light for germination.
Top of the refrigerator. Near a heating vent. On a sunny windowsill. Any spot that stays consistently warm (65-75°F) works.
Once green sprouts appear, light becomes essential. A south-facing window provides enough for most seedlings. Rotate containers daily so plants grow straight instead of leaning toward the light.
No sunny window? A basic shop light positioned a few inches above seedlings works surprisingly well.
Cover containers loosely with plastic wrap or their lids until sprouts emerge. This traps humidity and speeds germination. Remove the cover once green appears: seedlings need air circulation to prevent mold.
What seeds work best for a first family project?
Start with fast germinators. Quick results keep kids engaged.
Sprouts in 3-7 days:
- Lettuce
- Radishes
- Beans
- Peas
- Sunflowers
- Marigolds
Sprouts in 7-14 days:
- Tomatoes
- Peppers
- Basil
- Cucumbers
- Zucchini
Beans and sunflowers are crowd favorites. The seeds are large enough for small hands to handle easily. The sprouts emerge fast and grow visibly every day.
Avoid slow germinators like carrots or parsley for a first project. Two weeks of staring at dirt tests everyone’s patience.
What mistakes should families avoid?
Overwatering kills more seedlings than anything else. The soil should stay moist, not soggy. If it looks wet, skip the watering that day.
Planting too deep prevents small seeds from reaching the surface. When in doubt, plant shallower.
Forgetting drainage holes turns containers into swamps. Every container needs holes in the bottom. No exceptions.
Keeping seedlings covered too long causes mold and weak stems. Remove covers as soon as green appears.
Skipping labels creates mystery plants. Label everything. Future confusion is guaranteed otherwise.
What happens after the seeds sprout?
The excitement really starts here.
Once seedlings have two sets of true leaves (the second pair that looks different from the first), they’re ready for more space. Transplant into larger containers or directly into a garden bed.
Water consistently. Introduce diluted fertilizer after a few weeks. Watch them grow.
The $8 investment turns into tomatoes, herbs, flowers, and a project kids remember for years.
That’s the real payoff.
Quick recap: DIY seed starter for under $10
- Mix equal parts peat moss, vermiculite, and perlite
- Add water until damp but not dripping
- Fill recycled containers with drainage holes
- Plant seeds at the right depth
- Keep warm and moist until sprouts appear
- Move to light once green shows
- Label everything
Fifteen minutes of setup. A few dollars in supplies. Weeks of watching something grow together.
No excuses. This one’s easy.


