


A functional paper sundial requires three elements: a gnomon angled to match local latitude, a dial face marked with hour lines, and proper alignment to true north.
That’s it.
No batteries. No screens. Just shadow, angle, and math that humans figured out thousands of years ago.
The key detail most DIY sundial guides skip: the gnomon angle. Get this wrong, and the sundial becomes decoration. Get it right, and it tells accurate solar time within minutes.
What Materials Are Needed?
Minimal supplies. Most households already have everything.
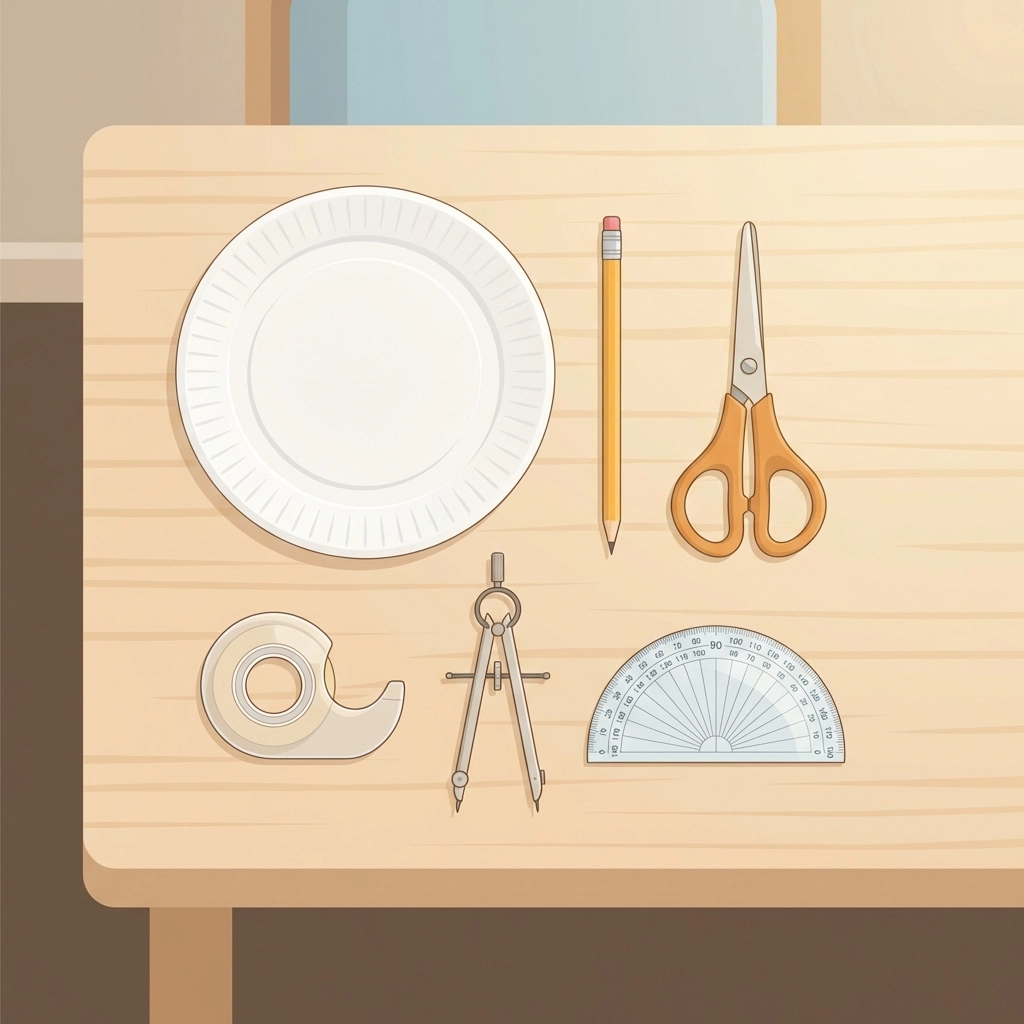
Essential items:
- Paper plate or sturdy cardstock (two sheets)
- Pencil, wooden skewer, or drinking straw
- Compass (magnetic or smartphone app)
- Scissors
- Tape or glue
- Ruler
- Protractor
Optional but helpful:
- Printed sundial template for specific latitude
- Watch or clock for calibration
- Small piece of cardboard for gnomon support
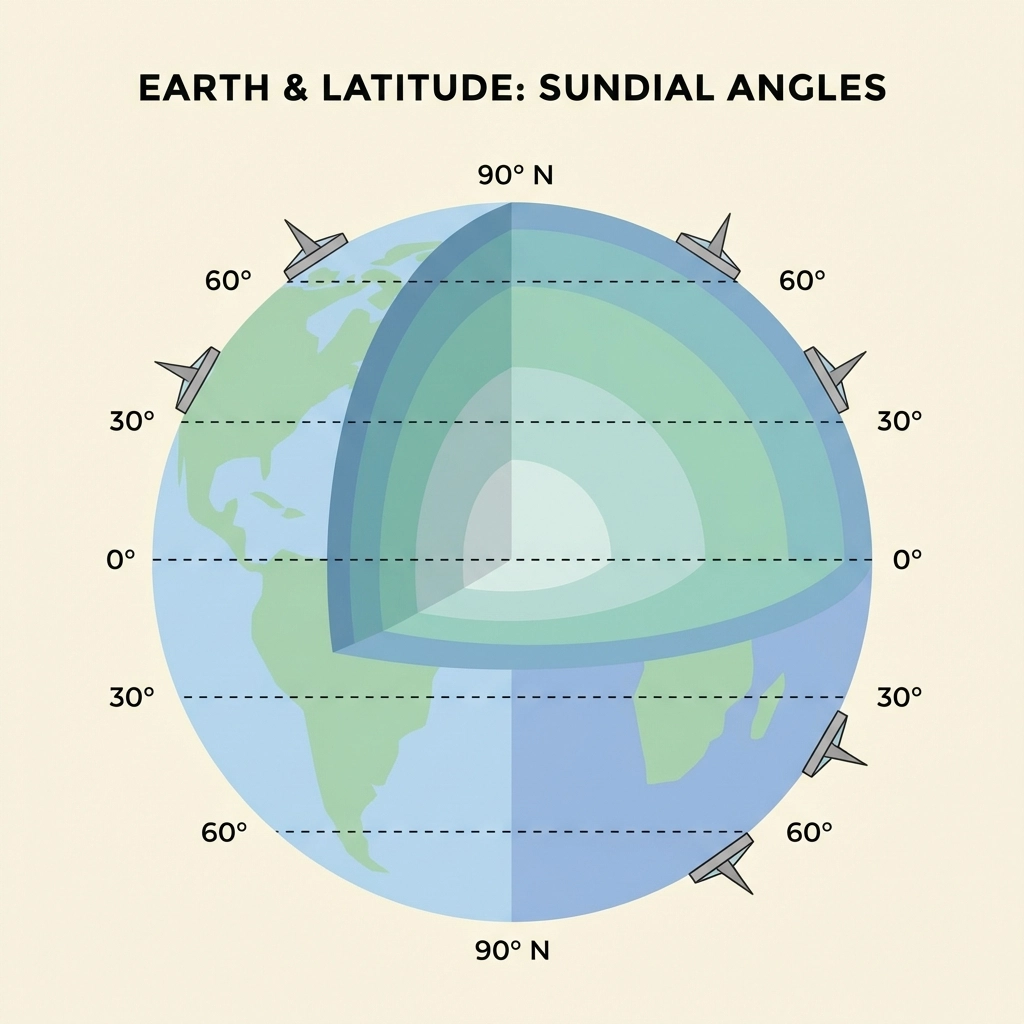
Why Does Latitude Matter So Much?
The gnomon must point toward the celestial pole.
This means its angle from horizontal equals the location’s latitude. A sundial built for Miami (25.7° N) fails in Chicago (41.8° N). The shadow falls in the wrong place at the wrong time.
Common latitudes for reference:
- San Diego: 32.7°
- Atlanta: 33.7°
- Denver: 39.7°
- New York: 40.7°
- Seattle: 47.6°
- Toronto: 43.7°
Look up local latitude online. Round to the nearest degree. This number determines the gnomon angle.
A sundial designed for one location travels poorly. The angle stays fixed. The Earth’s relationship to the sun does not change based on wishful thinking.
How Is the Dial Face Constructed?
Start with the base.
For a paper plate method:
- Place the plate face-up on a flat surface.
- Mark the center point.
- Draw a vertical line through center from top to bottom.
- Draw a horizontal line through center from left to right.
- Label the top intersection “12” (noon).
- Label the bottom “6.”
- Label the right side “3.”
- Label the left side “9.”
The remaining hours require calculation or a template.
For even spacing (simplified version):
Divide each quadrant into three equal 30° sections. This creates approximate hour markers. True hour lines vary by latitude and sundial type, but 30° divisions work for educational purposes.
For precise hour lines:
Download a printable template matched to local latitude. Many astronomy education sites offer free PDFs. Print on cardstock for durability.
How Is the Gnomon Built and Positioned?
The gnomon is the shadow-casting element.
Construction steps:
- Cut a right triangle from cardstock.
- One angle equals local latitude (e.g., 40° for New York).
- One angle equals 90° (the right angle).
- The third angle fills the remaining degrees.
The hypotenuse (longest side) becomes the shadow-casting edge. The right angle sits at the base of the dial.
Alternative method using a pencil:
- Push a pencil through the dial’s center point.
- Tilt the pencil toward the 12 o’clock mark.
- Secure at an angle matching local latitude.
- Use tape and a cardboard support to hold position.
The gnomon’s shadow-casting edge must point toward true north. Not magnetic north. True north.
Magnetic declination varies by location. Check local declination and adjust compass readings accordingly. In some areas, the difference exceeds 15°.

What Are the Step-by-Step Assembly Instructions?
Phase 1: Prepare the base
- Gather materials on a flat workspace.
- Print or draw the dial face.
- Ensure hour markers are clearly visible.
- Cut out the dial if using printed template.
Phase 2: Create the gnomon
- Measure local latitude.
- Draw the triangle on cardstock.
- Cut precisely along lines.
- Fold a small tab at the base for attachment.
Phase 3: Attach gnomon to dial
- Position the gnomon along the noon line.
- The right angle sits at the dial center.
- The angled edge rises toward the 12.
- Secure with tape or glue.
- Allow adhesive to dry completely.
Phase 4: Prepare for outdoor placement
- Choose a location with unobstructed southern sky.
- Avoid shadows from buildings, trees, or fences.
- A flat surface works best. Level ground matters.
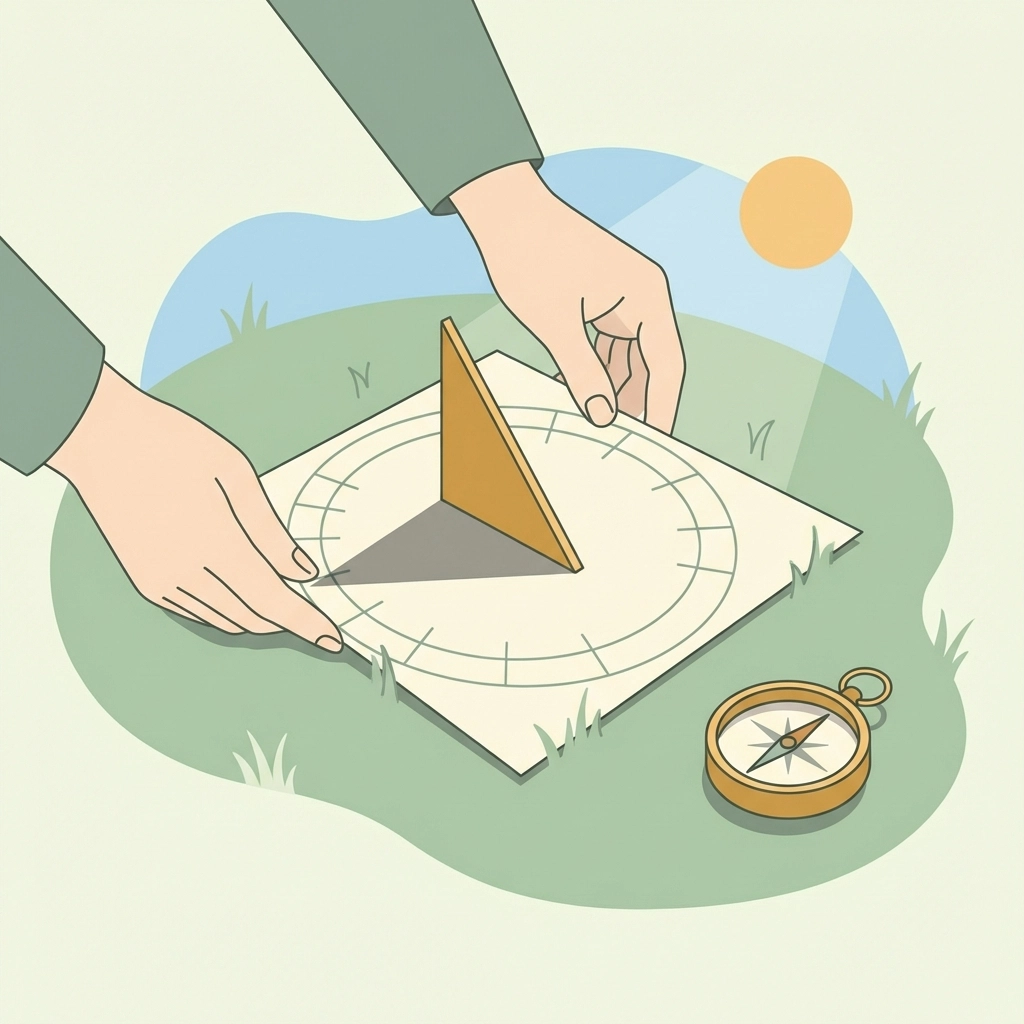
How Is the Sundial Aligned and Calibrated?
Alignment determines accuracy.
Alignment process:
- Place the sundial on a flat outdoor surface.
- Use a compass to find north.
- Rotate the dial until 12 points to true north.
- Account for magnetic declination.
- Secure the dial so wind cannot shift it.
Calibration check:
- Wait for a sunny day.
- Note the current clock time.
- Observe where the gnomon’s shadow falls.
- Compare shadow position to dial markings.
- Adjust rotation slightly if needed.
Solar time differs from clock time. Standard time zones create artificial uniformity. A sundial shows local solar time, which varies across a time zone by up to an hour.
The Equation of Time also affects readings. The Earth’s orbit is elliptical. Solar noon shifts throughout the year by up to 16 minutes. This is normal. The sundial is not broken.
What Are Common Mistakes to Avoid?
Gnomon angle errors:
Using 45° because it seems reasonable. Wrong. Latitude determines angle. Always.
Magnetic vs. true north confusion:
Compasses point to magnetic north. Sundials need true north. The difference matters.
Unstable placement:
Wind shifts the dial. Rain warps the paper. A few degrees of rotation ruins accuracy.
Expecting digital precision:
Sundials read solar time. Clocks read standardized time. They measure the same thing differently.
Indoor testing:
Window glass and artificial light do not substitute for direct sunlight. The sundial must go outside.
What Educational Value Does This Project Offer?
Building a sundial teaches astronomy, geometry, and geography simultaneously.
Concepts demonstrated:
- Earth’s axial tilt
- Latitude and longitude
- Solar vs. standard time
- Angles and degrees
- Cardinal directions
- Scientific calibration
The project scales in complexity. Young children learn about shadows and direction. Older students calculate hour lines trigonometrically.
A working sundial also demonstrates patience. Instant results do not exist. The sun moves slowly. Observation takes time.
Can Paper Sundials Survive Outdoors?
Short-term, yes. Long-term, no.
Paper absorbs moisture. Ink fades. Wind tears edges.
For extended use:
- Laminate the dial face.
- Use a plastic straw as gnomon.
- Weight the base with stones.
- Bring indoors during rain.
A paper sundial serves as a prototype. Once the concept is proven, builders often upgrade to wood, metal, or stone.
The principles remain identical regardless of material. Latitude still determines angle. North still determines orientation. The sun still tells time.
Human beings tracked time this way for millennia before clocks existed. A paper sundial built on a Saturday afternoon connects to that history directly.
No batteries required. No screens involved. Just shadow, angle, and the oldest clock in existence: the sun itself.


