


The short answer: Paint your child's hand or foot with washable paint, press it firmly onto paper, let it dry, and then add details like eyes, ears, and tails using markers or more paint. The whole project typically takes about 20–30 minutes, makes a fantastic keepsake, and costs very little.
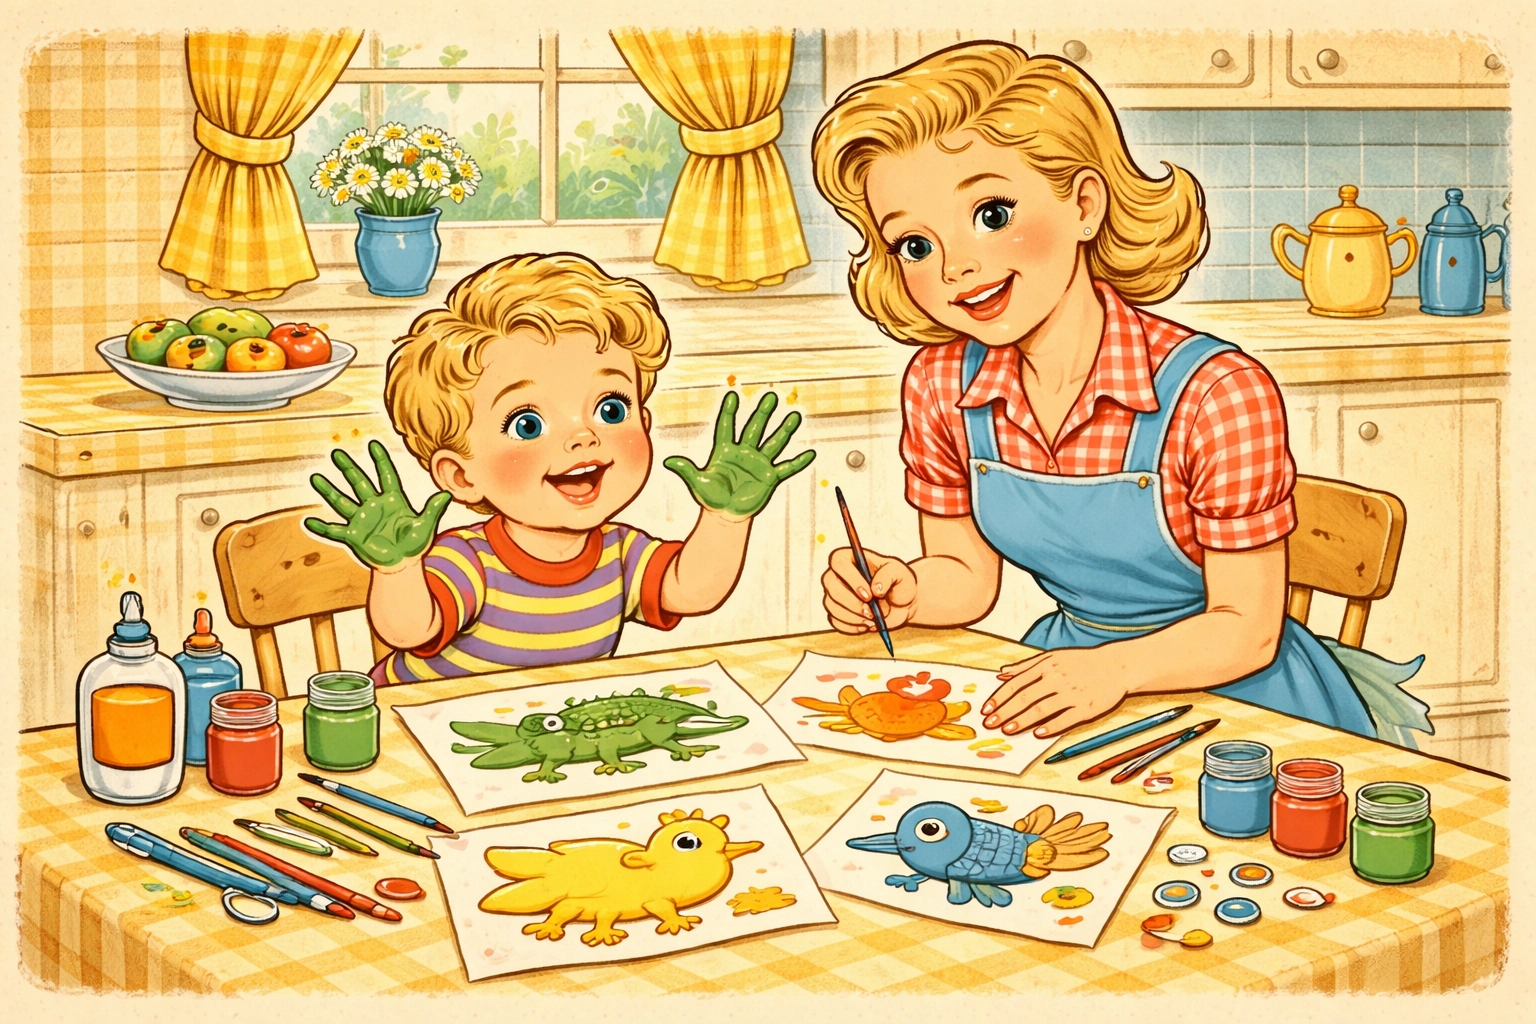
Handprint and footprint animals are one of those timeless crafts that families keep coming back to: and for good reason. They're simple enough for toddlers yet engaging enough for older kids who want to get creative with their creature designs. Plus, there's something pretty special about capturing those tiny fingers and toes in art that can hang on the fridge for years to come.
Let's walk through everything you need to turn those little appendages into an entire menagerie of adorable animals.
What You'll Need: Materials List (Under $10)
| Material | Approximate Cost | Notes |
|---|---|---|
| Washable tempera paint | $3–5 | Multiple colors recommended |
| White cardstock or construction paper | $1–3 | Heavier paper prevents warping |
| Paintbrushes (small and medium) | $1–2 | For applying paint and details |
| Black marker or fine-tip pen | $1 | For drawing facial features |
| Paper plates or palette | $1 | For holding paint |
| Baby wipes or damp washcloths | $1–2 | Essential for quick cleanup |
| Optional: Googly eyes | $1 | Adds extra fun |
Total estimated cost: $6–10
Most families already have several of these items at home, so your actual out-of-pocket expense could be even lower.
Age Range and Time Estimate
Best ages for enjoyment: 18 months to 8 years
Skill breakdown by age:
- Toddlers (18 months–3 years): Can participate in the stamping with help; adults handle painting and details
- Preschoolers (3–5 years): Can help apply paint and may add simple details with guidance
- School-age kids (5–8 years): Often capable of painting their own hands/feet and adding creative details independently
Time to complete: About 20–30 minutes per animal (including drying time for adding details)
Step-by-Step Instructions
Step 1: Set Up Your Workspace
Before any paint comes out, prepare your area. Lay down newspaper, a plastic tablecloth, or an old sheet to protect your table or floor. Have baby wipes or a damp washcloth within arm's reach: you'll want them handy the moment that print hits the paper.
Set out your paint colors on paper plates. Having everything ready means you can work quickly before wiggly little ones decide they're done.
Step 2: Choose Your Animal and Colors
Decide which animal you're making first. Here are some popular options:
- Lion: Yellow or orange base
- Penguin: Black and white combination
- Monkey: Brown with lighter brown accents
- Flamingo: Pink handprint
- Peacock: Blue and green handprint
- Butterfly: Any bright colors with both hands
- Octopus: Purple or blue handprint turned upside down
Knowing your animal ahead of time helps you apply the right colors in the right places.
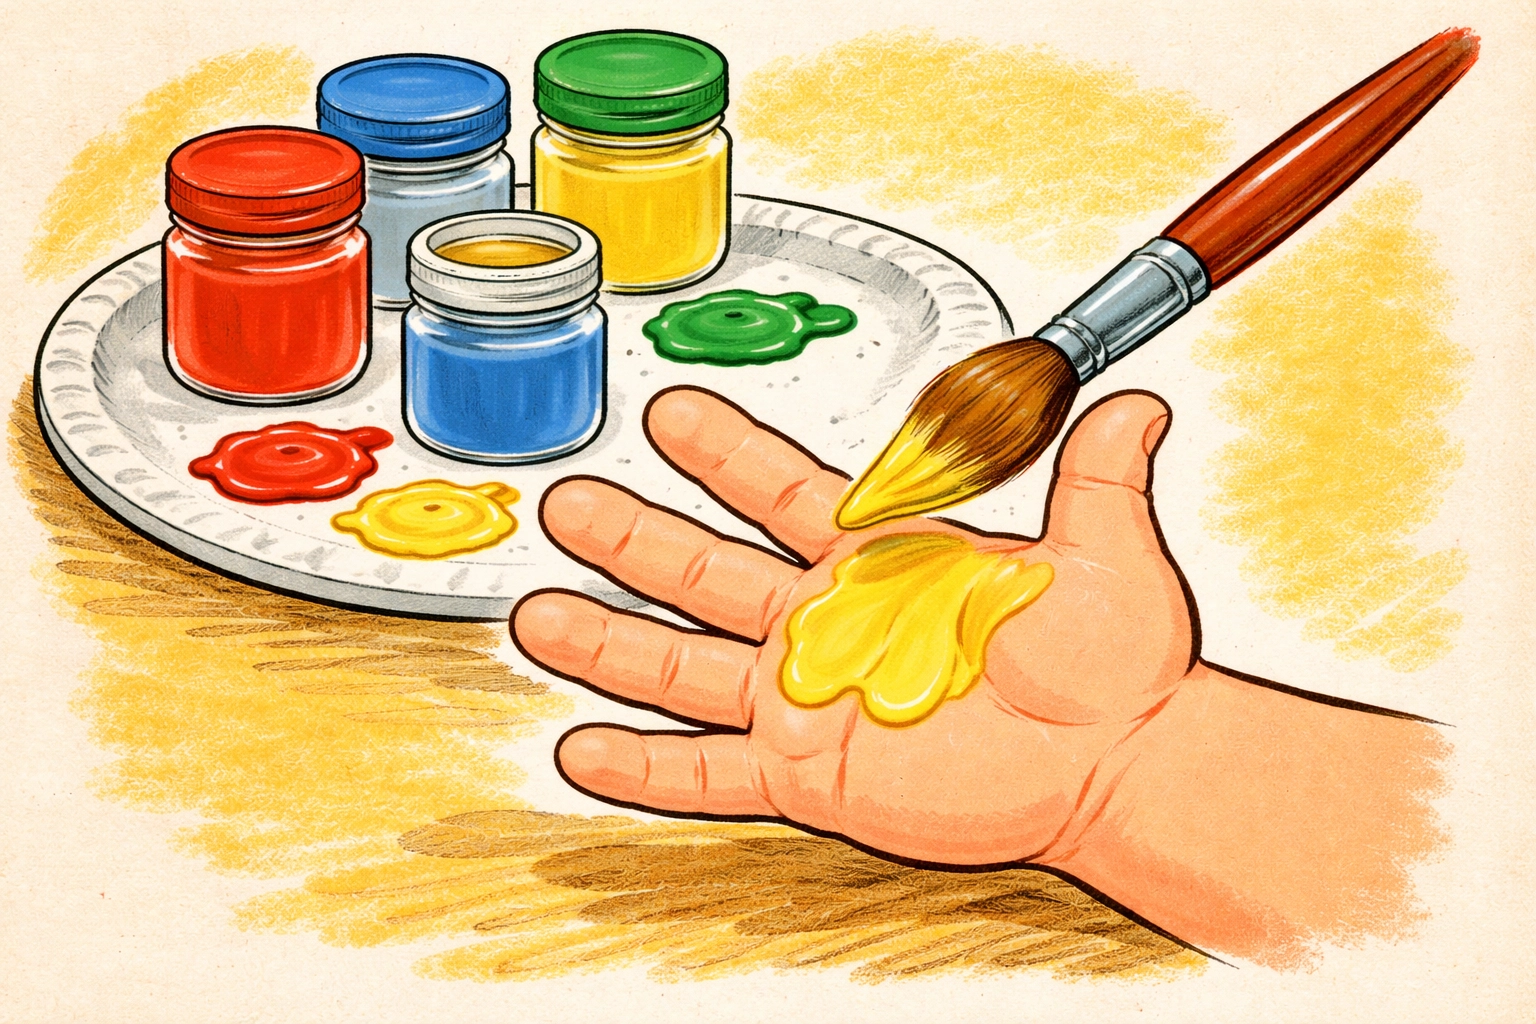
Step 3: Apply the Paint
Using a paintbrush, coat your child's hand or foot completely with paint. For single-color animals, one solid coat works great. For animals like penguins that need two colors, paint specific sections: for example, black on the thumb and pinky (for flippers) and white on the palm and middle fingers.
Pro tip: Using a brush rather than dipping directly into paint gives you more control and creates prints where you can actually see the finger and toe details.
Step 4: Make the Print
Press the painted hand or foot firmly onto the paper. Have your child hold still for just a moment: counting to five often helps younger kids stay put. Then lift straight up to avoid smudging.
If the first print looks too light, you can repaint and try again on a fresh sheet. Some families like to do a "practice print" first to get the pressure just right.
Step 5: Clean Up Immediately
This is the step that saves your sanity. The second that print is made, grab those wipes and clean off your child's hand or foot before paint ends up on clothes, furniture, or the family pet.
Step 6: Let It Dry
Wait about 10–15 minutes for the base print to dry completely. Trying to add details to wet paint usually ends in a smeared, muddy mess. This is a great time for a snack break or to read a quick story together.
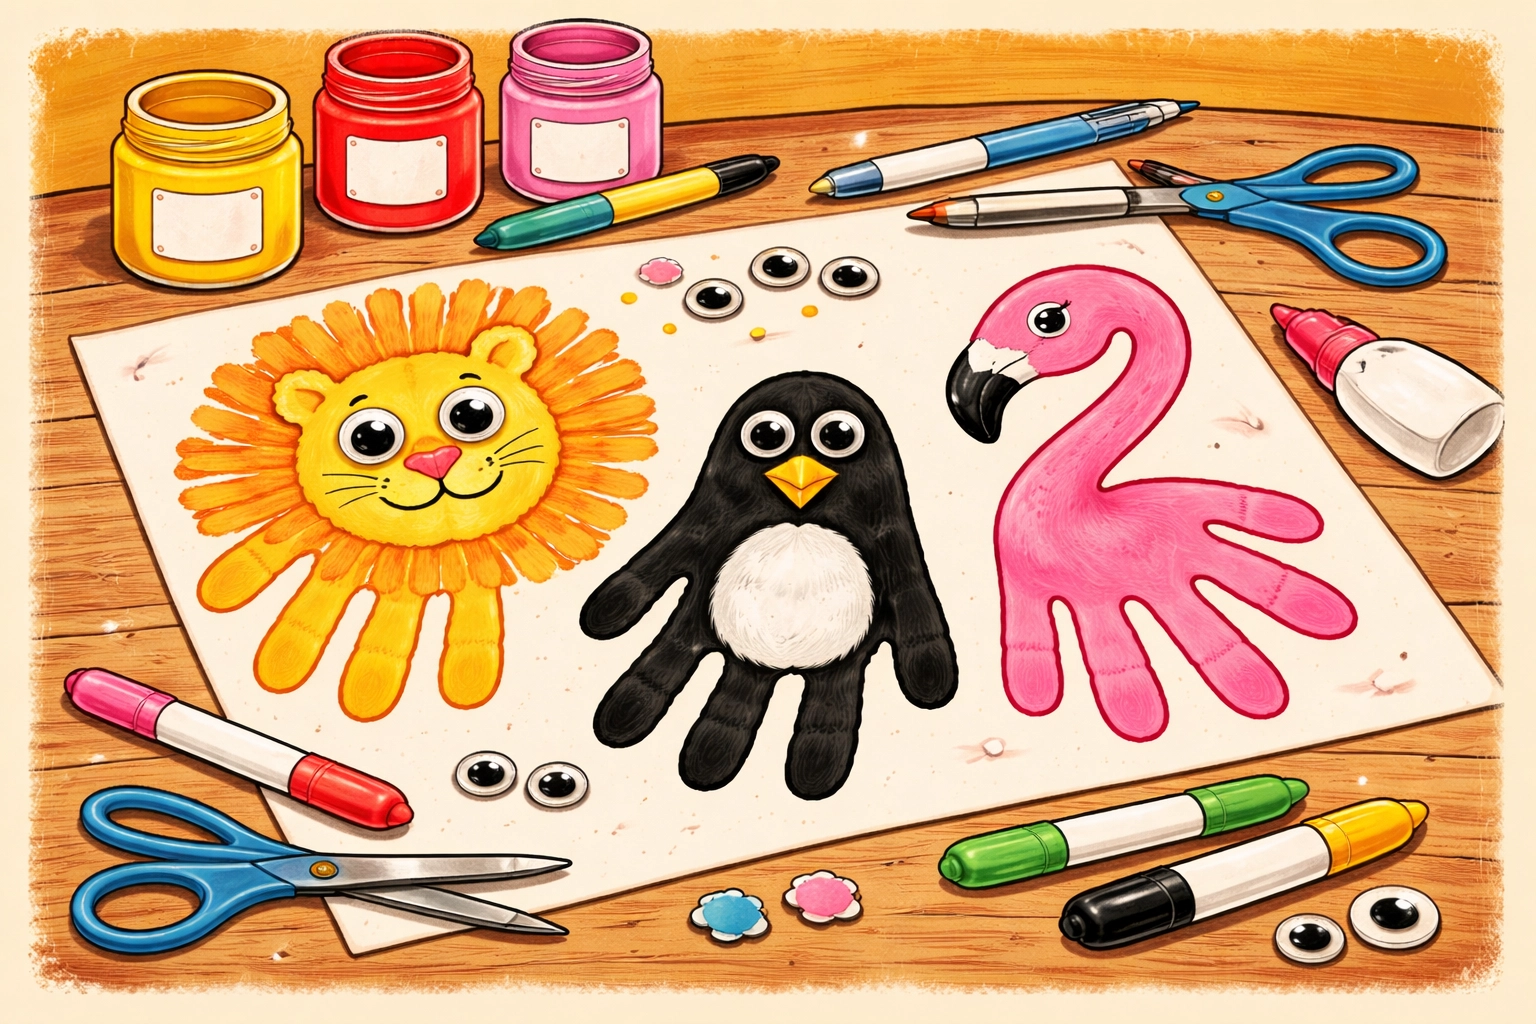
Step 7: Add Animal Features
Once dry, it's time to bring your creature to life! Use markers, additional paint, or glue-on googly eyes to add:
- Eyes: Dots, circles, or googly eyes
- Nose and mouth: Simple lines or shapes
- Ears: Painted circles or half-circles
- Tail: Curved lines or additional thumbprints
- Mane (for lions): Thumbprints arranged in a circle around the "head"
- Whiskers, spots, or stripes: Whatever your animal needs
This is where older kids can really let their creativity shine. Encourage them to add backgrounds, habitats, or even name tags for their animal creations.
Tips for Better Results
Use quality paper. Thin copy paper tends to wrinkle and warp when wet. Cardstock or heavier construction paper holds up much better and looks nicer for displaying.
Work quickly. Paint dries fast on skin, so have everything prepped before you start painting. The faster you move from paint to paper, the cleaner your print.
Try two coats for solid prints. If you want a really vibrant, solid-color print, stamp once, repaint, and stamp on a fresh piece of paper. The second print often comes out richer.
Embrace imperfection. Smudges, uneven prints, and wobbly details are part of the charm. These are keepsakes, not gallery art: the "flaws" often become the most treasured parts years later.
Make multiples. Since you're already set up, consider making several prints at once. You can turn them into different animals later or have backups if one doesn't turn out quite right.
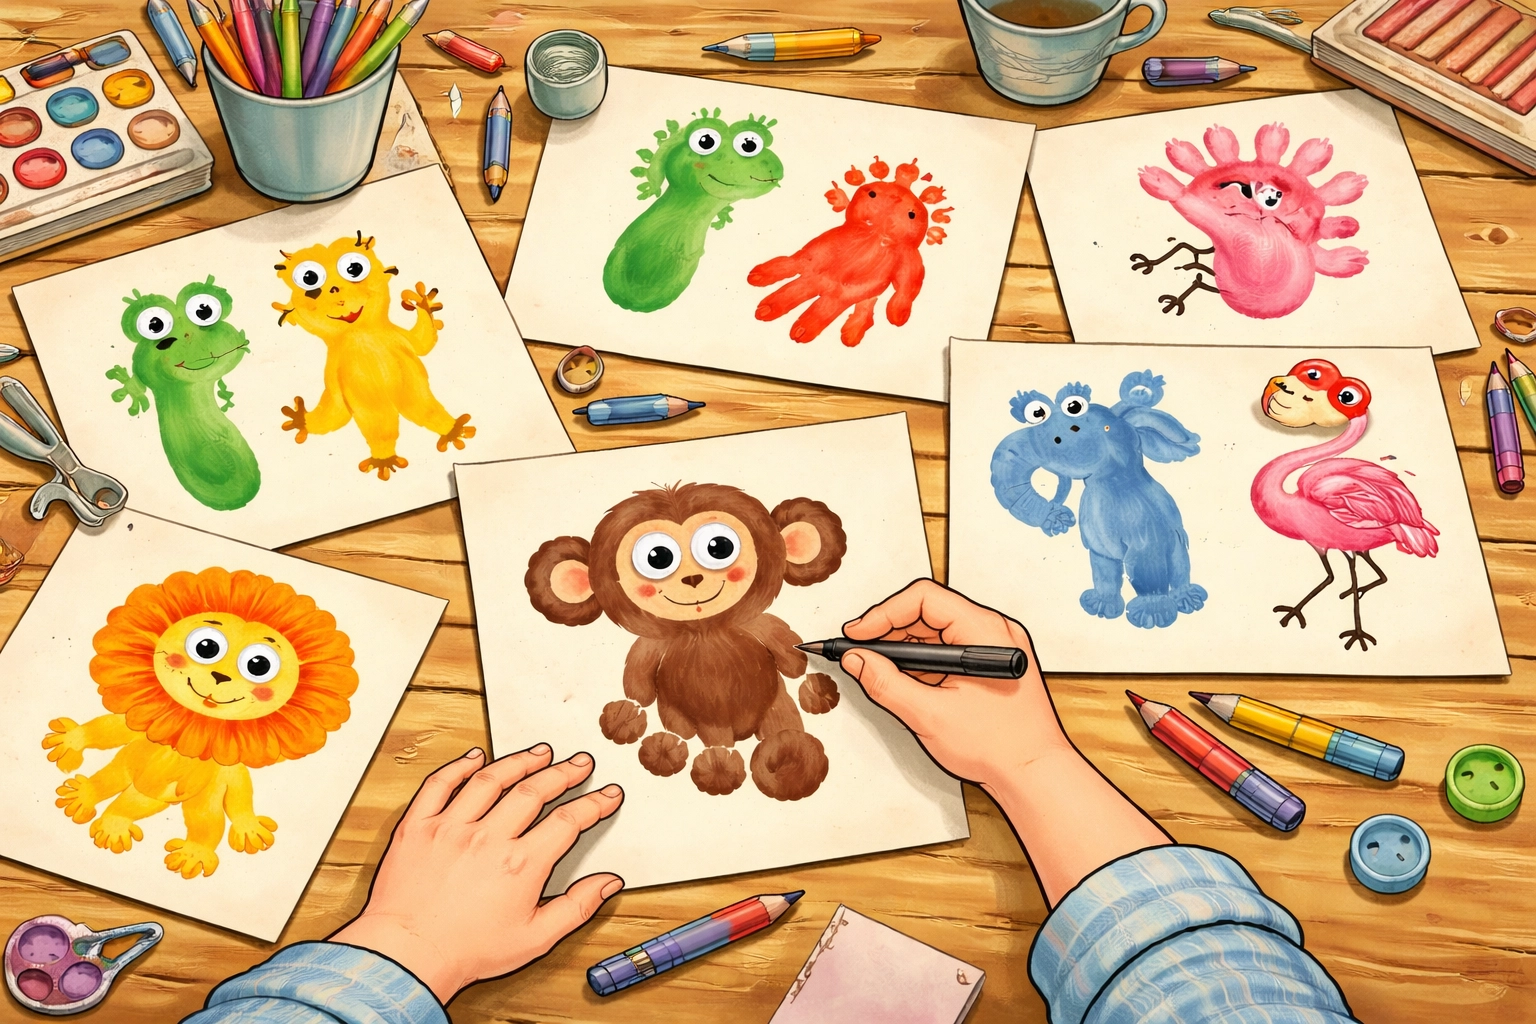
Creative Animal Ideas to Try
Here's a quick reference for turning prints into specific creatures:
| Animal | Print Type | Orientation | Key Details to Add |
|---|---|---|---|
| Lion | Handprint | Fingers down | Thumbprint mane around palm, face on palm |
| Penguin | Handprint | Fingers up | Black edges, white center, orange beak |
| Monkey | Footprint | Heel up | Round ears, curly tail, face on heel |
| Flamingo | Handprint | Fingers down | Long neck, legs, beak from thumb |
| Butterfly | Two handprints | Thumbs overlapping | Antennae, body between palms |
| Octopus | Handprint | Fingers down | Eyes on palm, fingers become tentacles |
| Fish | Footprint | Sideways | Eye near heel, fins and scales |
Frequently Asked Questions
What kind of paint works best for handprint art?
Washable tempera paint is generally the safest and easiest to clean. It's non-toxic, comes in vibrant colors, and washes off skin and most clothing without too much trouble.
Can babies do this activity?
With adult assistance, babies as young as 6 months can make footprints. Just be prepared for a quick stamp-and-clean operation: and keep paint away from curious mouths.
How do I keep my toddler still long enough to make a print?
Counting to five, singing a quick song, or having another adult provide a distraction often helps. Some parents find that footprints are easier with wiggly toddlers since little ones can sit while you handle their feet.
What if the print smudges?
It happens! You can try again on fresh paper, or embrace the smudge and work it into your animal design. Many "mistakes" turn into happy accidents.
How long does the paint take to dry?
Typically 10–15 minutes for a thin layer of tempera paint on cardstock. Thicker applications may take a bit longer.
Can we use finger paint instead of tempera?
Finger paint works but tends to be thicker and may not show as much detail in the prints. Tempera usually gives crisper results.
How do I preserve the finished artwork?
Once completely dry, you can frame it behind glass, laminate it, or spray it with a clear acrylic sealer to help protect it over time.
What's the best paper for handprint art?
Cardstock or heavyweight construction paper works best. It absorbs paint well without warping and holds up for display.
Can older kids do this independently?
Many kids ages 6 and up can manage most steps on their own, though they may need help with cleanup and some finer details.
How many animals can we make in one session?
That depends on your child's attention span! Most families find 2–4 animals per session keeps things fun without turning into a chore.
For more creative projects to do with your kids, check out our Kids Crafts collection for ideas that keep little hands busy and imaginations running wild.


