


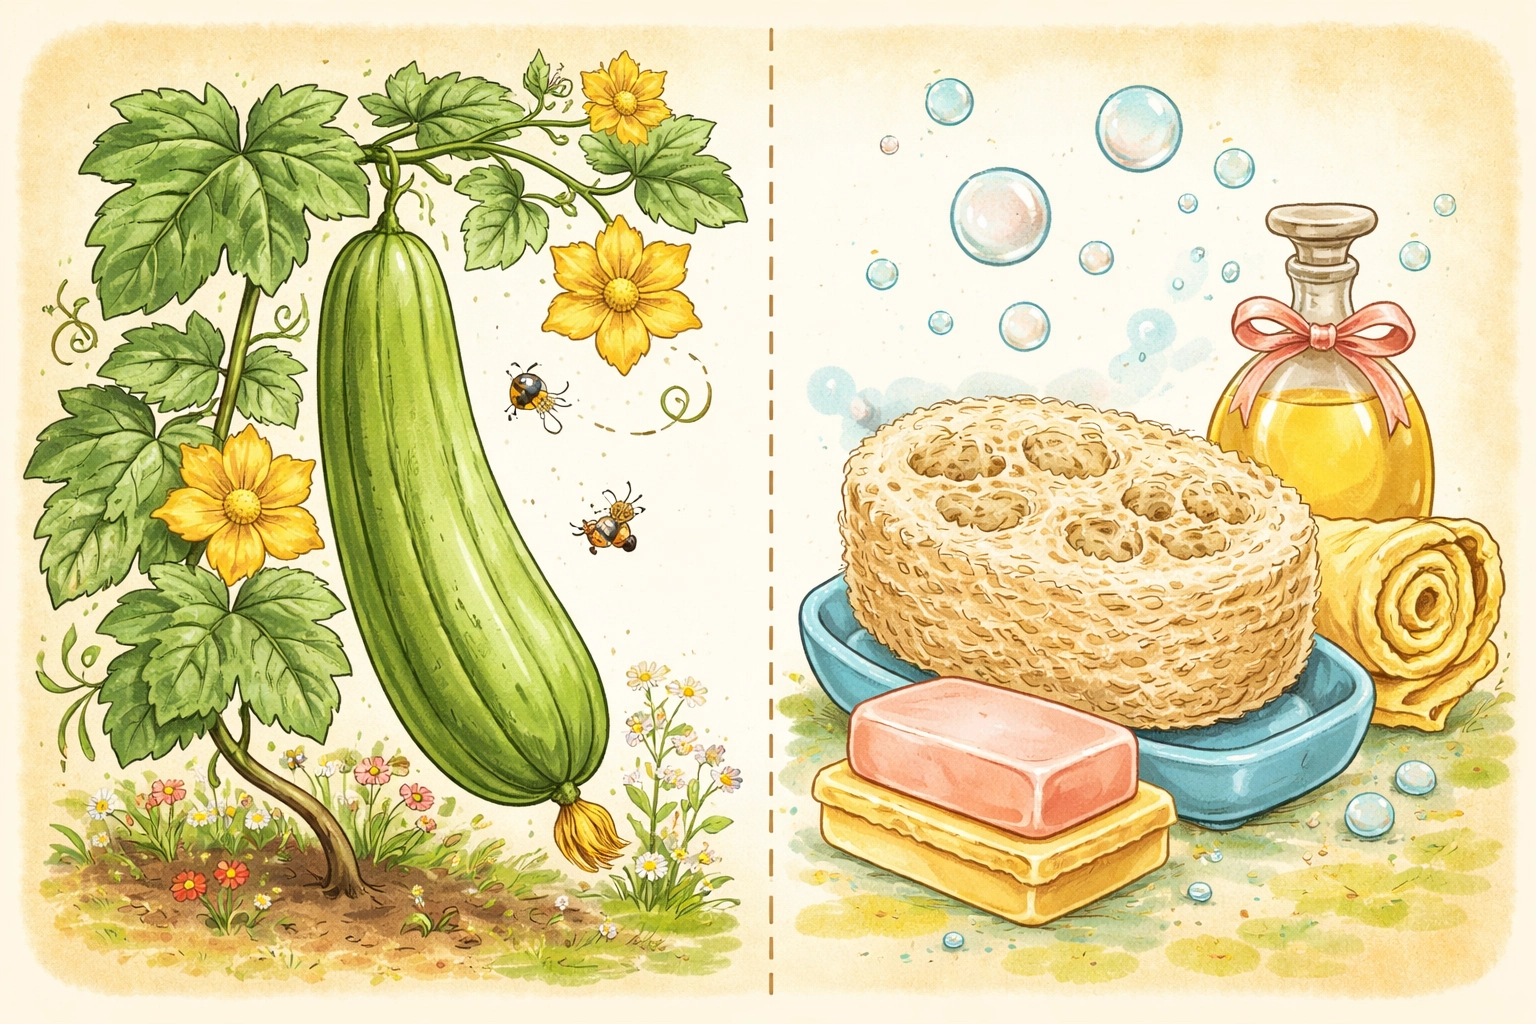
Yes, you can absolutely grow your own loofah sponge from a tiny seed, and it's one of the coolest garden surprises you'll ever share with your kids! Those scratchy bath sponges you see at the store? They're not from the ocean. They're not manufactured in a factory. They actually grow on vines, just like cucumbers and squash. Mind. Blown. Right?
Growing loofahs at home is a fantastic long-season project that teaches patience, rewards curiosity, and ends with a homegrown sponge your family can actually use. Best of all? You can get started for well under $10.
Let's dig in!
Wait, Loofahs Are Plants?!
You bet they are! The loofah (sometimes spelled "luffa") is a member of the gourd family, closely related to cucumbers, melons, and zucchini. When the fruit fully matures and dries out on the vine, the inside transforms into that familiar fibrous scrubber we all know from the bathtub.
It's basically nature's built-in dish sponge. How cool is that?
What You'll Need (Budget: Under $10)
Here's your simple supply list to get this project rolling:
| Item | Estimated Cost |
|---|---|
| Loofah seeds (1 packet) | $2–$4 |
| Seed starting mix (small bag) | $3–$4 |
| 4-inch pots or recycled containers | Free–$2 |
| Plastic wrap or humidity dome | Free (use kitchen wrap!) |
| Sunny window or basic grow light | Already have it! |
Total: Around $5–$10
You can often find loofah seeds at garden centers, big-box stores, or online seed shops. One packet usually contains 10–20 seeds, plenty for a family experiment!
Step-by-Step: Growing Loofahs From Seed
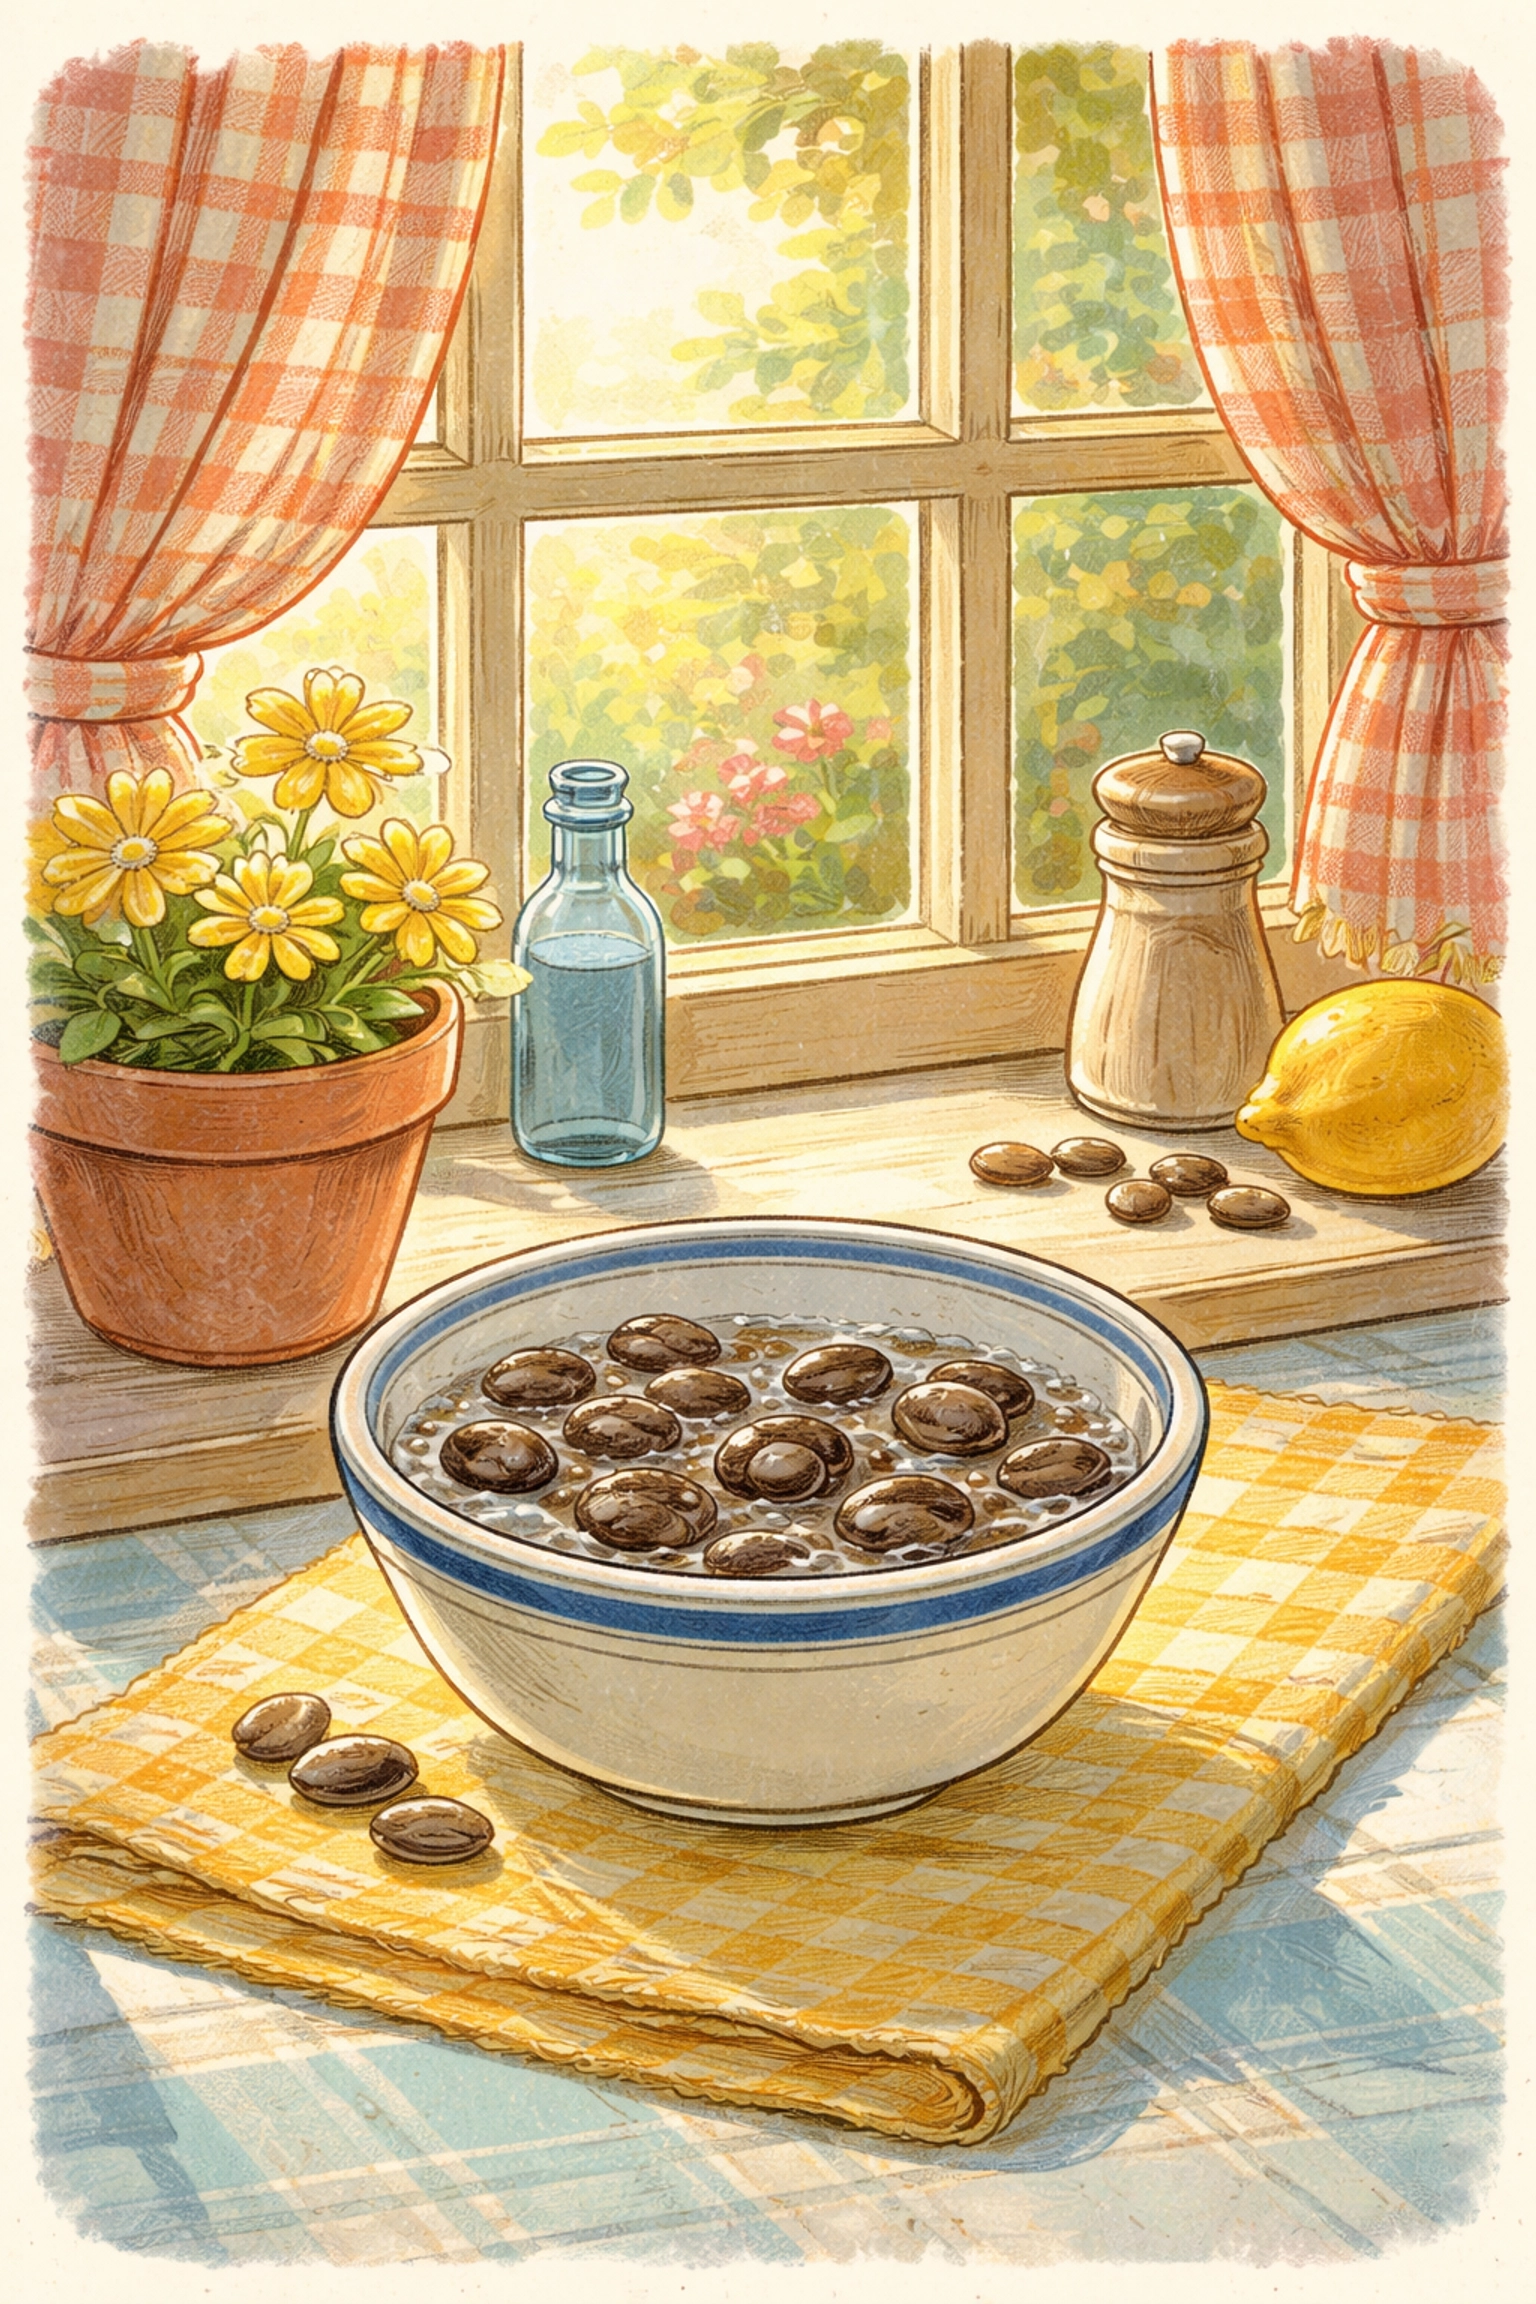
Step 1: Wake Up Those Seeds
Loofah seeds have a tough outer coat, so they appreciate a little help getting started. Soak your seeds in warm water for 24–48 hours before planting. This softens the shell and speeds up germination.
Pro tip: If you're feeling fancy, gently rub the seeds on medium-grit sandpaper to thin the coating. This is called "scarification," and it gives water an easier entry point.
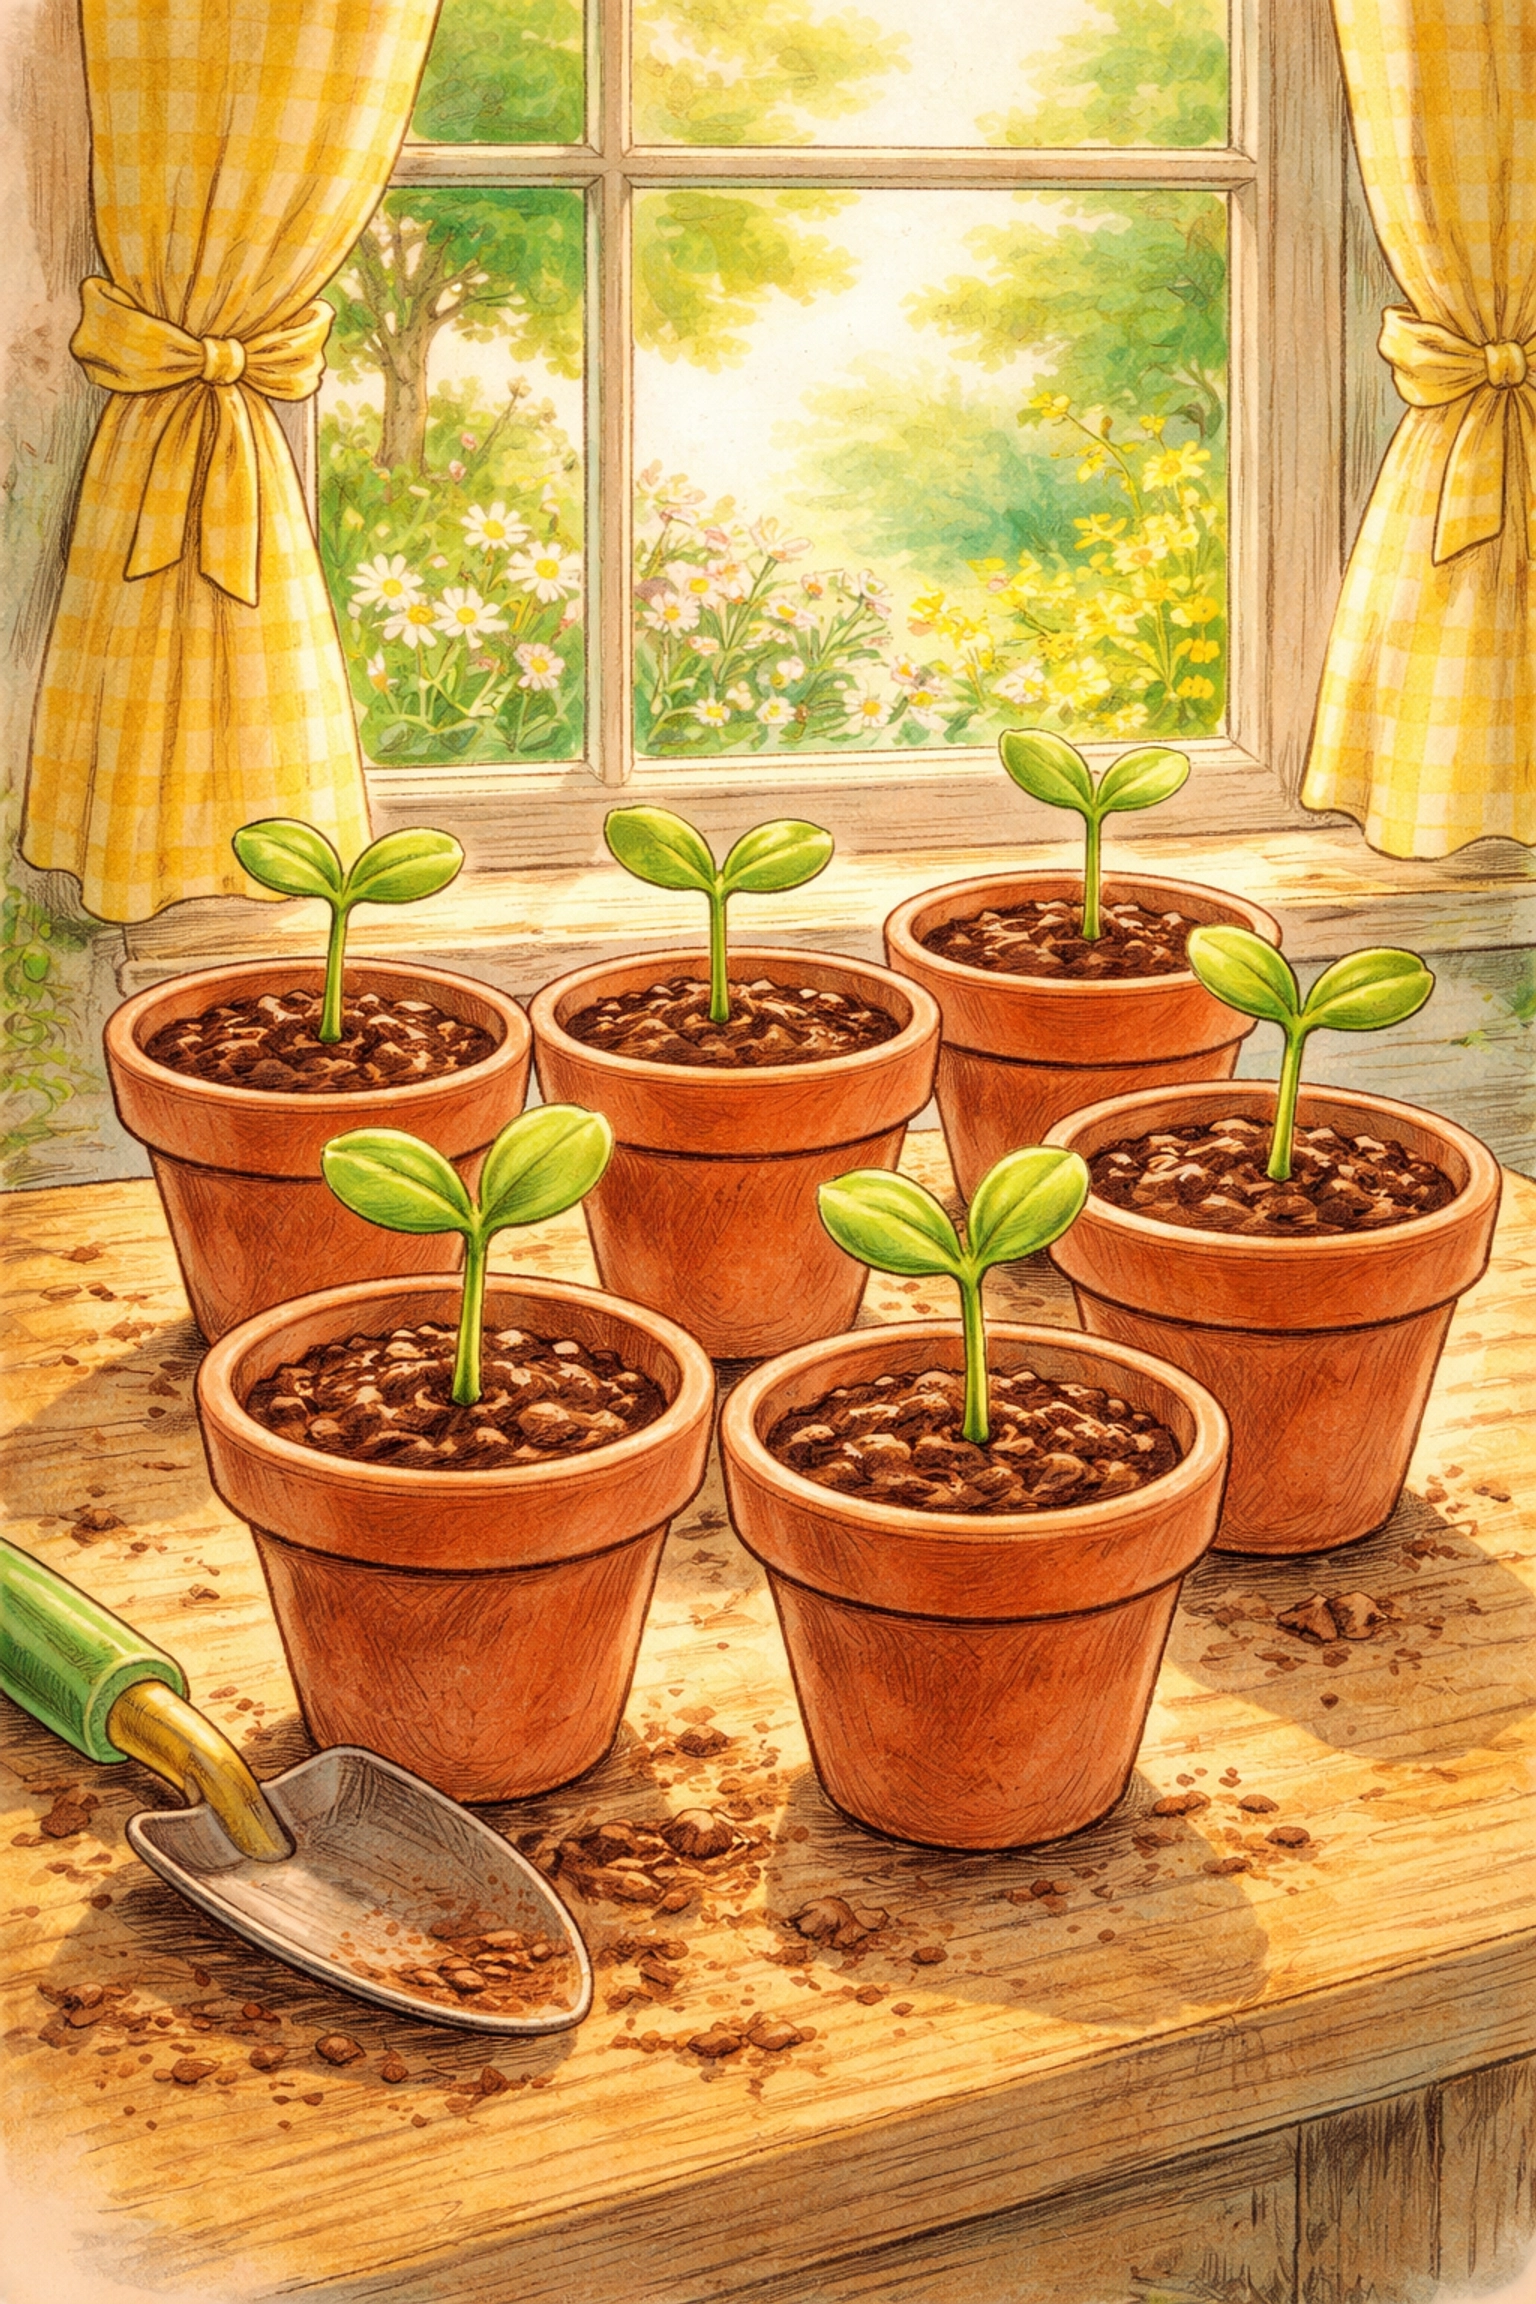
Step 2: Start Seeds Indoors (6–8 Weeks Early)
Loofahs need a looooong growing season, we're talking 100 to 200 days to fully mature into usable sponges. That's why starting indoors is essential, especially if you live anywhere north of Zone 8.
Here's how:
- Fill 4-inch pots with pre-moistened seed starting mix
- Plant seeds about ½ inch deep
- Cover pots loosely with plastic wrap to create a mini greenhouse effect
- Place in a warm spot (70–85°F is ideal)
If you have a seedling heat mat, now's the time to use it! Warm soil can cut germination time down to just 5–14 days. Without heat, you might be waiting up to three weeks.
Once those little sprouts pop up, remove the plastic covering right away. Good airflow prevents mold and keeps seedlings happy.
Step 3: Baby Your Seedlings
When your loofah babies develop their first "true leaves" (the second set of leaves that look different from the initial rounded seed leaves), it's time to start feeding them. Use a diluted liquid fertilizer every week or two.
Keep the soil lightly moist, not soggy, not bone dry. Think of a wrung-out sponge. (Hey, that's fitting!)
Step 4: Harden Off and Transplant Outdoors
Once nighttime temperatures are consistently above 55°F, it's time to move your loofah plants outside. But don't just toss them into the garden cold turkey! Seedlings need a "hardening off" period to adjust to outdoor conditions.
Here's the drill:
- Days 1–3: Set seedlings outside in a shaded, sheltered spot for 2–3 hours
- Days 4–6: Gradually increase sun exposure and time outdoors
- Days 7–10: Leave them out overnight (if temps stay above 55°F)
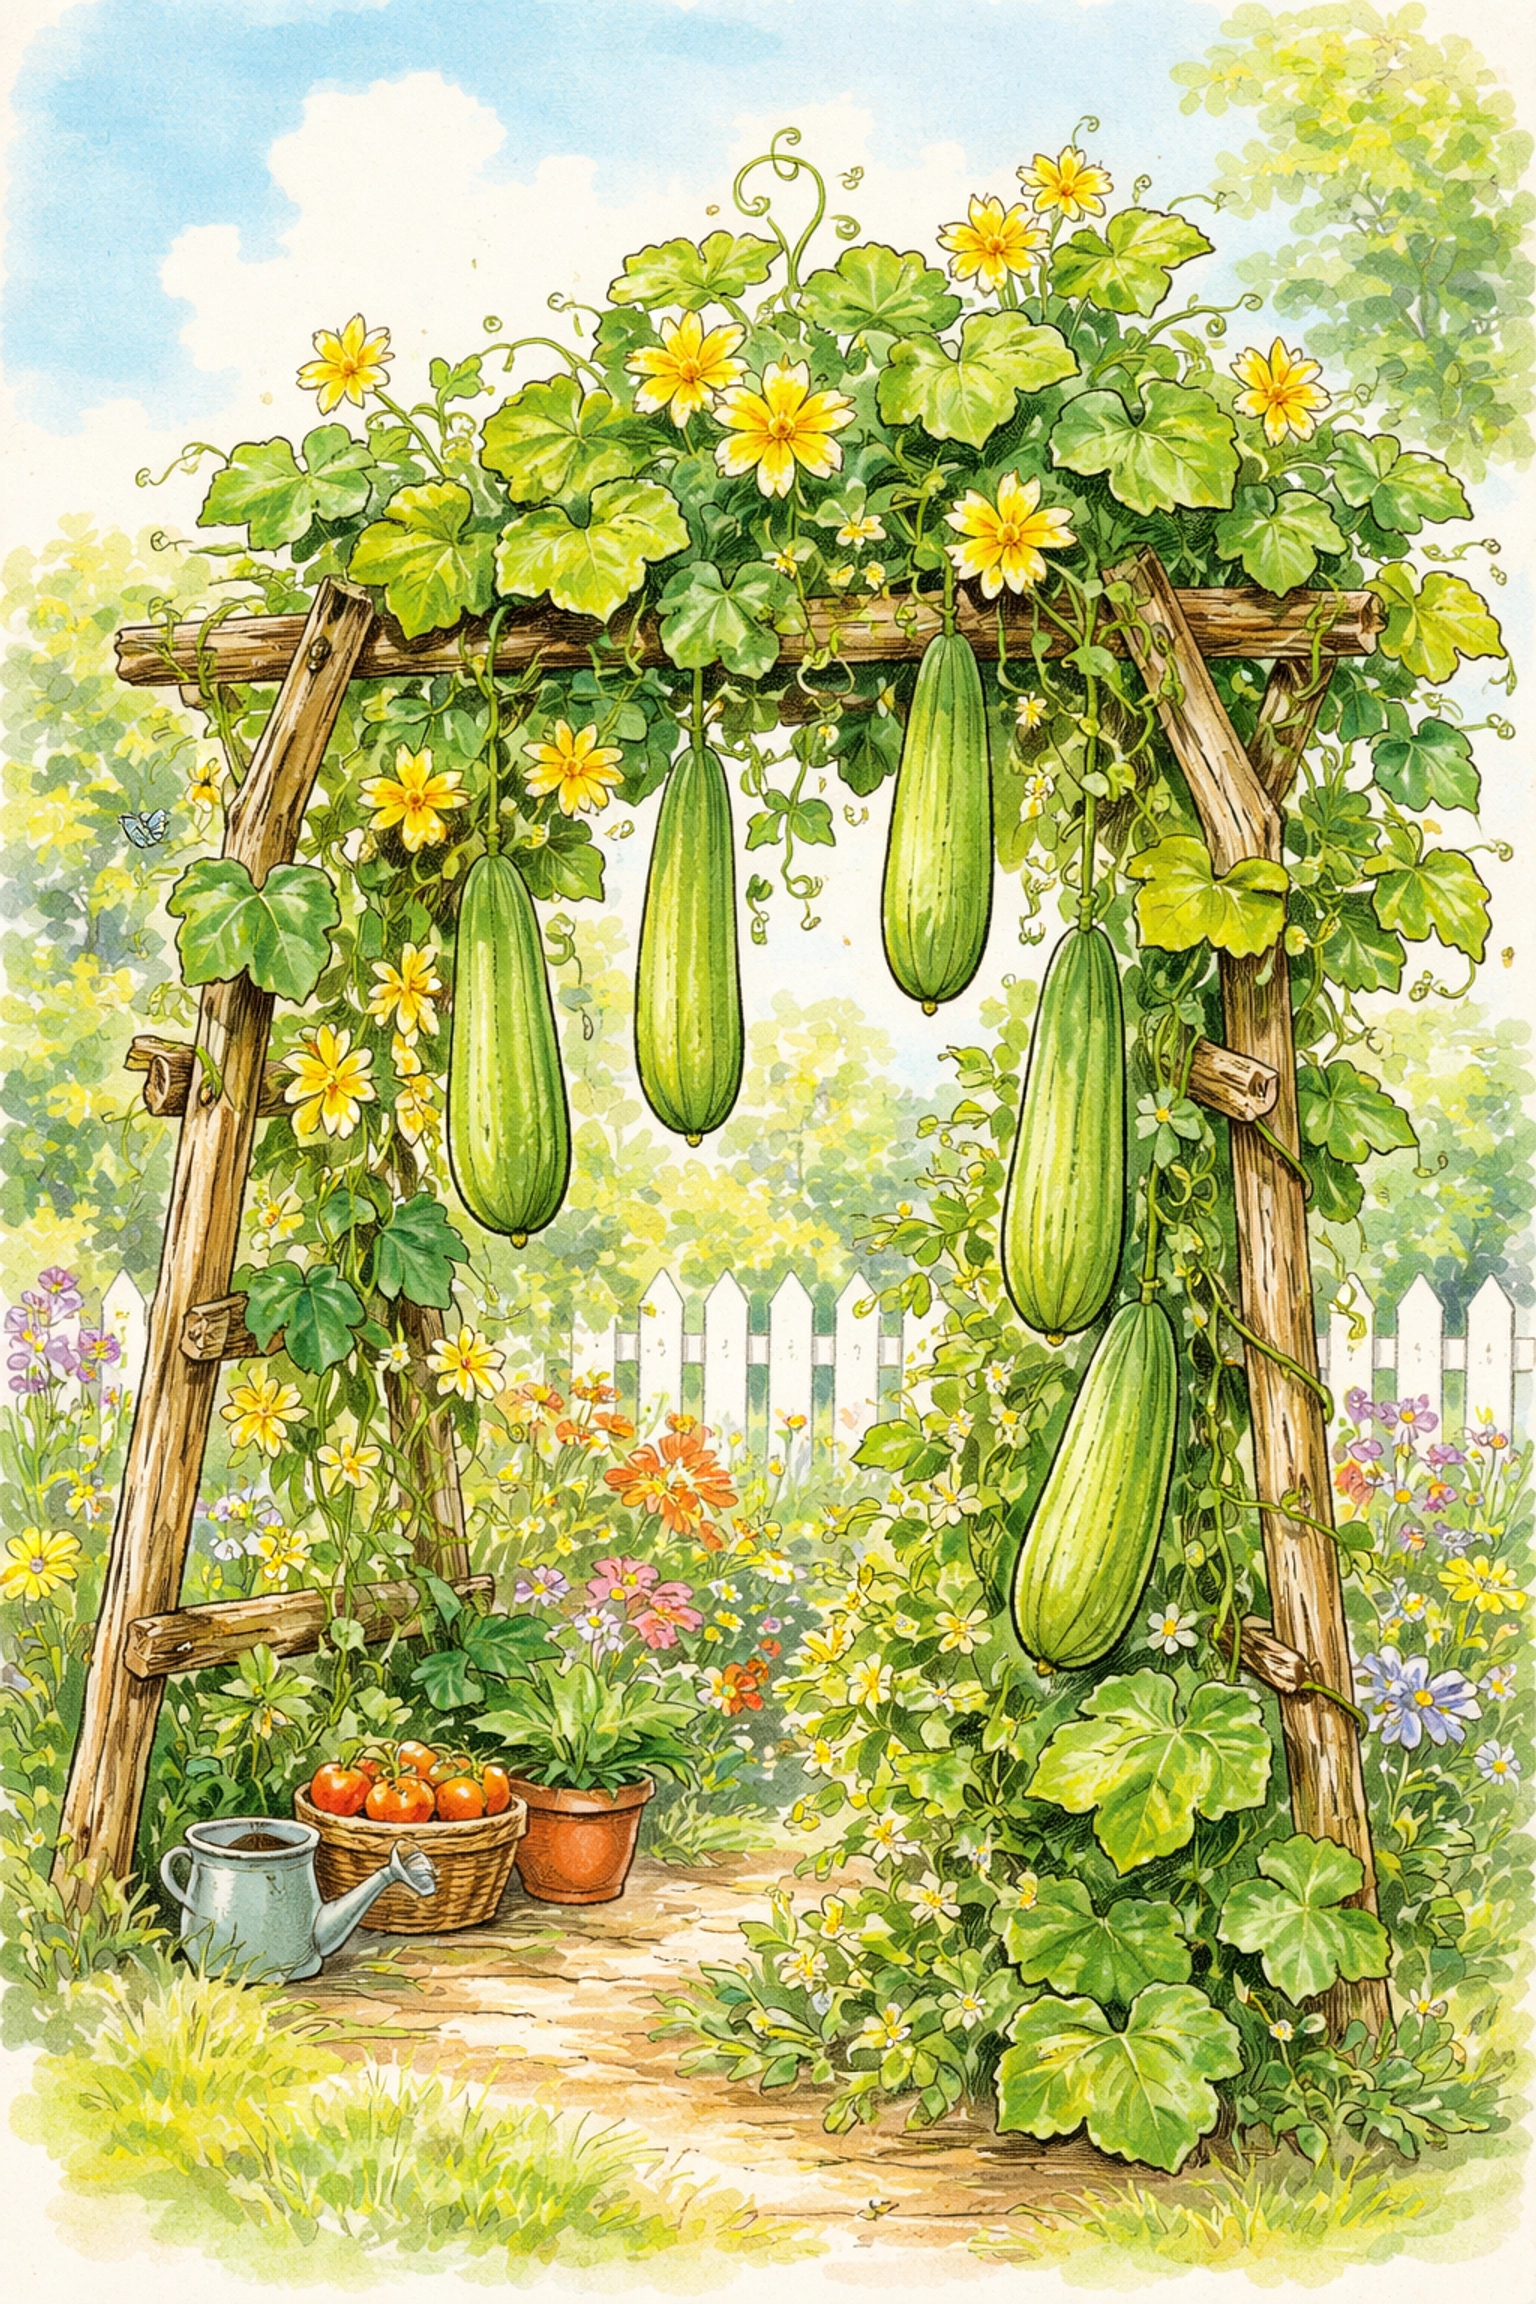
After hardening off, transplant into a sunny garden spot with rich, well-draining soil. Loofahs are vines, so give them a sturdy trellis, fence, or arbor to climb. They can get BIG, we're talking 15–30 feet of vigorous green growth!
Step 5: Water, Feed, and Watch the Magic
Loofahs are thirsty plants. Give them 1–2 inches of water per week and add mulch around the base to help retain moisture. Continue feeding with a balanced fertilizer throughout the growing season.
In ideal conditions, a single loofah plant can produce anywhere from 5 to 20 gourds. That's a lot of homegrown sponges!
You'll see pretty yellow flowers appear first, followed by small green fruits that look a lot like cucumbers. As the season progresses, these gourds will grow longer and heavier.
Step 6: Harvest Your Sponges
Here's where patience really pays off. Leave your loofahs on the vine as long as possible, ideally until the skin turns brown and feels lightweight and dry. If frost threatens before they're fully dried, harvest them anyway and let them finish drying indoors in a warm, airy spot.
To process your loofah:
- Step on the dried gourd and roll it gently under your foot to crack and loosen the outer skin
- Peel away the papery brown layer
- Shake out the seeds (save them for next year!)
- Rinse thoroughly under running water to remove any remaining plant material
- Let the sponge dry completely in the sun
And just like that, you've got a homegrown, all-natural bath scrubber or dish sponge!
Fun Ways to Use Your Homegrown Loofahs
Once you've harvested and cleaned your loofah sponges, the possibilities are endless:
- Bath time scrubbers – Gentle exfoliation, zero plastic waste!
- Kitchen dish sponges – Great for scrubbing pots and pans
- Craft projects – Cut into shapes for stamping or sensory play
- Gifts – Tie with twine and pair with homemade soap for an adorable present
Your kids will get a huge kick out of telling friends, "I grew this sponge myself!"

Why This Project Is Perfect for Families
Growing loofahs teaches some wonderful lessons:
- Patience: This isn't a quick-win crop. It takes months!
- Life cycles: Kids witness the entire journey from seed to usable product
- Sustainability: Homegrown sponges = zero plastic waste
- Curiosity: The "wait, this is a plant?!" factor never gets old
It's also a fantastic companion project if you're already doing container gardening or building mini greenhouses. Speaking of which, if you need a budget-friendly way to protect your seedlings, check out our guide on how to make a DIY mini greenhouse out of plastic bottles!
Frequently Asked Questions
How long does it take to grow a loofah sponge?
Plan for 100–200 days from seed to harvest. Starting seeds indoors 6–8 weeks before your last frost gives you the best head start.
Can I grow loofahs in containers?
Yes, but choose a large container (at least 5 gallons) and provide a sturdy trellis. Container loofahs may produce fewer fruits than garden-grown plants.
When should I plant loofah seeds?
Start seeds indoors 6–8 weeks before your last expected frost date. Transplant outdoors when nighttime temperatures stay above 55°F.
Do loofahs need a trellis?
Highly recommended! Loofah vines can grow 15–30 feet long. A trellis keeps fruit off the ground and helps them dry evenly.
How many loofahs will one plant produce?
In ideal conditions, a single plant can yield 5–20 gourds.
Can I eat loofah?
Yes! Young, tender loofah gourds (harvested when 4–6 inches long) are edible and popular in Asian cuisine. Once they mature and become fibrous, they're sponge-only material.
How do I save loofah seeds?
Shake or bang the dried gourd to release the black seeds inside. Store in a cool, dry place and plant next spring!
Will loofahs grow in cold climates?
They can, but you'll need to maximize your growing season by starting early indoors and possibly using row covers or cold frames to extend warmth.
Are loofah sponges compostable?
Absolutely! When your sponge wears out, toss it in the compost bin. It's 100% plant material.
Where can I buy loofah seeds?
Check your local garden center, big-box stores, or online seed retailers. They're usually found near the gourd and squash seeds.
References
- Research on loofah seed germination and indoor starting techniques
- Growing guides for luffa gourd cultivation and harvest processing
Happy growing, friends! There's nothing quite like the moment your kiddo realizes that scratchy bath sponge started as a tiny seed in a pot on your windowsill. Nature is wild like that. 🌱🧽


