


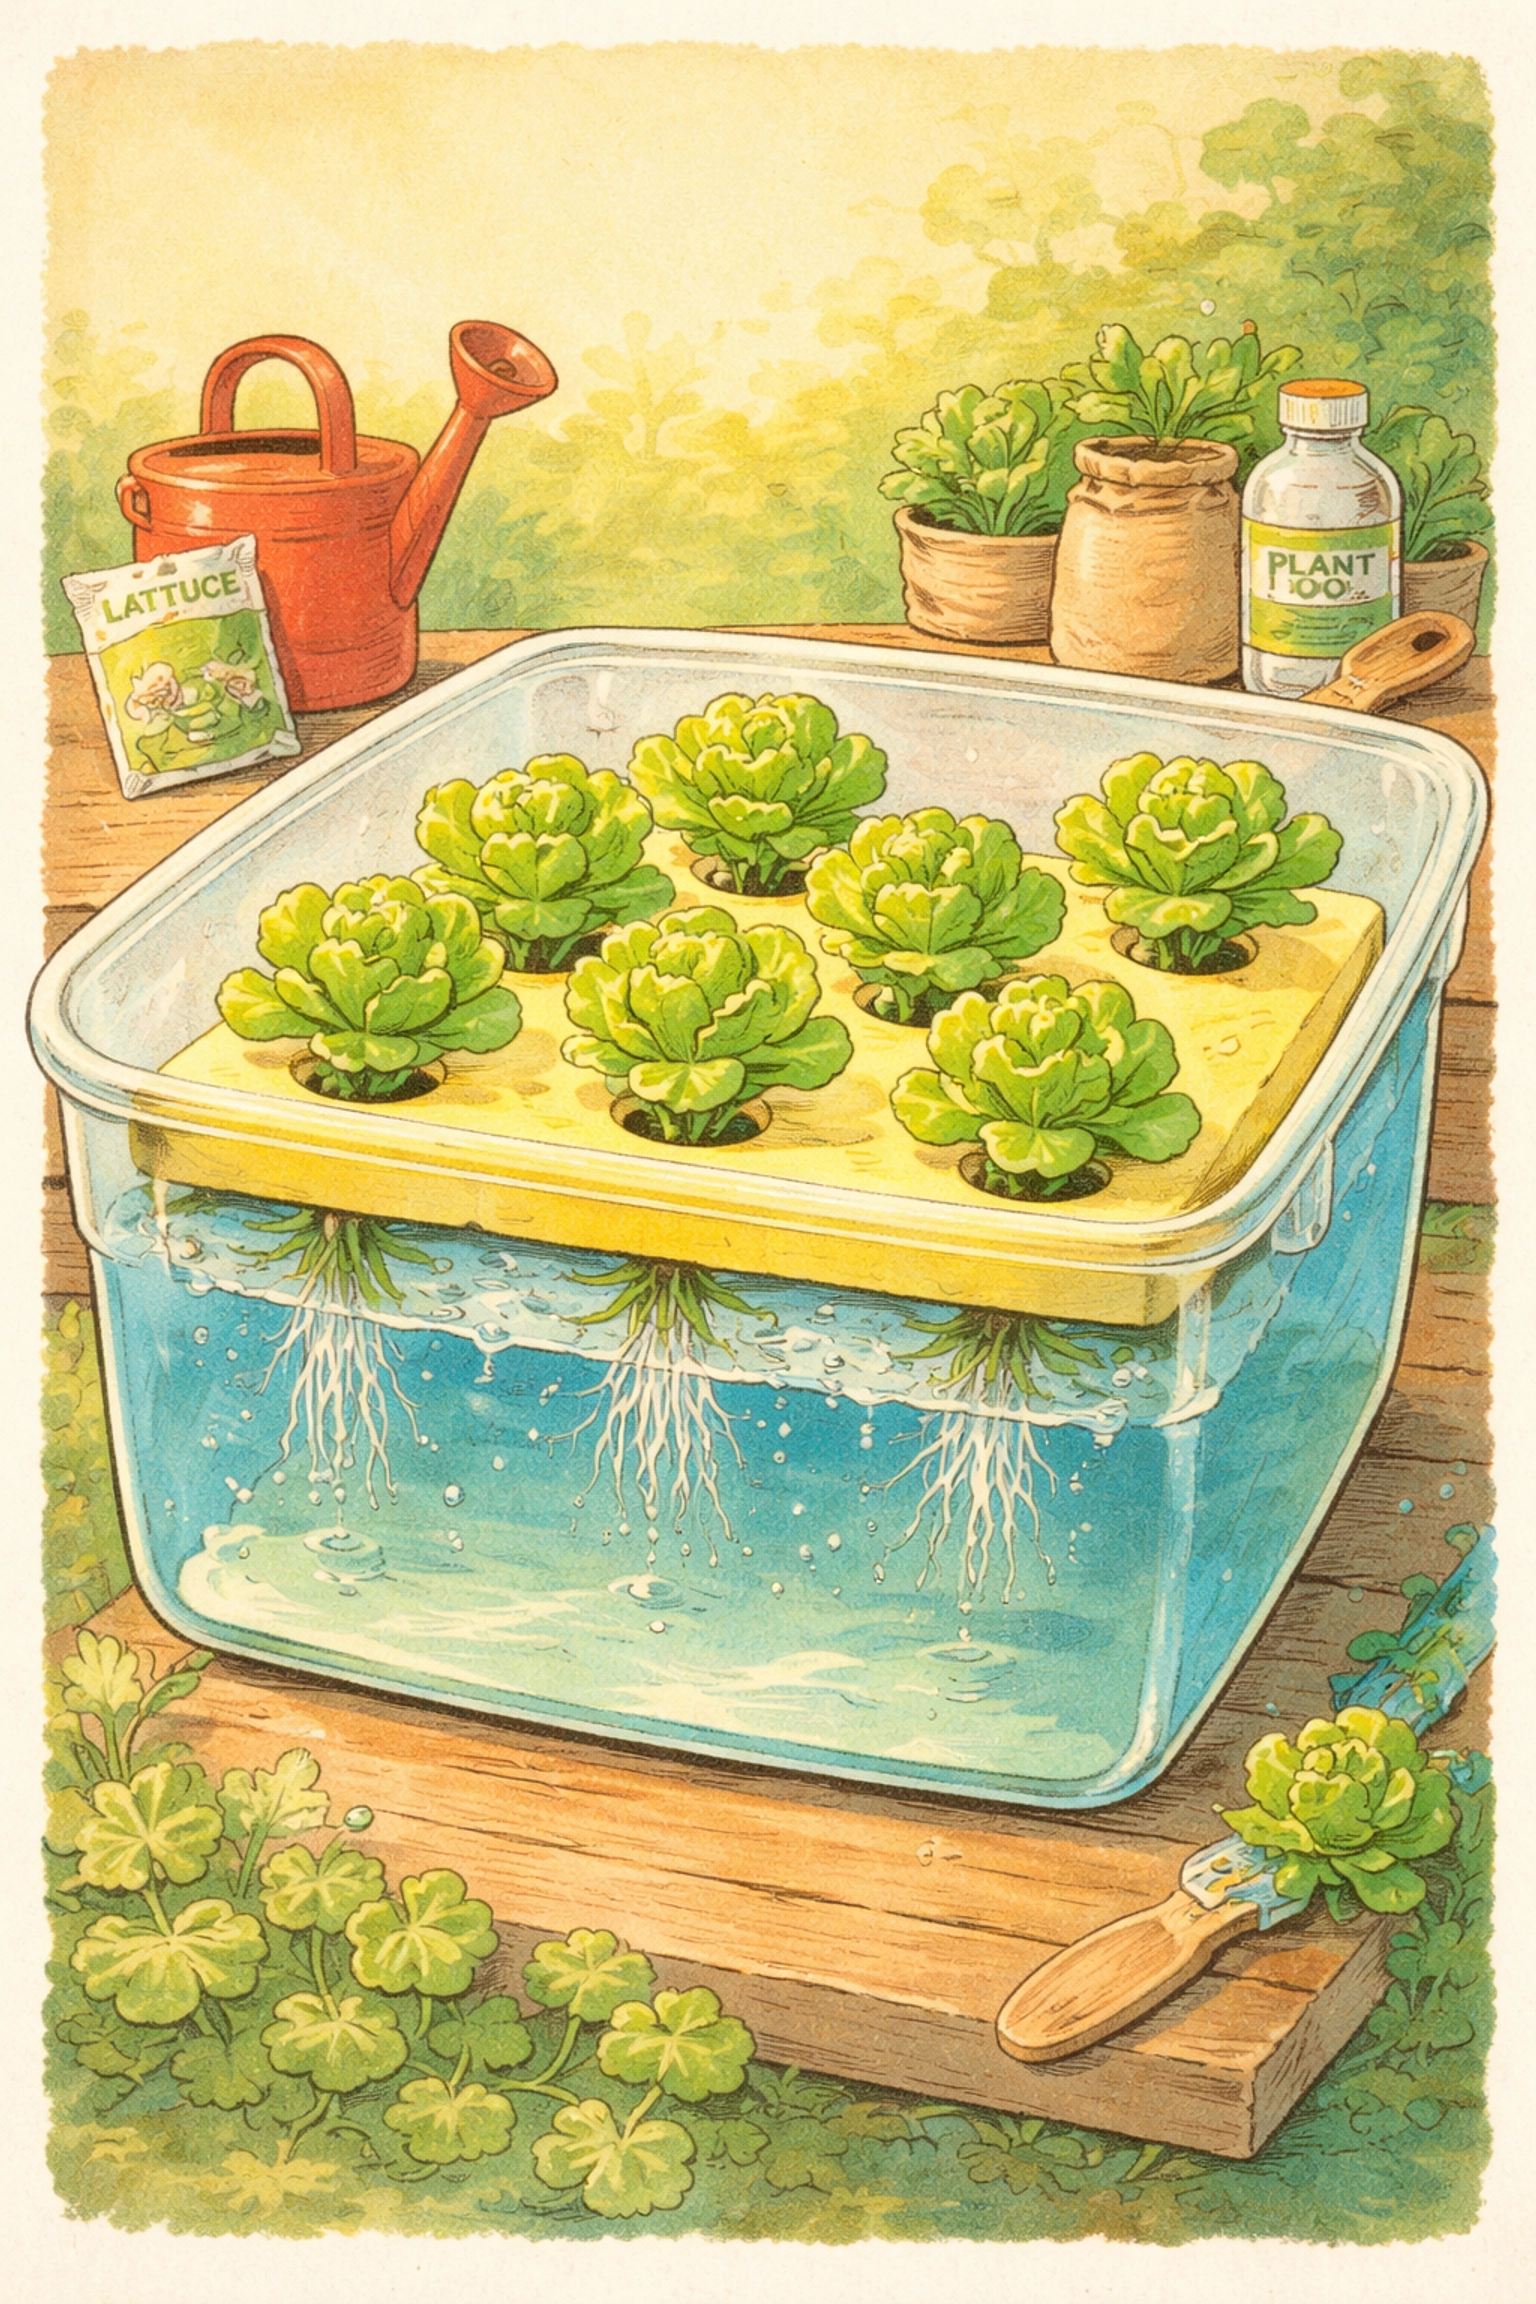
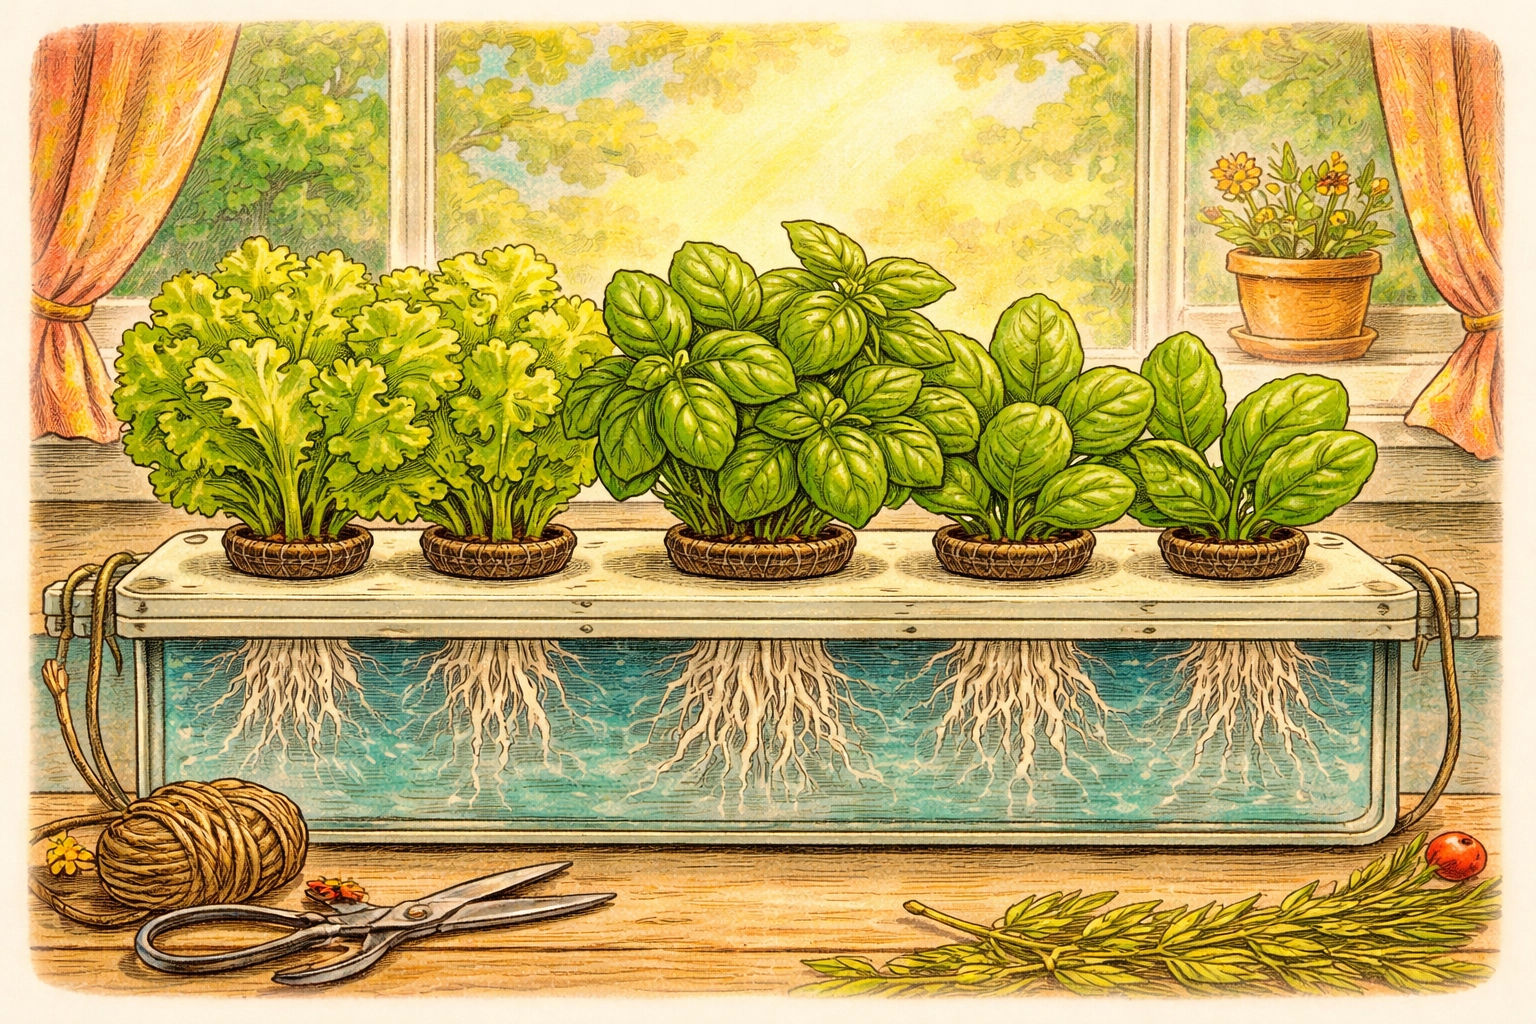
A floating raft garden is one of the easiest hydroponic systems you can build at home. Simply fill a plastic storage bin with water and nutrient solution, cut holes in a foam sheet to hold your plants, and let the raft float on top. The roots dangle into the nutrient-rich water below, and you can grow fresh lettuce, herbs, and greens without any soil at all, often for under $10 if you shop smart.
This beginner-friendly project is perfect for families who want to explore hydroponics without complicated pumps, expensive equipment, or a degree in botany. Kids especially love watching the roots grow through the clear water, and the whole setup can sit on a sunny windowsill, patio, or even under a simple grow light.
Let's break it all down step by step.
What Is a Floating Raft System?
A floating raft system (sometimes called "deep water culture lite" or a raft garden) is a hydroponic method where plants sit in a buoyant foam platform that floats directly on nutrient-enriched water. The roots hang down into the solution, soaking up everything they need to grow.
Unlike more advanced hydroponic setups, there are no pumps cycling water through tubes or timers to manage. The foam does all the heavy lifting, literally, by keeping your plants suspended at the perfect height while providing access to oxygen at the water's surface.
Budget Breakdown: Building Your Raft Garden for Under $10
One of the best things about this project is how affordable it can be. Here's a sample budget using common materials:
| Item | Estimated Cost | Where to Find It |
|---|---|---|
| Plastic storage bin (6–10 gallon) | $3–$5 | Dollar store, discount retailer |
| Polystyrene foam sheet (1" thick) | $1–$3 | Craft store, packaging scraps |
| Small net cups or plastic cups | $1–$2 (or free) | Garden center, repurpose yogurt cups |
| Hydroponic nutrient solution | $2–$4 | Garden center (small bottle) |
| Seeds (lettuce, basil, spinach) | $1–$2 | Dollar store, garden section |
| Total | $8–$16 |
Pro tip: You can often find foam sheets for free from packaging materials. Old cooler lids work wonderfully too. And if you already have a storage bin collecting dust in the garage, you're already halfway there.
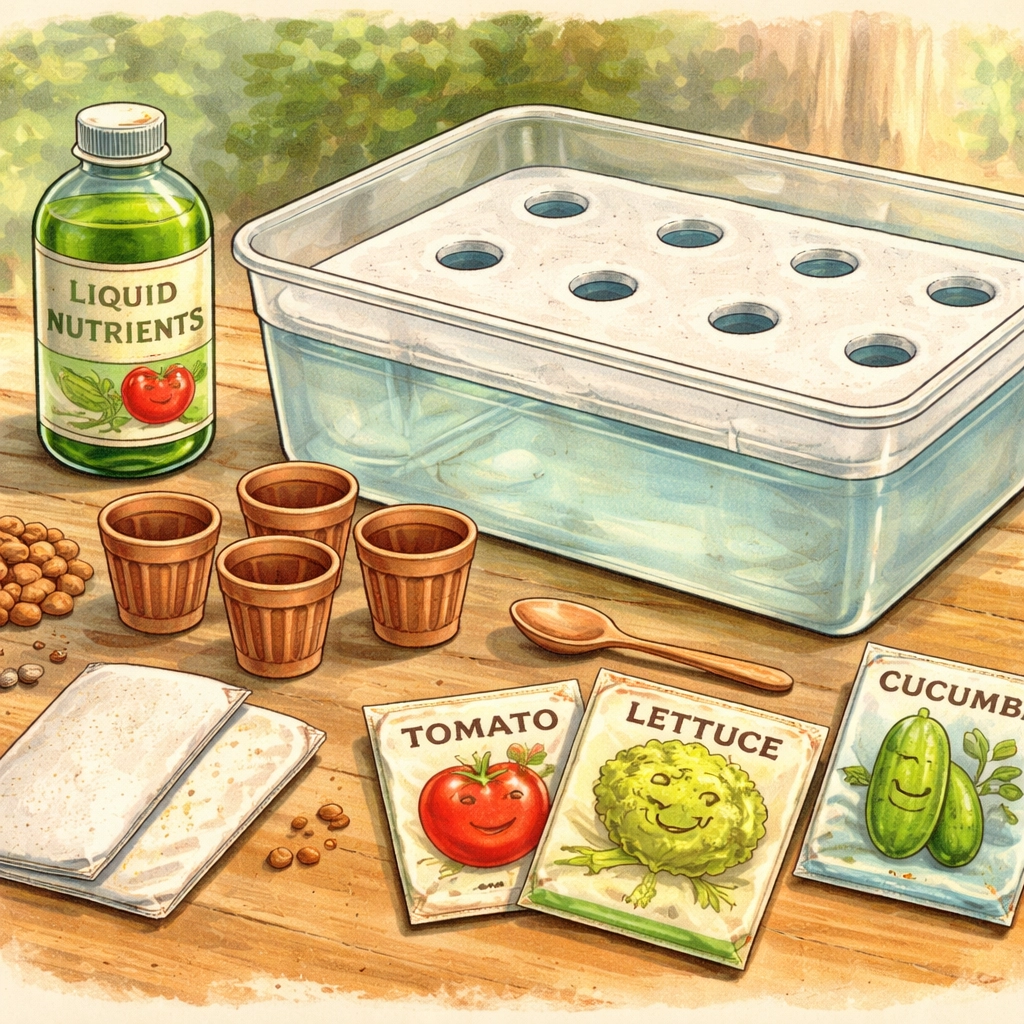
What You'll Need
Before you start, gather these supplies:
- Plastic storage bin (6–10 gallon capacity with straight sides works best)
- Polystyrene foam sheet (about 1 inch thick, sized to fit inside your bin)
- Net cups or small plastic cups (2–3 inch diameter)
- Soilless growing medium (perlite, clay pebbles, or even clean sponge pieces)
- Hydroponic nutrient solution (liquid concentrate)
- Seeds (leafy greens and herbs work best)
- Marker and ruler
- Sharp knife or hole saw
- Optional: Small aquarium air pump and air stone for aeration
Step-by-Step Instructions
Step 1: Prepare Your Container
Choose a plastic storage bin that can hold 4–6 inches of water depth. Darker bins tend to work better because they block light from reaching the water, which helps prevent algae growth. Give it a good rinse to remove any dust or residue.
Avoid metal containers, they can react with the nutrient solution and cause problems for your plants.
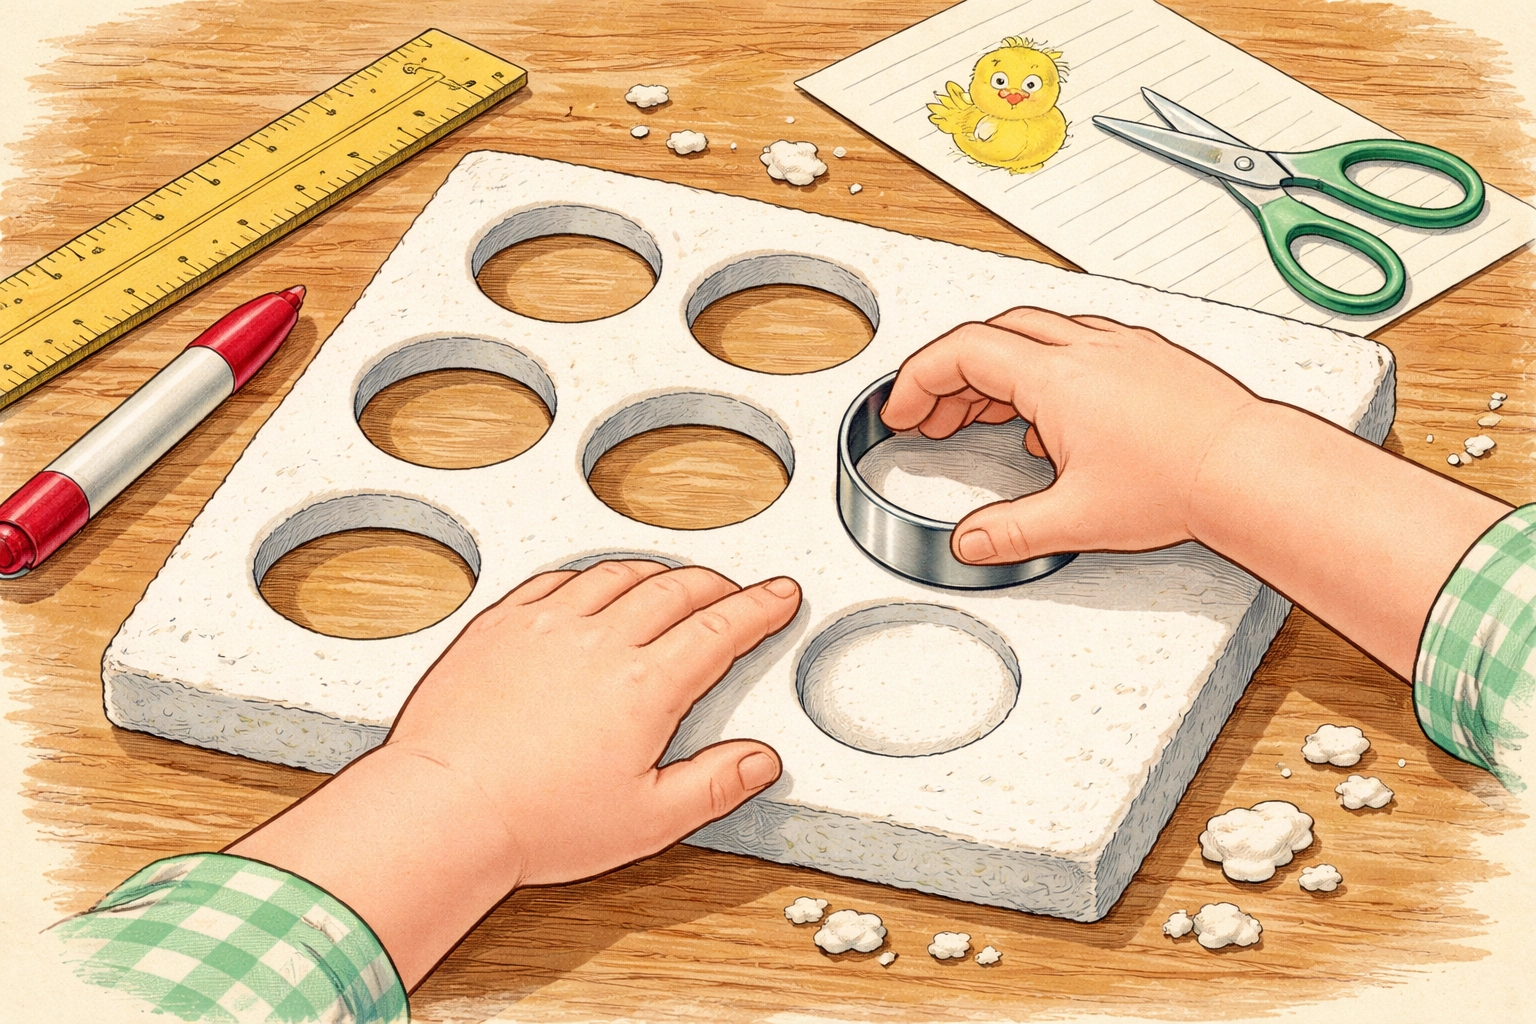
Step 2: Cut Your Foam Raft
Measure the inside dimensions of your bin and cut your polystyrene foam sheet to fit snugly but not too tight. You want it to float freely and rise or fall with the water level.
Using a marker, plan where your plant holes will go. Space them about 3–4 inches apart, and keep holes at least 3 inches from the edges so the foam stays sturdy.
Step 3: Cut the Plant Holes
Using a sharp knife, hole saw, or even a large cookie cutter, cut circles in the foam that match the size of your net cups. The cups should sit in the holes without falling through, a snug fit is what you're after.
For a small bin, 4–6 holes usually works well. Don't overcrowd things; your plants need room to spread their leaves.
Step 4: Prepare Your Planting Cups
Fill each net cup (or repurposed plastic cup with drainage holes poked in the bottom) with your soilless growing medium. Perlite, clay pebbles, or even pieces of clean kitchen sponge all work fine.
Plant 2 seeds per cup, pressing them gently into the medium about ¼ inch deep. You can thin to the strongest seedling later.
Step 5: Mix Your Nutrient Solution
Fill your storage bin with water, aim for about 4–6 inches deep. Add hydroponic nutrient solution according to the package directions. Most liquid concentrates call for about 1–2 teaspoons per gallon, but always follow your specific product's instructions.
Give it a gentle stir to mix everything evenly.
Step 6: Float Your Raft
Place the foam sheet on top of the water with your planted cups nestled in the holes. The bottom of each cup should just barely touch or dip into the nutrient solution. As your seedlings grow, their roots will reach down into the water.
That's it, your floating raft garden is officially launched!
Best Plants for Your Floating Raft Garden
Not every plant thrives in a raft system, but leafy greens and herbs are naturals. Here are some beginner-friendly options:
- Lettuce (butterhead, romaine, or leaf varieties)
- Spinach
- Basil
- Cilantro
- Mint
- Kale
- Swiss chard
These plants have relatively small root systems and don't need the structural support that fruiting plants like tomatoes or peppers require. Start with lettuce or basil, they're forgiving and grow quickly, so you'll see results within a few weeks.
If you're curious about growing basil specifically, check out our guide on regrowing kitchen scraps for more budget-friendly growing ideas.
Tips for Success
Add aeration if you can. While not strictly required for a small raft garden, adding a simple aquarium air pump with an air stone helps oxygenate the water and can prevent root rot. A small pump costs just a few dollars and makes a noticeable difference.
Check your water level weekly. Plants drink! Top off with plain water as needed, and refresh your nutrient solution every 1–2 weeks.
Keep it out of direct hot sun. Warm water encourages algae growth. A bright spot with indirect light or a few hours of morning sun is usually ideal.
Watch for slime. If you notice green algae forming, it means too much light is reaching your water. Consider wrapping your bin in dark paper or moving it to a shadier spot.
Frequently Asked Questions
Can I use tap water for my floating raft garden?
Usually, yes. Most municipal tap water works fine. If your water is heavily chlorinated, let it sit out overnight before adding nutrients so the chlorine can dissipate.
How often should I change the nutrient solution?
Every 1–2 weeks is a good rule of thumb. Top off with plain water between changes if the level drops.
Do I absolutely need an air pump?
Not always. Small raft gardens can work without one, especially if you're growing lettuce or herbs. However, an air pump helps prevent root rot and tends to produce healthier plants.
Can I grow tomatoes or peppers in a floating raft system?
It's possible but tricky. Fruiting plants need more support and nutrients than a basic raft system typically provides. Stick with leafy greens and herbs for best results.
How long until I can harvest?
Leafy greens like lettuce can be ready for their first harvest in 3–4 weeks. Herbs like basil may take 4–6 weeks to reach a good picking size.
What if my foam sheet sinks?
Make sure you're using polystyrene (Styrofoam-type) foam, not a denser craft foam. If it's sinking, your sheet may be too thin or waterlogged.
Can kids help with this project?
Absolutely! This is a fantastic hands-on project for children. They can help measure, plant seeds, and monitor root growth through the water.
Where should I put my raft garden?
A sunny windowsill, covered porch, or under a simple grow light all work well. Aim for 6–8 hours of light daily.
References
- University of Minnesota Extension – Introduction to Hydroponics
- Cornell University Cooperative Extension – Deep Water Culture Systems
- USDA National Agricultural Library – Hydroponic Growing Methods
- Oklahoma State University Extension – Building Simple Hydroponic Systems
Happy growing from all of us at Tierney Family Farms! 🌱


