


Direct Answer: A floating raft garden is a beginner-friendly hydroponic system where plants sit on a foam board that floats on top of nutrient-rich water. To make one in a plastic storage bin, you'll need a container, a piece of polystyrene foam, net cups, growing medium, hydroponic nutrients, and a small air pump. The entire setup can often be built for under $15, and in many cases closer to $10 if you have a few items lying around the house. It's a fantastic hands-on STEAM project for kids that teaches plant science, water chemistry, and sustainability all at once.
Why Build a Floating Raft Garden?
If you've ever wanted to grow lettuce, spinach, or basil indoors without the mess of soil, this project is for you. Floating raft systems (also called "Deep Water Culture" or DWC) are one of the simplest forms of hydroponics. The roots dangle directly into the water, soaking up nutrients while the foam raft keeps the plant's leaves and stems high and dry.
For families, it's a wonderful way to:
- Teach kids where food comes from without needing a backyard.
- Demonstrate basic biology and chemistry in a hands-on, visual way.
- Upcycle materials like styrofoam packaging or old storage bins.
- Grow fresh greens year-round, even in apartments or during winter months.
Plus, watching those little roots stretch down into the water is genuinely magical, kids love checking on them daily.

Budget Breakdown
One of our goals at Tierney Family Farms is to keep projects affordable. Here's a realistic budget table for this build. Many of these items can be sourced from around the house or your recycling bin!
| Item | Estimated Cost | Notes |
|---|---|---|
| Plastic storage bin (5–10 gallon) | $0 – $5 | Check your garage or dollar store |
| Polystyrene foam board | $0 – $3 | Recycle packaging foam or buy a sheet |
| Net cups (6-pack) | $2 – $4 | Available at garden centers or online |
| Soilless growing medium (perlite, clay pebbles, or coconut coir) | $3 – $5 | A small bag goes a long way |
| Hydroponic nutrient solution | $5 – $8 | Lasts for many refills |
| Air pump with tubing and air stone | $5 – $10 | Aquarium pumps work great |
| Seeds (lettuce, basil, spinach) | $1 – $3 | One packet is plenty |
| Total | $10 – $25 | Closer to $10 if you upcycle! |
Pro Tip: If you already have an old aquarium air pump sitting in a closet, you're halfway there. And styrofoam from a recent delivery? Perfect raft material.
Materials You'll Need
Before you get started, gather everything in one spot. There's nothing worse than getting halfway through a project and realizing you're missing the air stone!
Essential Materials:
- 1 plastic storage bin with straight sides (5–10 gallon capacity)
- 1 sheet of polystyrene foam (about 1–2 inches thick)
- 4–6 net cups (2-inch size works well for leafy greens)
- Soilless growing medium (perlite, hydroton clay pebbles, or coconut coir)
- Hydroponic nutrient solution (follow the dilution instructions on the bottle)
- 1 small air pump with tubing and an air stone
- Seeds or seedlings (lettuce, spinach, and basil are excellent beginner choices)
Tools:
- A marker or pen
- A cookie cutter, craft knife, or hole saw (for cutting holes in the foam)
- Scissors
- Measuring cup (for mixing nutrients)
Safety Note: If younger kids are helping, an adult should handle all cutting. Craft knives and foam can be tricky!

Step-by-Step Instructions
Step 1: Prepare Your Container
Start by giving your plastic storage bin a good rinse. You want it free of dust, dirt, or any residue. Metal containers are not recommended, they can react with the nutrient solution and harm your plants. Plastic is the way to go.
Fill the bin with water to a depth of about 4–6 inches. This gives the roots plenty of room to grow without the water level being too shallow.
Step 2: Mix Your Nutrient Solution
Following the instructions on your hydroponic nutrient bottle, mix the appropriate amount into your water. Most solutions will have you add a specific number of teaspoons or milliliters per gallon. Stir it gently until it's fully dissolved.
This nutrient-rich water is what feeds your plants instead of soil. Pretty cool, right?
Step 3: Set Up the Air Pump
Assemble your air pump by connecting the tubing to the pump outlet and attaching the air stone to the other end. Drop the air stone into the bottom of your bin and plug in the pump.
You should see bubbles rising through the water. This aeration is crucial, it keeps the water oxygenated and prevents it from becoming stagnant. Happy roots need oxygen!

Step 4: Cut Your Foam Raft
Measure your foam board so it fits snugly inside the bin but can still float freely. You want a little wiggle room (about a half-inch gap on each side).
Using a marker, trace circles for your net cups. Space them about 3–4 inches apart, and keep them at least 3 inches away from the edges of the foam. A cookie cutter or the rim of a net cup makes a great template.
Carefully cut out the holes using a craft knife or hole saw. The net cups should fit snugly into the holes without falling through.
Step 5: Prepare Your Net Cups
Fill each net cup about two-thirds full with your soilless growing medium. If you're starting from seed, place 2–3 seeds in each cup and lightly cover them. If you're using seedlings, gently rinse the soil off the roots and nestle them into the growing medium.
The roots will eventually grow down through the net cup and into the water below.
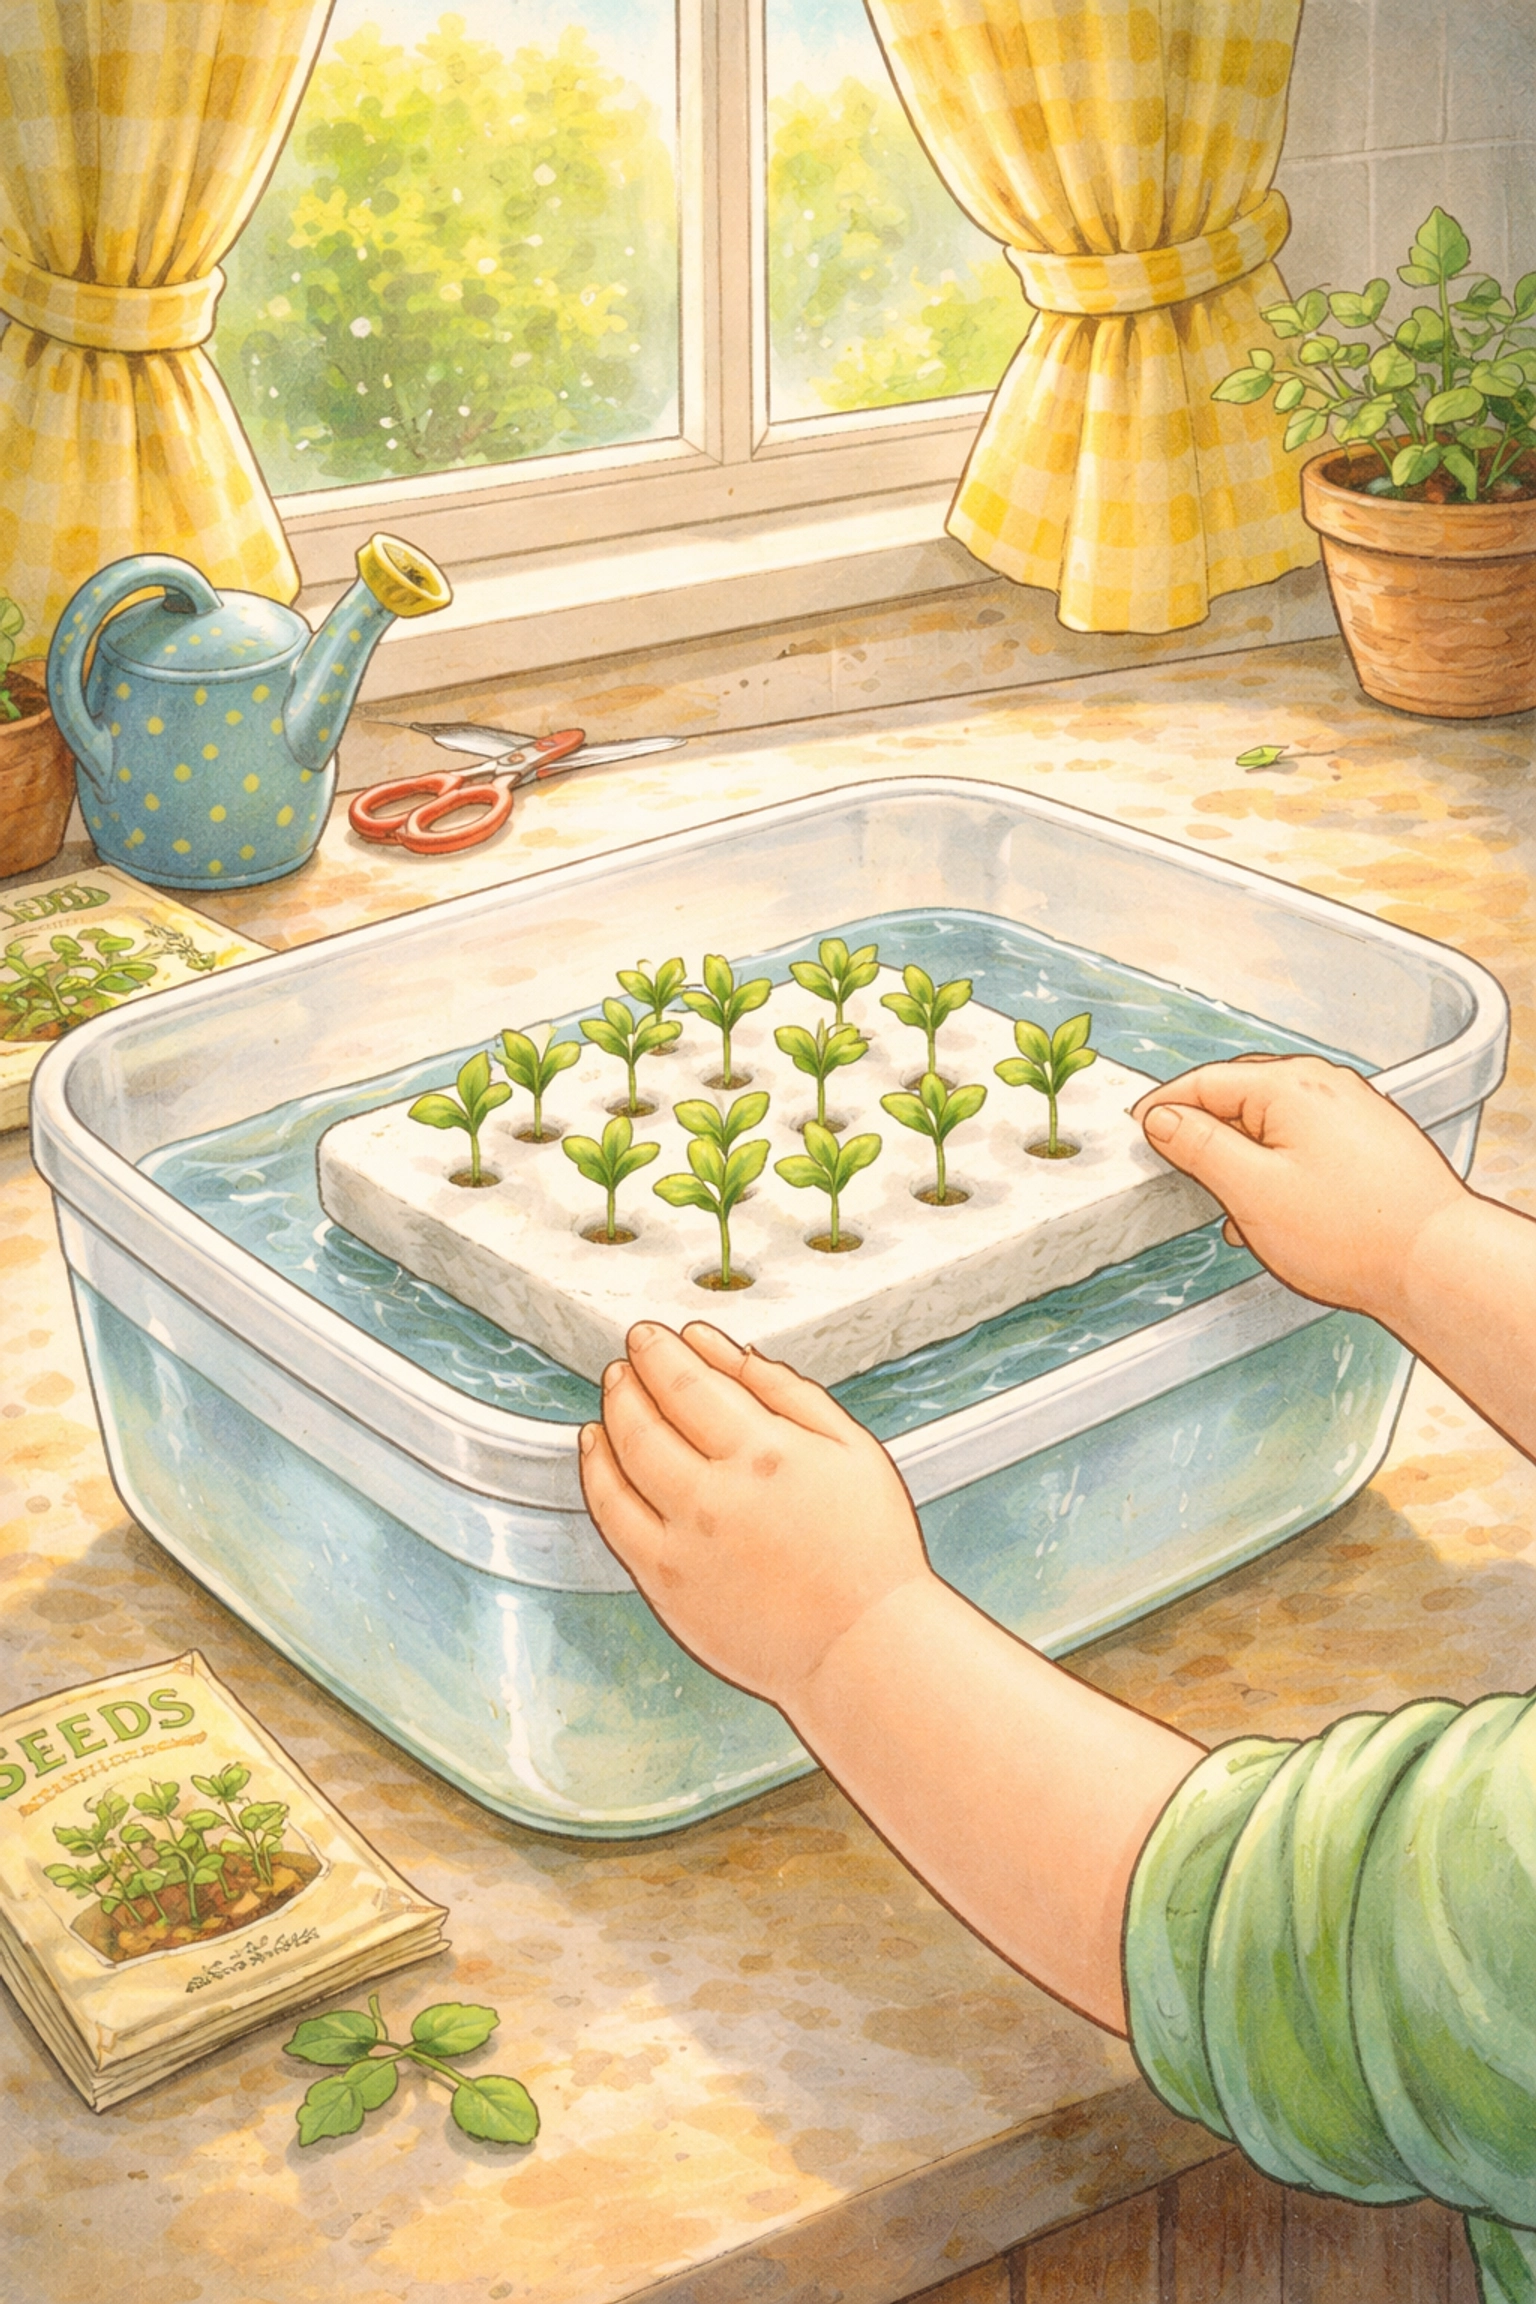
Step 6: Float Your Raft!
Place the foam board (with the planted net cups) directly onto the water surface. It should float nicely, with the bottom of the net cups just touching or slightly submerged in the nutrient solution.
Make sure your bin is sitting on a level surface, this keeps the water depth even across the entire raft.
Step 7: Find the Right Spot
Place your floating raft garden in a location that gets plenty of light. A sunny windowsill works, but a simple grow light is even better for consistent results, especially during shorter winter days.
Check your water level every few days and top it off with fresh nutrient solution as needed. Plants drink a lot!
Tips for Success
- Start with leafy greens. Lettuce, spinach, basil, and other herbs are forgiving and grow quickly. Save tomatoes and peppers for when you've got more experience.
- Check your pH. If you want to level up, grab an inexpensive pH testing kit. Most leafy greens prefer a pH between 5.5 and 6.5.
- Keep it dark below. Algae loves light. If your bin is clear or translucent, consider wrapping the outside with dark tape or fabric to block light from the water.
- Change the water every 1–2 weeks. Fresh nutrient solution keeps plants healthy and prevents buildup.
For more hydroponic tips, check out our guide on how much space you need for a productive hydroponic garden.
Frequently Asked Questions
What plants grow best in a floating raft system?
Leafy greens like lettuce, spinach, kale, and herbs such as basil, cilantro, and mint tend to thrive. These plants have smaller root systems and don't need the structural support that fruiting plants require.
Can I use regular tap water?
In most cases, yes. However, if your tap water is heavily chlorinated, letting it sit out for 24 hours before use can help the chlorine dissipate. Some growers prefer filtered or distilled water for more control.
Do I really need an air pump?
Technically, some very simple systems (like the Kratky method) skip the air pump entirely. However, for a storage bin setup with multiple plants, an air pump significantly improves oxygen levels and plant health. We recommend using one.
How often should I change the nutrient solution?
Every 1–2 weeks is a good rule of thumb. Top off with fresh solution between changes if the water level drops.
Can I put this system outside?
You can, but be mindful of temperature swings, rain diluting your nutrients, and pests. Indoor setups tend to be more consistent and easier to manage.
What if algae starts growing in my water?
Algae thrives on light. Block light from reaching the water by using an opaque bin or covering transparent containers with dark material. Keeping the lid (your foam raft) in place also helps.
Is this safe for young children to help with?
Absolutely! Kids can help with mixing nutrients, planting seeds, and monitoring growth. Adults should handle all cutting and any electrical components (like plugging in the air pump).
Where can I find more kid-friendly gardening projects?
We've got over 100 DIY projects waiting for you! Browse our full collection at Tierney Family Farms Kids Crafts.
References
- University of Florida IFAS Extension – Floating Raft Hydroponic Systems
- Cornell University Controlled Environment Agriculture – Deep Water Culture Basics
- USDA National Agricultural Library – Hydroponics: An Overview
AI was used to assist in creating this content. Always double-check instructions and measurements before starting your project. Happy growing!


