


What’s the Easiest Way to Make a Homemade Kaleidoscope?
The simplest way to make a homemade kaleidoscope with kids is to line the inside of a paper towel tube with aluminum foil strips folded into a triangle, add colorful translucent beads between two plastic circles at one end, and peek through the other end while rotating the tube toward light. The whole project typically takes about 20-30 minutes and costs just a few dollars using materials you likely already have at home.
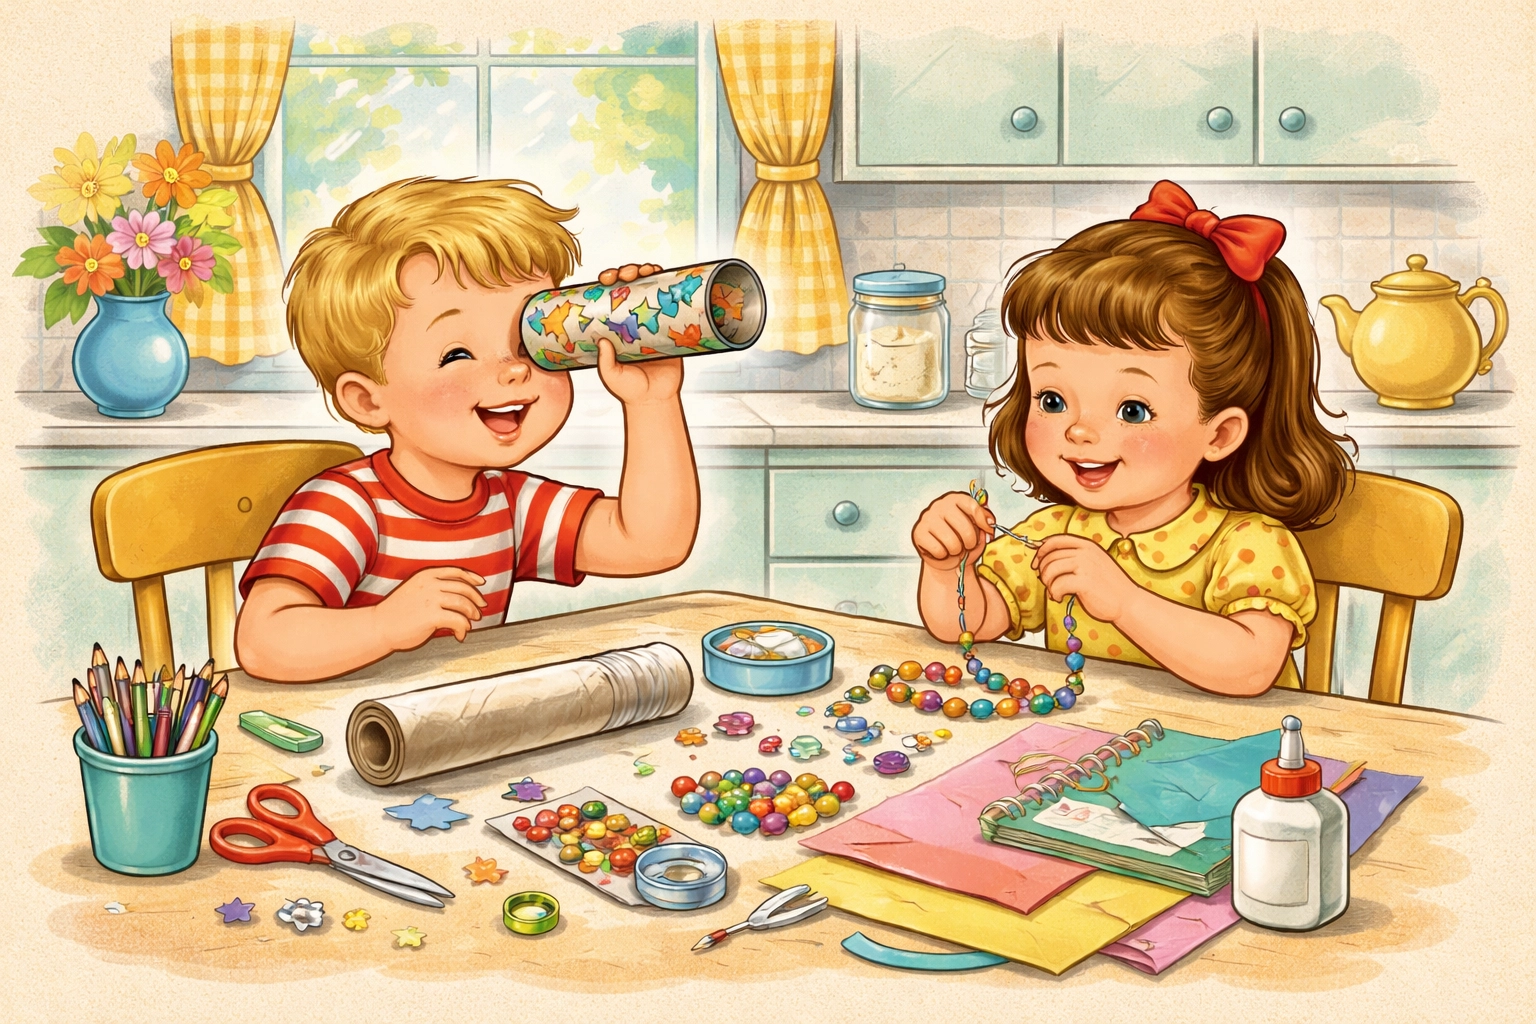
This classic STEM activity teaches kids about light, reflection, and symmetry while giving them something magical they actually made themselves. And unlike store-bought kaleidoscopes that break after a week, these homemade versions can be customized, repaired, and treasured for much longer.
Why Kids Love This Project
There’s something almost hypnotic about kaleidoscopes. You hold this simple tube up to your eye, give it a little twist, and suddenly you’re watching an endless dance of colors and shapes that never repeats exactly the same way twice.
For kids, that moment when they first peek through a kaleidoscope they built themselves is pure wonder. They made this thing. They understand (at least a little bit) how it works. And now they get to enjoy it.
This project also hits that sweet spot where craft meets science. You’re not just gluing stuff together: you’re exploring how light bounces off reflective surfaces to create symmetrical patterns. It’s sneaky learning wrapped in sparkly beads and decorated cardboard.
Age Recommendations
| Age Group | Skill Level | Enjoyment Level | Notes |
|---|---|---|---|
| 3-4 years | Needs significant help | High | Can add beads and decorate |
| 5-7 years | Moderate assistance | Very High | Can handle most steps with guidance |
| 8-10 years | Mostly independent | Very High | May want to experiment with designs |
| 11+ years | Independent | High | Great for teaching younger siblings |
Younger kids will need help with cutting and assembly, but they can absolutely participate in choosing beads, decorating the outside, and: most importantly: enjoying the finished product. Older kids might want to experiment with different bead combinations or even build multiple kaleidoscopes to compare.
Time Estimate
Total project time: 20-30 minutes
- Gathering materials: 5 minutes
- Cutting and preparing pieces: 5-10 minutes
- Assembly: 10-15 minutes
- Decorating: 5-10 minutes (optional but recommended)
If you’re working with multiple kids, add some extra time. Everyone will want their own kaleidoscope, and that’s totally reasonable.
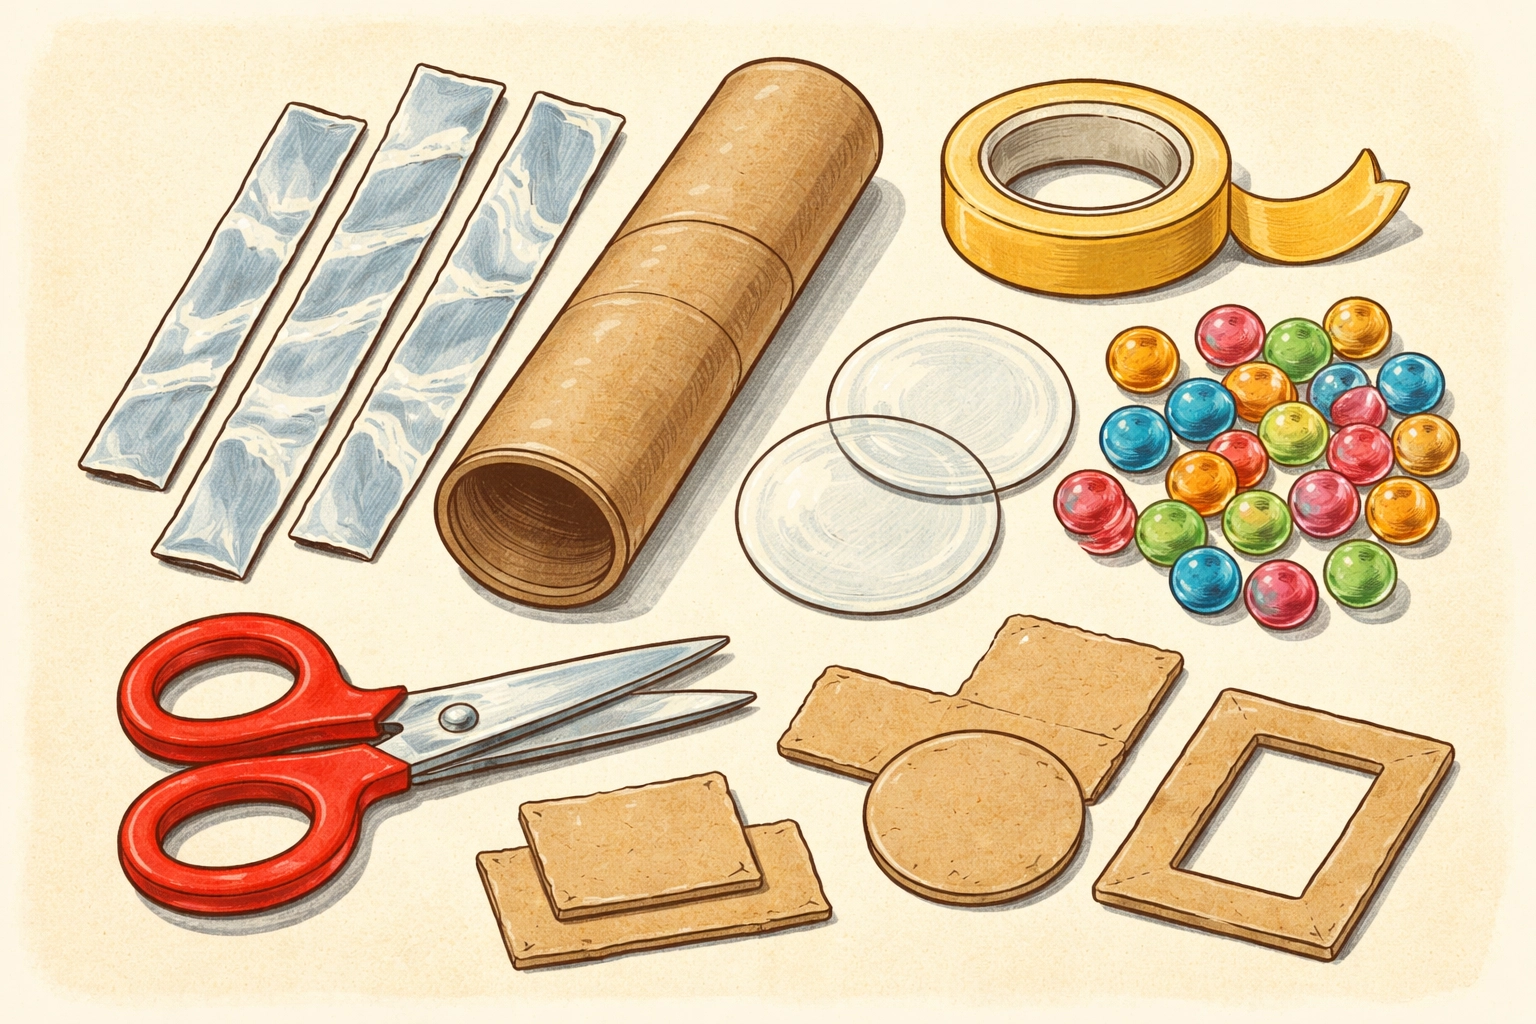
Materials You’ll Need
Good news: this project rings in well under $10, especially if you raid your recycling bin and craft drawer first.
| Material | Approximate Cost | Notes |
|---|---|---|
| Paper towel tube | Free | From your recycling |
| Aluminum foil | Free | Already in most kitchens |
| Clear plastic (from packaging) | Free | Fruit containers work great |
| Colorful translucent beads or sequins | $1-3 | Dollar store packs work perfectly |
| Cardboard scraps | Free | Cereal boxes are ideal |
| Scissors | Free | Already have these |
| Tape (clear or masking) | Free | Standard craft supply |
| Decorating supplies | $0-3 | Stickers, markers, washi tape |
Total estimated cost: $1-6
If you want to level up the reflective quality, you can purchase flexible mirror sheets at craft stores for around $5-8, but aluminum foil works surprisingly well for a first kaleidoscope.
Step-by-Step Instructions
Step 1: Prepare Your Tube
Start with a clean, dry paper towel tube. If it’s a little bent or squished, gently reshape it: you want it as round as possible for the best effect.
Give the tube a once-over to make sure there aren’t any tears or weak spots. This is going to be your kaleidoscope’s main body, so it needs to hold together.
Step 2: Cut Your Cardboard Strips
From a cereal box or similar thin cardboard, cut three strips that are each about 1 inch wide and slightly shorter than your tube (maybe 1/2 inch shorter on each end).
These strips will become the reflective triangle that creates the kaleidoscope magic, so try to keep them relatively straight and even.
Step 3: Wrap Strips in Aluminum Foil
Tear off three pieces of aluminum foil, each a bit larger than your cardboard strips. Wrap each strip carefully with the shiny side of the foil facing out.
Smooth out wrinkles as much as you can: the smoother the foil, the clearer your reflections will be. Tape the foil in place on the back of each strip.
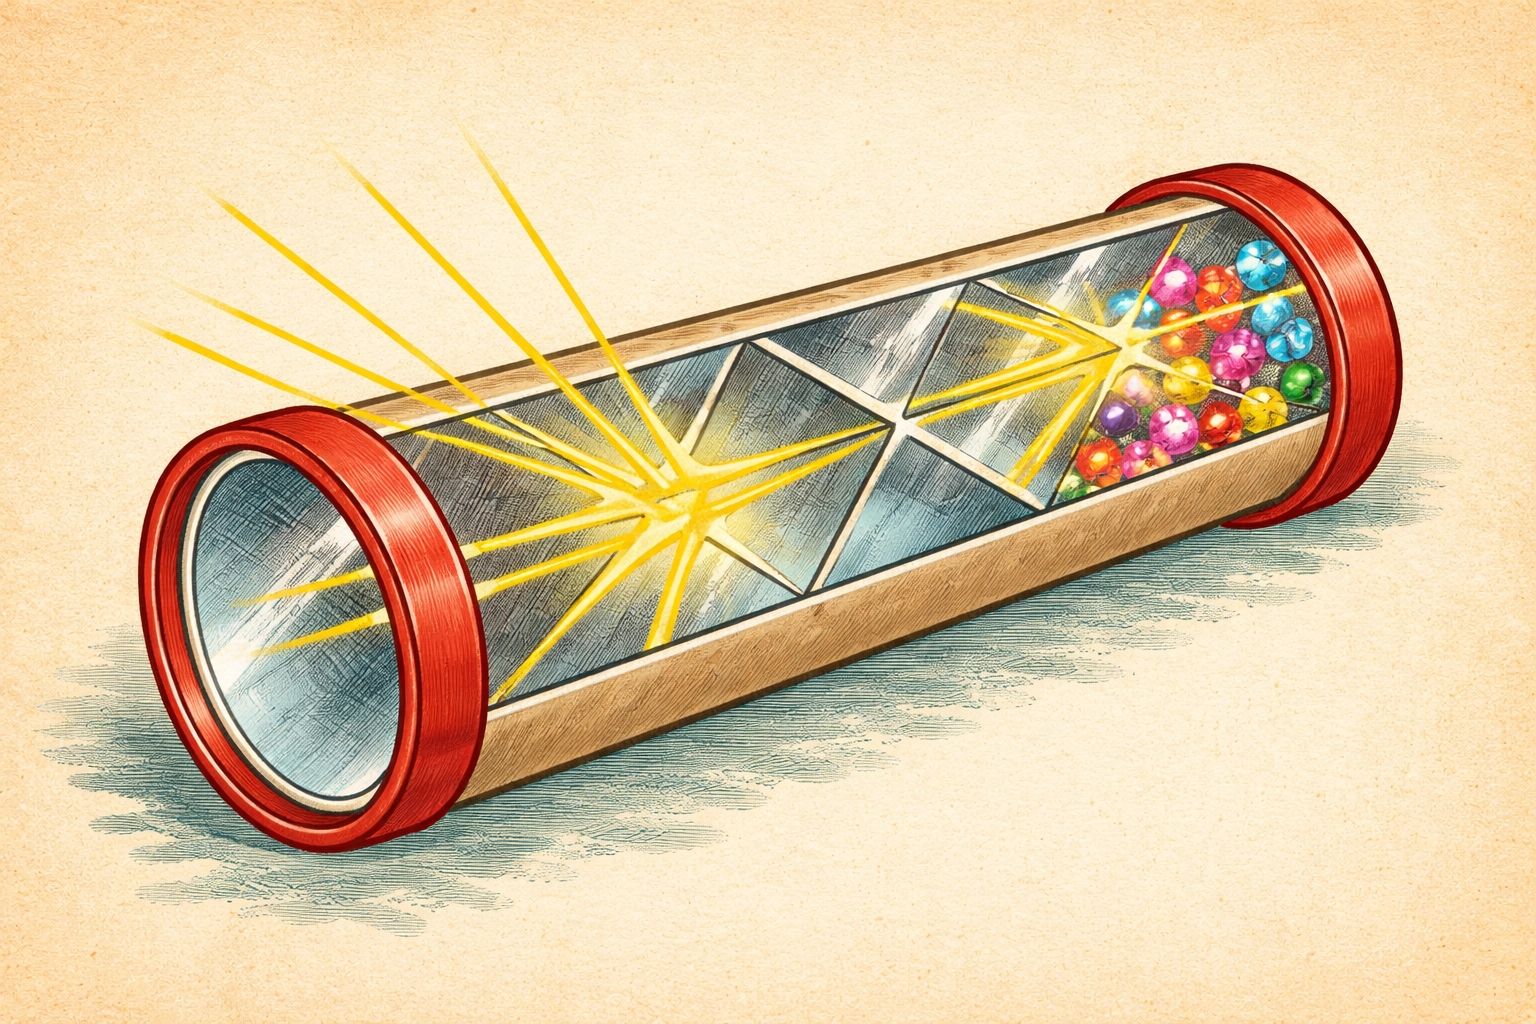
Step 4: Create the Reflective Triangle
Take your three foil-wrapped strips and tape them together along their long edges to form a triangular tube. The shiny foil sides should all face inward.
This triangle is the heart of your kaleidoscope. When you look through it, light bounces between the three mirrored surfaces to create those repeating symmetrical patterns.
Step 5: Make Your Plastic Circles
Using the end of your paper towel tube as a template, trace and cut three circles from clear plastic. Fruit container lids, blister packaging, or even plastic report covers work well.
Try to keep these circles as clean and clear as possible: scratches and smudges will affect how well you can see your kaleidoscope patterns.
Step 6: Attach the First Circle
Tape or glue one plastic circle securely to one end of your paper towel tube. This creates the bottom of your bead chamber.
Make sure it’s sealed well so no beads escape. A few pieces of tape around the edges usually does the trick.
Step 7: Add Your Beads
Drop your colorful beads, sequins, or small buttons onto the plastic circle inside the tube. You want enough to almost cover the circle, but not so many that they can’t move freely.
Translucent beads work best because light needs to pass through them. Opaque beads can work too, but the effect won’t be quite as vibrant.
Step 8: Insert the Second Circle
Gently place your second plastic circle inside the tube, resting it on top of the beads. This circle shouldn’t be glued down: it needs to stay loose so the beads can tumble around between the two plastic layers.
Push it down just far enough that the beads have room to move but aren’t flying around the whole tube.
Step 9: Insert Your Reflective Triangle
Slide your foil-covered cardboard triangle into the tube, resting it on top of the loose plastic circle. It should fit snugly enough to stay in place.
The triangle should extend from just above your bead chamber to just below the viewing end.
Step 10: Add the Viewing Window
Tape your third plastic circle to the open end of the tube. This is where you’ll look through to see your kaleidoscope patterns.
Make sure this circle is as clean and clear as possible since you’ll be looking directly through it.
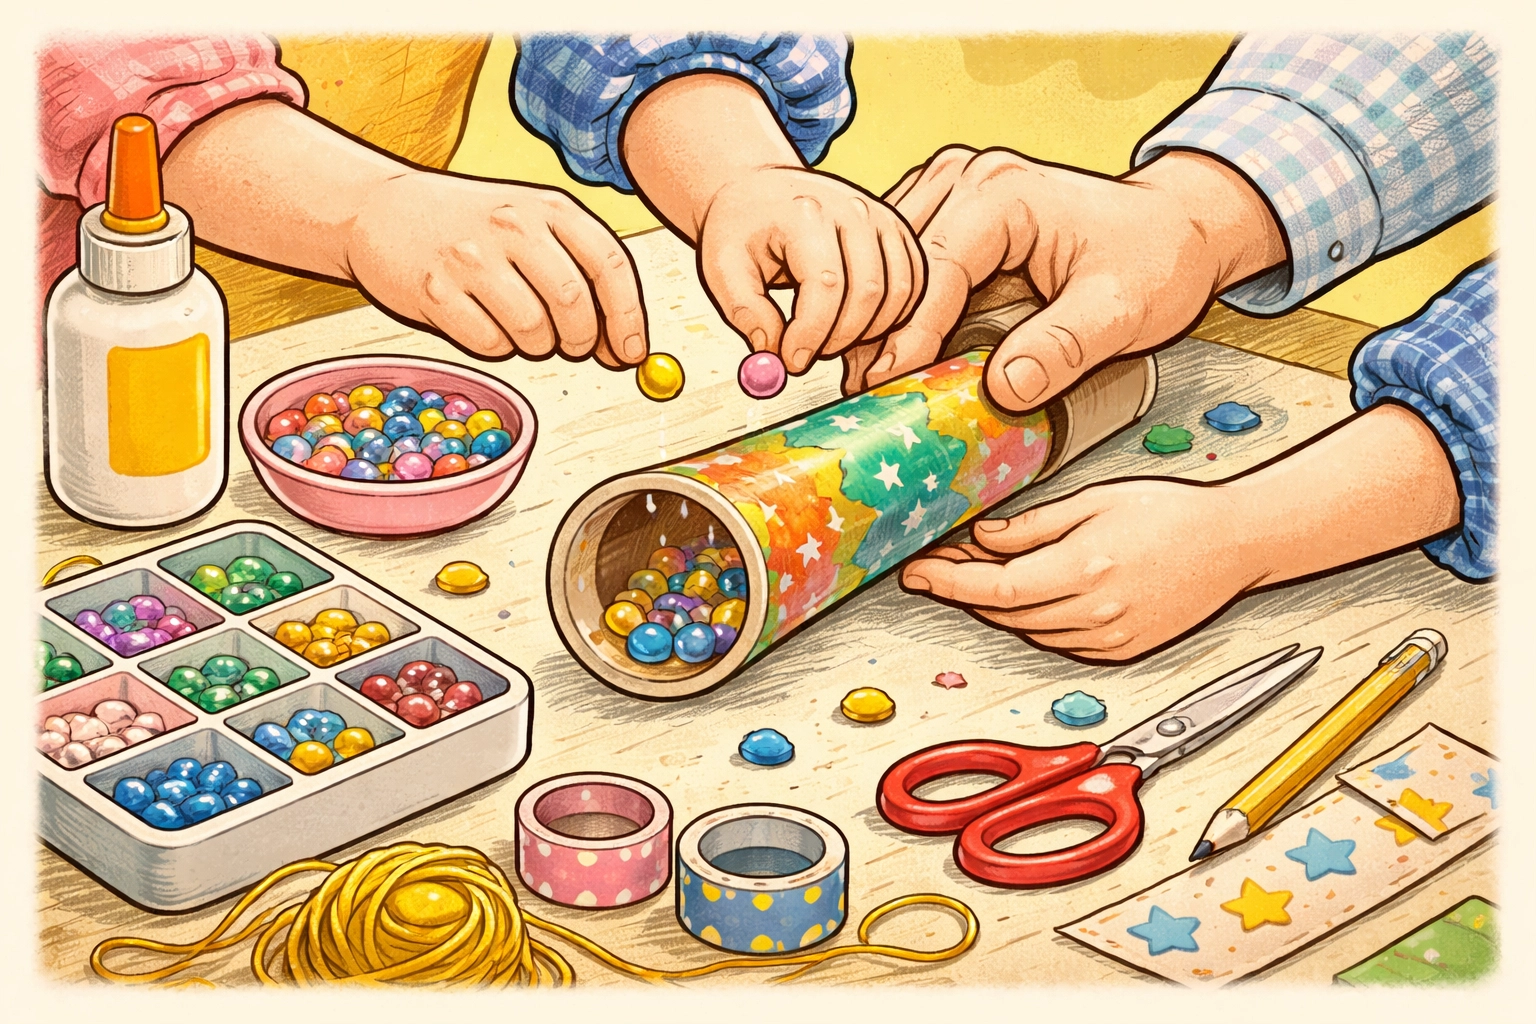
Step 11: Decorate the Outside
Now for the fun part! Let kids decorate the outside of their kaleidoscope with stickers, washi tape, markers, colored paper, or whatever craft supplies you have handy.
Just remind them not to squeeze or crush the tube while decorating: you don’t want to bend that reflective triangle inside.
Step 12: Test It Out
Hold your kaleidoscope up to a light source (a window works great), look through the viewing end, and slowly rotate the tube. Watch those beautiful patterns shift and change!
If the patterns seem dim, try pointing toward a brighter light. If beads aren’t moving, you might need to loosen that middle plastic circle a bit.
Tips for Success
Choose the right beads. Translucent or transparent beads in multiple colors create the most vibrant effects. Mix shapes and sizes for more interesting patterns.
Don’t overfill. Too many beads means they can’t tumble freely. About 15-20 small beads is usually a good starting point.
Smooth that foil. The smoother your aluminum foil surfaces, the clearer your reflections. Take an extra minute to really press out those wrinkles.
Bright light matters. Kaleidoscopes need light to work their magic. Point yours toward a window or lamp for the best experience.
Experiment freely. Once kids understand the basic concept, encourage them to try different bead combinations or even build a second kaleidoscope to compare.
Frequently Asked Questions
Can I use a toilet paper tube instead of a paper towel tube?
You can, but the kaleidoscope will be shorter, which means a smaller viewing area and less room for your reflective triangle. Paper towel tubes generally work better for this project.
What if I don’t have translucent beads?
Small pieces of colored cellophane, cut-up plastic straws, or even tiny torn pieces of tissue paper can work as alternatives. The key is using materials that let some light pass through.
Why isn’t my kaleidoscope showing clear patterns?
The most common issues are wrinkled foil (smooth it out), dirty plastic viewing circles (wipe them clean), or not enough light (try pointing toward a brighter source).
How do I make the patterns more colorful?
Use a wider variety of bead colors and add some metallic or iridescent pieces. The more variety in your bead chamber, the more complex your patterns will be.
Is this safe for toddlers?
Building the kaleidoscope involves small beads that could be a choking hazard, so keep little ones supervised during assembly. The finished kaleidoscope should be sealed well enough to be safe for viewing.
Can we make the kaleidoscope waterproof for outdoor use?
Not easily with these materials. This is really an indoor project, though brief outdoor use on dry days should be fine.
What’s the science behind how kaleidoscopes work?
Light enters through the bead chamber, bounces between the three mirrored surfaces of the triangle, and creates multiple symmetrical reflections. The pattern changes as the beads shift positions.
How long will a homemade kaleidoscope last?
With reasonable care, these can last for months or even years. The main vulnerabilities are crushing the tube or getting the plastic circles dirty.
Can we add new beads later?
If you used tape instead of glue, you can carefully remove the end circle, swap out or add beads, and reseal it. This is a great way to refresh the kaleidoscope over time.
For more hands-on projects you can tackle with the kids, check out our Kids Crafts collection for plenty of family-friendly ideas.
References
- Research on DIY kaleidoscope construction using mirror sheets and paper towel tubes
- Aluminum foil alternative method for creating reflective kaleidoscope interiors


