


Age Range: 4–10 years (with adult supervision for drilling)
Estimated Cost: $0–$15 (often free if upcycling materials you already have!)
What Is the Easiest Way to Make a Compost Bin with Kids?
The simplest DIY compost bin for kids uses an upcycled plastic storage container with a lid, some drill holes for airflow, and a few layers of natural materials. That's it! Within about 20 minutes, you and your kids can build a working compost bin that turns kitchen scraps and yard waste into rich garden soil, all while teaching lessons about sustainability, science, and taking care of the Earth.
This project is perfect for beginners. You don't need fancy equipment, worms, or a big backyard. Just a little curiosity and some stuff you probably already have lying around the house.
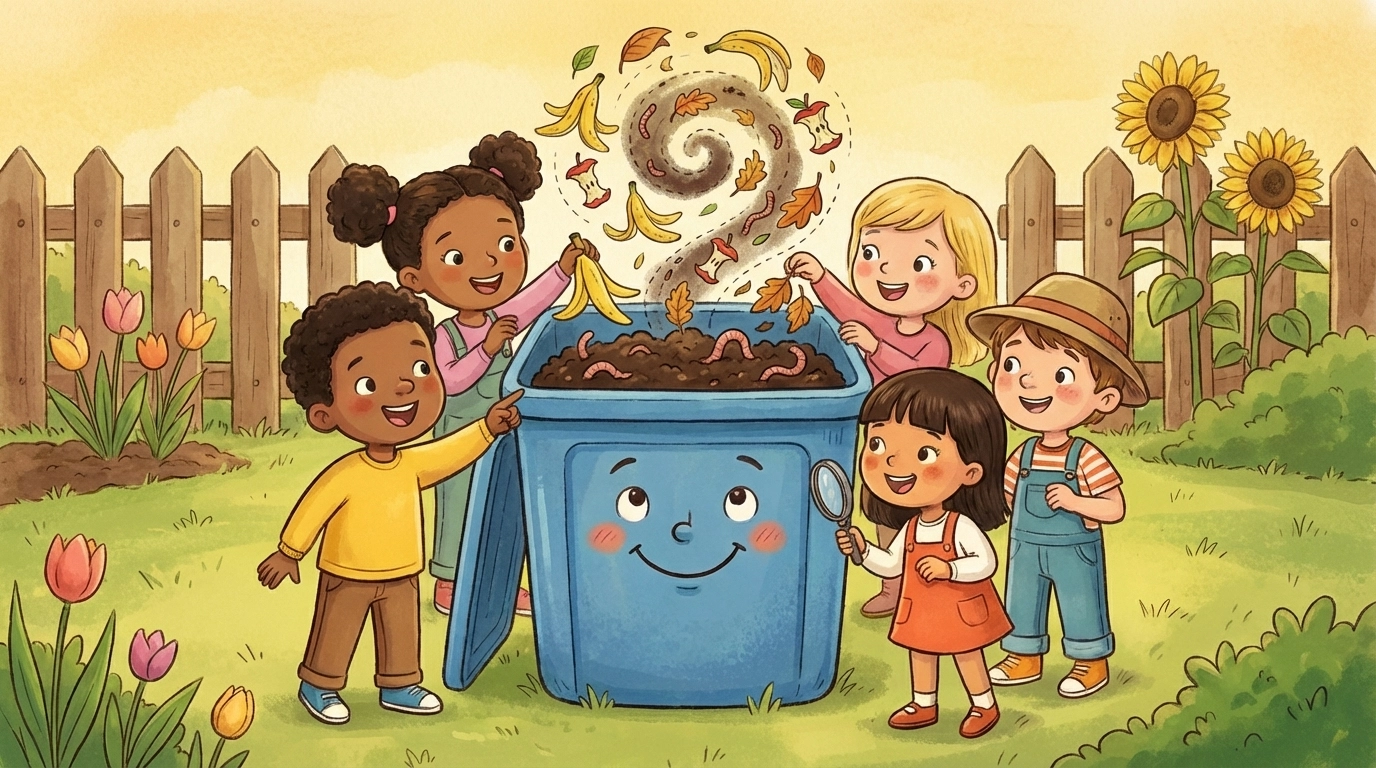
Why Should Kids Learn to Compost?
Composting is one of the best hands-on ways to teach children about the cycle of life, decomposition, and how nature recycles nutrients. When kids see banana peels and leaves transform into dark, crumbly "black gold" for the garden, they start to understand that nothing in nature is wasted.
Here's what composting teaches kids:
- Science in action: Decomposition, microorganisms, and the role of oxygen and moisture
- Responsibility: Caring for a project over time
- Sustainability: Reducing household waste and giving back to the earth
- Patience: Good things take time (compost doesn't happen overnight!)
Plus, it's genuinely fun. Kids love getting their hands dirty, and there's something magical about creating soil from scraps.
What Materials Do You Need for a DIY Compost Bin?
Here's the good news: almost everything you need can be upcycled or found around the house. If you need to buy a bin, check thrift stores or ask neighbors for old containers.
Materials List
| Item | Upcycle Option | Approximate Cost |
|---|---|---|
| Plastic storage bin with lid (24–30 gallons) | Old toy bin, storage tote | $0–$10 |
| Drill with 3/16" bit | Borrow from a neighbor | $0 |
| Dry leaves or shredded paper | Collect from yard or recycle bin | $0 |
| Soil or topsoil | From your garden or a friend's | $0–$5 |
| Spray bottle | Upcycle a cleaning bottle | $0 |
| Stick, shovel, or old broomstick | Use what you have | $0 |
Pro tip: Dark-colored bins work best because they absorb heat, which helps speed up decomposition. But any bin with a tight lid will do the job!
How Do You Build a Compost Bin Step by Step?
Let's break it down into simple steps that kids can follow (with a little help from a grown-up for the drilling part).
Step 1: Find Your Container
Dig out an old plastic storage bin with a lid. The bigger the better, aim for at least 24 inches tall. A 30-gallon bin is ideal, but use what you have. Check your garage, basement, or ask around before buying anything new.
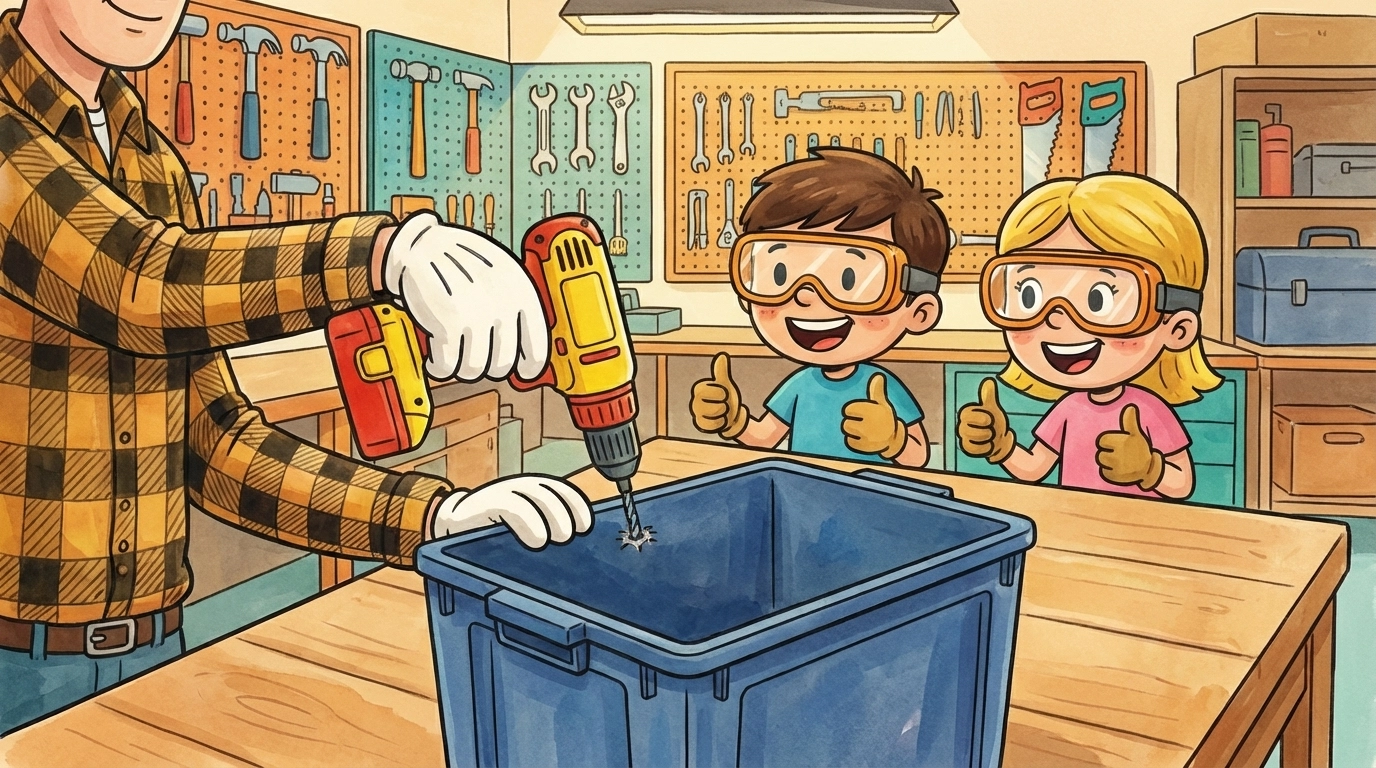
Step 2: Drill Airflow Holes (Adult Step)
Composting needs oxygen to work. Without air, your bin will get stinky and slimy, not fun for anyone!
Have an adult drill 8–10 small holes in the bottom of the bin and another 8–10 holes in the lid. Use a 3/16" drill bit. These holes let air circulate and excess moisture drain out.
Safety note: Kids should stand back during drilling. Let them count the holes or mark where they should go with a marker.
Step 3: Add the "Brown" Base Layer
Now it's time for kids to take over! Fill the bottom of the bin about 1/4 full with dry "brown" materials. These are carbon-rich items like:
- Dry leaves (collect them on a nature walk!)
- Shredded newspaper or junk mail
- Torn-up cardboard egg cartons
- Coffee filters
Let your kids tear up paper and crunch leaves, the smaller the pieces, the faster they'll break down.
Step 4: Add a Layer of Soil
Scoop regular garden soil or topsoil on top of the brown layer until the bin is about half full. This soil contains microorganisms that kickstart the composting process. No special worms needed!
Kids can use a small shovel, cup, or even their hands (with gloves if they prefer).
Step 5: Start Adding "Green" Materials
Now you're ready to feed your compost! "Green" materials are nitrogen-rich items like:
- Fruit and vegetable scraps (banana peels, apple cores, carrot tops)
- Grass clippings
- Crushed eggshells
Important rule for kids to remember: Always cover green materials with a layer of brown materials (like shredded paper or dry leaves). This keeps flies away and prevents bad smells.

Step 6: Mist with Water
Use a spray bottle to lightly mist the contents. You want the compost to feel like a damp sponge, moist but not dripping wet. Too much water leads to odors; too little slows everything down.
Kids love being in charge of the spray bottle. Let them check the moisture level every few days.
Step 7: Stir and Wait
Every day or two, have your child mix the compost with a stick, shovel, or old broomstick. This adds oxygen and helps everything break down evenly. Younger kids can poke holes in the pile; older kids can give it a good stir.
Composting takes several months, so this is a great lesson in patience. Over time, you'll notice the scraps shrinking and the mixture getting darker.
What Can (and Can't) Go in a Kids' Compost Bin?
Teaching kids what to add, and what to avoid, is a big part of the learning process.
Yes! Add These:
- Fruit and vegetable scraps
- Coffee grounds and filters
- Tea bags (remove staples)
- Dry leaves and grass clippings
- Shredded paper, cardboard, newspaper
- Crushed eggshells
- Dryer lint (from natural fibers)
No! Keep These Out:
- Meat, fish, or bones
- Dairy products
- Oily or greasy foods
- Pet waste
- Diseased plants
- Plastic, metal, or glass (obviously!)
A simple way to explain it to kids: "If it grew from the ground, it can go back in the ground."
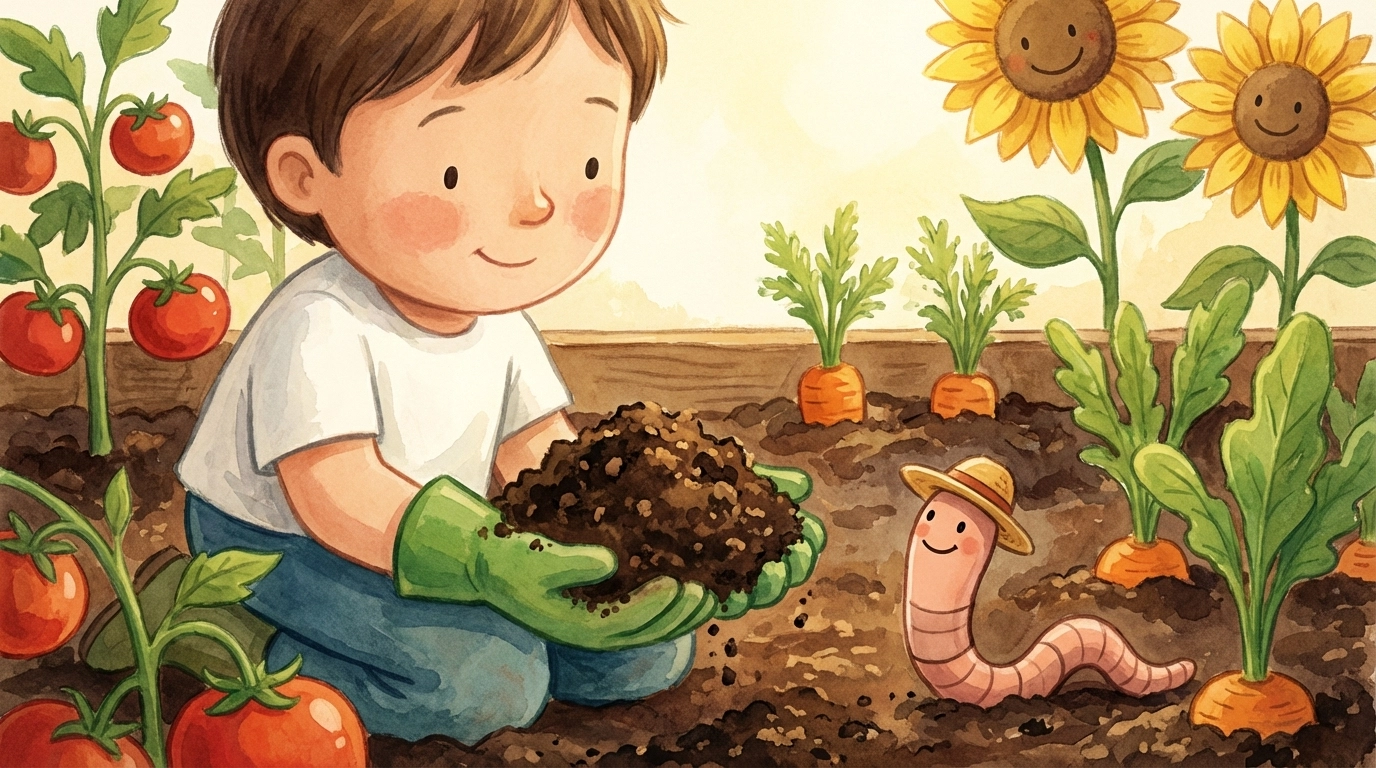
How Do You Know When Compost Is Ready?
Finished compost looks like dark, crumbly soil and smells earthy: like a forest floor after rain. You shouldn't be able to recognize any of the original scraps anymore.
This usually takes 2–4 months, depending on how often you stir, what you add, and the temperature outside.
Once it's ready, let your kids rake or scoop the compost into your garden beds, container plants, or even houseplants. They made this! It's a proud moment.
Tips for Making Composting Fun for Kids
- Give them ownership: Let kids name the compost bin, decorate the outside, or keep a "compost journal" tracking what they add.
- Create a scrap collection station: Put a small container on the kitchen counter where kids can toss fruit peels and veggie scraps throughout the day.
- Make it a game: Challenge kids to find brown materials around the house or yard. Who can collect the most dry leaves?
- Celebrate milestones: When the compost is ready, have a mini "harvest party" and spread it in the garden together.
What's the Estimated Cost Breakdown?
| Item | Low End | High End |
|---|---|---|
| Storage bin (upcycled) | $0 | $10 |
| Drill (borrowed) | $0 | $0 |
| Brown materials | $0 | $0 |
| Soil | $0 | $5 |
| Spray bottle (upcycled) | $0 | $0 |
| Total | $0 | $15 |
Most families can do this project for free using items they already have. That's the beauty of upcycling!
Ready to Start Composting with Your Kids?
Building a DIY compost bin is one of the easiest and most rewarding family projects you can do together. It costs almost nothing, teaches real science, and gives kids a sense of responsibility and accomplishment.
Plus, you'll reduce your household waste and create free, nutrient-rich soil for your garden. That's a win for your family and a win for the planet.
For more hands-on family gardening projects, check out our guide on how to create a DIY worm composting bin with children or explore building a fairy garden planter with kids for under $10.
Happy composting!
DIY Compost Bin for Kids FAQ
- How big does a backyard compost bin need to be? For a family, a bin about the size of a large storage tub or a wooden crate is perfect. It’s big enough to hold your scraps but small enough for kids to help stir.
- Do we need to add worms to our compost bin? If your bin is on the ground, local worms will often find their way in! If it’s a closed bin, you don't need them, but they certainly help speed up the process.
- How long does it take for compost to be ready? Depending on the weather and what you put in, it can take anywhere from 3 months to a year. It’s a great long-term lesson in nature's recycling program!
References:
- Basic composting principles and bin construction methods adapted from standard home composting guides
- Material ratios based on the two-parts-brown-to-one-part-green composting rule


