


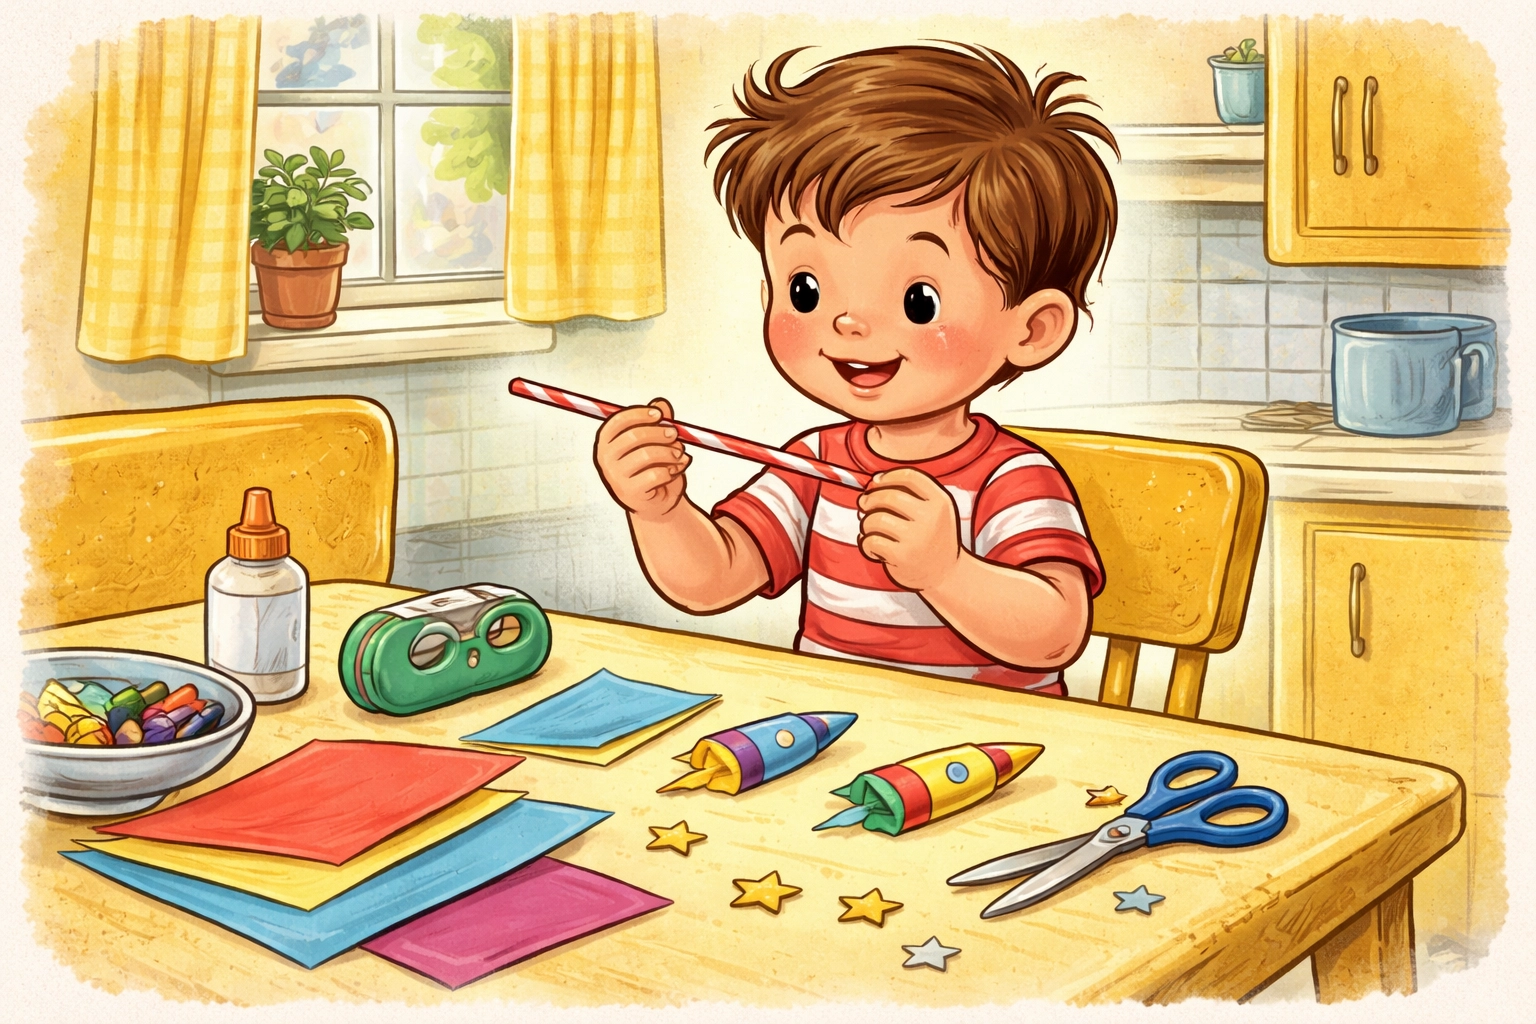
Straw rockets are simple paper tubes sealed at one end that launch using the air pressure from your breath: and they're one of the easiest STEM activities you can do with kids using materials you likely already have at home. With just paper, tape, scissors, and a drinking straw, children can build and launch their own rockets in about 15 to 20 minutes. This activity introduces basic physics concepts like thrust and aerodynamics while keeping the mess to a minimum and the giggles to a maximum.
No fancy supplies. No complicated instructions. Just good old-fashioned crafting followed by the satisfying whoosh of a homemade rocket soaring across the living room.
Why Straw Rockets Are a Great Indoor Activity
Sometimes you need a project that delivers big excitement without requiring a trip to the craft store. Straw rockets fit that bill perfectly. They're inexpensive, quick to assemble, and endlessly customizable. Kids get to practice fine motor skills while wrapping and taping, exercise their creativity while decorating, and then experience the thrill of watching their creation actually do something.
The science sneaks in naturally. When your child blows into the straw and watches their rocket fly, they're learning about air pressure and propulsion without even realizing they're having a lesson. And because the rockets are lightweight and soft, this activity works well indoors: no broken lamps required.
Materials You'll Need
Good news: this project costs next to nothing. Most families already have everything on hand.
| Material | Estimated Cost | Notes |
|---|---|---|
| Copy paper or construction paper | $0–$3 | One sheet makes multiple rockets |
| Plastic drinking straws | $0–$2 | Regular width works well |
| Clear tape | $0–$2 | Masking tape works too |
| Scissors | $0 | Kid-safe scissors recommended |
| Pencil | $0 | For shaping the rocket body |
| Markers or crayons (optional) | $0–$3 | For decorating |
Total estimated cost: Under $10 (and often $0 if you're using what's already in the junk drawer)
Age Ranges
Best for ages 4 and up. Younger children may need help with the taping and folding steps, while kids around 6 or 7 can often handle most of the construction independently.
| Age Group | Skill Level | Enjoyment Level |
|---|---|---|
| Ages 3–4 | Needs significant help | High (loves the launching part) |
| Ages 5–6 | Needs some guidance | Very high |
| Ages 7–9 | Mostly independent | Very high |
| Ages 10+ | Fully independent | High (enjoys experimenting) |
Time Estimate
- Prep time: 5 minutes
- Build time: 10–15 minutes per rocket
- Launch and play time: As long as you want
Plan for about 20 to 30 minutes total for the first rocket. Once kids get the hang of it, they can crank out new designs much faster.
Step-by-Step Instructions
Step 1: Cut Your Paper
Start with a piece of copy paper or construction paper. Cut a rectangle roughly 4 inches wide and 6 inches long. This size works well for standard drinking straws, but you can adjust based on what you have.
If your child wants a longer rocket, go ahead and experiment. Part of the fun is seeing how different sizes perform.
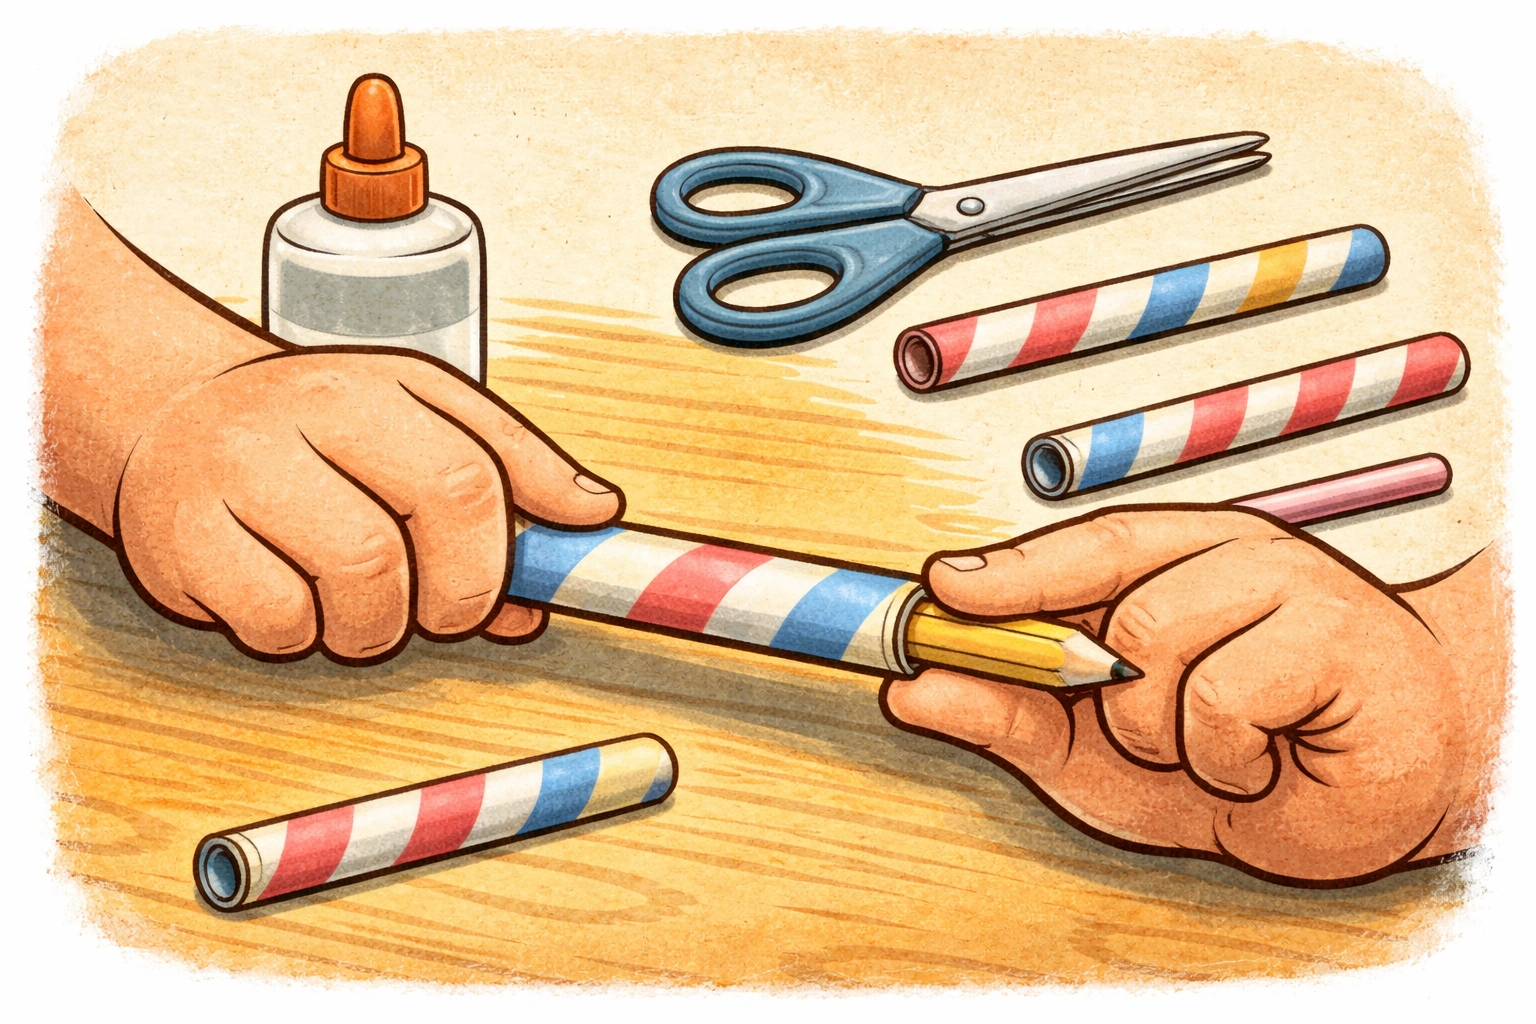
Step 2: Roll the Rocket Body
Place a pencil along one of the longer edges of your paper rectangle. Roll the paper tightly around the pencil, creating a tube. The paper should wrap snugly enough to hold its shape but loosely enough that you can slide the pencil out easily.
Once you've rolled it up, tape along the seam to keep the tube from unraveling. One long piece of tape down the length usually does the trick.
Step 3: Create the Nose Cone
Here's the important part: your rocket needs a sealed top so the air doesn't escape.
Slide the pencil out of the tube. Pinch one end of the paper tube flat, then fold the corners down to create a triangular point (kind of like wrapping a present). Tape this closed securely. Give it a gentle blow to make sure no air leaks out.
If air escapes from the nose cone, the rocket won't launch well. A little extra tape never hurts.
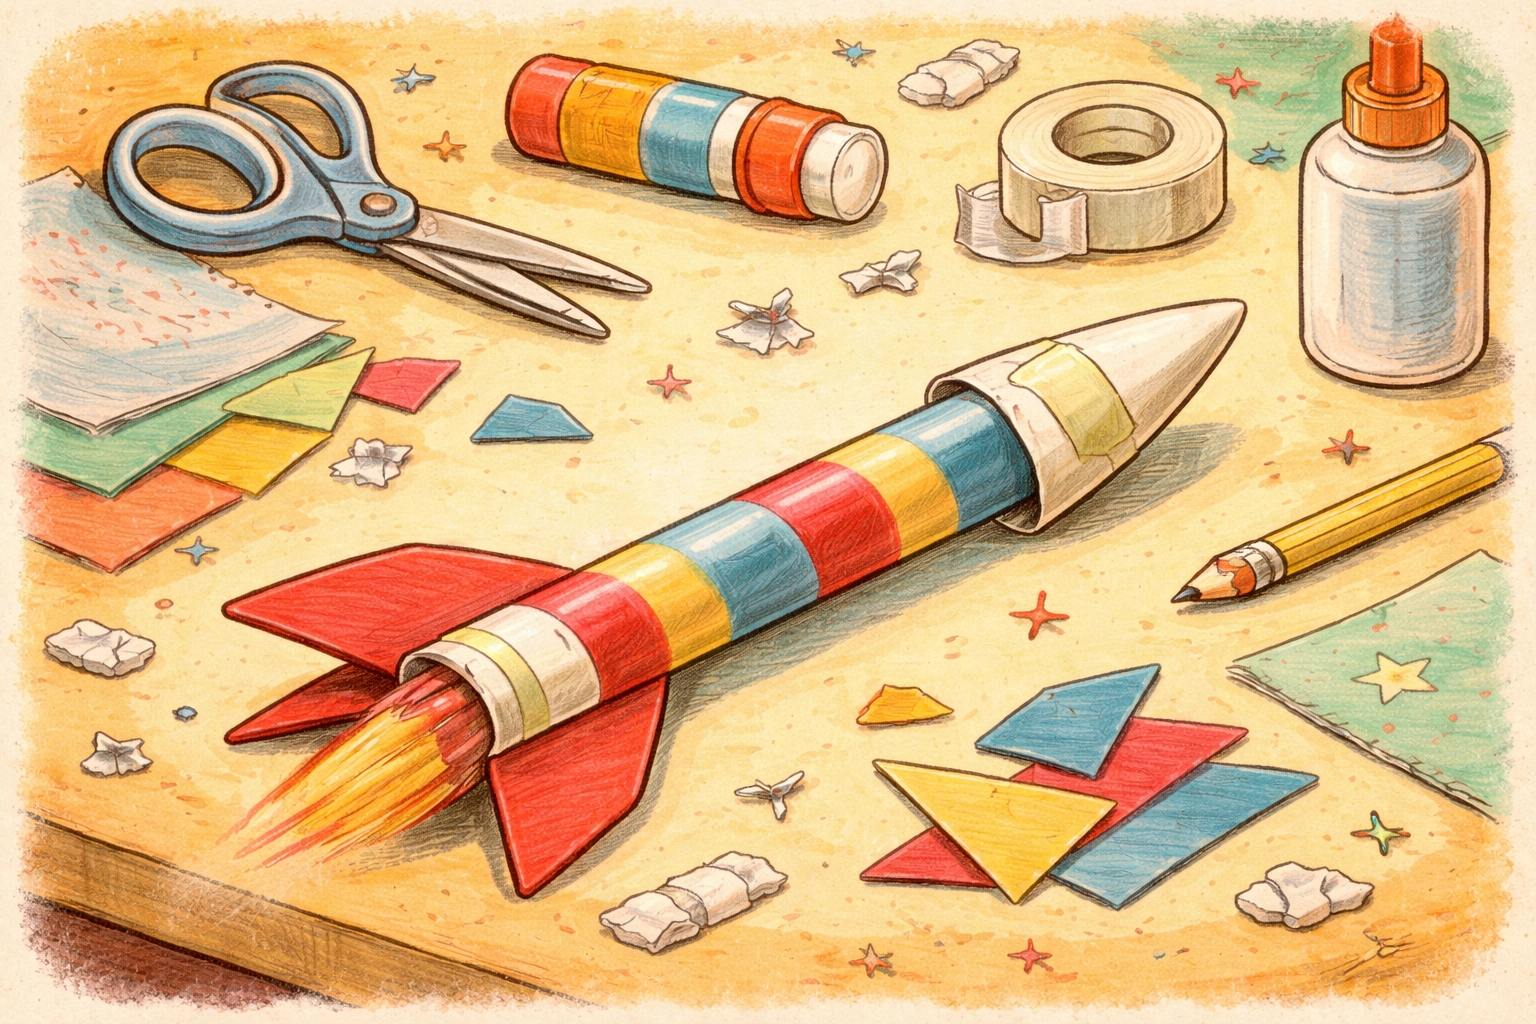
Step 4: Add Fins for Stability
Cut two small fin shapes from leftover paper: triangles or rectangles both work. Tape them to opposite sides of the rocket near the open (bottom) end.
When you look at your rocket from the bottom, the fins should form a "+" shape. This helps the rocket fly straight instead of tumbling through the air like a confused paper airplane.
Step 5: Decorate Your Rocket
This step is optional but highly encouraged. Break out the markers, crayons, or stickers and let your child personalize their creation. Flames shooting out the back? Absolutely. Racing stripes? Go for it. A tiny window with an imaginary astronaut peeking out? Perfect.
The decorating phase is when kids really take ownership of their rockets, and it makes the launching even more exciting.
Step 6: Prepare for Launch
Insert your drinking straw into the open end of the rocket. The straw should fit snugly inside the paper tube. If it's too loose, the air will escape around the sides instead of pushing the rocket forward.
Find a clear launching zone: a hallway, living room, or backyard works great. Make sure no one is standing in the flight path, including pets and siblings.
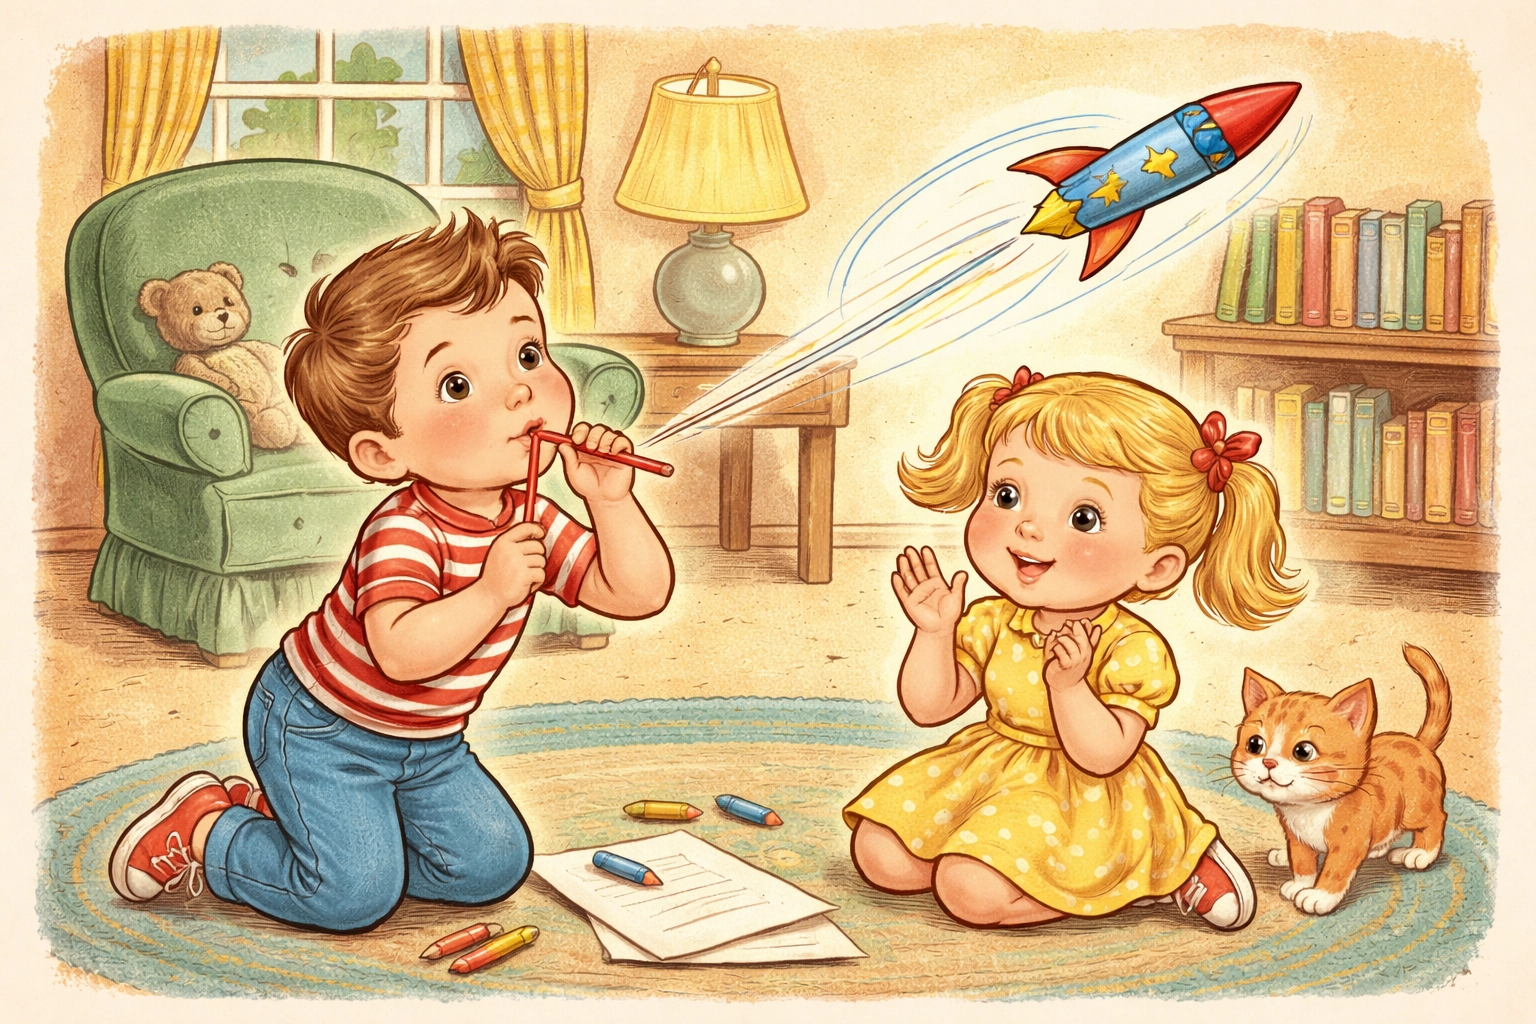
Step 7: Launch!
Hold the straw near your mouth, aim in a safe direction, and blow a quick, sharp puff of air into the straw. Your rocket should shoot off and fly several feet.
Experiment with different blowing strengths and launch angles. Blowing straight ahead sends the rocket on a direct path, while angling upward creates more of an arc. See how far you can get your rocket to travel.
Ideas for Extended Learning
Once the basic rocket-building is mastered, there's plenty of room for experimentation:
- Test different paper weights. Does construction paper fly differently than copy paper?
- Try longer or shorter rockets. How does size affect distance?
- Add more fins. Does four fins work better than two?
- Change the nose cone shape. What happens with a blunt tip versus a pointy one?
- Measure flight distances. Use a tape measure and keep a simple chart to track results.
- Hold a family competition. Who can build the rocket that flies the farthest? The straightest? The highest?
These experiments turn a simple craft into a genuine science exploration. Kids learn about variables, testing, and observation: all while having a blast.
For more hands-on STEM projects, check out our collection of kids crafts for additional ideas.
Helpful Tips for Success
- Wrap tightly but not too tightly. The rocket body needs to slide off the pencil easily.
- Seal the nose cone completely. Air leaks are the number one cause of sad, floppy launches.
- Use smooth straws. Bendy straws can work, but straight straws provide more consistent airflow.
- Launch in a clear space. Rockets can travel surprisingly far when everything's working right.
Frequently Asked Questions
Can I use paper straws instead of plastic straws?
Paper straws can work, though they may get soggy after multiple launches. Plastic straws tend to hold up better for extended play sessions.
What if my rocket doesn't fly very far?
Check the nose cone for air leaks and make sure the paper tube fits snugly around the straw. A tighter seal usually means better flights.
Is this activity safe for toddlers?
Toddlers can participate in decorating and watching, but the launching should be supervised closely. The straws and small paper pieces can be choking hazards for very young children.
Can we do this activity outdoors?
Outdoor launching works great, especially on calm days. Wind can affect flight paths, but that adds another variable for kids to observe.
How do I make the rocket fly straighter?
Adding fins helps with stability. Make sure they're evenly spaced and securely attached.
What's the best angle for launching?
Straight ahead or slightly upward (around 30 to 45 degrees) typically produces the longest flights. Encourage kids to experiment.
Can we reuse the rockets?
Most rockets survive multiple launches. If the nose cone gets damaged, just add more tape to reseal it.
Why does blowing harder make the rocket go farther?
More air pressure means more force pushing the rocket forward. This is a great opportunity to talk about thrust and propulsion.
What other decorations can we add?
Stickers, glitter glue, and ribbon streamers all work well. Just keep additions lightweight so they don't affect flight performance too much.
References
- STEM activity guides on air-powered rockets
- Physics education resources on propulsion and aerodynamics
- Family craft tutorials on paper rocket construction


