


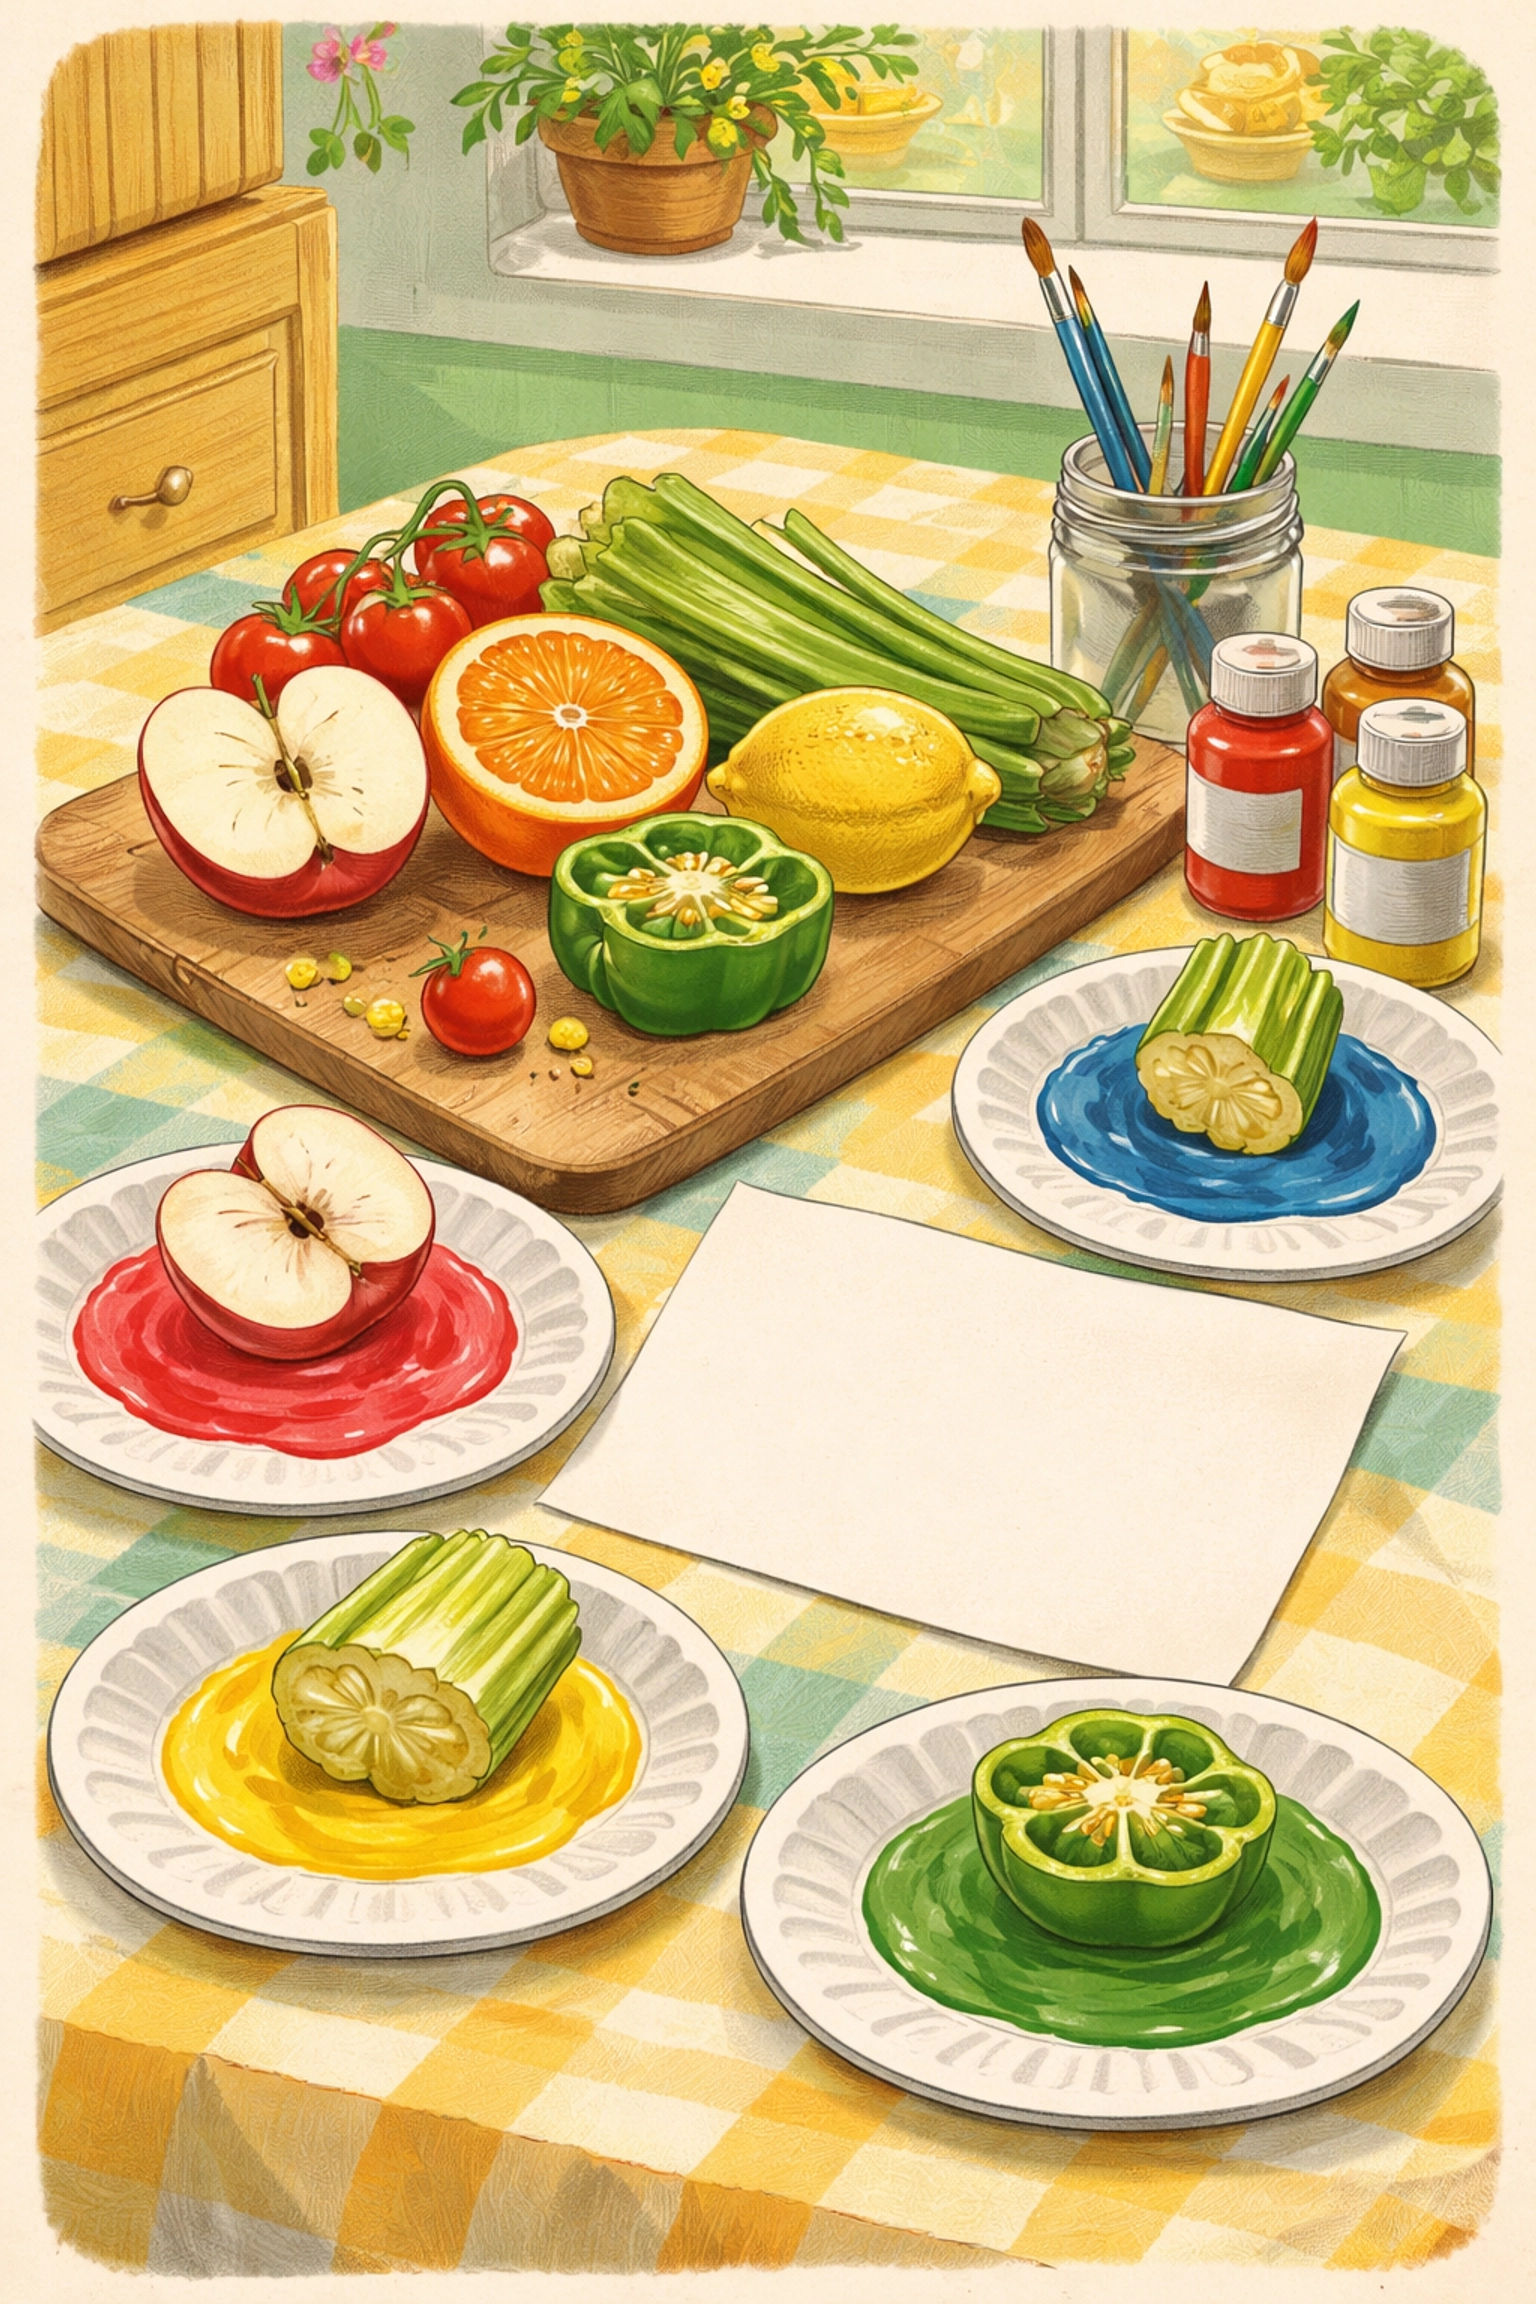
Fruit stamp art is one of the easiest and most satisfying craft projects you can do with kids. Simply cut fruits (or vegetables) in half, dip the flat side into washable paint, and press firmly onto paper to create colorful prints. The natural shapes, apple stars, citrus wheels, pepper flowers, make gorgeous patterns without needing any artistic skill. It's affordable, it uses items you likely have in your kitchen, and cleanup is a breeze with the right setup.
This activity works wonderfully for toddlers through elementary-aged kids, and honestly, plenty of adults get hooked on it too. There's something deeply satisfying about that moment when you lift the fruit and see what pattern you've created.
Who Is This Activity Best For?
| Age Range | Skill Level | Enjoyment Level |
|---|---|---|
| 2–3 years | Needs help with stamping pressure | High (loves the sensory experience) |
| 4–5 years | Can stamp independently with supervision | Very high (experimenting with patterns) |
| 6–8 years | Can create intentional designs and sequences | High (appreciates the artistic control) |
| 9+ years | Can plan complex artwork and color schemes | Moderate to high (may prefer adding mixed media) |
Estimated Time: 30–45 minutes of active crafting (plus about 10 minutes of prep and 15 minutes of cleanup)
Materials You'll Need
Good news, this project typically costs under $10, especially if you raid your produce drawer for items that are slightly past their prime.
| Material | Estimated Cost | Notes |
|---|---|---|
| Fruits and vegetables | $0–$5 | Use what you have! Soft or slightly old produce works great |
| Washable tempera paint | $3–$6 | A basic multi-pack covers most needs |
| Paper or cardstock | $0–$2 | Construction paper, printer paper, or cardstock all work |
| Paper plates or shallow trays | $1–$2 | For holding paint; foam plates work especially well |
| Newspaper or plastic tablecloth | $0–$2 | Protects your work surface |
Optional but helpful: Art smocks or old t-shirts, paper towels, a damp cloth for quick hand-wipes.
Step-by-Step Instructions
Step 1: Choose and Prep Your Produce
Head to your kitchen and gather a variety of fruits and vegetables. The best options have interesting cross-sections and hold their shape when cut:
- Apples (cut horizontally to reveal the star-shaped seed pattern)
- Oranges, lemons, or limes (gorgeous citrus wheel prints)
- Bell peppers (cut horizontally for a flower-like shape)
- Celery stalks (the base creates a rose pattern)
- Mushrooms (lovely organic shapes)
- Corn on the cob (roll it for a unique textured pattern)
- Grapes or strawberries (smaller accent stamps)
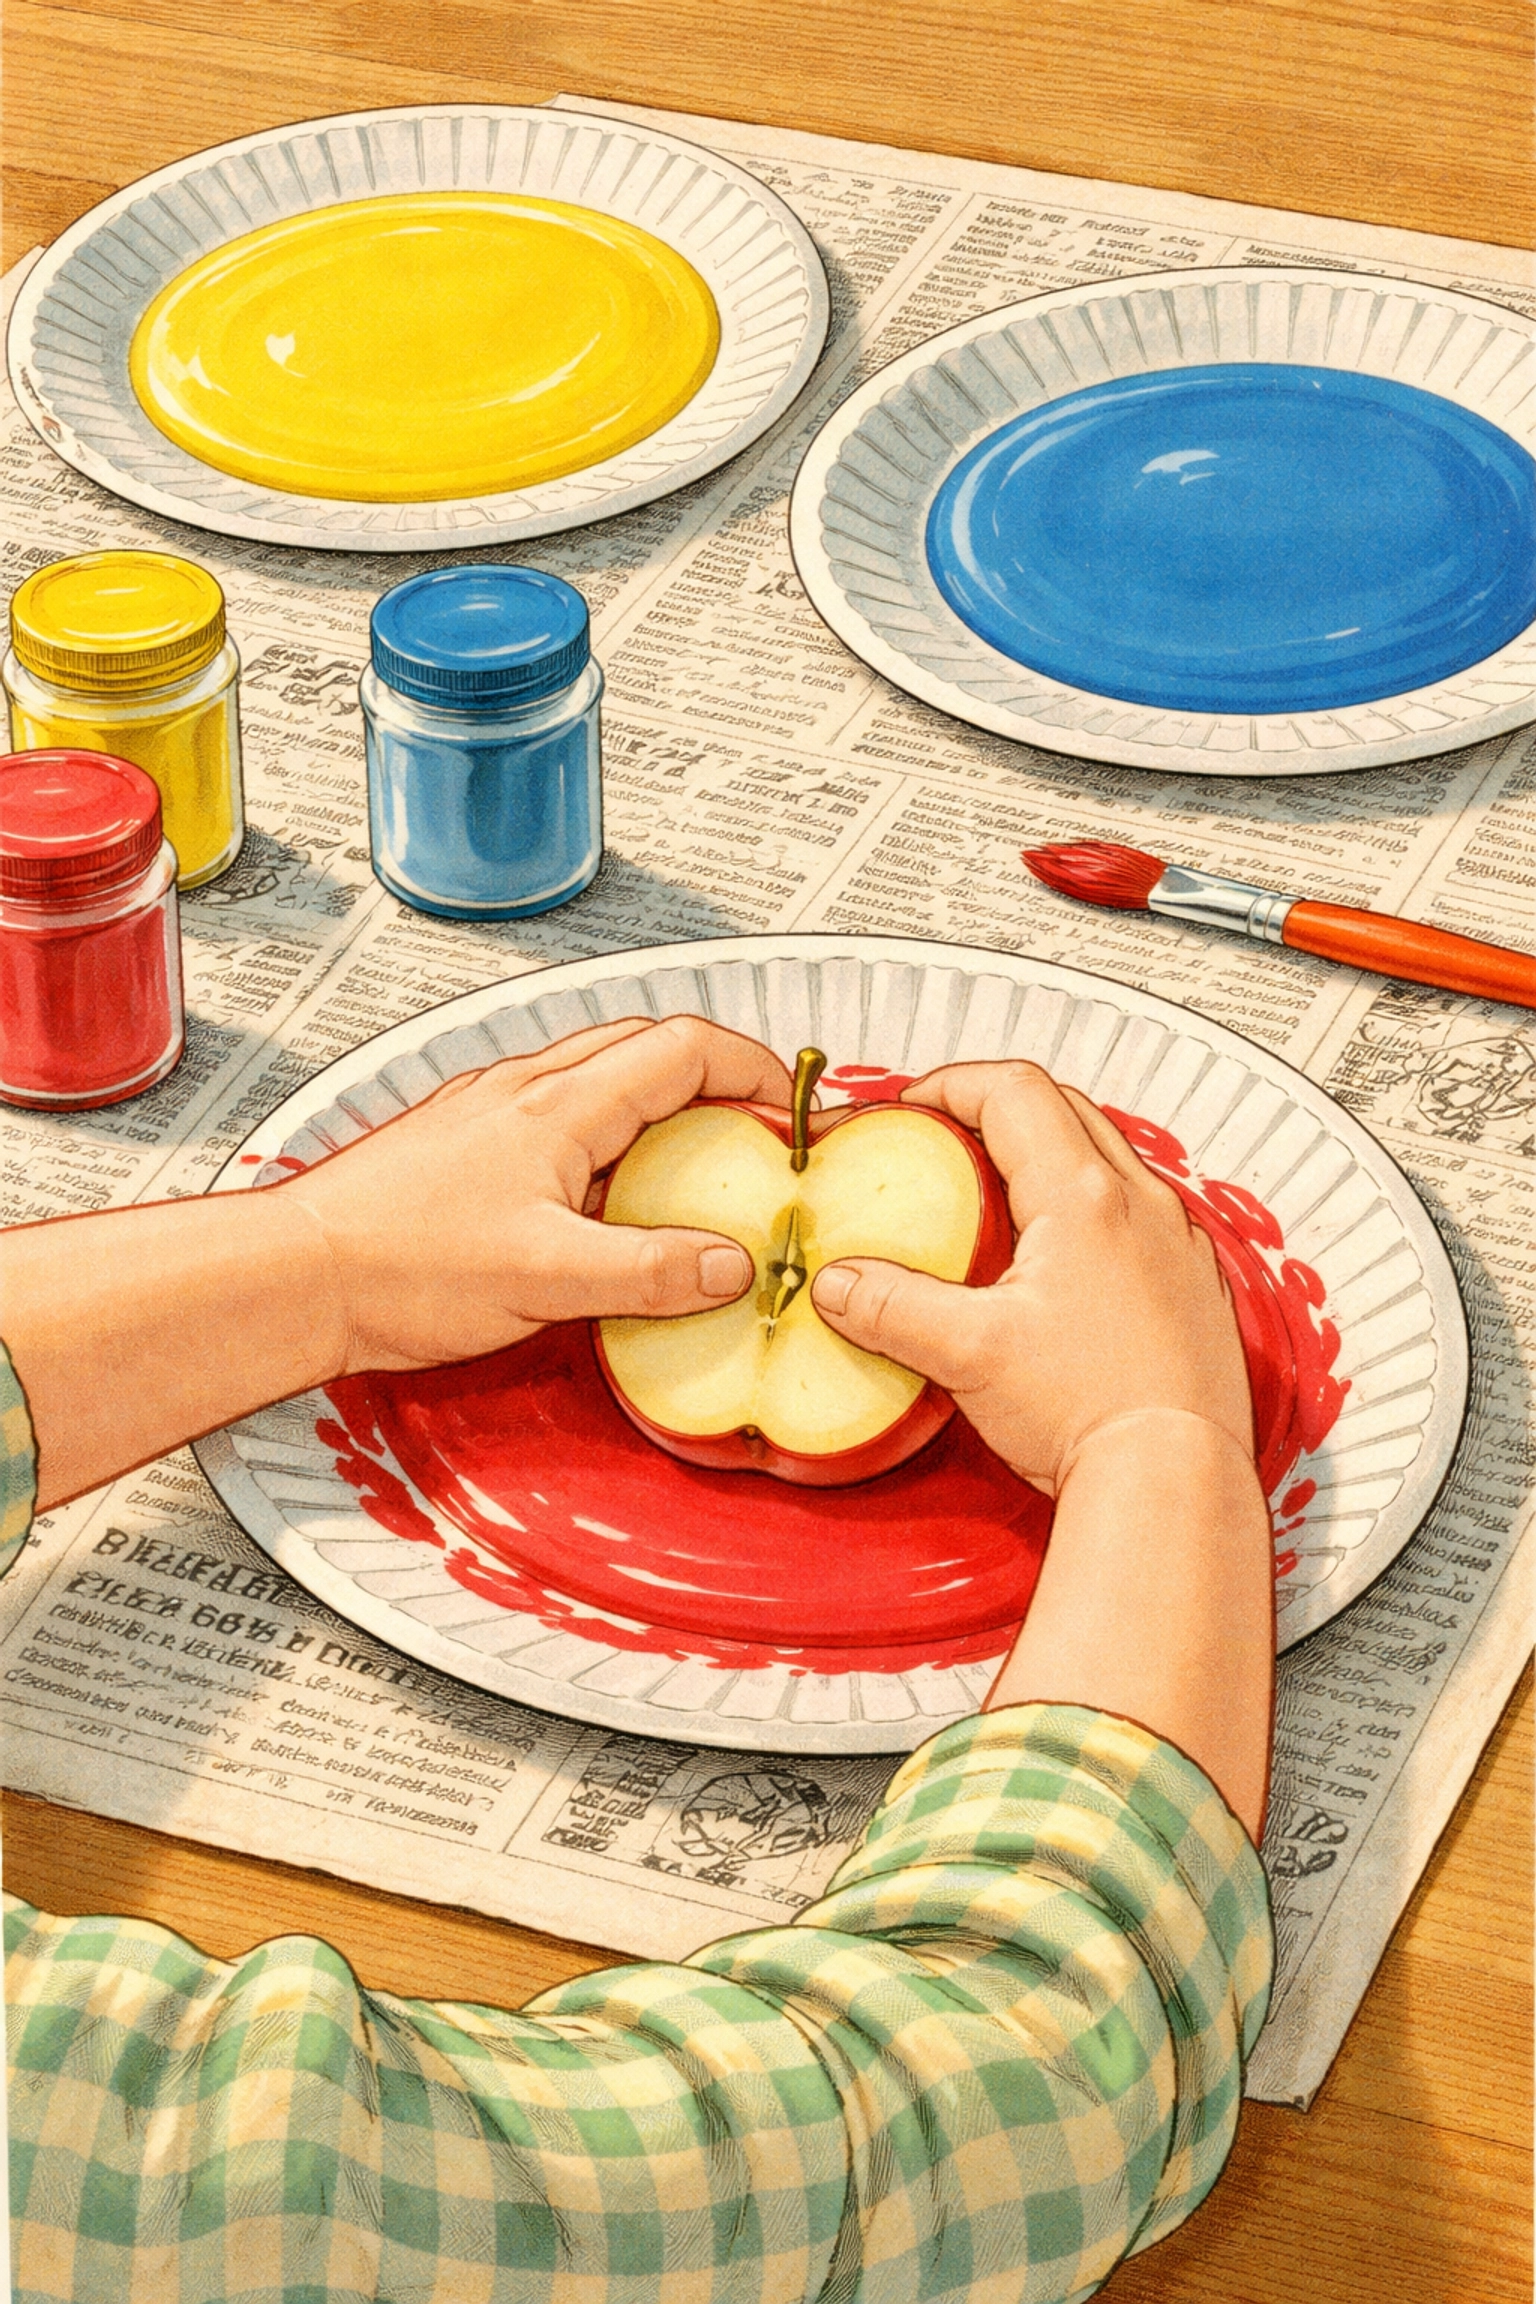
Adult job: Using a sharp knife on a cutting board, slice your produce to create flat, level surfaces. You can cut vertically through the center for symmetrical prints, or horizontally for different effects. Pat the cut surfaces with a paper towel to remove excess moisture, this helps the paint adhere better.
Step 2: Set Up Your Paint Station
Squeeze or pour washable paint onto paper plates or shallow trays. A few tips here:
- Use separate plates for each color if you want to keep colors distinct
- Combine colors on one plate if you're okay with some mixing (this can create beautiful effects!)
- Don't pour too much, a thin, even layer works better than a deep pool
Lay out newspaper or a plastic tablecloth to protect your table. Trust me on this one.
Step 3: Demonstrate the Technique
Before handing everything over to eager little hands, show them how it's done:
- Hold the fruit firmly by the back (the uncut side)
- Press the flat, cut side into the paint, wiggling slightly to coat evenly
- Lift and check that the surface is covered but not dripping
- Press firmly onto the paper, straight down, no sliding
- Hold for a moment, then lift straight up to reveal the print
Kids often want to drag or wiggle the stamp on the paper, which creates smears. A quick demo helps them understand that firm, still pressure gives the cleanest results.
Step 4: Let Them Create!
Now comes the fun part. Let your kids experiment freely at first, random stamping, overlapping prints, mixing colors. This exploration phase is where the magic happens.
After they've gotten comfortable, you can introduce some structure if they're interested:
- Pattern making: Try apple-orange-apple-orange sequences
- Color gradients: Start with yellow, move to orange, end with red
- Scene building: Use different produce to create a garden, underwater scene, or abstract design
- Card making: Fold paper first, then stamp on the front for homemade greeting cards
Step 5: Add Details (Optional)
Once the stamped prints dry (usually 15–20 minutes), older kids might enjoy adding details with markers, crayons, or more paint. An apple print can become a face. Citrus wheels can get stems and leaves to become flowers. This second layer of creativity often produces the most treasured artwork.
Step 6: Clean Up Together
Cleanup is pretty straightforward:
- Compost or toss the used produce (it's not food-safe after paint contact)
- Wash reusable trays and let them dry
- Wipe down the table
- Wash little hands thoroughly with soap and water
Making cleanup part of the activity teaches responsibility and honestly makes the whole experience less stressful for parents.
Tips for Better Results
Blot excess moisture. Watery produce creates runny prints. A quick pat with a paper towel before painting makes a noticeable difference.
Less paint is often more. A thick layer of paint fills in the natural texture and detail. A thinner coat preserves those gorgeous organic patterns.
Try different papers. Cardstock holds up better to moisture than thin printer paper. Construction paper adds color contrast. Experiment to find what you like.
Embrace imperfection. Some prints will be messy, partial, or blobby. That's part of the charm. The "mistakes" often become favorite pieces.
What Kids Learn From This Activity
This isn't just mess-making, though the mess is certainly part of the appeal. Fruit stamp art sneaks in some genuine learning:
- Symmetry and patterns: Natural produce has beautiful symmetrical structures
- Cause and effect: Different pressure, paint amounts, and techniques create different results
- Fine motor skills: Gripping, pressing, and lifting build hand strength and coordination
- Observation skills: Encourage kids to predict what shape each fruit will make before stamping
- Botany basics: Which items have seeds? That's often the difference between fruits and vegetables!
After the artwork dries, challenge your kids to identify which fruit or vegetable created each print just by looking at the shapes.
Frequently Asked Questions
Can I use any fruit or vegetable for stamp art?
Most work reasonably well, but firmer produce holds its shape better. Very soft items like bananas or ripe tomatoes tend to squish rather than stamp. Apples, peppers, citrus fruits, and potatoes are reliable choices.
What type of paint works best for fruit stamping?
Washable tempera paint is ideal for kids, it's easy to clean, safe, and has good coverage. Acrylic paint works for older children but stains more readily. Avoid watercolors; they're typically too thin.
How do I keep the colors from getting muddy?
Use separate paint plates for each color, and encourage kids to wipe or rinse stamps between color changes. Some color mixing is inevitable (and often beautiful), so don't stress too much about it.
Can we eat the fruit after we're done?
No: once produce touches paint, it's no longer food-safe. Use items that are slightly past their prime, bruised, or otherwise destined for the compost bin anyway.
What's the best paper for fruit stamp art?
Heavier paper like cardstock or mixed-media paper works best because it doesn't buckle or tear when wet. Construction paper is a good budget option. Regular printer paper works but may wrinkle.
How long does the artwork take to dry?
Most pieces dry within 15–30 minutes depending on how much paint was used and your room's humidity. Thicker paint layers take longer.
Can toddlers really do this activity?
With supervision and help, many toddlers enjoy fruit stamping. They may need assistance with pressure and aim, and the results will be abstract: but the sensory experience is valuable regardless of the final product.
What should I do with the finished artwork?
Frame favorites, mail them to grandparents, turn them into greeting cards, or use them as wrapping paper. You can also photograph the pieces for a digital keepsake before recycling.
How do I prevent a huge mess?
Set up in an easy-to-clean area (kitchen floor, outdoor table, or covered dining table). Use smocks or old clothes, keep wet wipes nearby, and lay down plenty of newspaper. Accepting that some mess will happen reduces stress considerably.
For more hands-on activities the whole family can enjoy, explore our kids crafts collection or try making a kitchen scrap regrow garden for another budget-friendly project.


