


Veggie scrap stamping is one of the easiest and most budget-friendly art activities you can do with kids. You simply cut vegetable scraps so they have a flat surface, dip them in washable paint, and press them onto paper to create colorful prints. The whole project typically costs under $10 (often free if you use scraps you'd otherwise toss), takes about 20-45 minutes, and works well for children ages 2 and up. It's a fantastic way to reduce kitchen waste while sparking creativity and teaching little ones about different vegetables.
Why Veggie Stamping Works So Well for Families
Before you start chopping up your celery butts and bell pepper tops, here's why this activity tends to be a crowd-pleaser:
- Zero-waste crafting: You're using scraps destined for the compost bin anyway
- Sensory exploration: Kids get to touch, smell, and examine vegetables up close
- Unpredictable results: Each stamp creates a slightly different pattern, which keeps things exciting
- Low pressure: There's no "wrong" way to stamp, making it ideal for younger children
Plus, it's a sneaky conversation starter about where food comes from, something we're pretty passionate about here at Tierney Family Farms.
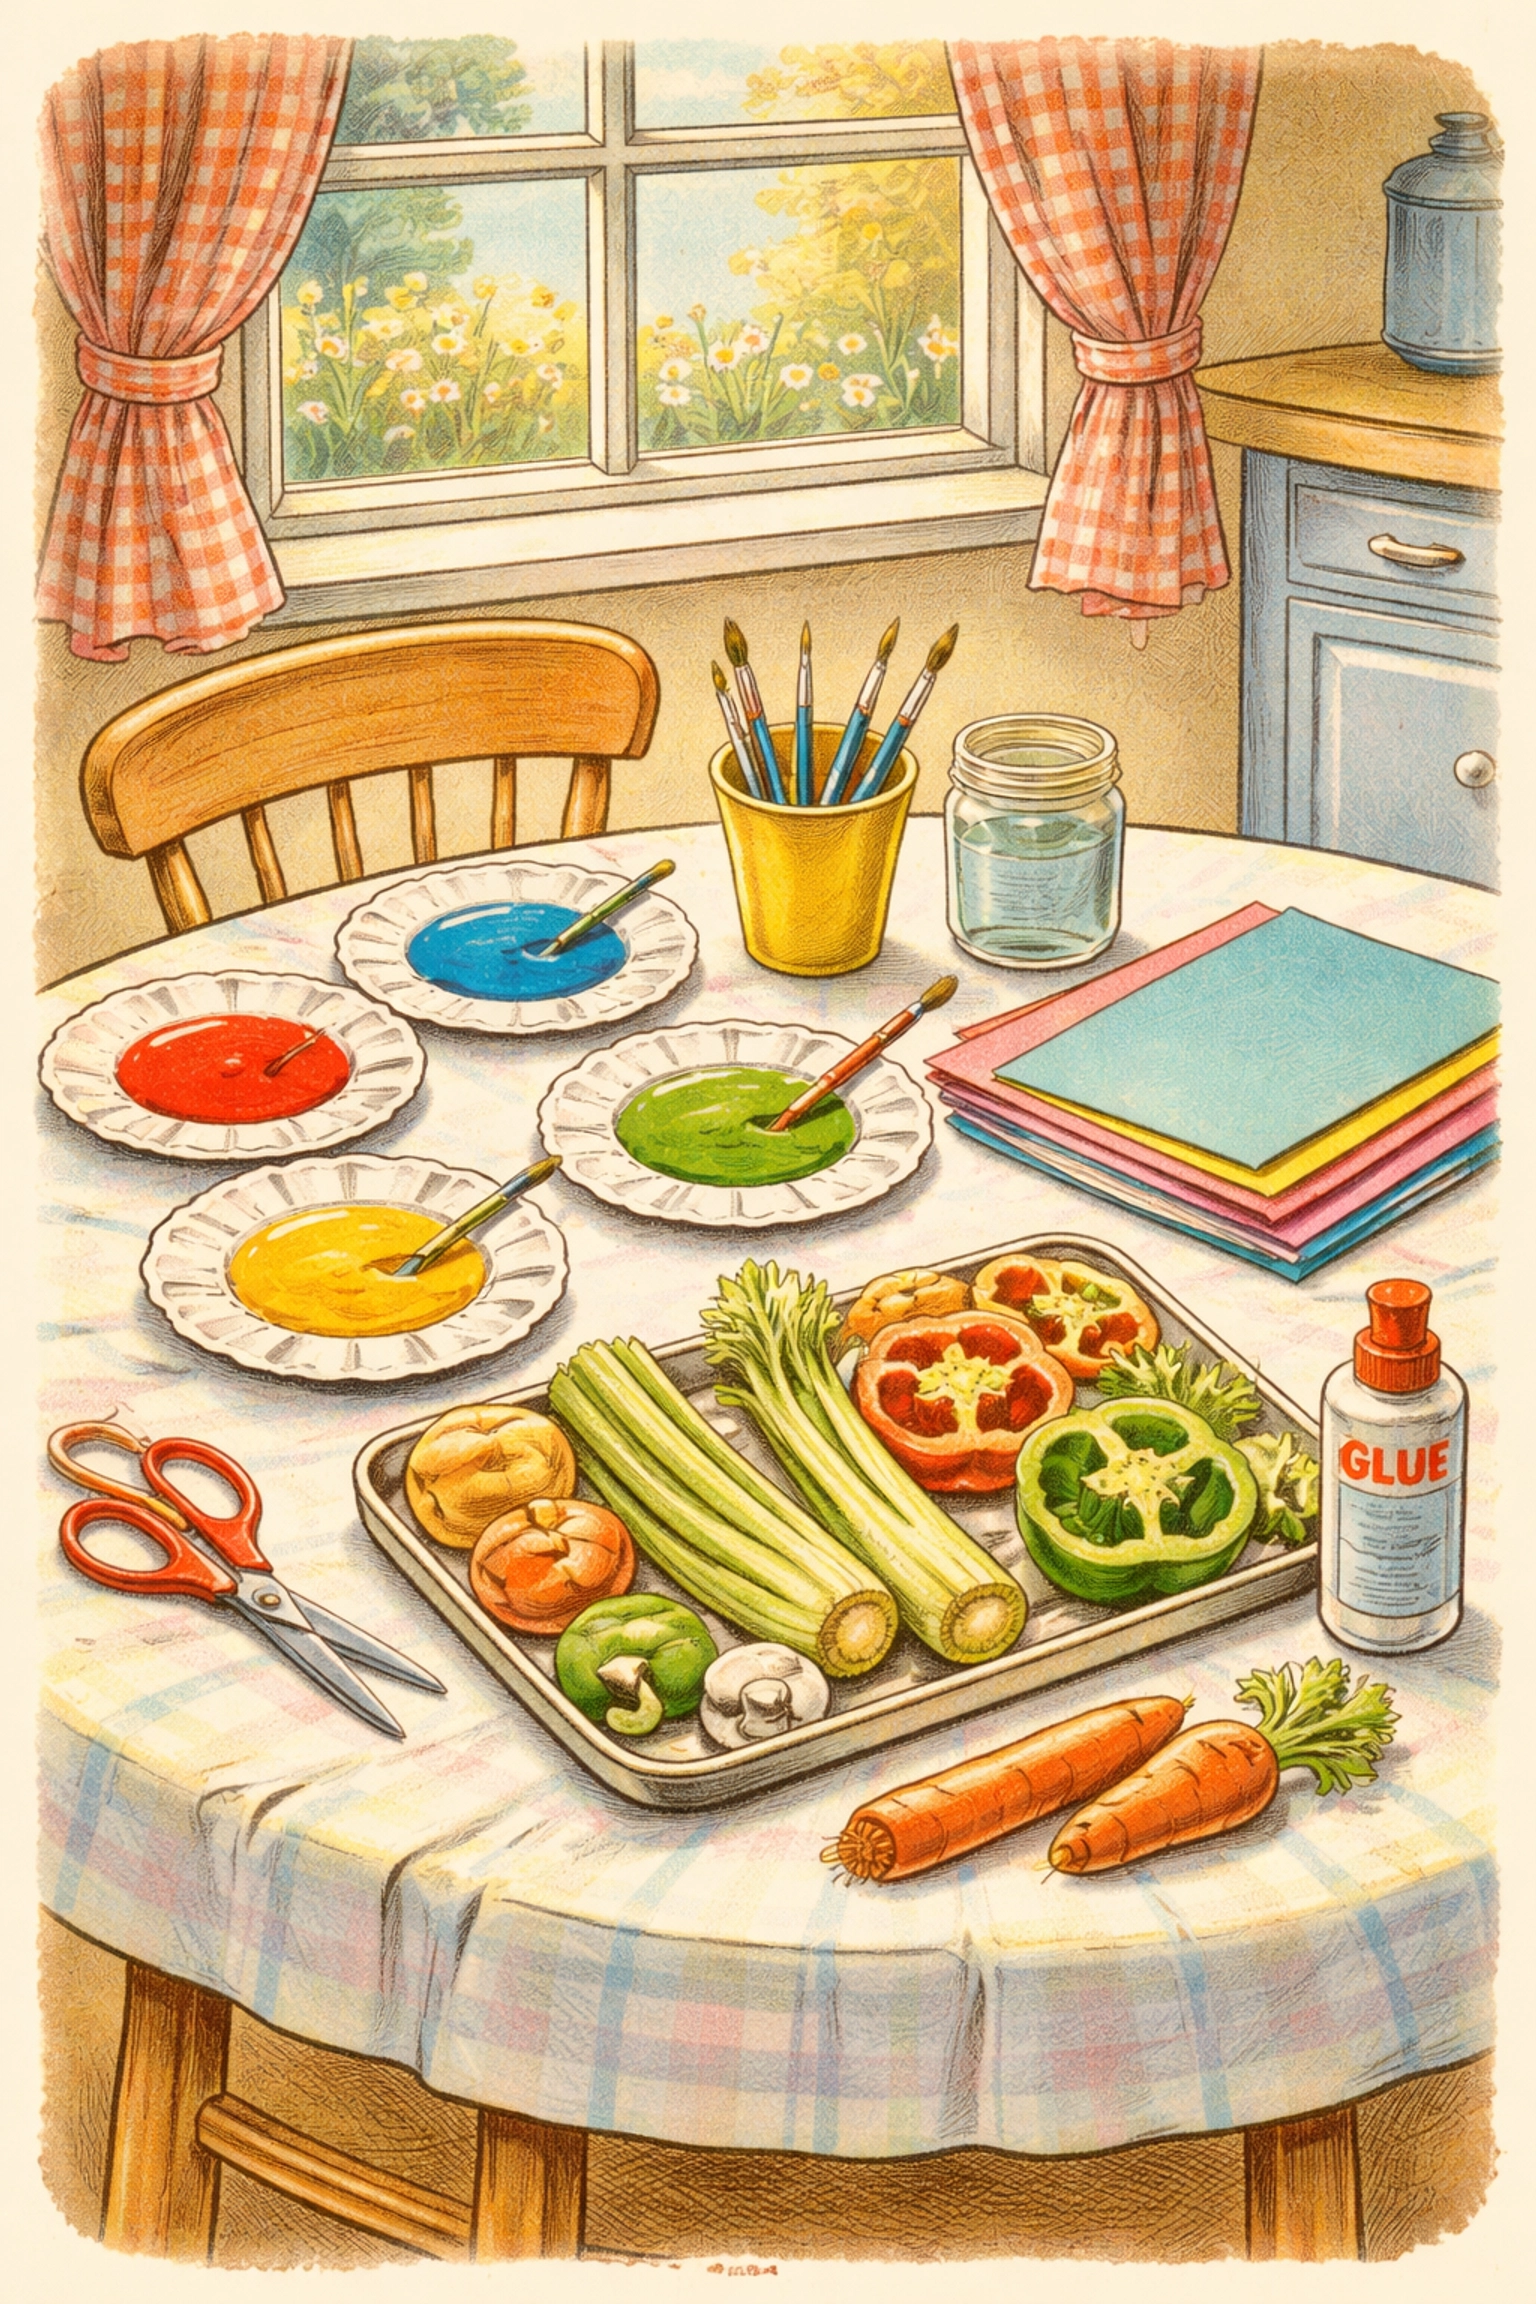
Materials You'll Need
| Item | Estimated Cost | Notes |
|---|---|---|
| Vegetable scraps | Free | Celery ends, bell pepper tops, carrot pieces, onion slices |
| Washable paint | $3-5 | Finger paint or poster paint works great |
| Paper | $1-3 | Construction paper, cardstock, or plain printer paper |
| Paper plates or shallow trays | $1-2 | For holding paint |
| Paper towels | $1 | For blotting excess moisture |
| Art smock or old t-shirt | Free | Optional but helpful |
Total estimated cost: Under $10 (and often much less if you already have paint and paper at home)
Age Recommendations
This activity is wonderfully flexible across age groups:
| Age Range | Skill Level | Enjoyment Level | Notes |
|---|---|---|---|
| 2-3 years | Beginner | High | Focus on sensory play; expect abstract results |
| 4-5 years | Developing | Very High | Can create intentional patterns and simple designs |
| 6-8 years | Intermediate | High | Ready for themed projects like flowers or animals |
| 9+ years | Advanced | Moderate to High | May enjoy more complex compositions or gift-making |
Time estimate: 20-45 minutes of active stamping, plus 15-30 minutes for paint to dry
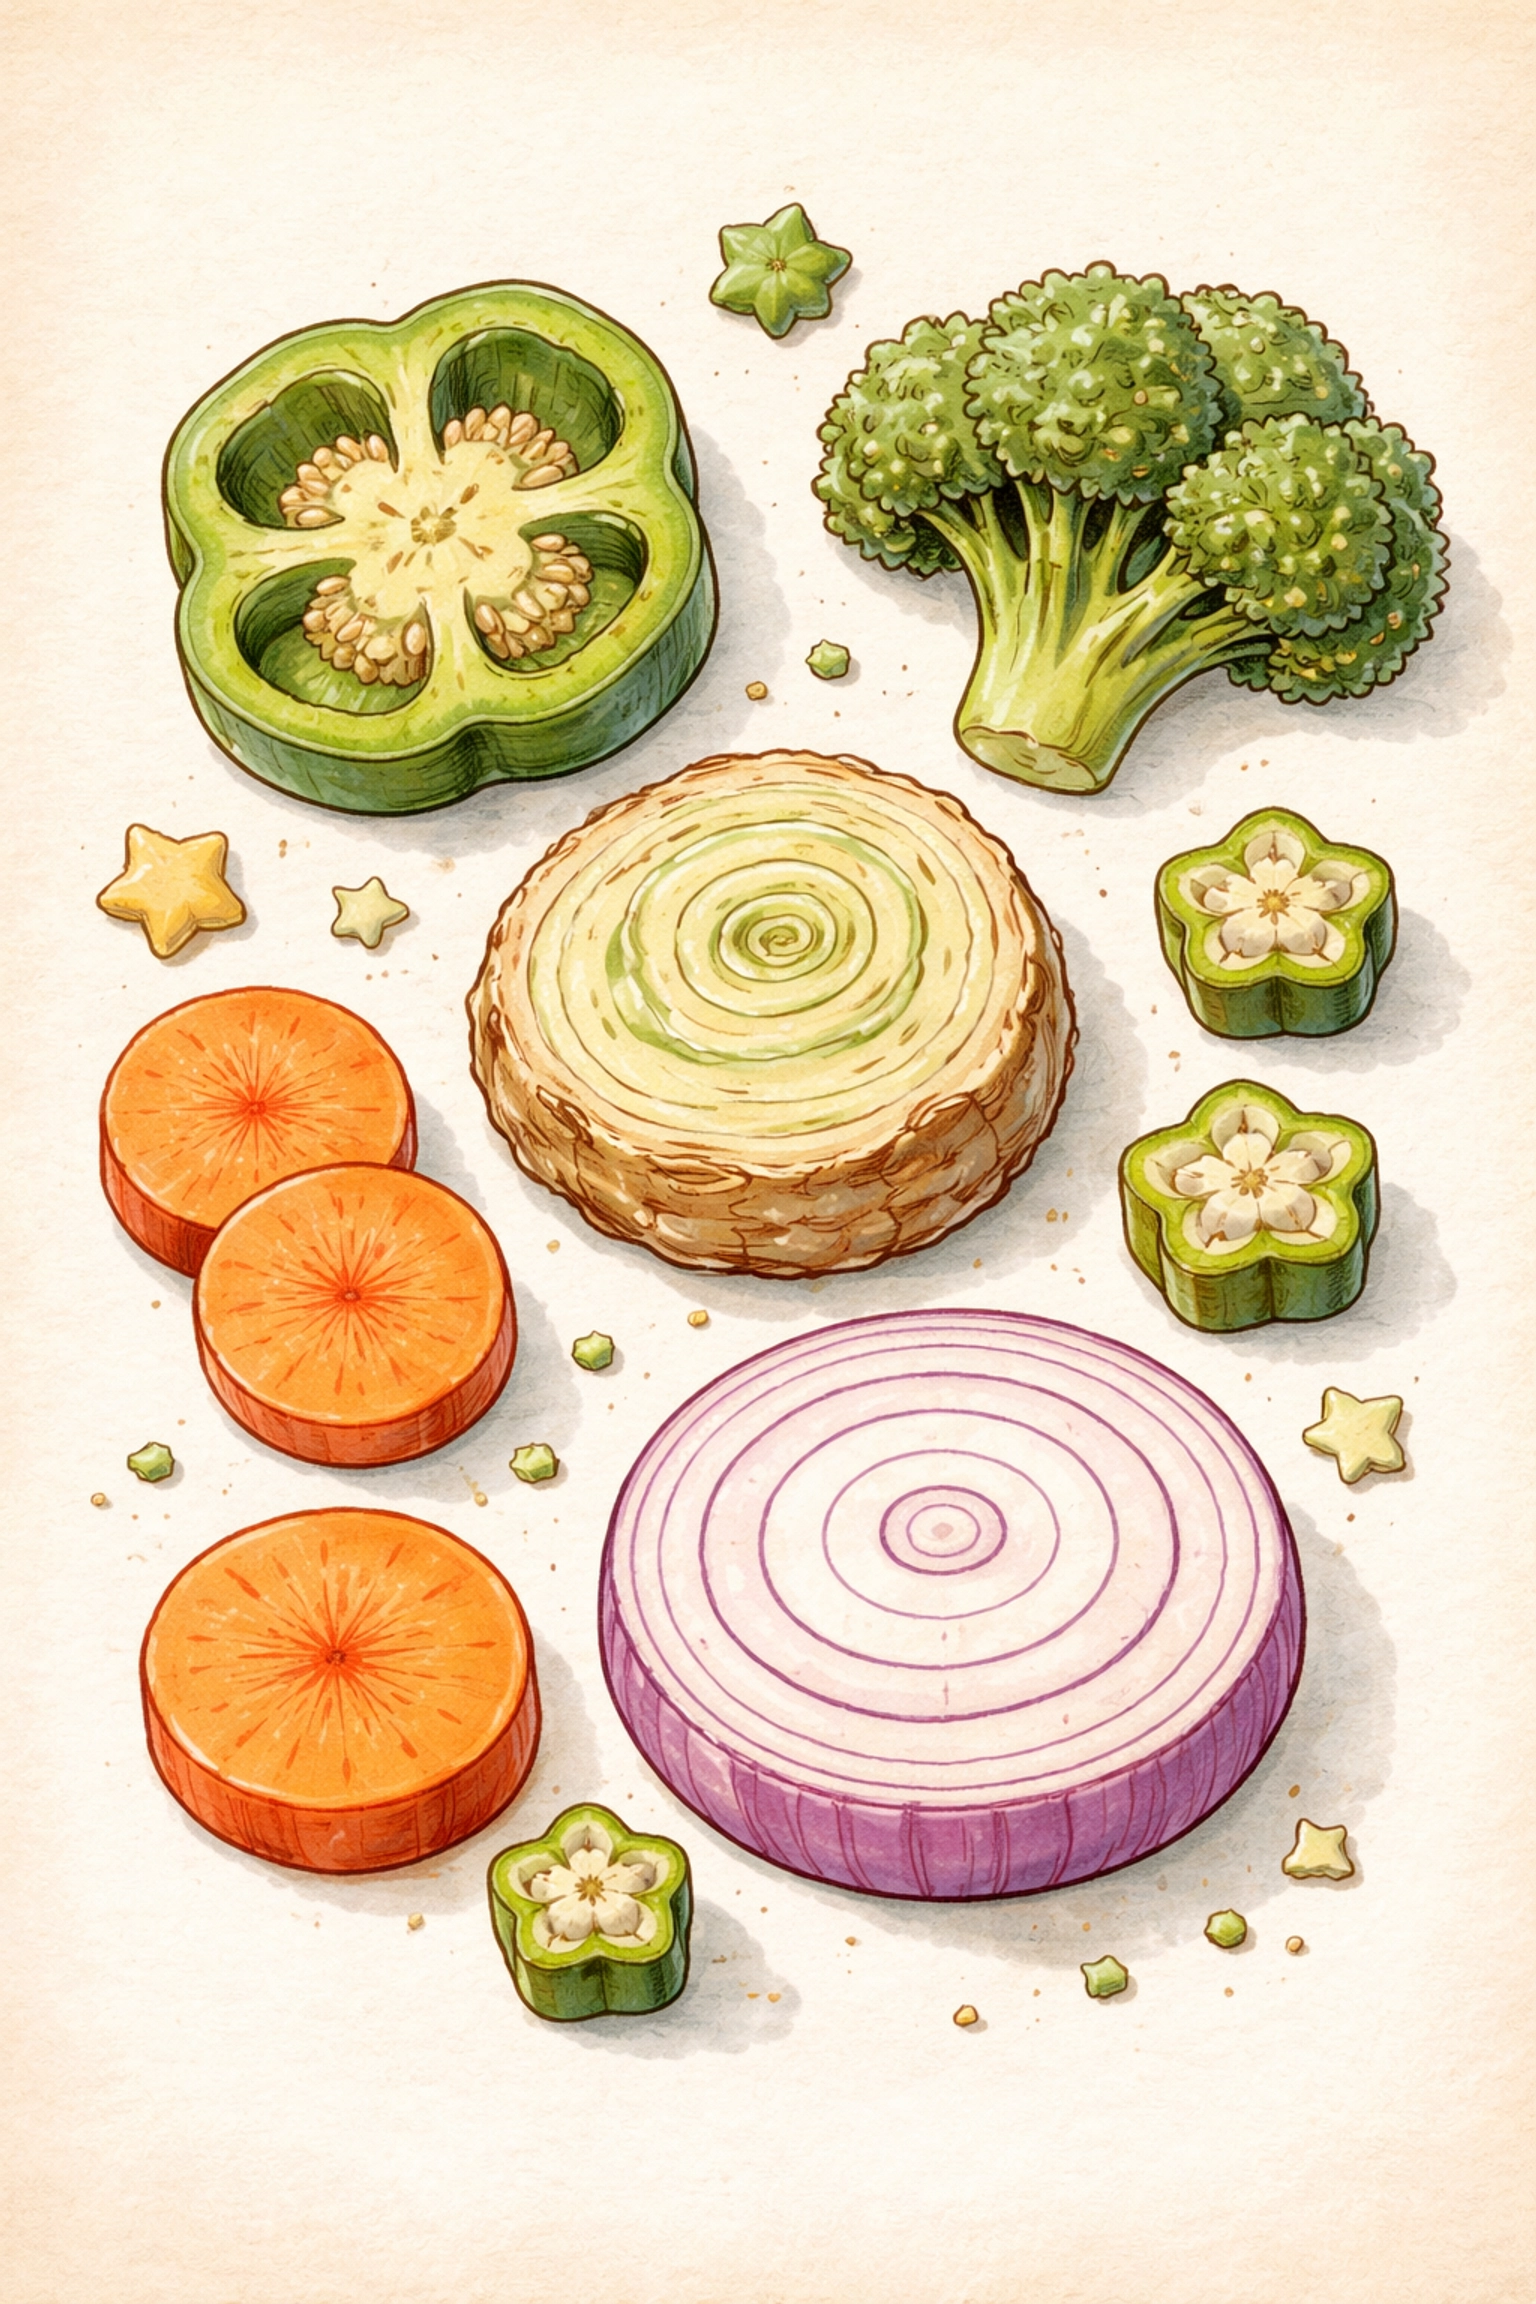
Best Vegetable Scraps for Stamping
Not all veggie scraps stamp equally well. Here are some that tend to produce the most interesting results:
Celery (root end): When you slice off the bottom two inches of a celery bunch and stamp with it, you often get a rose-like flower pattern. This one consistently impresses kids and adults alike.
Bell peppers (cross-section): Cut a pepper horizontally and remove the seeds. The resulting stamp looks somewhat like a four-leaf clover or flower.
Carrots: Slice them into circles for polka dots, or cut them lengthwise for ovals. You can also carve simple shapes into larger carrots.
Onions: Sliced onions create concentric ring patterns that work well for abstract designs or tree rings.
Okra: Cut crosswise, okra produces charming star-shaped stamps.
Broccoli florets: These create a textured, tree-like impression, perfect for making forests or bushes.
Mushrooms: Slice lengthwise to get an umbrella shape that kids often use for actual mushrooms or umbrellas in their artwork.
Step-by-Step Instructions
Step 1: Gather and Prep Your Veggie Scraps
Collect scraps from your kitchen throughout the week, or intentionally save ends and pieces after meal prep. When you're ready to stamp:
- Cut each vegetable so you have at least one flat, level surface
- Pat them dry with a paper towel (moisture can dilute the paint and make stamps blurry)
- Let very wet vegetables sit on a paper towel for a few minutes
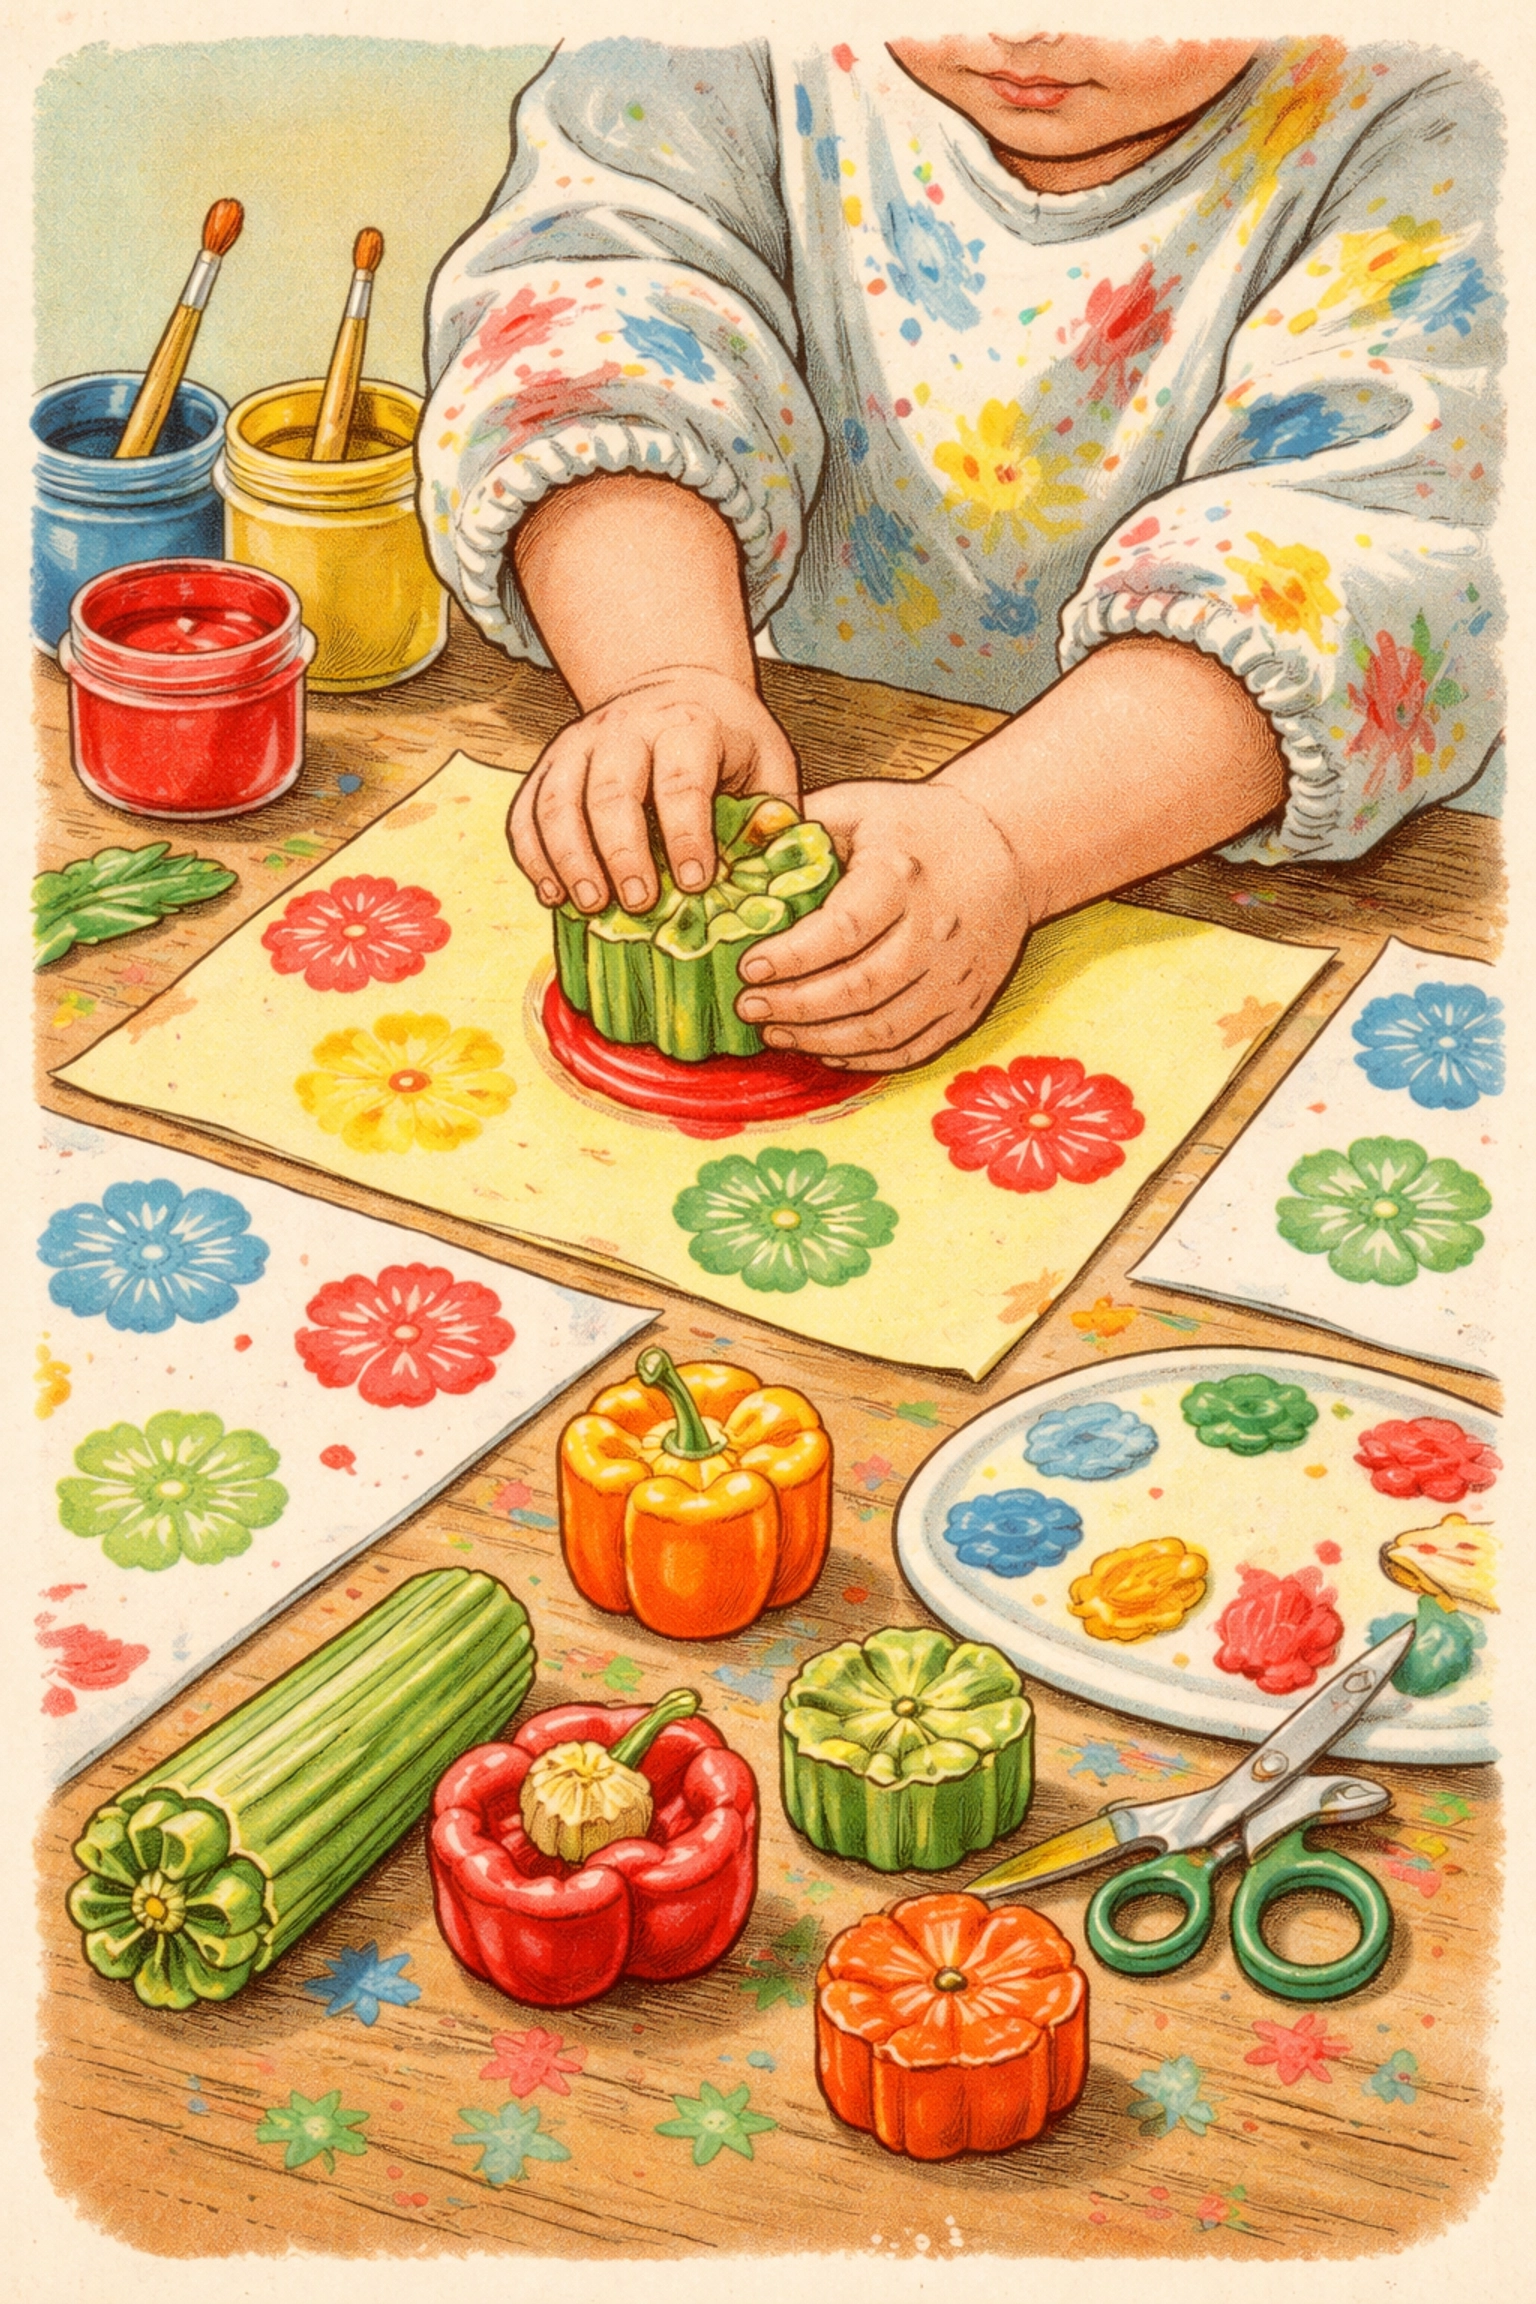
Step 2: Set Up Your Paint Station
Pour small amounts of washable paint onto paper plates or into shallow trays. A few tips:
- Use one plate per color to keep things tidy (though color mixing can also be part of the fun)
- Add just a tiny bit of water if your paint seems too thick
- Spread the paint into a thin, even layer so stamps get consistent coverage
Step 3: Protect Your Space and Your Child
Lay down newspaper, a plastic tablecloth, or an old sheet under your work area. Dress your child in an art smock, paint shirt, or clothes you don't mind getting messy. Washable paint generally comes out of fabric, but "washable" has limits.
Step 4: Demonstrate the Technique
Show your child how to:
- Hold the vegetable firmly
- Press the flat side into the paint
- Lift it up and check that paint covers the surface evenly
- Press it onto the paper with gentle, steady pressure
- Lift straight up (no wiggling) to get a clean print
Let them try it themselves immediately. Resist the urge to guide their hands too much, the slightly imperfect stamps are often the most charming.
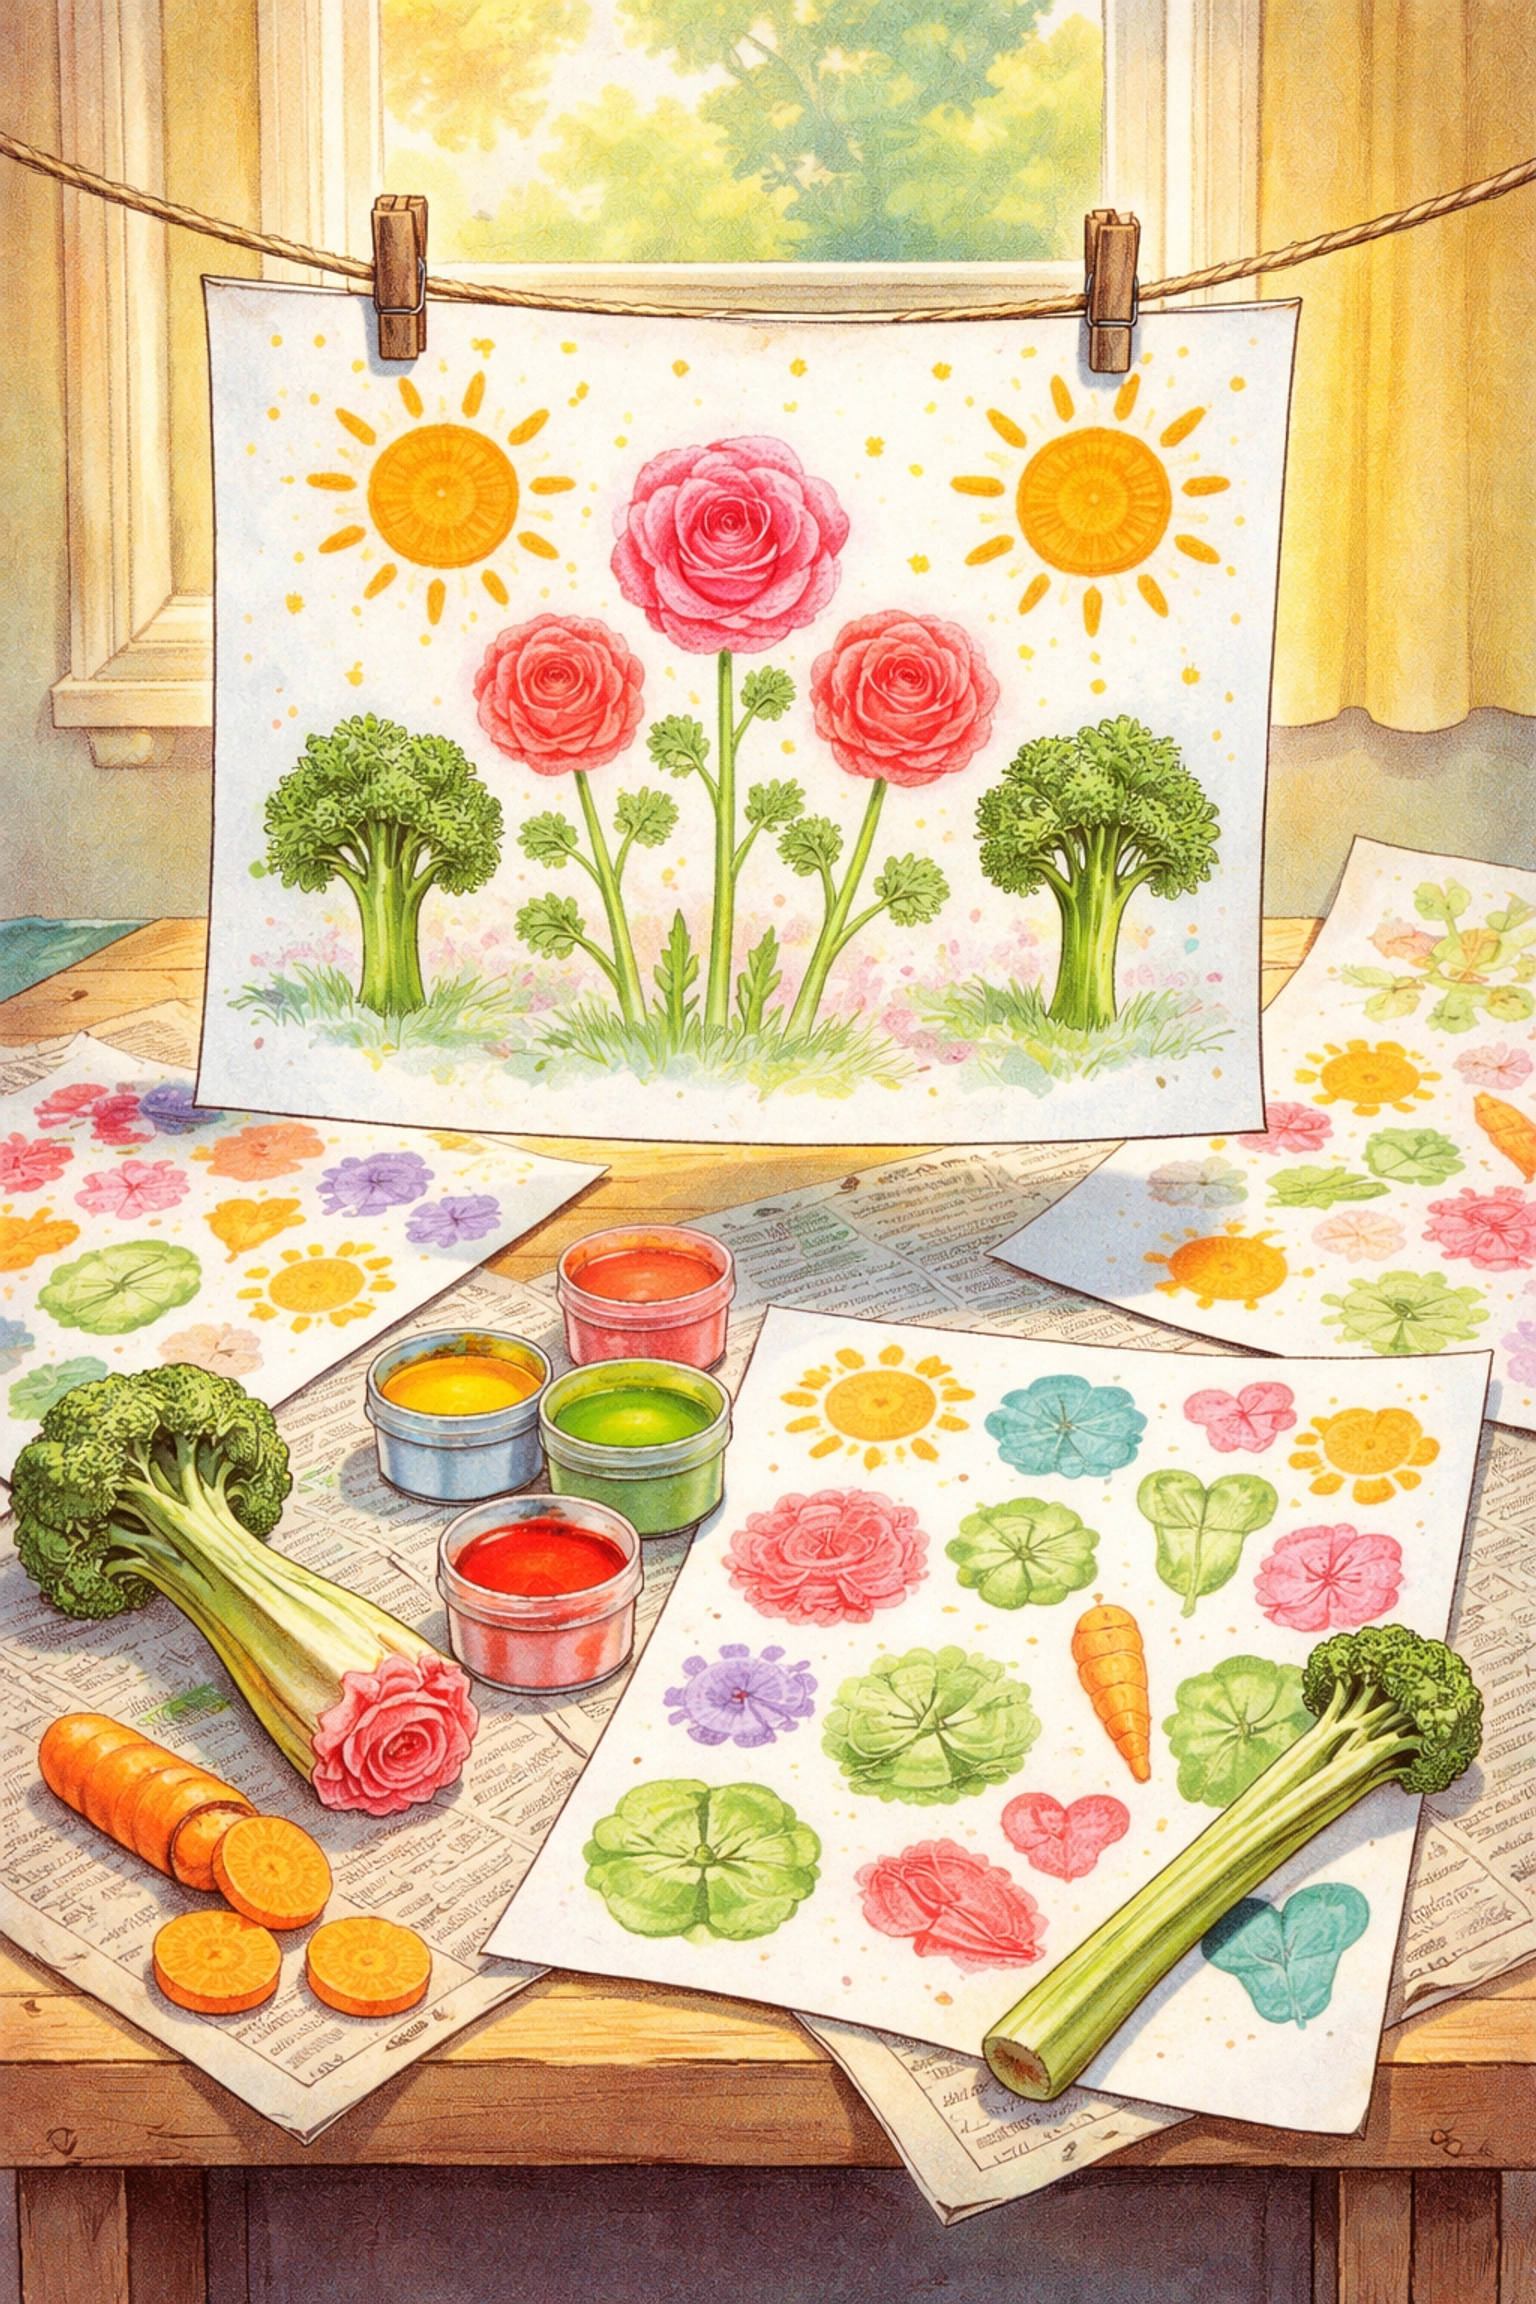
Step 5: Experiment and Create
Once kids understand the basic technique, let them explore freely. Some ideas to suggest (but don't force):
- Make a garden scene using celery roses, broccoli trees, and carrot suns
- Create patterns by alternating colors or vegetable shapes
- Stamp wrapping paper on large sheets of kraft paper
- Design greeting cards for grandparents or friends
Step 6: Add Details (Optional)
After the paint dries completely, kids can use markers, crayons, or additional paint to add stems, faces, backgrounds, or other embellishments to their stamped designs.
Step 7: Clean Up
Veggie scraps can go straight into the compost. Rinse plates and hands, and hang or lay artwork flat to finish drying.
Tips for Stamping Success
Don't overload the paint. Too much paint creates blobby, undefined stamps. A thin, even coat works better.
Experiment with pressure. Light pressure gives a delicate print; firm pressure creates bolder results. Both can look great.
Try stamping on different surfaces. Construction paper absorbs paint differently than cardstock or glossy paper. Each creates a unique effect.
Embrace imperfection. The beauty of veggie stamping is its organic, handmade quality. Wobbly prints and color bleed often make the final artwork more interesting.
Save some scraps for comparison. Before stamping, let kids examine the vegetables whole. Matching the stamp to the original veggie helps reinforce learning.
Project Ideas to Try
Once your family gets comfortable with basic stamping, you might explore:
- Seasonal cards: Stamp holiday or birthday cards using seasonal vegetables
- Fabric stamping: Use fabric paint on cotton tote bags or plain t-shirts
- Nature journals: Stamp vegetables alongside drawings of your garden
- Gift wrap: Create custom wrapping paper for presents
If your family enjoys kitchen-garden projects, you might also like our guide to making a DIY kitchen scrap regrow garden, another great way to teach kids about food and reduce waste.
Frequently Asked Questions
Can you use any vegetable for stamping?
Most firm vegetables work, though softer ones like tomatoes or avocados tend to be too mushy. Stick with celery, peppers, carrots, potatoes, onions, and similar produce for the clearest stamps.
What kind of paint works best for veggie stamping?
Washable tempera paint or finger paint generally works well. Poster paint is another good option. Avoid acrylic unless you're stamping on fabric, as it doesn't wash out of clothes easily.
How do you keep the stamps from getting too soggy?
Pat vegetables dry before stamping, and don't let them sit in paint. Between stamps, you can blot them lightly on a paper towel if they seem oversaturated.
Can toddlers do this activity safely?
Yes, with supervision. Use non-toxic, washable paints and watch to make sure they don't put painted vegetables in their mouths. The stamping motion itself is simple enough for most 2-year-olds.
How long does the artwork take to dry?
Depending on how thick the paint is and your humidity levels, most veggie stamp art dries within 15-30 minutes. Thicker applications may take up to an hour.
Can you save vegetable stamps to use again later?
You can refrigerate them wrapped in a damp paper towel for a day or two, but they tend to get soft and less effective. Fresh scraps usually stamp better.
What do you do with the vegetable scraps after stamping?
Compost them! The paint residue in small amounts typically won't harm your compost pile, especially if you used non-toxic washable paint.
Does this activity work for classroom settings?
Absolutely. It's budget-friendly, easy to set up for multiple children, and creates minimal mess compared to many paint projects. Teachers often use it for seasonal art activities.
References:
Research compiled from craft education resources on vegetable stamping techniques and best practices for family art activities.


