


Quick Answer: The best seed starting experiments for kids combine visible results, hands-on participation, and a bit of friendly competition. From watching roots grow through a plastic bag taped to your window to racing seeds against each other, these ten experiments turn germination into an adventure your kids will actually get excited about.
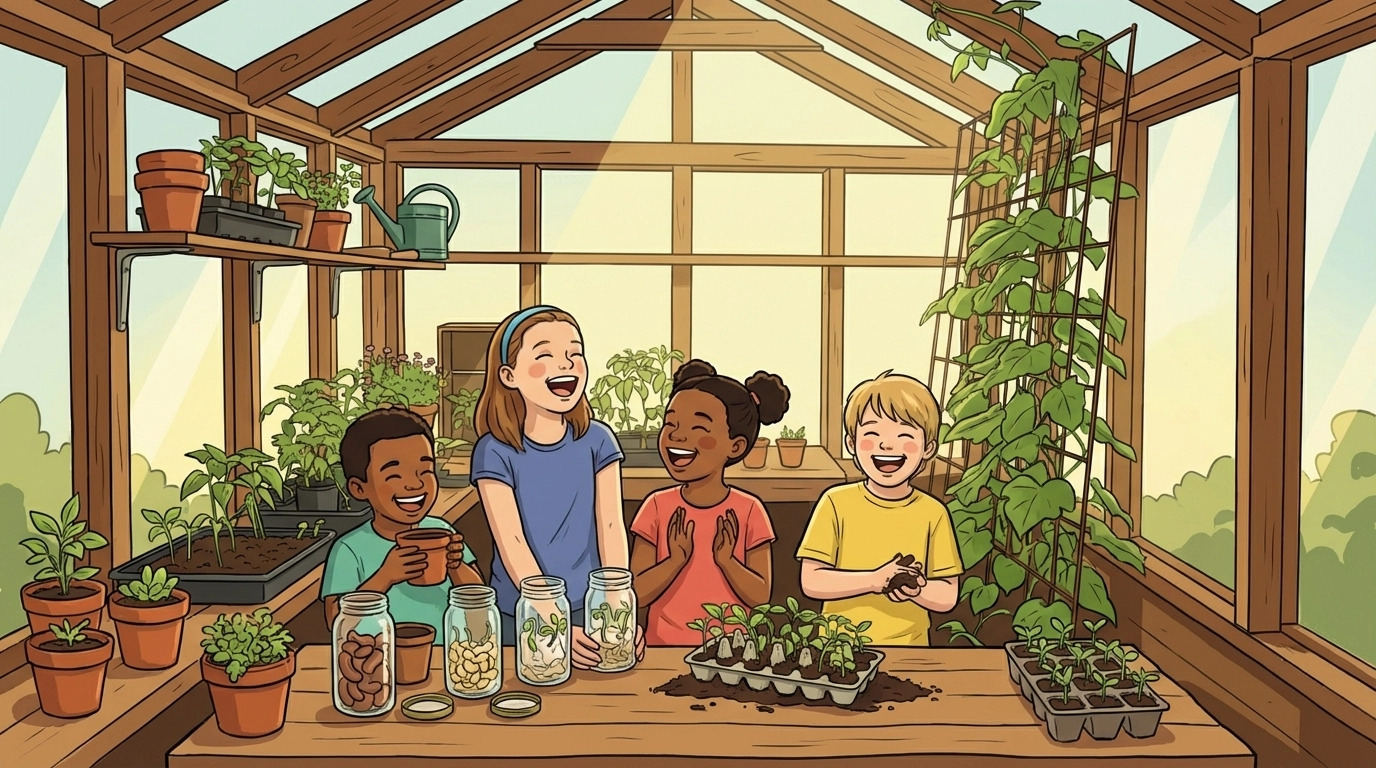
Getting kids interested in gardening starts with showing them the magic happening beneath the soil. The problem? Most of that magic is invisible. These experiments flip the script by making seed germination something kids can see, measure, and celebrate in real time.
Let's dig in.
1. The Window Bag Bean Experiment
Best for ages: 4–10 (with light help for sealing/taping)
Estimated cost: $0–$3 (upcycled bag/jar + pantry beans + paper towels)
This one's a classic for good reason: kids get a front-row seat to germination without digging anything up.
What You Need:
- Dried beans (lima or kidney work great)
- Paper towels
- Ziplock bag
- Tape
- Sunny window
Steps:
- Dampen a paper towel until it's wet but not dripping.
- Fold the paper towel and place it inside the ziplock bag.
- Tuck 2-3 dried beans between the paper towel and the bag's side.
- Seal the bag and tape it to a sunny window at your child's eye level.
- Check daily and mist the paper towel if it dries out.
Within 3-5 days, your kids will see roots pushing out and leaves unfurling. It's like having x-ray vision into the soil.
2. Glass Jar Germination Station
Best for ages: 5–12
Estimated cost: $0–$4 (reused jar + paper towels + a few seeds)
Similar to the bag method but with more room to observe root systems growing downward.
What You Need:
- Wide-mouth glass jar
- Paper towels
- Large seeds (peas, beans, or sunflower seeds)
- Water
Steps:
- Stuff damp paper towels around the inside of the jar, pressing them against the glass.
- Slide seeds between the paper towel and the glass about halfway down.
- Add a small amount of water to the bottom of the jar (about half an inch).
- Place in a bright spot but out of direct harsh sunlight.
- Have kids measure root and shoot growth daily with a ruler.
This setup works perfectly for science journals or homeschool tracking sheets.

3. Eggshell Cress Heads
Best for ages: 3–9 (adult helps crack/clean shells)
Estimated cost: $0–$5 (saved eggshells + cotton/tissue + a pinch of seeds)
Fast results plus a craft element equals kids who stay interested. Cress sprouts in 24-48 hours, which is practically instant gratification in gardening terms.
What You Need:
- Empty eggshell halves (cleaned and dried)
- Cotton balls or tissue
- Cress seeds
- Markers
- Egg carton for holding shells upright
Steps:
- Draw silly faces on the outside of each eggshell with markers.
- Place a damp cotton ball or folded tissue inside each shell.
- Sprinkle cress seeds generously on top.
- Mist lightly with water and set in a bright windowsill.
- Keep the cotton damp and watch the "hair" grow within days.
Kids can harvest and eat their cress on sandwiches or salads within a week. Bonus: they're more likely to eat greens they grew themselves.
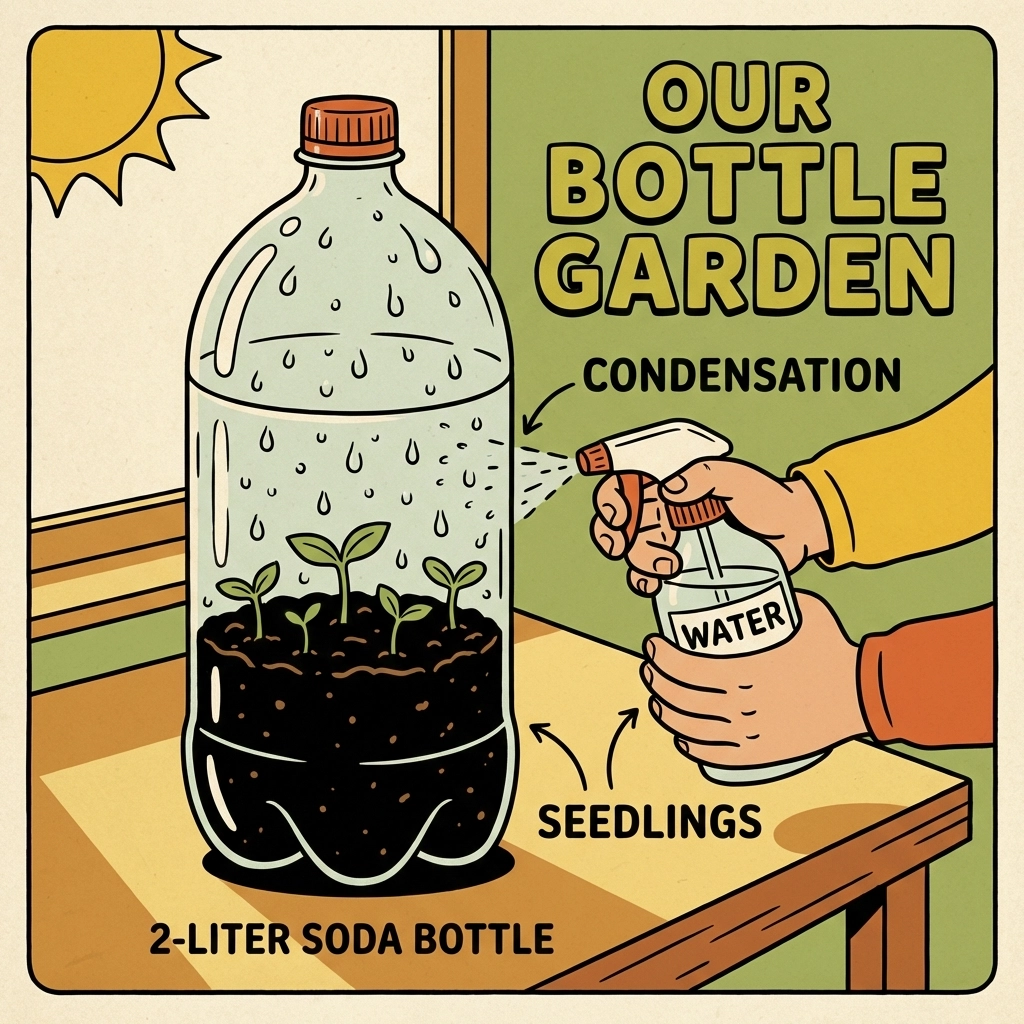
4. Soda Bottle Greenhouse
Best for ages: 6–12 (adult handles cutting)
Estimated cost: $0–$6 (recycled bottle + leftover potting soil + seeds)
Turn recycling into a science lesson about controlled growing environments.
What You Need:
- Clean 2-liter soda bottle
- Scissors or craft knife (adult use)
- Potting soil
- Seeds (herbs or fast-sprouting vegetables)
- Spray bottle
Steps:
- Cut the soda bottle in half horizontally about two-thirds up from the bottom.
- Fill the bottom section with 2-3 inches of damp potting soil.
- Plant seeds according to packet instructions.
- Place the top section back over the bottom like a dome (leave the cap off for airflow).
- Mist inside the dome when condensation disappears.
This mini greenhouse creates a humid microclimate that speeds up germination. Kids can compare growth rates between greenhouse seeds and seeds planted in open containers.
5. The Great Seed Race
Best for ages: 5–12
Estimated cost: $0–$8 (reused cups + homemade labels + a few different seeds)
Nothing motivates kids like competition: even against plants.
What You Need:
- 4-6 small pots or cups
- Potting soil
- Different seed types (radish, lettuce, bean, sunflower, pea)
- Popsicle sticks for labels
- Ruler
Steps:
- Fill each container with the same amount of damp soil.
- Plant one seed type per container at the recommended depth.
- Label each pot with the seed type and planting date.
- Place all containers in the same location with equal light.
- Water equally and track which seed sprouts first, grows tallest, and produces leaves fastest.
Create a simple chart on the fridge and let kids update it daily. This teaches the scientific method while keeping engagement high.
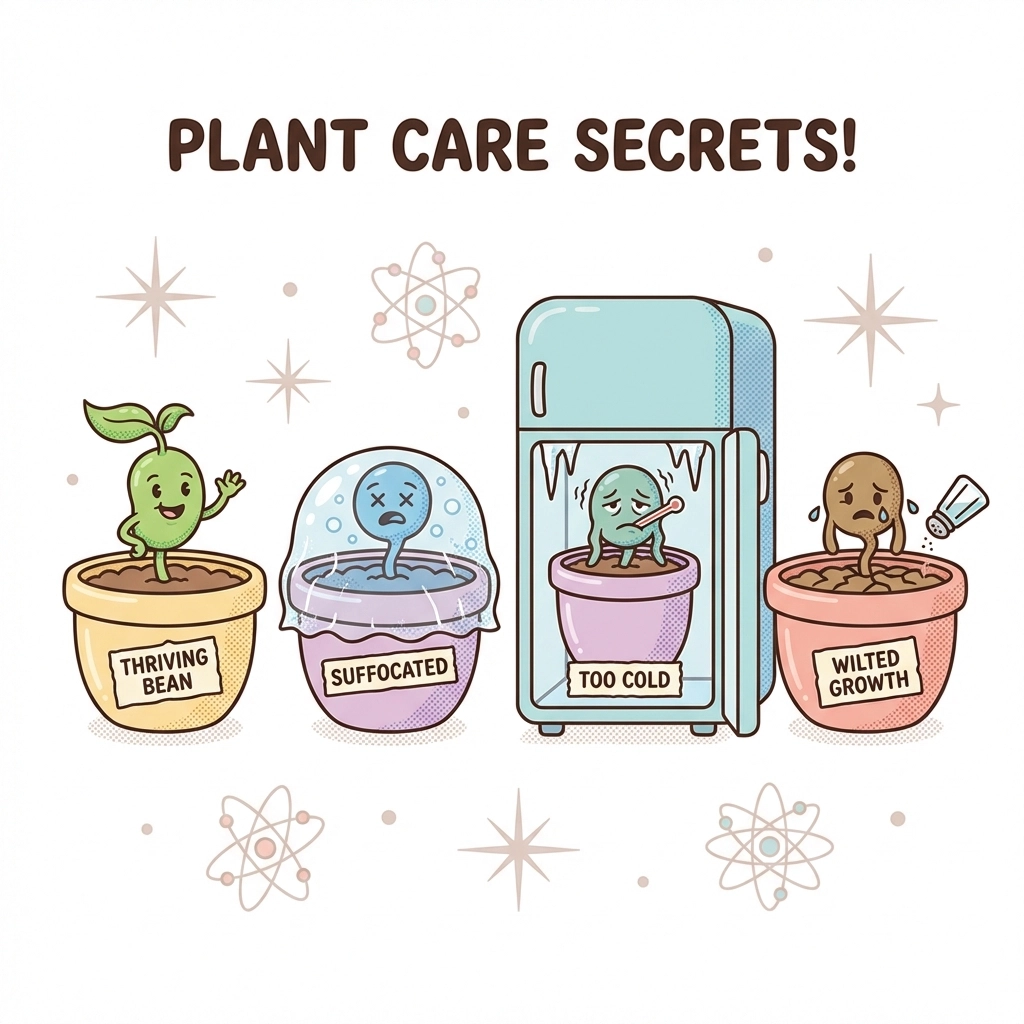
6. Seed Condition Challenge
Best for ages: 7–13
Estimated cost: $0–$6 (reused containers + pantry salt + plastic wrap)
What do seeds actually need to grow? Let your kids find out by sabotaging some of them (for science).
What You Need:
- 4 identical small pots
- Potting soil
- Bean seeds
- Plastic wrap
- Salt
- Access to a refrigerator
Steps:
- Plant a bean seed in each of the four pots with damp soil.
- Label them: Normal, No Air, Cold, Salty.
- Keep the "Normal" pot in regular conditions as your control.
- Seal the "No Air" pot completely with plastic wrap.
- Place the "Cold" pot in the refrigerator.
- Mix a tablespoon of salt into the soil of the "Salty" pot.
- Observe and record results over two weeks.
This experiment demonstrates why seeds need specific conditions and introduces variables in a way kids can understand firsthand.
7. Kitchen Scrap Sprouting
Best for ages: 4–12
Estimated cost: $0–$5 (free seeds from produce scraps + reused cup + a little soil)
Show kids that seeds are hiding in their lunch.
What You Need:
- Scraps from tomatoes, peppers, squash, or citrus fruits
- Small pots with drainage
- Potting soil
- Water
Steps:
- Collect seeds from fruits and vegetables during meal prep.
- Rinse seeds and let them dry for a day or two.
- Plant seeds about a quarter inch deep in damp soil.
- Place in a warm spot with indirect light.
- Keep soil moist and wait for sprouts.
Not everything will germinate: and that's part of the lesson. Comparing which kitchen scraps actually grow teaches observation and patience.
8. LEGO Growth Tracker
Best for ages: 4–10
Estimated cost: $0–$6 (using LEGO you already own + reused pot/cup + seeds)
Combine building toys with botany for kids who need a visual hook.
What You Need:
- Fast-growing seeds (beans or sunflowers)
- Small pot with soil
- LEGO minifigures or small LEGO builds
- Camera or phone for photos
Steps:
- Plant seeds in a pot and place a LEGO minifigure next to the soil surface.
- As the plant grows, add LEGO bricks underneath the figure to match the plant's height.
- Take comparison photos at each stage.
- Count how many bricks tall the plant grows over time.
This method turns abstract measurements into something tactile. Kids remember "twelve bricks tall" better than "six inches."

9. Floating and Sinking Seed Test
Best for ages: 4–12
Estimated cost: $0–$2 (bowl of water + found seeds from outdoors/kitchen)
Before planting, teach kids how seeds travel in nature.
What You Need:
- Variety of seeds (dandelion fluff, maple spinners, acorns, apple seeds, coconut pieces if available)
- Bowl of water
- Open outdoor space
Steps:
- Gather different seed types and examine their shapes together.
- Test which seeds float and which sink in a bowl of water.
- Drop seeds from different heights outside to see which ones catch the wind.
- Spin maple "helicopter" seeds and blow dandelion fluff.
- Discuss why different seeds have different travel methods.
This isn't just about germination: it's about understanding how plants spread across landscapes. Perfect for curious kids who ask "why" constantly.
10. Wildflower Seed Bombs
Best for ages: 5–12 (adult supervises tossing + location rules)
Estimated cost: $0–$8 (homemade clay + compost/soil + a pinch of wildflower seed)
End with a project kids can throw. Literally.
What You Need:
- Air-dry clay or homemade clay (flour, water, soil mix)
- Wildflower seed mix (native species preferred)
- Compost or potting soil
- Bowl for mixing
Steps:
- Mix five parts clay with one part compost in a bowl.
- Add wildflower seeds and mix thoroughly.
- Roll the mixture into small balls about one inch in diameter.
- Let the seed bombs dry for 24-48 hours.
- Toss them into garden beds, empty lots (with permission), or bare patches of yard.
When rain comes, the clay dissolves and the seeds germinate. Kids love the idea of "planting" by throwing things. For more seed bomb ideas, check out our guide on how to make seed bombs for a wildflower garden with kids.
Tips for Seed Starting Success
Choose the right seeds. Large seeds like beans, peas, sunflowers, and pumpkins are easier for small hands to handle and sprout faster. Cress is unbeatable for speed: visible growth within a day or two keeps impatient kids engaged.
Set expectations. Some experiments fail. Seeds rot, mold appears, nothing sprouts. Frame these moments as data, not disasters. Real scientists learn from failed experiments too.
Make it routine. Daily check-ins work better than sporadic attention. A quick morning look at the windowsill seeds takes thirty seconds and builds consistency.
FAQ
What is the 'coolest' seed starting experiment? Watching a bean sprout in a glass jar with a damp paper towel is always a favorite. Kids can see the whole process from root to stem in real time!
Do all these experiments need dirt? Nope! Many experiments use things like sponges, paper towels, or even just water to show how seeds start to grow.
What can we do with the plants after the experiment? If they have roots and leaves, you can plant them in a pot or in your garden! It’s the perfect way to turn a science lesson into a real gardening project.
References
- Royal Horticultural Society: Gardening with Children
- National Gardening Association: Kids Garden Resources
- University Extension Services: Seed Germination Basics for Educators


