


Worm composting transforms kitchen scraps into rich soil.
No special skills required.
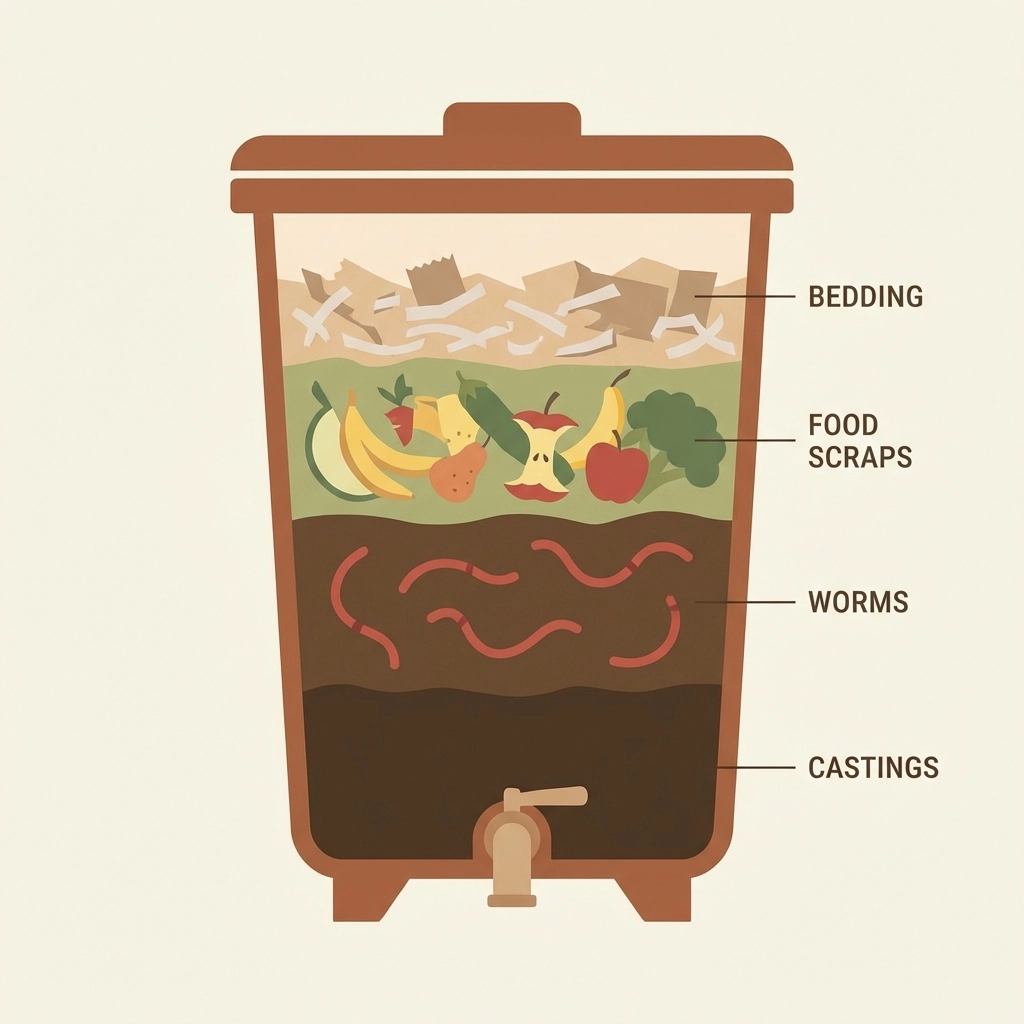
A plastic bin, some worms, and vegetable scraps create a living recycling system. The process works indoors or outdoors. Results appear in four to six months.
This project suits all ages. The science is visible. The maintenance is minimal.
What Is Worm Composting?
Vermicomposting is the technical term.
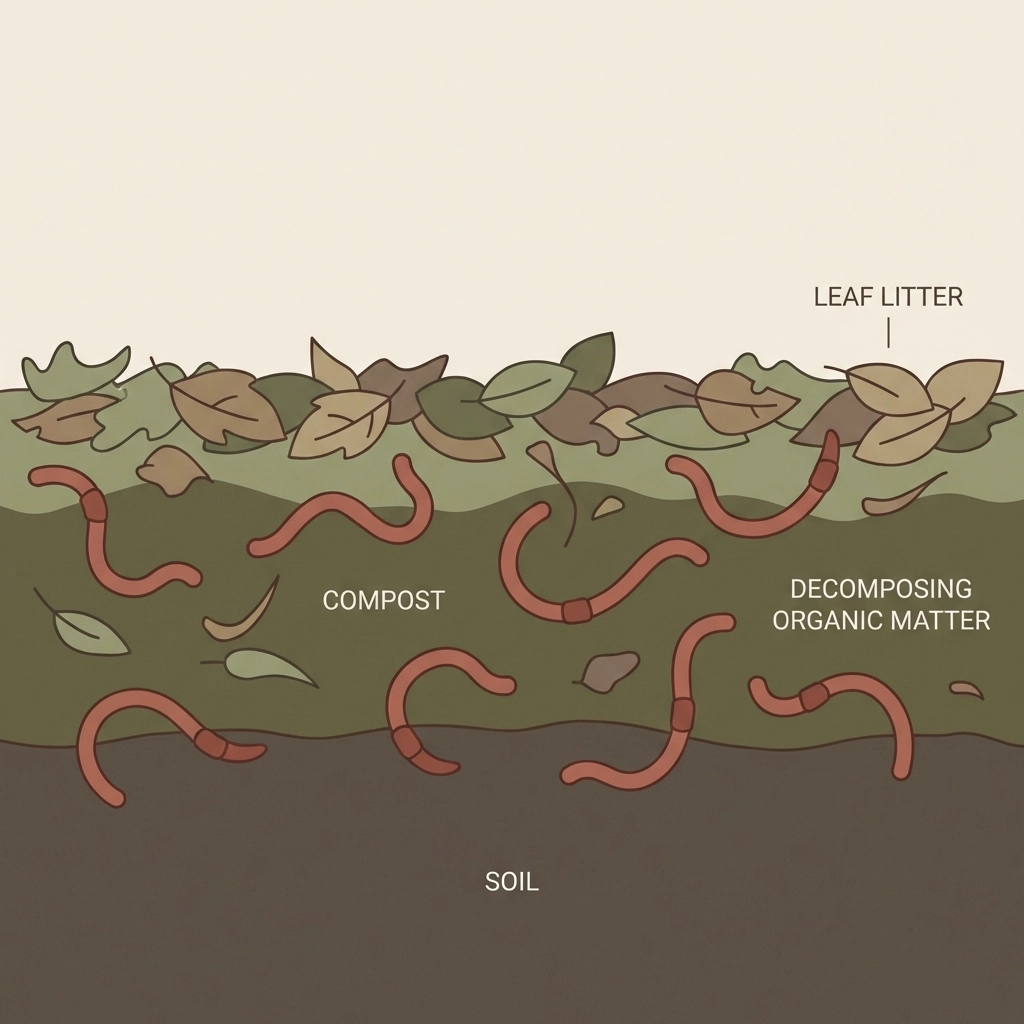
Worms consume organic material. Their digestive process produces castings. Castings are nutrient-dense soil amendments.
The system operates continuously. Worms eat, reproduce, and process waste without intervention. A balanced bin requires attention once or twice per week.
This differs from traditional composting. Heat is not the primary driver. Worms do the work.
Why Does Worm Composting Work?
Red Wiggler worms have specialized digestive systems.
They break down cellulose and organic matter. Beneficial microorganisms in their gut transform nutrients into plant-available forms.
The process is aerobic. Oxygen flows through the bin. Decomposition happens without odor when conditions stay balanced.
Key factors:
- Moisture keeps worm skin functional
- Darkness mimics natural soil environments
- Temperature between 55°F and 77°F sustains activity
- Airflow prevents anaerobic conditions
Worms double their population every 90 days under ideal conditions.
What Materials Are Needed?
The supply list is short.
Container options:
- Plastic storage bin (10-20 gallons)
- Wooden crate
- Commercial worm bin systems
Avoid containers with antimicrobial coatings. These harm beneficial organisms.
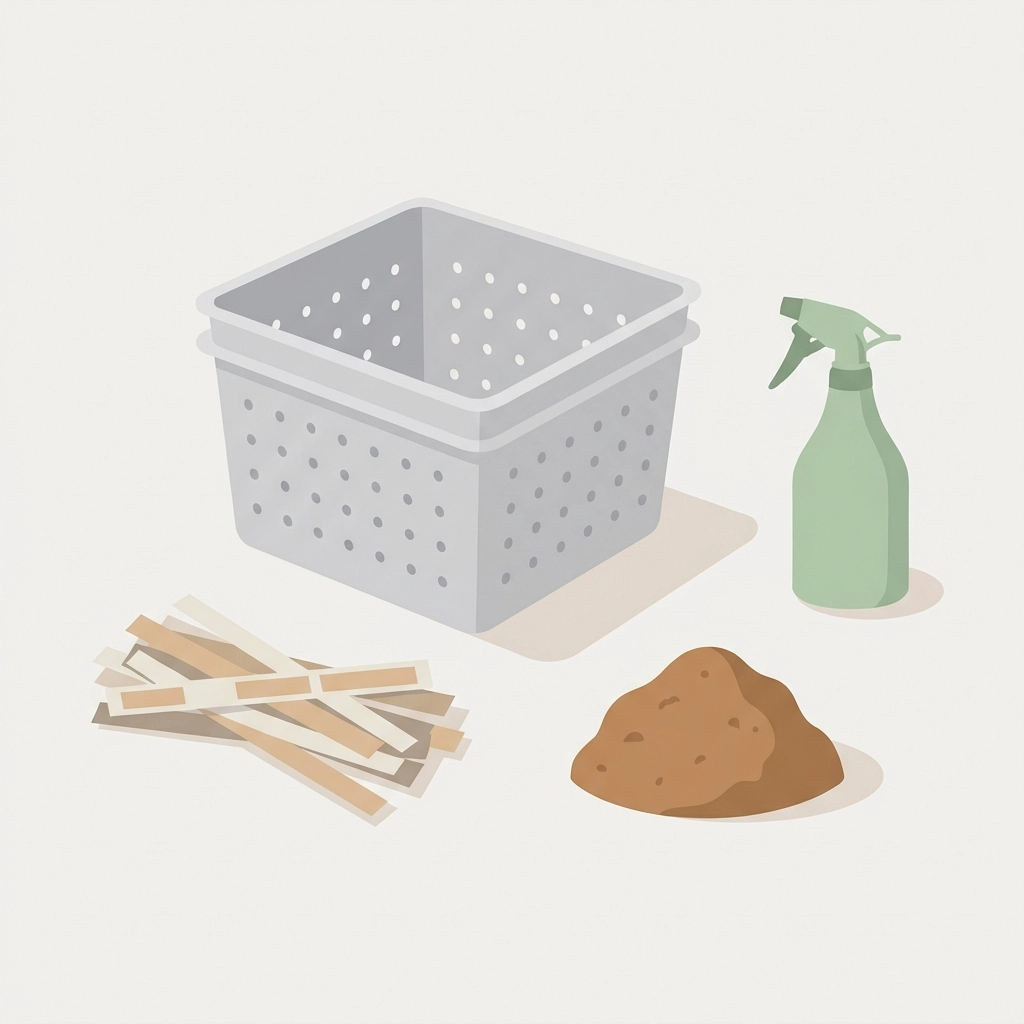
Required supplies:
- Drill or nail for ventilation holes
- Shredded newspaper or cardboard
- Handful of garden soil
- Spray bottle with water
- Red Wiggler worms (600-1,000 to start)
Optional additions:
- Tray to catch liquid runoff
- Cloth or mesh to cover lid holes
- Small hand trowel
Total cost stays under $30 for a basic setup. Worms cost $20-40 depending on quantity and source.
How to Build the Bin?
Start with ventilation.
Drill 20-30 small holes in the bottom of the container. These allow drainage and airflow.
Add two rows of holes along the lower sides. Space them every two inches.
Punch larger holes in the lid. Cover these with fabric or fine mesh. This prevents fruit flies while maintaining air exchange.
Dimensions that work:
- 18 inches wide
- 24 inches long
- 18 inches deep
Smaller bins function for beginners. Larger populations need more space over time.
Elevate the bin. Use bricks, wooden blocks, or overturned pots. Air circulation underneath prevents moisture buildup.
Place a tray beneath to catch any liquid. This “worm tea” makes excellent fertilizer when diluted.
How to Prepare the Bedding?
Bedding creates the worm habitat.
Shred newspaper into one-inch strips. Avoid glossy inserts or colored inks. Plain newsprint works best.
Cardboard tears into small pieces. Egg cartons break down well.
Fill the bin halfway with dry bedding material.
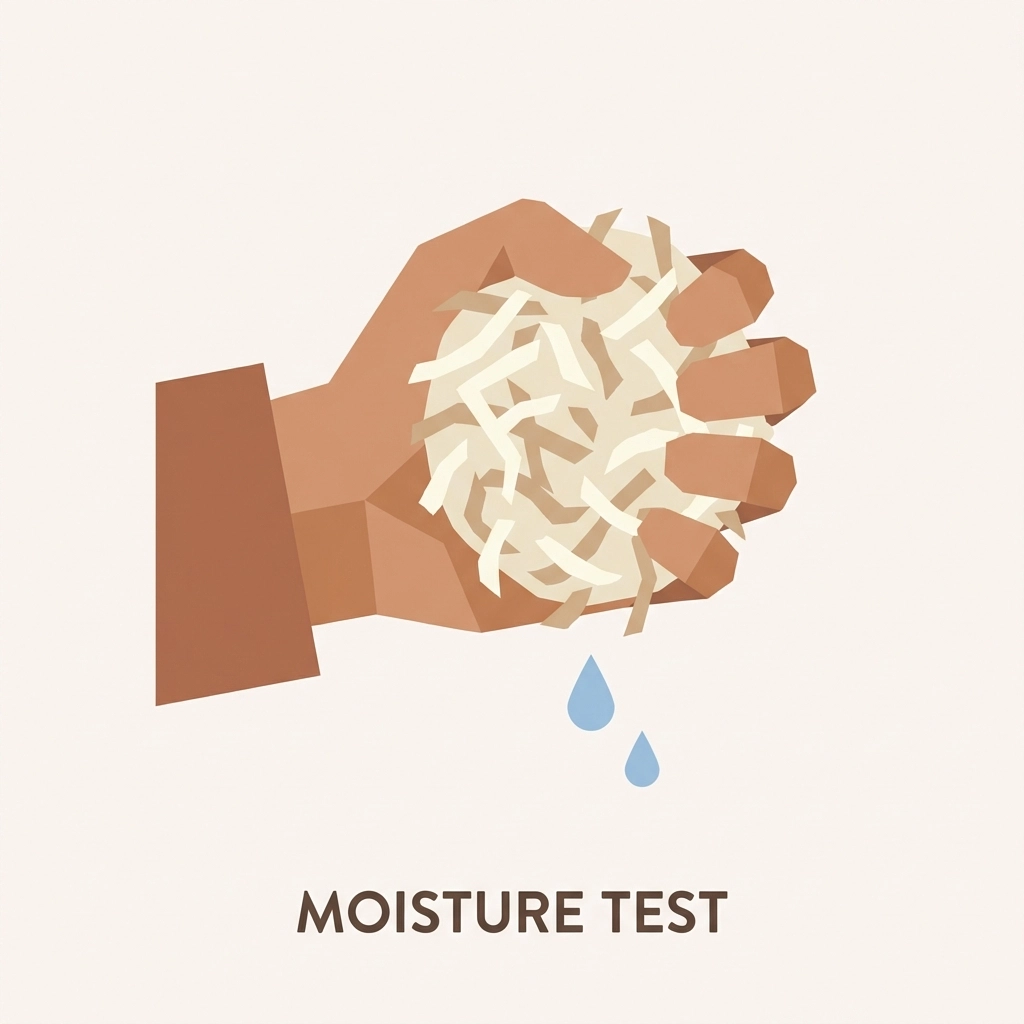
Moisture test:
- Grab a handful of bedding
- Squeeze firmly
- One or two drops of water should release
- The material holds together without crumbling
Spray water gradually. Mix thoroughly. Check moisture throughout the bin.
Add one handful of garden soil. This introduces microorganisms. It also provides grit for worm digestion.
The bedding rests for 24 hours before adding worms. This allows temperature and moisture to stabilize.
Which Worms Work Best?
Red Wigglers are the standard choice.
Scientific name: Eisenia fetida.
These worms live in the top six inches of soil. They consume decomposing organic matter. They tolerate bin conditions better than earthworms.
Earthworms burrow deep. They need soil structure that bins cannot provide.
Red Wigglers adapt to confined spaces. They process half their body weight in food daily.
Stocking guidelines:
- Half pound of worms per square foot of surface area
- One pound processes roughly half a pound of food scraps daily
- Populations self-regulate based on food availability
Purchase worms from vermicomposting suppliers. Bait shop worms are different species.
What Do Worms Eat?
Vegetable and fruit scraps form the primary diet.
Safe to add:
- Fruit peels and cores
- Vegetable trimmings
- Coffee grounds with filters
- Tea bags (remove staples)
- Crushed eggshells
- Plain pasta or rice
- Shredded paper towels
- Dead leaves
Never add:
- Meat or fish
- Dairy products
- Oils or greasy foods
- Pet waste from dogs or cats
- Citrus in large quantities
- Onions or garlic in excess
- Spicy foods
Chop scraps into smaller pieces. Smaller surface area speeds decomposition.
Feeding method:
- Pull back bedding in one corner
- Bury food beneath the surface
- Cover completely with bedding
- Rotate to different corners each feeding
Buried food attracts fewer pests. Surface feeding invites fruit flies.
New bins process food slowly. Worm populations need time to establish. Start with small amounts. Increase as the population grows.
Check previous feeding spots. Uneaten food indicates overfeeding. Remove excess and reduce portions.
How to Maintain the Bin?
Weekly checks keep the system balanced.
Moisture monitoring:
- Bedding stays damp, not wet
- Pooling water indicates drainage problems
- Dry bedding needs misting
Temperature awareness:
- Below 55°F slows activity
- Above 80°F stresses worms
- Indoor locations provide stability
Bedding additions:
- Add fresh shredded paper monthly
- Bedding compacts as worms process it
- Maintain several inches of loose material on top
Healthy bins smell earthy. Foul odors signal problems.
Common issues:
- Sour smell: Too much food, reduce feeding
- Ammonia smell: Nitrogen imbalance, add more paper
- Worms escaping: Conditions are wrong, check moisture and food
How to Harvest the Compost?
Finished compost appears dark and crumbly.
Original bedding is unrecognizable. The material smells like forest soil.
Harvest timing: four to six months after starting.
Dump and sort method:
- Spread bin contents on a tarp
- Position in bright light or sunshine
- Form several cone-shaped piles
- Wait three minutes
- Worms migrate downward away from light
- Remove the top layer of compost
- Repeat until worms cluster at the bottom
- Return worms to the bin with fresh bedding
Migration method (for stackable systems):
- Stop feeding the current tray
- Add a new tray on top with fresh bedding and food
- Worms move upward over two weeks
- Remove the bottom tray of finished compost
Weigh worms before returning them. This tracks population health over time.
What Are the Benefits of Worm Castings?
The end product outperforms standard compost.
Nutrient density:
- Higher nitrogen content
- Increased phosphorus availability
- Potassium in plant-ready forms
- Beneficial microorganisms
Application methods:
- Mix into potting soil
- Top-dress garden beds
- Add to transplant holes
- Brew into liquid fertilizer
A small bin produces several pounds of castings annually. Enough for container gardens and seed starting.
The system closes the loop. Kitchen waste becomes plant food. Plants produce more waste. The cycle continues.
Why Start This Project?
Worm composting demonstrates biology in action.
Decomposition becomes observable. Nutrient cycling becomes tangible. Waste reduction becomes measurable.
The project scales easily. Start small. Expand as skills develop.
Maintenance fits into busy schedules. A few minutes weekly sustains the system.
The reward is immediate. Healthy worms, rich compost, and fewer scraps in the trash.
Science happens in a bin under the sink.


