


Yes, you can! Growing a charming herb garden in upcycled tea tins is one of the simplest and most budget-friendly kitchen projects around. With a sunny windowsill, a handful of old tins, some potting soil, and a few herb starts or seeds, you can have fresh basil, mint, or thyme within arm's reach while you cook: all for under $10.
Tea tins make surprisingly great planters because they're the perfect size for compact herbs, they're sturdy enough to last multiple growing seasons, and let's be honest: they look absolutely adorable lined up on a windowsill. Plus, giving those pretty tins a second life instead of tossing them in the recycling bin feels pretty good.
Let's walk through everything you need to know to get your own "Kitchen Window" herb garden growing this week.
Why Tea Tins Work So Well for Herbs
You might be wondering why tea tins specifically. Here's the thing: most tea tins are designed to keep their contents fresh and protected from light and moisture, which means they're made from food-safe materials. This is important when you're growing something you plan to eat!
Tea tins also tend to be just the right depth for herb roots (usually 3-5 inches), and their compact footprint means you can fit several on even a small windowsill. The vintage designs on many tins add a lovely decorative touch without any extra effort on your part.

What You'll Need (Under $10 Budget)
Here's a quick breakdown of materials. Most of these you likely already have around the house!
| Material | Estimated Cost | Notes |
|---|---|---|
| Old tea tins (3-5) | Free | Raid your pantry or ask friends and neighbors |
| Potting soil (small bag) | $3-5 | Look for organic options when possible |
| Small pebbles or gravel | Free-$2 | Check your yard or a local creek |
| Herb seeds or starts | $1-4 | Seeds are cheaper; starts are faster |
| Nail and hammer | Free | For drainage holes |
| Shallow tray or dish | Free | To catch water drips |
Total estimated cost: $4-10
If you already have potting soil from another project, this could cost you practically nothing!
Step-by-Step: Building Your Tea Tin Herb Garden
Step 1: Gather and Clean Your Tea Tins
First, collect your tea tins. You'll want ones that are at least 3 inches deep: most standard loose-leaf tea tins work great. Empty them completely and wash them out with warm, soapy water. Let them dry thoroughly before moving on.
Food-safe tip: Stick with tins that originally held food products (tea, cookies, candies). Avoid tins that held candles, craft supplies, or anything non-edible, as residues could potentially leach into your soil over time.
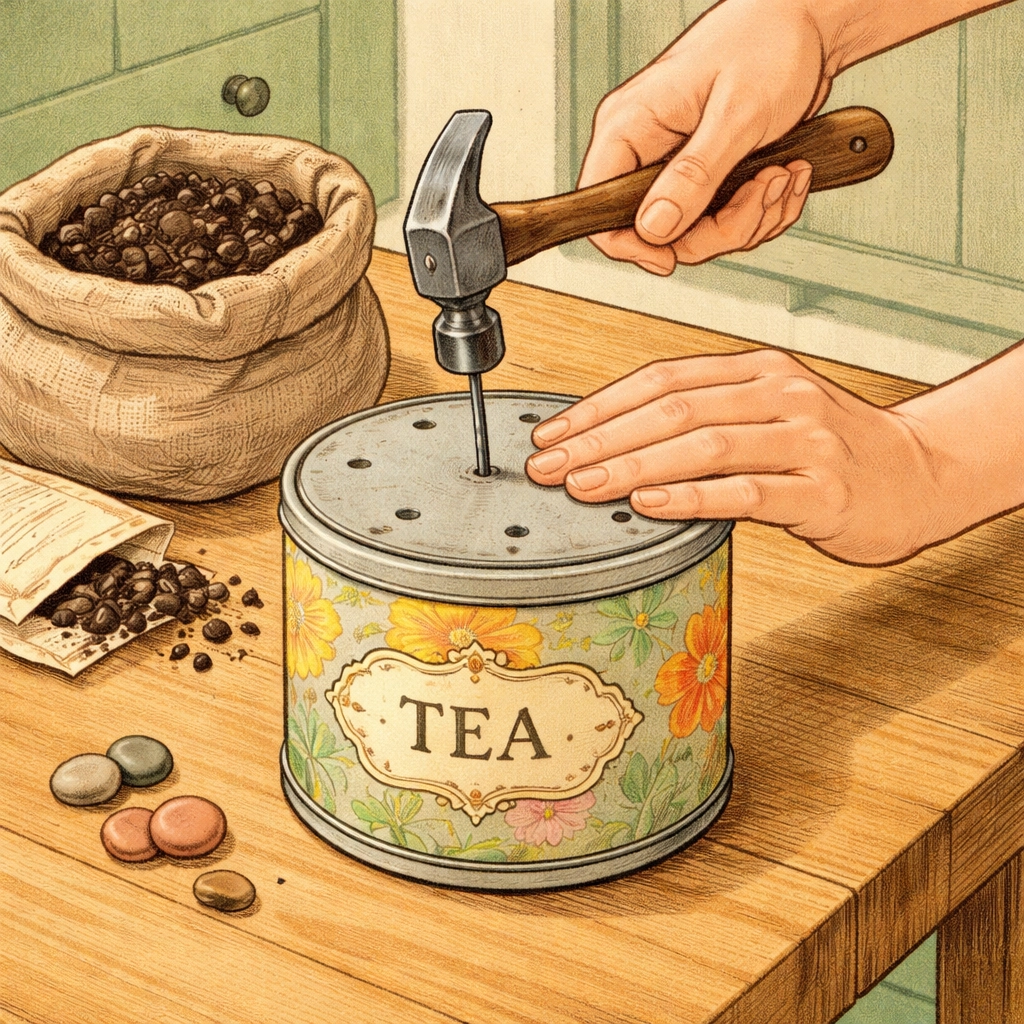
Step 2: Create Drainage Holes
This step is important! Herbs generally don't like sitting in soggy soil, so you'll need to give excess water somewhere to escape.
Turn your tin upside down and use a nail and hammer to carefully punch 3-5 small holes in the bottom. Work slowly and hold the nail steady: the metal is usually thin enough that it doesn't take much force.
No-drill alternative: If you'd rather skip the holes, you can add a 1-inch layer of small pebbles or gravel to the bottom of each tin before adding soil. This creates a drainage reservoir so roots don't sit in standing water. Just be extra careful not to overwater.
Step 3: Add Your Drainage Layer and Soil
Whether you made holes or not, start with a thin layer of small pebbles at the bottom (about half an inch to an inch). This helps with drainage and airflow.
Next, fill your tin about three-quarters full with potting soil. Don't pack it down too tightly: roots like a little room to breathe and grow.
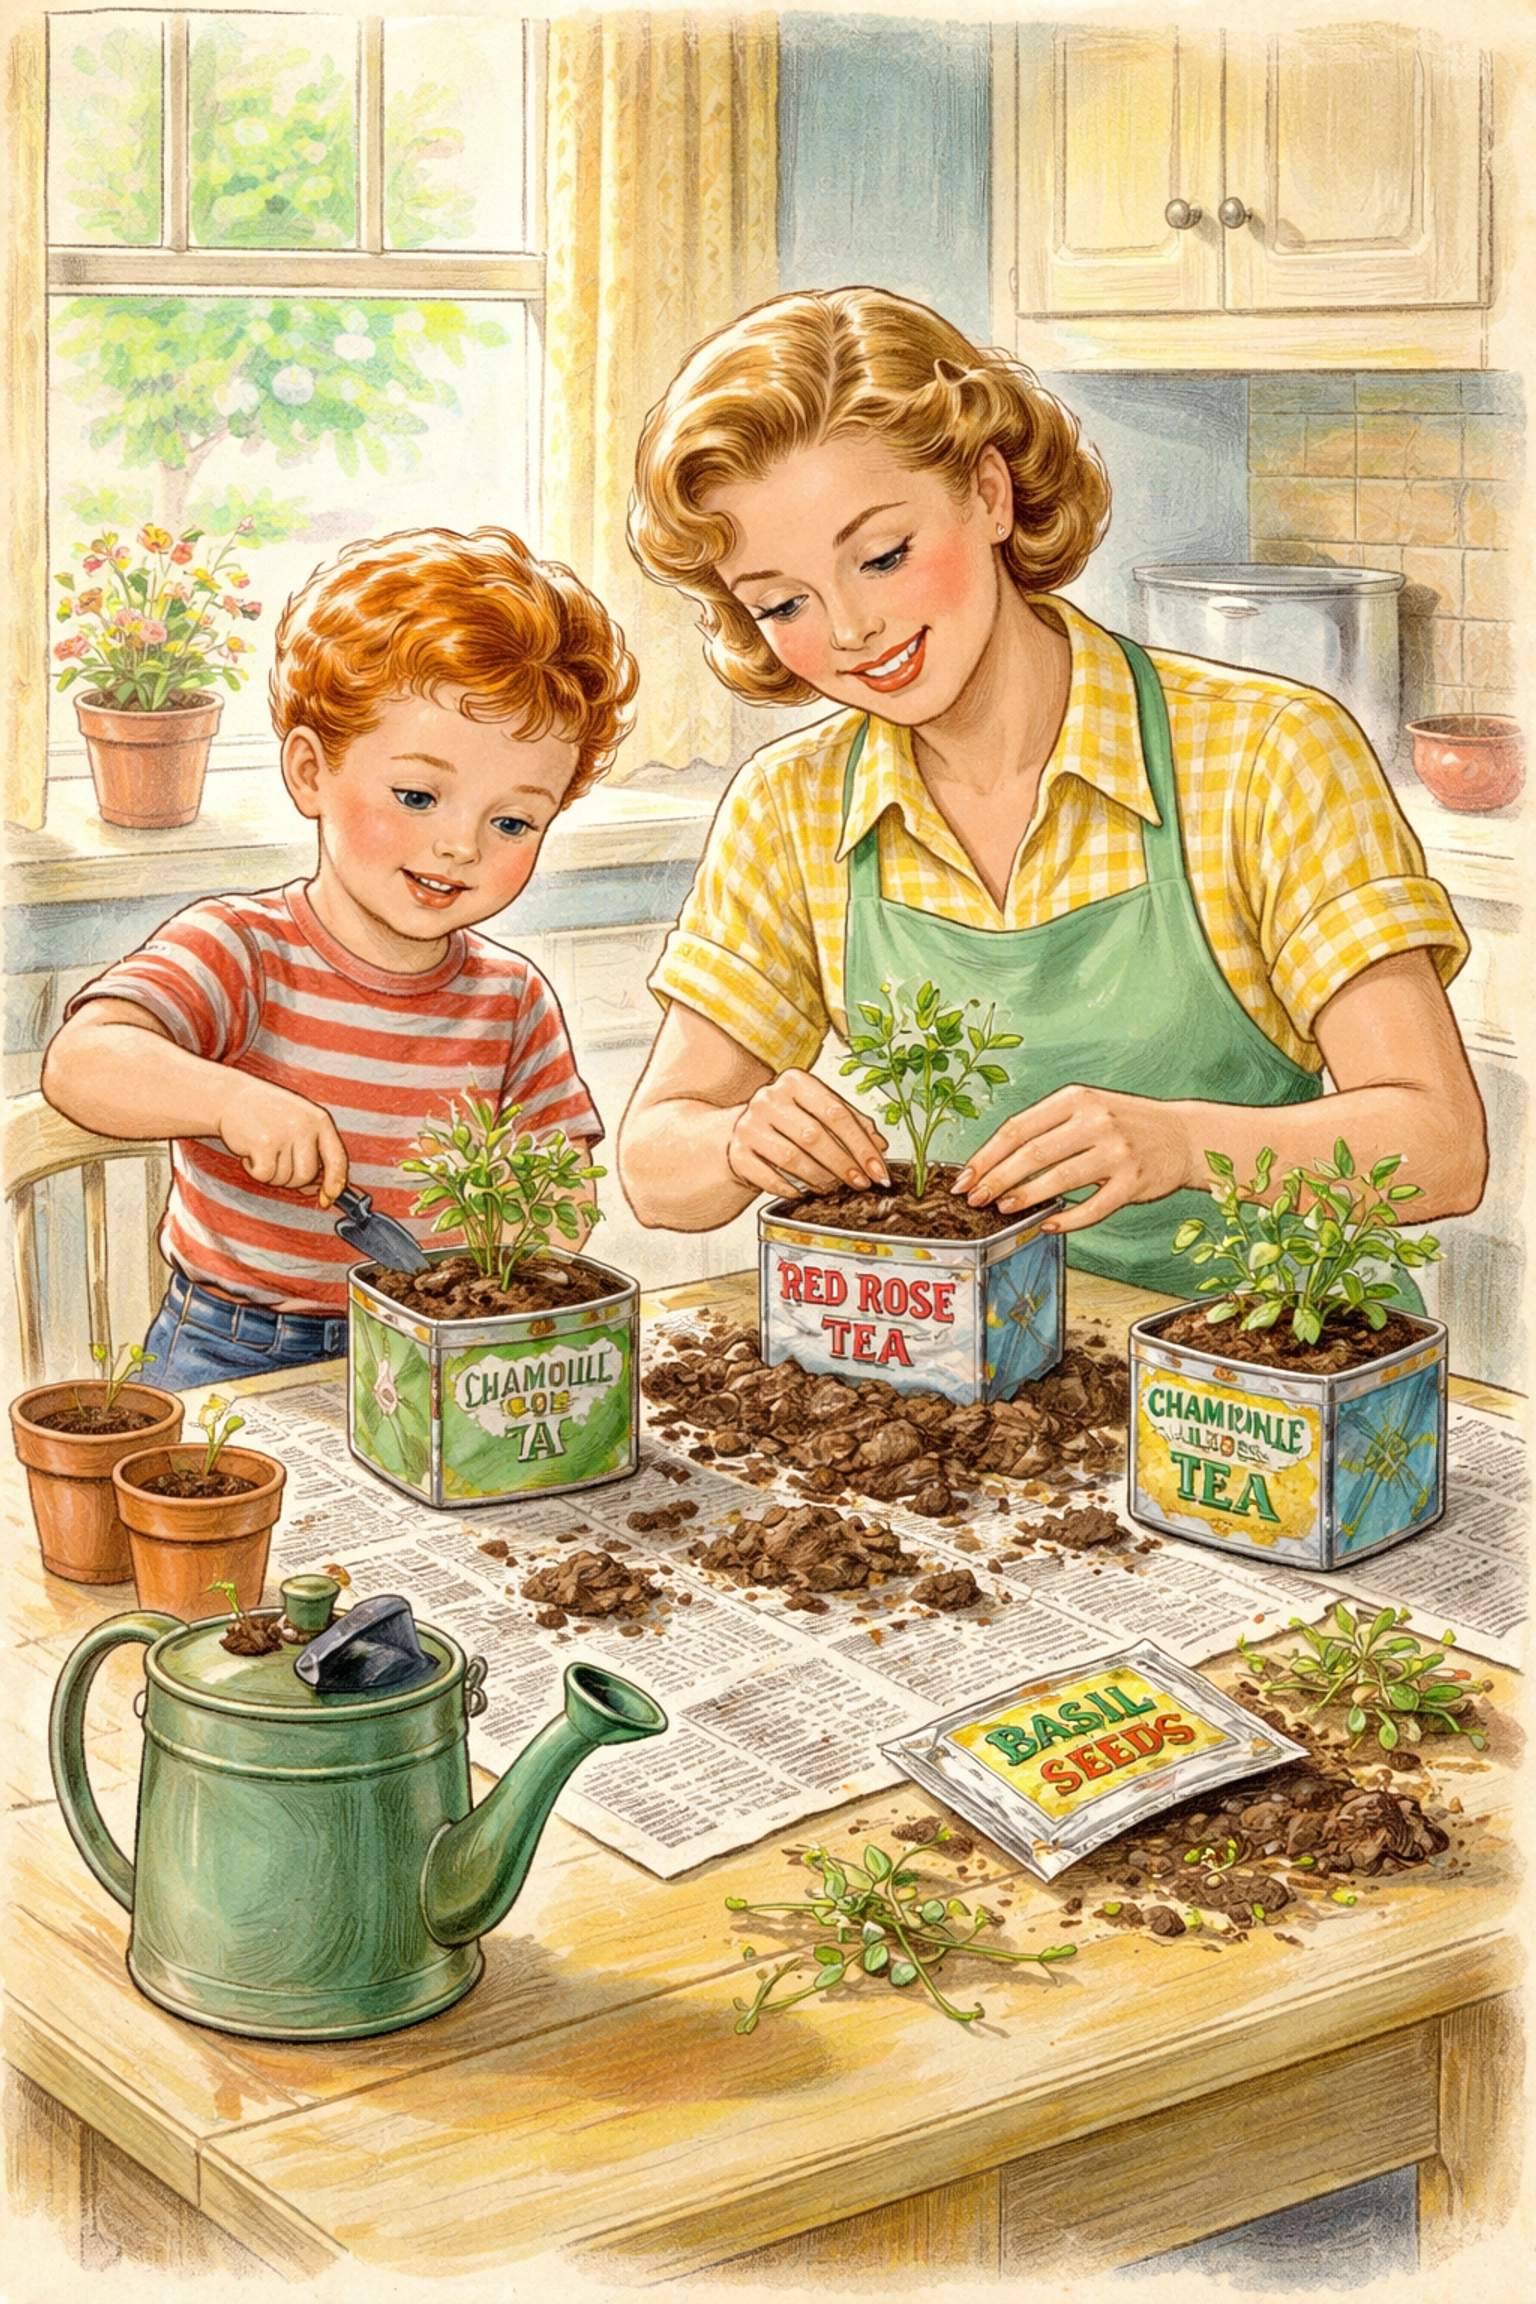
Step 4: Plant Your Herbs
If using seeds: Sprinkle 3-5 seeds on top of the soil, then cover with a thin layer (about ¼ inch) of additional soil. Mist gently with water.
If using starts: Gently remove the herb from its plastic nursery pot. If the root ball is a bit wide for your tin opening, you can carefully compress it or shake off some excess soil. Place the herb in the tin and fill around the roots with more potting soil. Pat down gently and water lightly.
Step 5: Find the Perfect Sunny Spot
Most culinary herbs love sunshine, so a south-facing or west-facing kitchen window tends to work best. Aim for a spot that gets at least 4-6 hours of light per day.
Place your tea tins on a shallow tray, plate, or dish to catch any water that drains through. This protects your windowsill from water stains and makes cleanup easy.
Step 6: Water and Watch Them Grow!
Here's where patience comes in. Water your herbs when the top inch of soil feels dry to the touch: stick your finger in to check. Overwatering is actually more common than underwatering with indoor herbs, so when in doubt, wait another day.
Within a few weeks (faster with starts, slower with seeds), you should have thriving herbs ready for snipping!
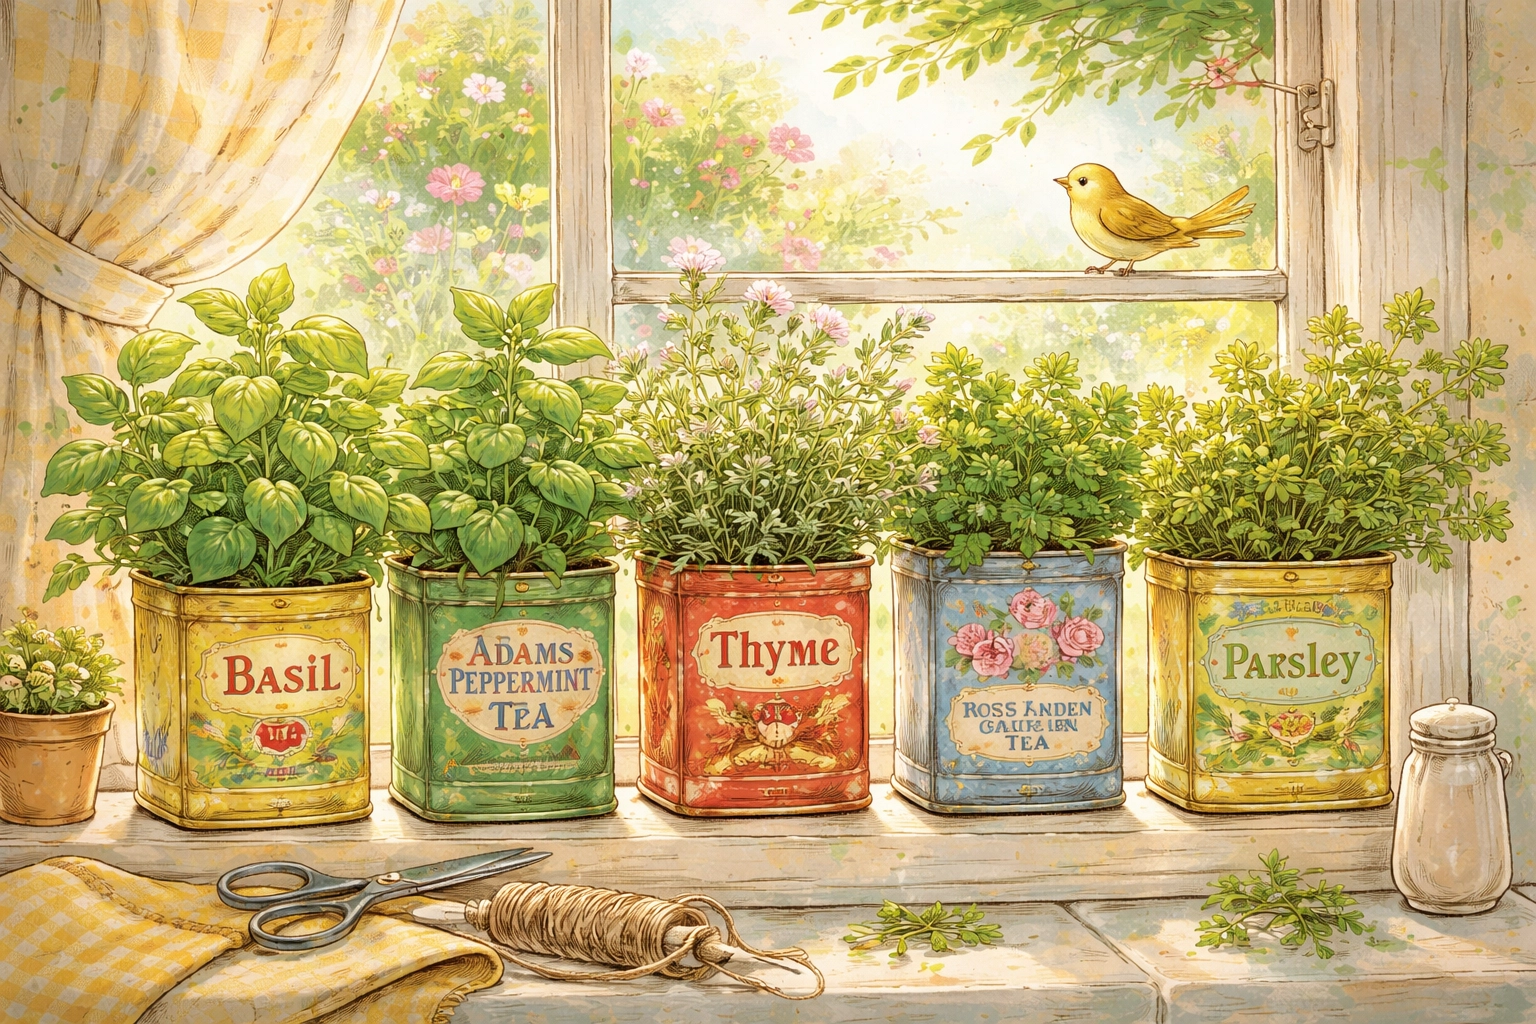
Best Herbs for Tea Tin Gardens
Not every herb thrives in a small container, so here are some that tend to do particularly well:
- Basil – A kitchen classic that loves warmth and light
- Mint – Almost impossible to kill (and it smells amazing)
- Chives – Compact and happy in small spaces
- Thyme – Doesn't need much water and stays petite
- Parsley – Versatile and relatively forgiving
- Cilantro – Grows quickly, though it can bolt in warm weather
- Lemon balm – Fragrant and great for teas
Pro tip: Mint can be a bit of a bully in shared garden beds, but in its own tea tin, it stays perfectly contained!
Caring for Your Kitchen Window Garden
Once your herbs are established, they're fairly low-maintenance. Here are a few tips to keep them happy:
- Rotate your tins every week or so, giving each side a turn toward the light. This helps them grow evenly instead of leaning dramatically toward the window.
- Harvest often! Regular snipping actually encourages bushier, healthier growth. Don't be shy: use those herbs!
- Watch for leggy growth. If your herbs are getting tall and spindly, they might need more light. Consider moving them to a brighter window.
- Refresh the soil every few months by adding a thin layer of fresh potting mix on top.
If you're heading out of town and worried about watering, check out our guide on easy DIY ways to keep plants watered when kids are away.
Frequently Asked Questions
Do I have to paint or seal my tea tins before planting?
Not necessarily! Most tea tins are already coated to be food-safe. If yours shows signs of rust or you want to add a pop of color, you can paint the outside with a non-toxic spray paint: just keep the inside unpainted.
Can kids help with this project?
This is a great project for little helpers. Kids can help wash tins, add soil, plant seeds, and water. Supervise the drainage hole step since it involves a hammer and nail.
How often should I water my tea tin herbs?
Check the soil every 2-3 days by poking your finger about an inch deep. If it feels dry, give it a gentle drink. If it still feels moist, wait another day or two.
What if my windowsill doesn't get much sun?
Some herbs (like mint, parsley, and chives) can tolerate lower light conditions better than others. You might also consider a small grow light if your kitchen is particularly dim.
Can I grow herbs from kitchen scraps in tea tins?
Some herbs, like basil and mint, can be regrown from cuttings placed in water first, then transplanted. For more ideas, see our post on DIY kitchen scrap regrow gardens.
Will the metal get too hot or too cold on the windowsill?
Metal can conduct temperature, so in very hot summer sun or cold winter drafts, you might want to move your tins back from the glass a few inches. Most of the time, it's not a major concern.
How long do tea tin herb gardens typically last?
With proper care, your herbs can thrive for months or even years. Annual herbs like basil will eventually go to seed and need replanting, while perennials like mint and thyme can keep going indefinitely.
Can I use tea tins for vegetables too?
Tea tins are generally too small for most vegetables, but they can work for microgreens or very compact varieties like tiny peppers. Herbs are really their sweet spot!
References
- DIY Network – Herb Garden Planting Guide
- Better Homes & Gardens – Container Herb Gardening Tips
- The Old Farmer's Almanac – Growing Herbs Indoors
- University Extension Services – Indoor Herb Care


