


The Direct Answer: You can build a self-watering planter from a milk jug by cutting it in half, adding a simple cotton wick that draws water up from a reservoir in the bottom, and nesting the top portion (with soil and plants) into the base. The whole project typically costs under $5, uses recycled materials, and teaches kids about capillary action, all while keeping your plants happily hydrated for days at a time.
Why Build a Self-Watering Planter with Kids?
If you've ever returned from a weekend trip to find wilted herbs on the windowsill, you already know the heartbreak of a thirsty plant. A self-watering planter solves that problem beautifully, and when you build one from a recycled milk jug, you're also teaching kids some seriously cool science.
This project introduces the concept of capillary action, which is how water moves through tiny spaces (like the fibers of a cotton wick) against the pull of gravity. It's the same principle that helps trees pull water from their roots all the way up to their leaves. Pretty neat for a Tuesday afternoon craft, right?
Beyond the science, this build checks all our favorite boxes:
- Budget-friendly: Most families already have everything they need.
- Eco-conscious: You're keeping a plastic jug out of the landfill.
- Low-maintenance gardening: Perfect for busy families or forgetful waterers.
- Quick wins: Kids can see results within days when growing fast-sprouting herbs or lettuce.
If you enjoyed our kitchen scrap regrow garden, this project pairs perfectly with it!
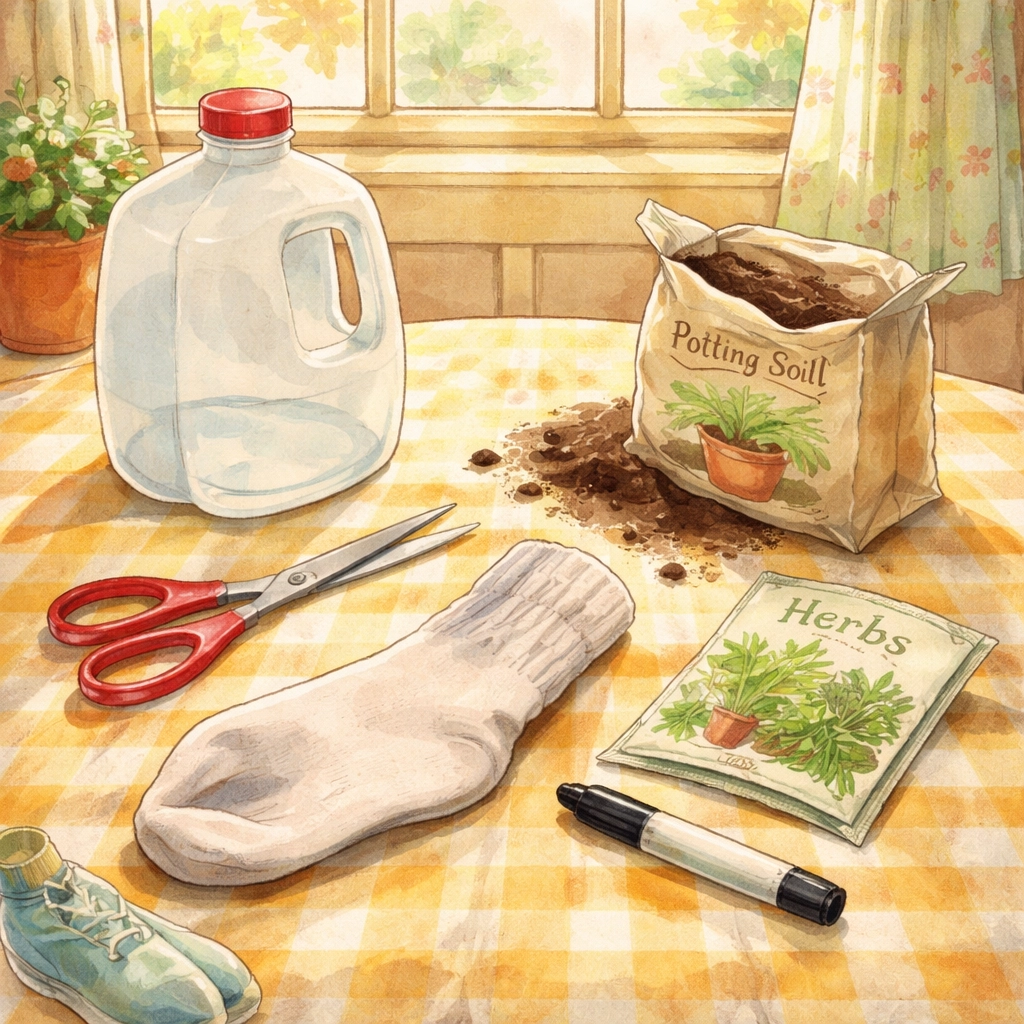
What You'll Need (Budget Breakdown)
Here's the good news: you likely won't need to buy a single thing. Raid your recycling bin and junk drawer, and you're halfway there.
| Material | Estimated Cost | Notes |
|---|---|---|
| Empty plastic milk jug (gallon or half-gallon) | Free | Rinse it out well! |
| Cotton fabric strip or old cotton sock | Free | Avoid synthetic materials, they won't wick properly. |
| Potting soil | $3–$5 | A small bag goes a long way. |
| Seeds or small seedling | $1–$3 | Herbs like basil or mint work great. |
| Scissors or craft knife | Free | Adult supervision required for cutting. |
| Marker or pen | Free | For marking your cut lines. |
| Nail or thumbtack | Free | For poking drainage holes. |
Total Estimated Cost: $0–$8
Step-by-Step Instructions
Ready to get your hands dirty (well, soil-y)? Let's build this thing.
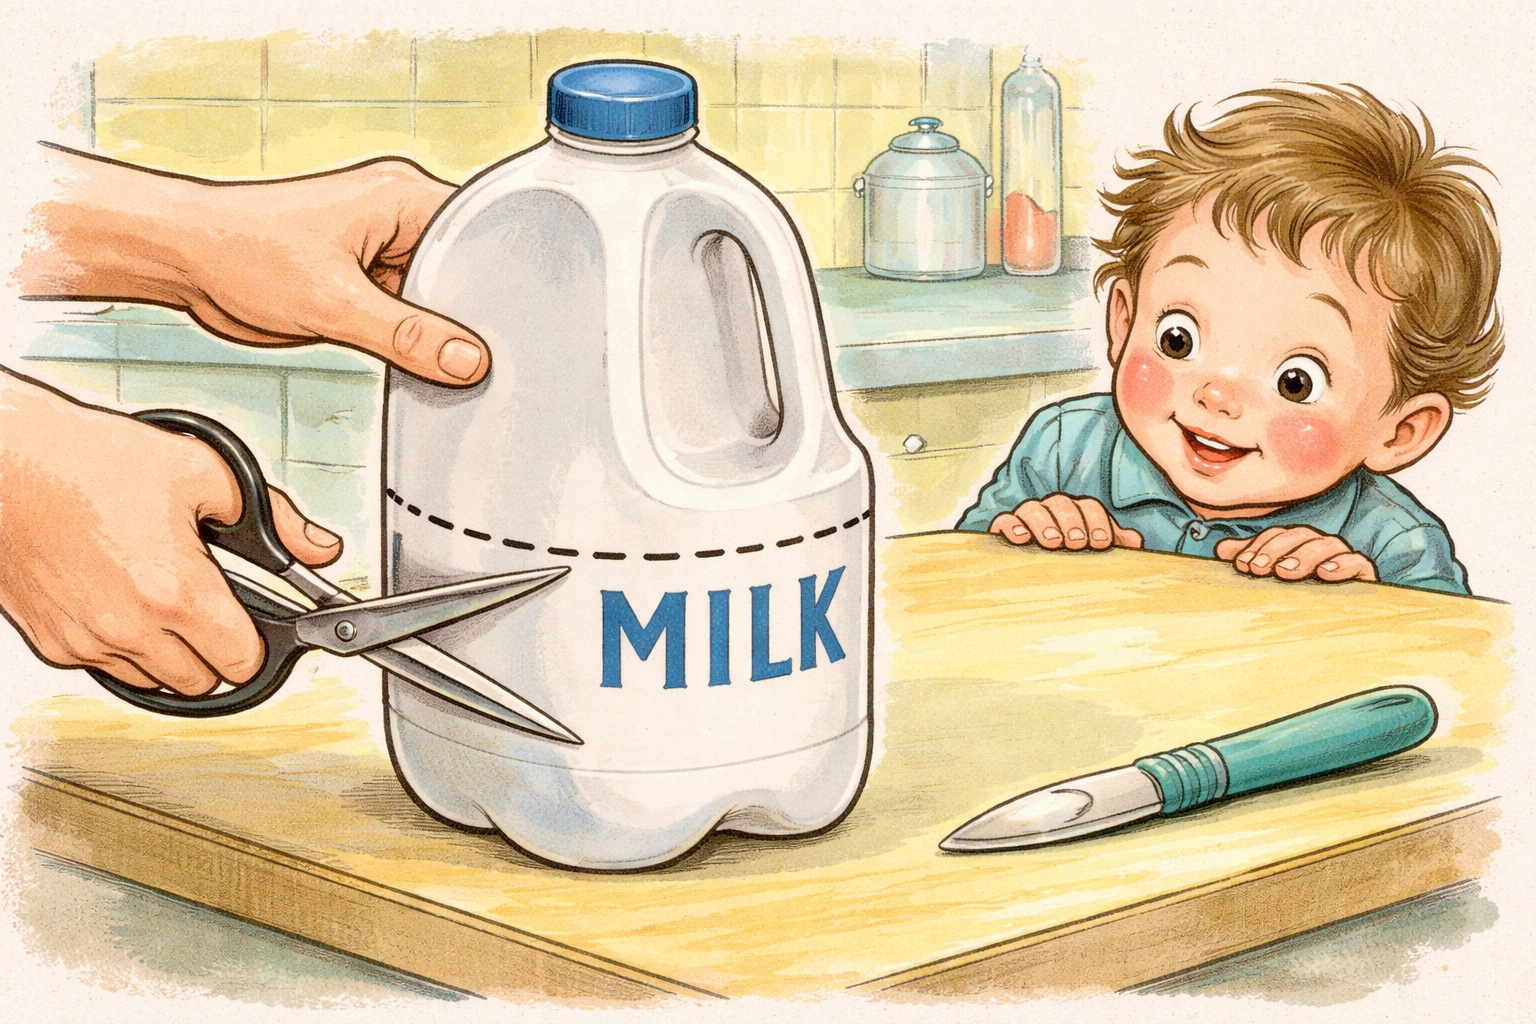
Step 1: Clean Your Milk Jug
Give your empty milk jug a good rinse with warm, soapy water. You want to remove any milk residue: nobody wants a stinky planter, and leftover dairy can encourage mold. Let it dry completely before moving on.
Step 2: Mark Your Cutting Line
Using a marker, draw a line around the jug approximately two-thirds of the way up from the bottom. This doesn't need to be perfect: plants aren't picky about aesthetics. The bottom section will become your water reservoir, and the top section (with the cap) will hold your soil and plant.
Step 3: Cut the Jug in Half
Adult step alert! Using scissors or a craft knife, carefully cut along your marked line. You'll end up with two pieces:
- The base: A cup-shaped reservoir.
- The top: A funnel-shaped planter (with the cap still attached).
Set both pieces aside.
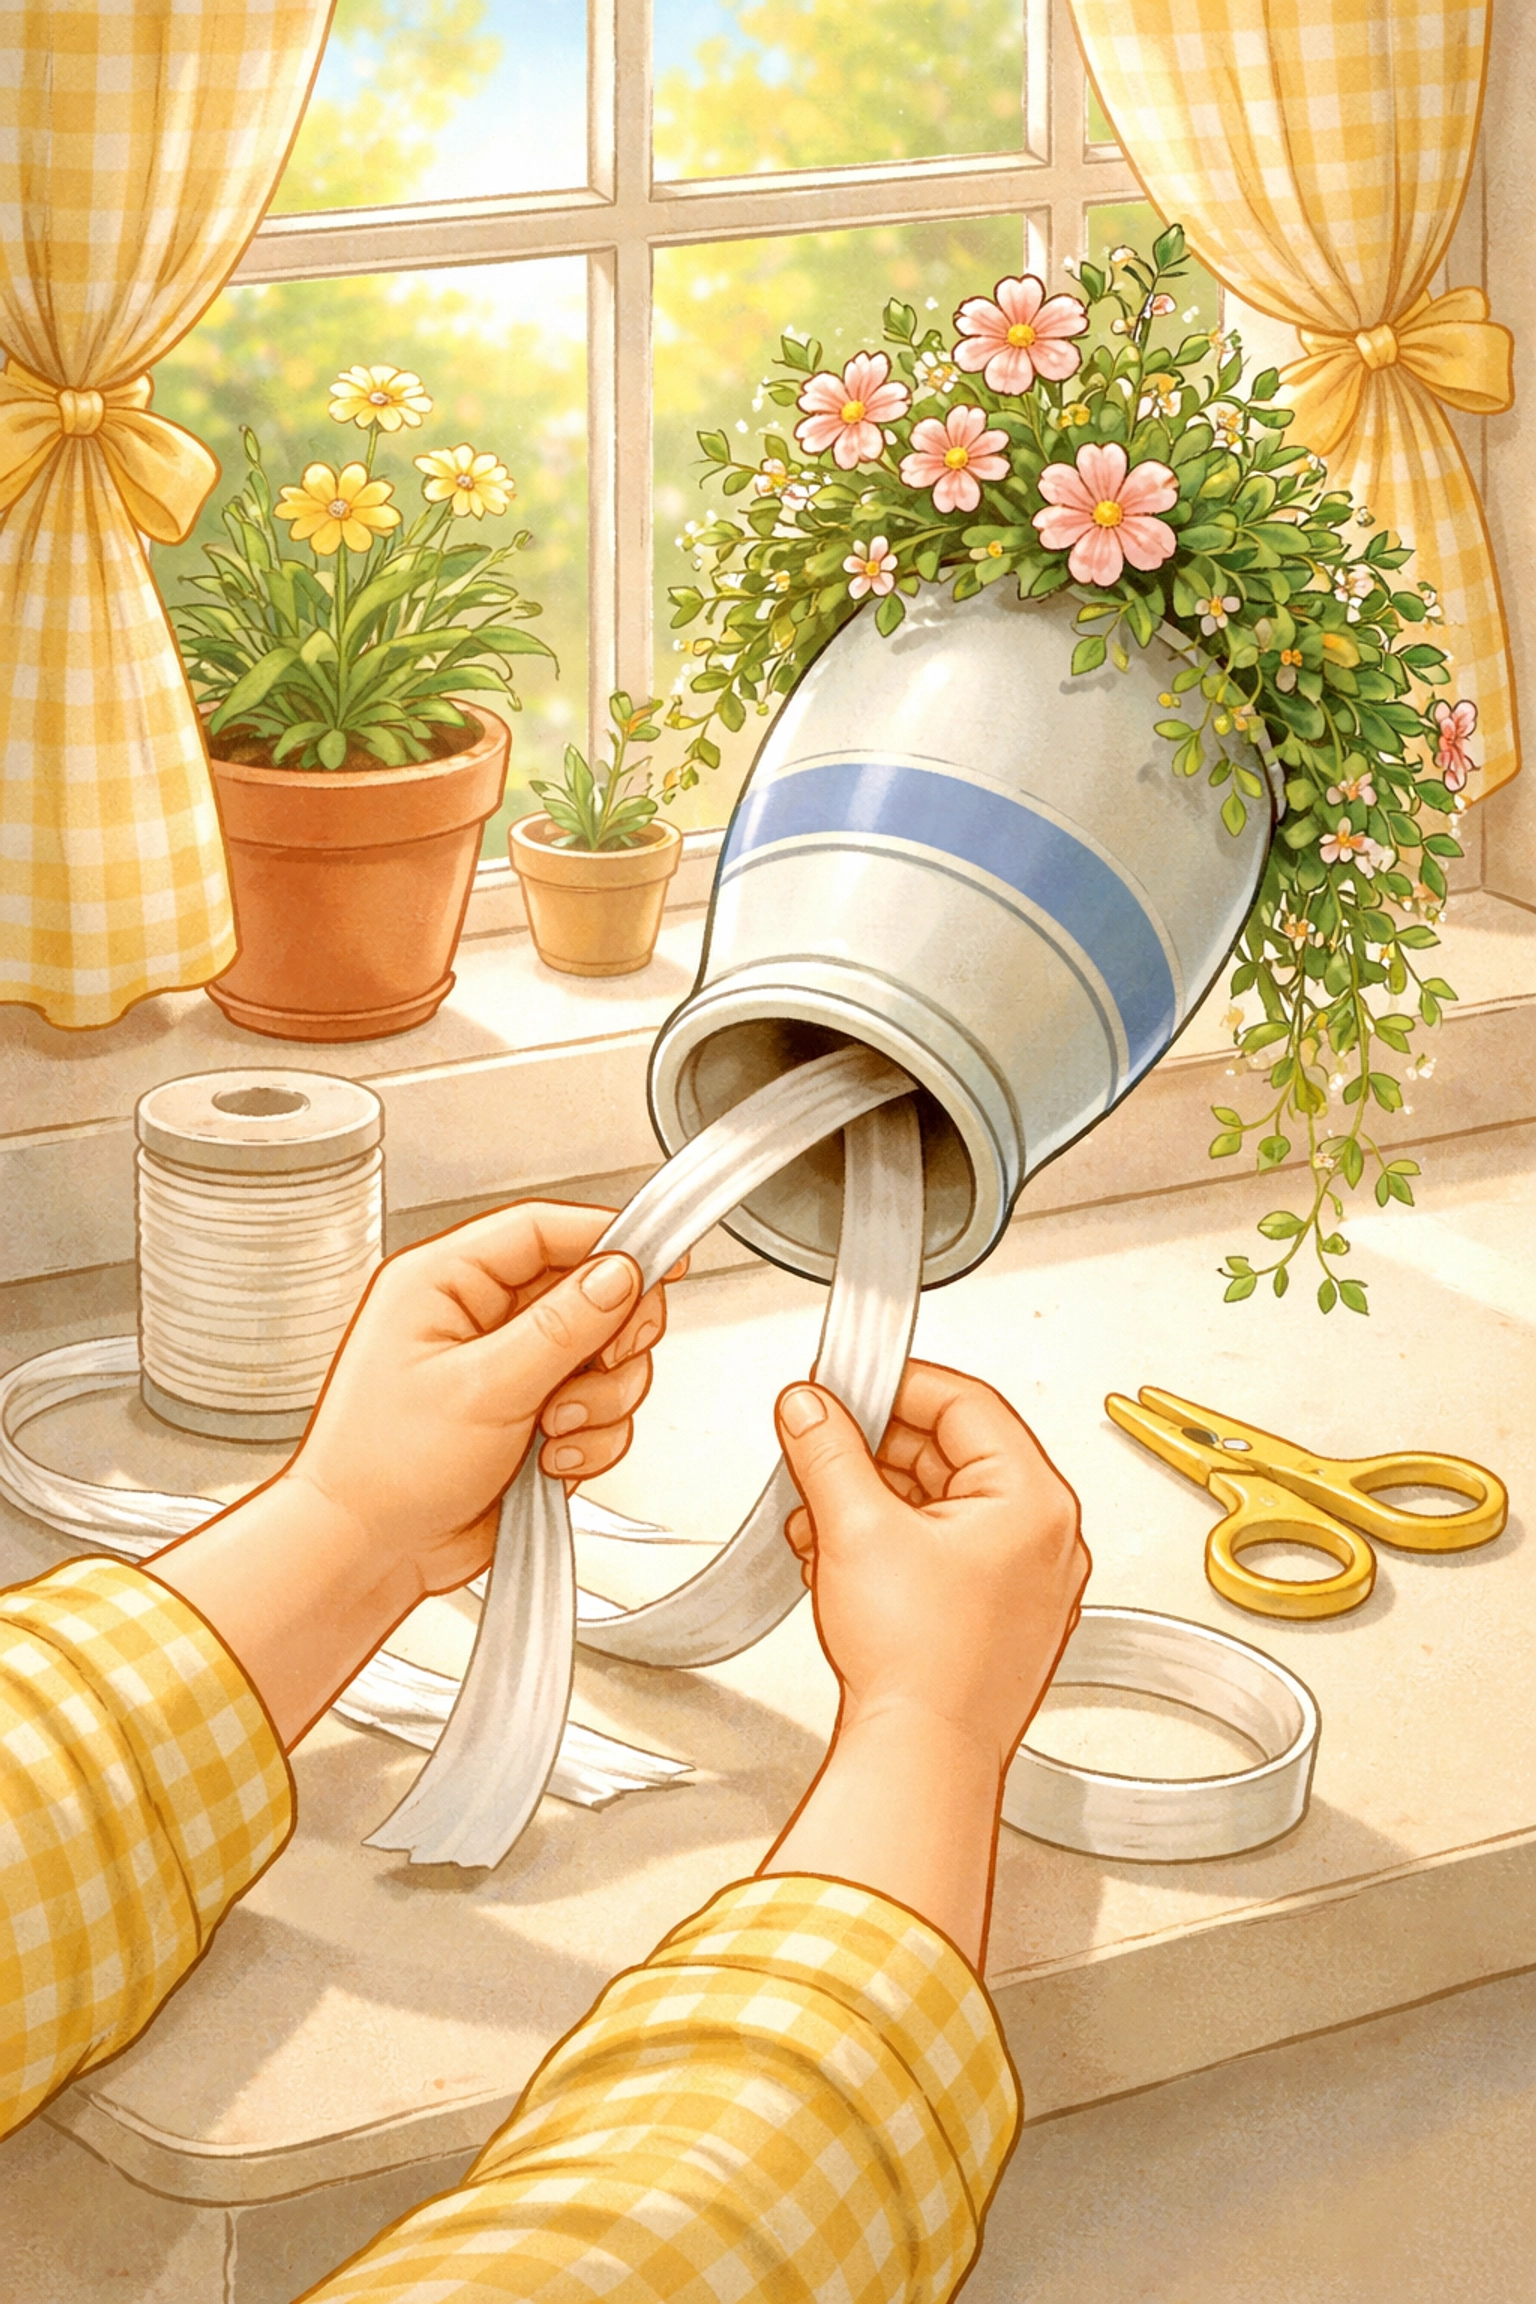
Step 4: Create Your Wick
Grab an old cotton rag, a strip of cotton t-shirt, or even an old cotton sock. Cut a strip approximately 1 inch wide and 8–10 inches long. This is your wick: the magic bridge that will pull water up into the soil.
Pro tip: Make sure your fabric is 100% cotton. Synthetic blends don't absorb water the same way and can leave your plant high and dry.
Step 5: Thread the Wick
Remove the cap from the milk jug top. Thread your cotton wick through the mouth of the jug so that:
- About 2–3 inches of the wick hangs out of the bottom (this will dangle into the water reservoir).
- The rest of the wick stays inside the planter portion, where it will be surrounded by soil.
You can tie a small knot at the end inside the planter to keep the wick from slipping through.
Step 6: Poke Drainage Holes (Optional but Helpful)
Using a nail or thumbtack, poke 3–4 small holes around the cap area of your planter top. This helps with airflow and prevents the soil from becoming waterlogged if you accidentally overfill the reservoir.
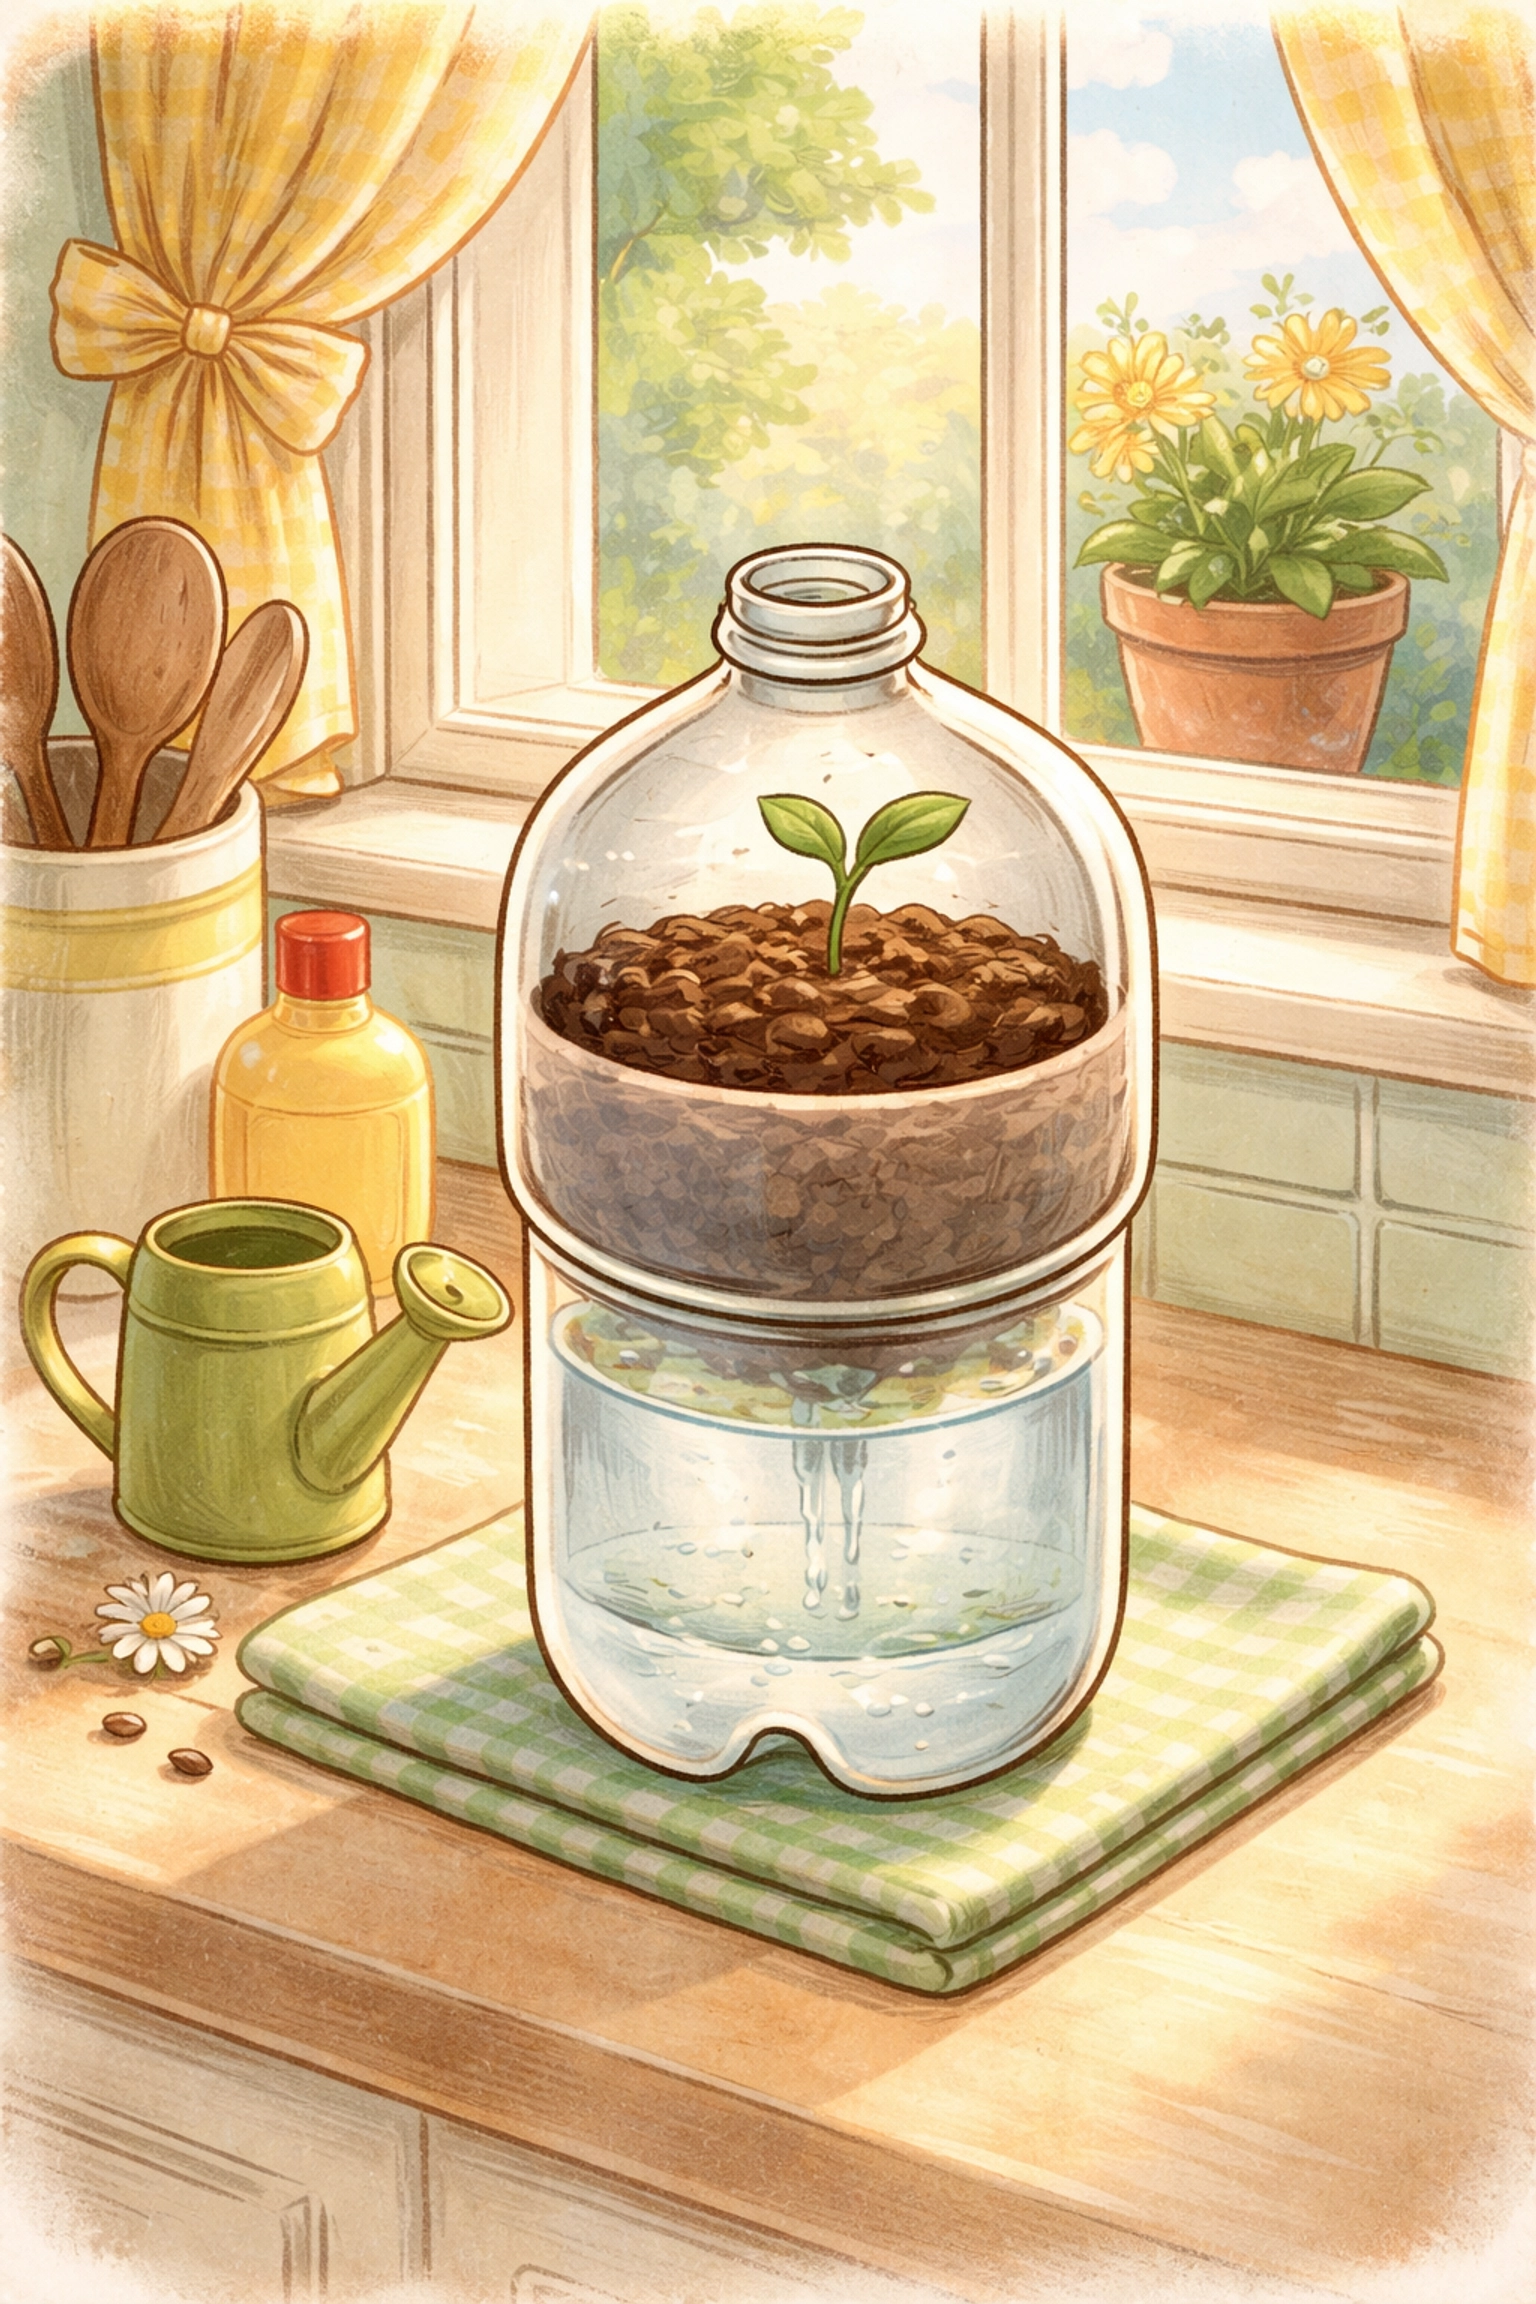
Step 7: Assemble Your Planter
Now for the satisfying part! Flip the top portion upside down (so the cap/mouth points downward) and nest it into the base. The wick should dangle down into the reservoir section.
Your planter should now look like a little hourglass: soil chamber on top, water chamber on the bottom.
Step 8: Add Soil and Plant
Fill the top chamber with potting soil, making sure the wick is spread out and makes good contact with the soil (this helps it draw water evenly). Leave about an inch of space at the top.
Now, plant your seeds or transplant a small seedling. Herbs like basil, mint, cilantro, and parsley thrive in this setup. Lettuce and small greens work wonderfully too.
Step 9: Water from the Top (Just Once!)
Give your newly planted creation a gentle watering from the top to settle the soil and establish good contact between the soil and wick. This is the only time you'll water from above.
Step 10: Fill the Reservoir
Carefully lift the top portion and pour water into the base reservoir until it's about three-quarters full. Reassemble your planter. The wick will now do all the heavy lifting, drawing water up to the roots as the soil dries out.
Tips for Self-Watering Success
- Check the reservoir weekly. Depending on your plant and environment, you may need to refill every 5–10 days.
- Place in a sunny spot. Most herbs need at least 6 hours of sunlight daily.
- Don't let the reservoir go completely dry. If the wick dries out, it can take a little time to "restart" the capillary action.
- Start with fast growers. Basil, lettuce, and radishes give kids quick gratification and help them stay engaged.
Looking for more ways to keep plants watered with minimal effort? Check out our post on easy DIYs to keep plants watered when kids are away.
Frequently Asked Questions
What size milk jug works best for this project?
A gallon jug gives you more soil capacity and a larger reservoir, making it ideal for herbs or small vegetables. A half-gallon jug works fine for smaller plants like lettuce starts or single herb seedlings.
Can I use a cardboard milk carton instead of plastic?
You can, but cardboard tends to break down over time when constantly exposed to moisture. Plastic jugs are more durable for long-term use.
Why does the wick need to be cotton?
Cotton fibers absorb and transport water through capillary action. Synthetic materials like polyester don't absorb water the same way, so they won't wick effectively.
How often do I need to refill the water reservoir?
It depends on your plant, the temperature, and humidity levels. In most indoor settings, checking once a week is usually sufficient. Outdoor planters in hot weather may need refilling every few days.
Can I grow vegetables in a milk jug planter?
Absolutely! Small vegetables like lettuce, radishes, and cherry tomato seedlings can do well. Larger vegetables may eventually outgrow the container and need transplanting.
Is this project safe for young children?
Yes, with adult supervision during the cutting steps. Let kids handle the fun parts: threading the wick, adding soil, planting seeds, and filling the reservoir.
What if my plant looks overwatered?
If leaves are yellowing or the soil seems soggy, your wick may be too thick or the reservoir too full. Try using a thinner wick or reducing the water level slightly.
Can I decorate the milk jug?
Of course! Acrylic paints, stickers, or even wrapping it in colorful tape can make your planter uniquely yours. Just avoid covering any drainage holes.
References
- University of Maryland Extension. "Container Gardening: Self-Watering Containers." https://extension.umd.edu
- Cornell Cooperative Extension. "Capillary Action in Plants." https://cce.cornell.edu
- EPA. "Reducing Waste: What You Can Do." https://www.epa.gov/recycle
Looking for more hands-on projects? Browse our full library of 100+ DIY Kids Crafts for STEAM and gardening activities the whole family can enjoy!


