


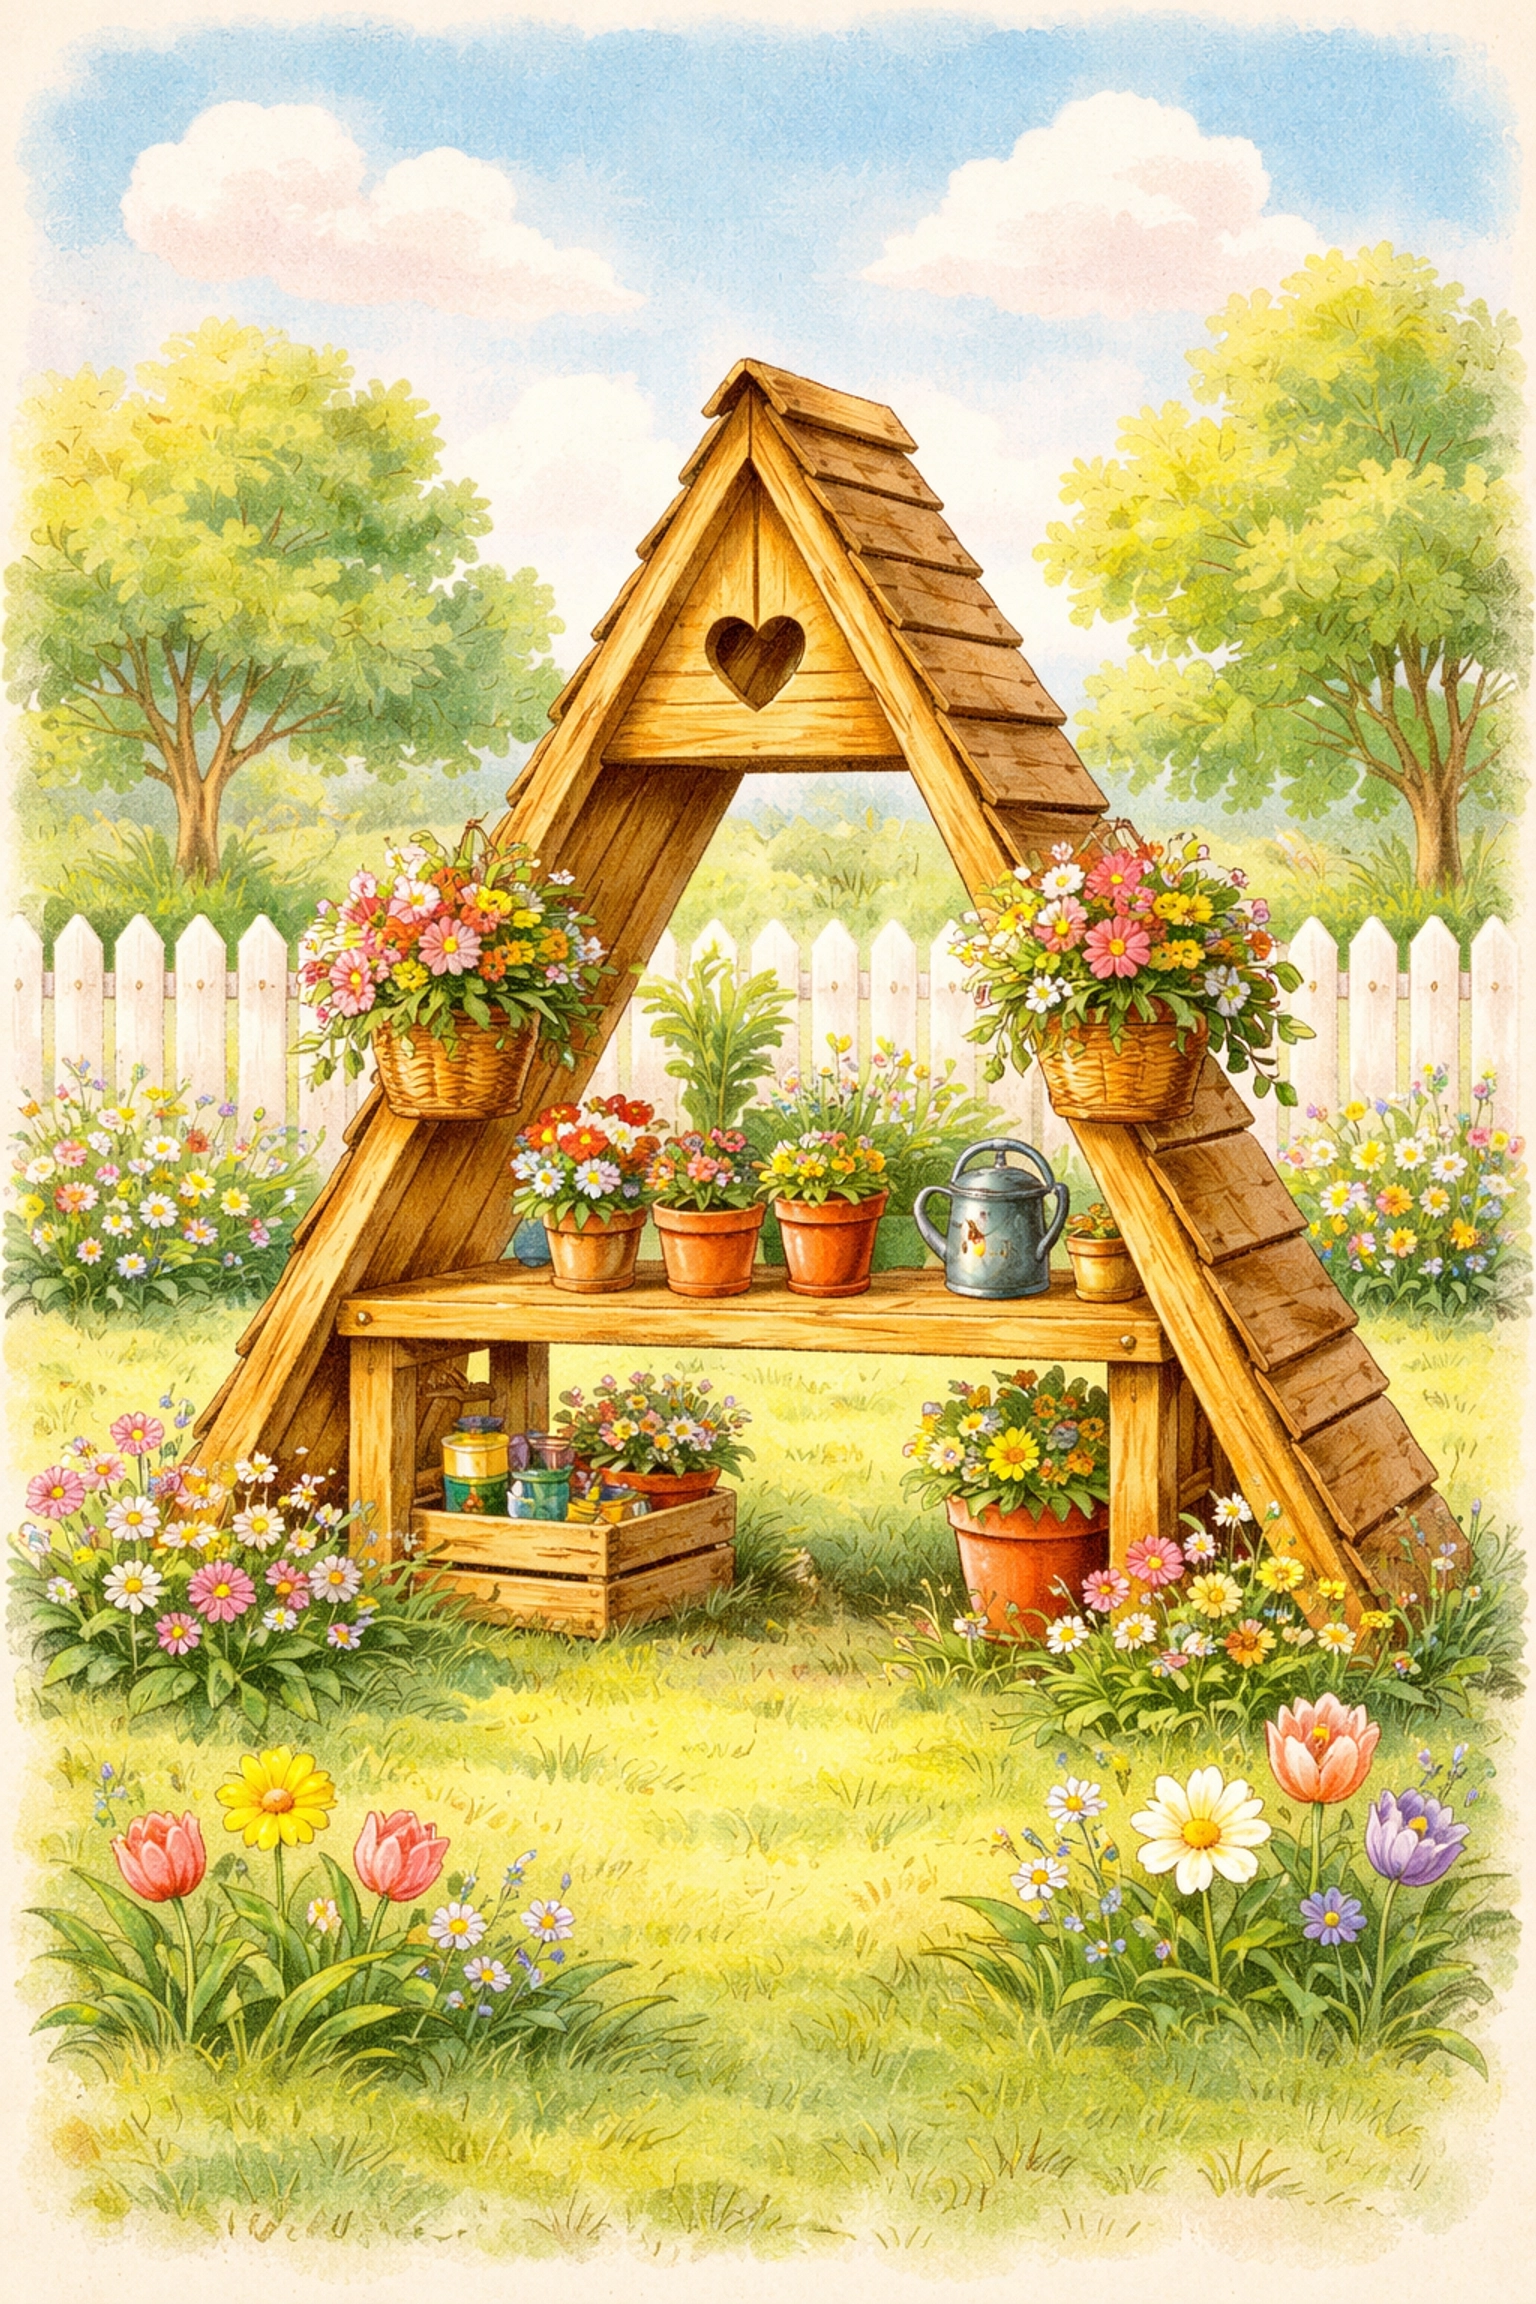
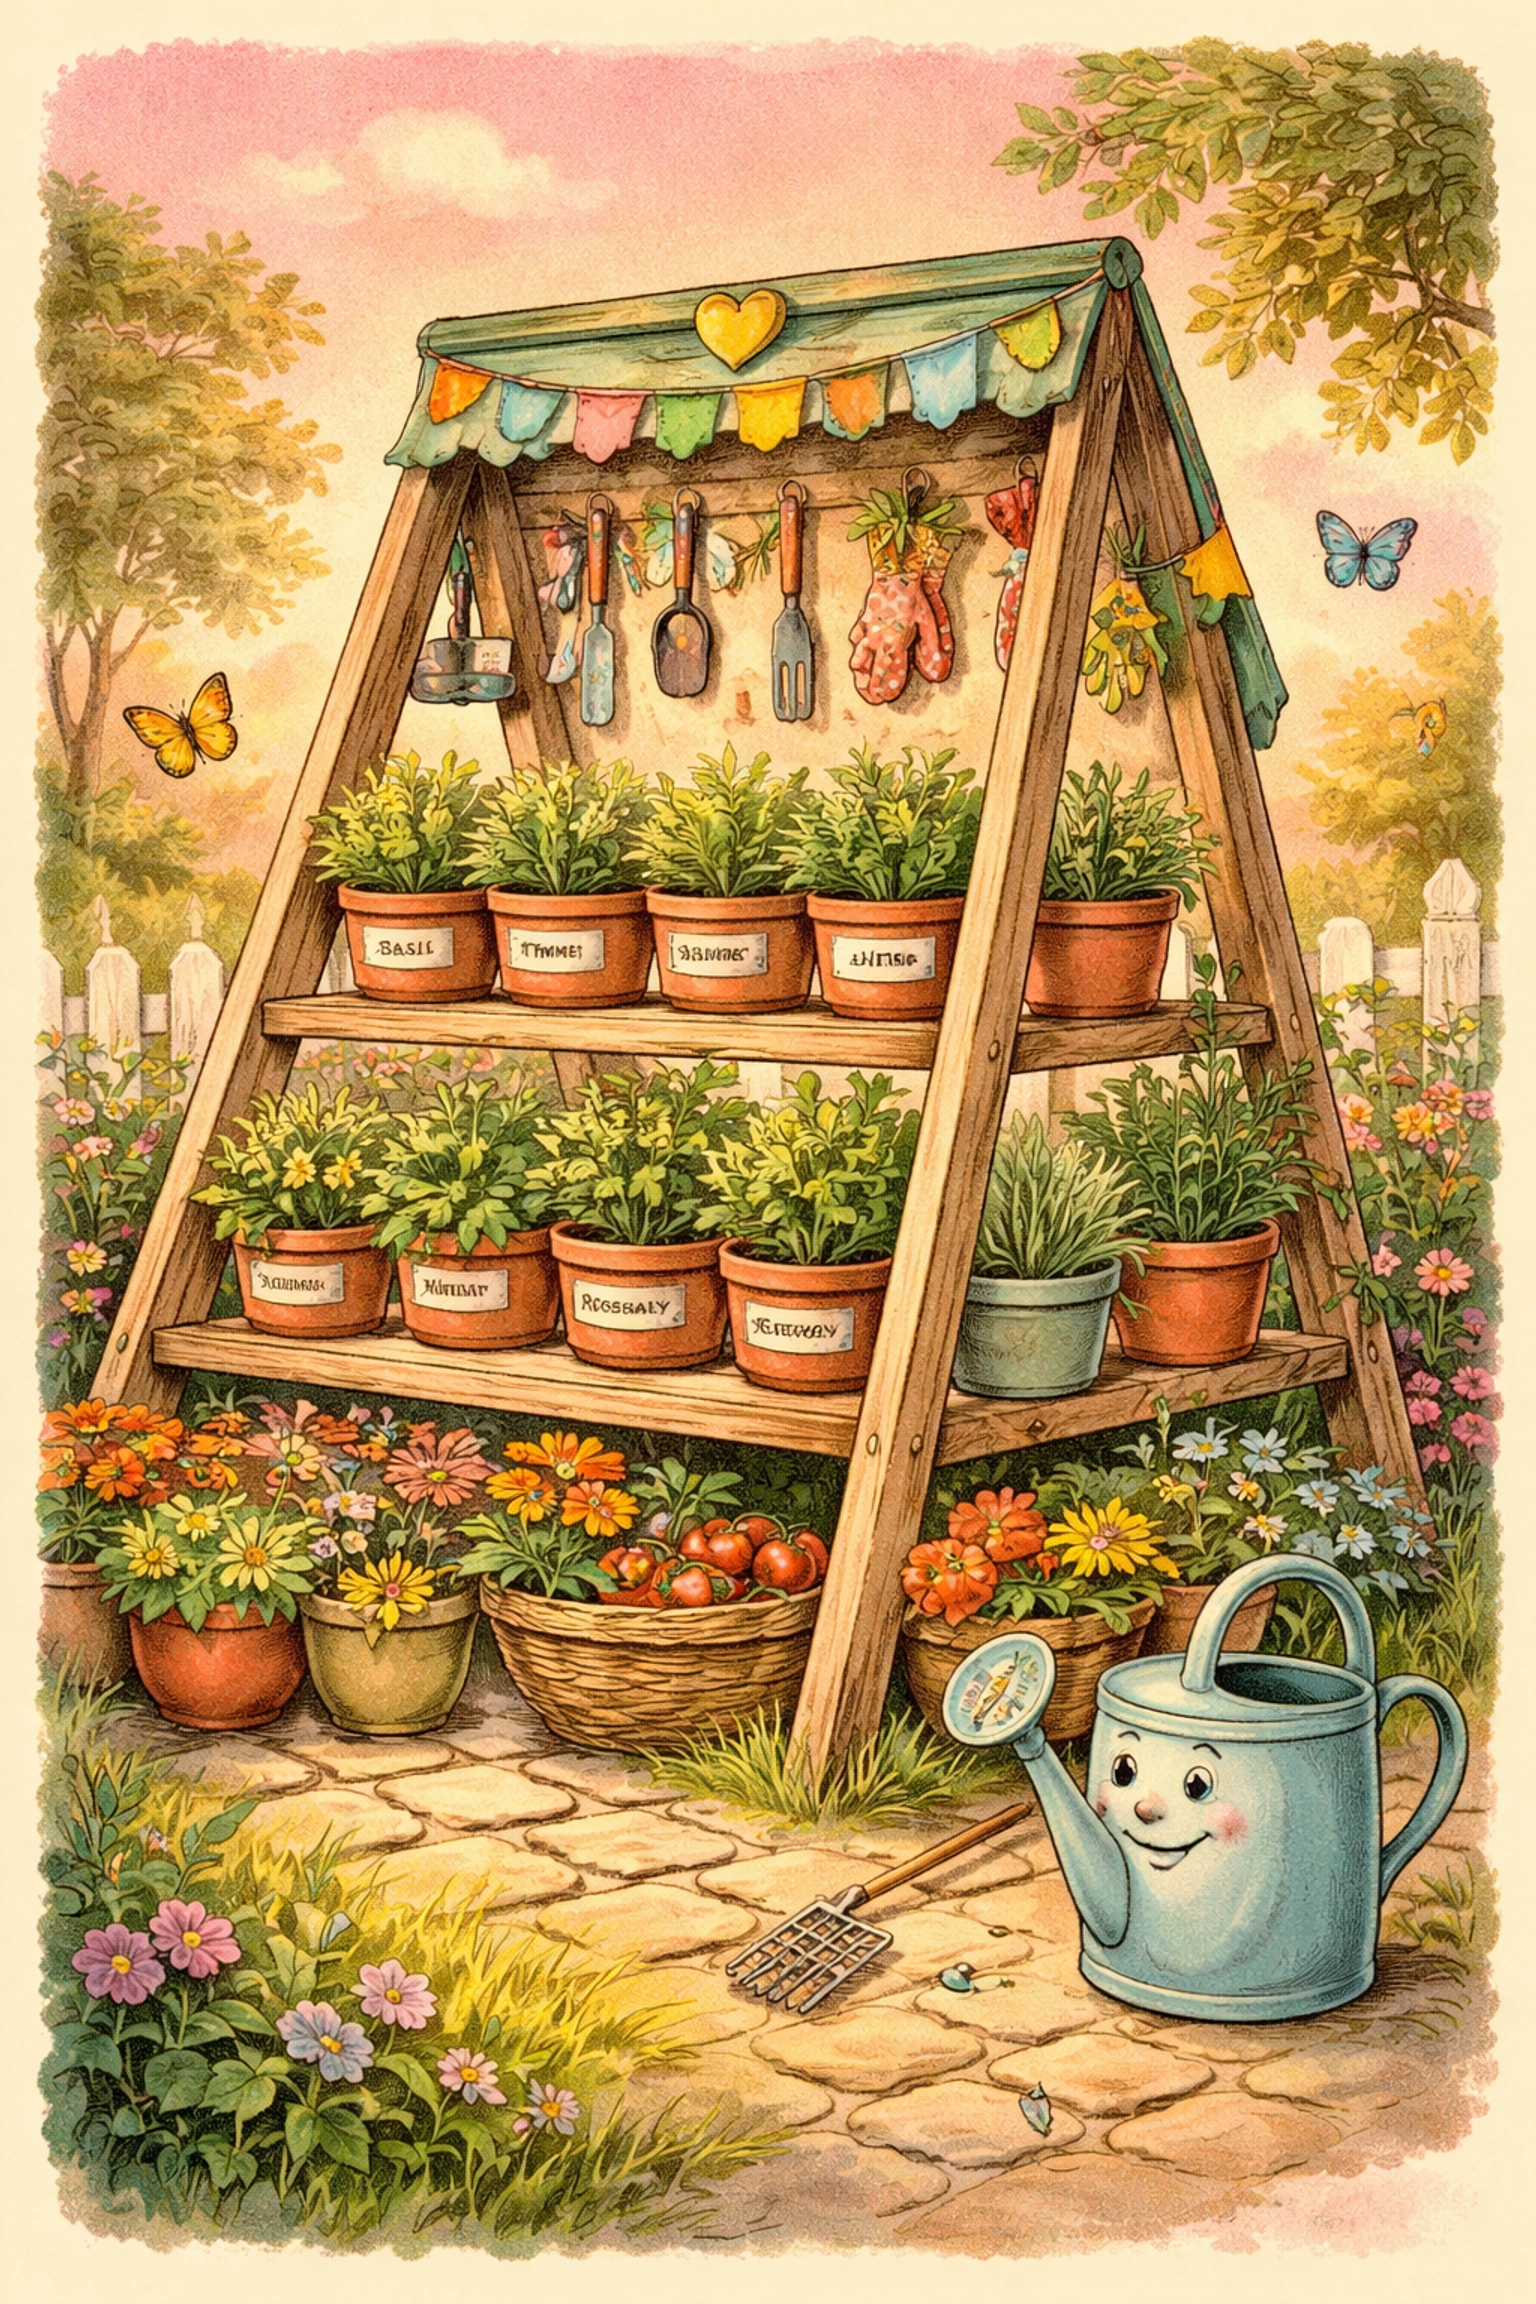
Quick Answer: Yes, you can absolutely build a sturdy wooden A-frame vertical garden with your kids for under $10! This beginner-friendly project takes about 1-2 hours, teaches basic woodworking skills, and creates a space-saving garden perfect for herbs, flowers, or small vegetables. The A-frame design is naturally stable, kid-height accessible, and works wonderfully on patios, balconies, or in small backyards.
Why an A-Frame Design Works So Well for Kids
The A-frame shape isn't just charming to look at, it's genuinely smart engineering that even ancient builders relied on. Here's why this design is perfect for a family garden project:
Natural Stability: The triangular structure distributes weight evenly, making it nearly tip-proof. You won't worry about your kiddo's garden toppling over during an enthusiastic watering session.
Perfect Height: An A-frame garden puts plants right at kid-height, eliminating the need for stools or bending over garden beds. Little hands can plant, water, and harvest independently.
Space Efficiency: Growing vertically means you can fit more plants in a smaller footprint. Perfect for apartments, small yards, or that sunny corner of your porch.
Drainage Built In: The angled sides naturally direct water downward, preventing root rot and teaching kids about how water moves through soil.
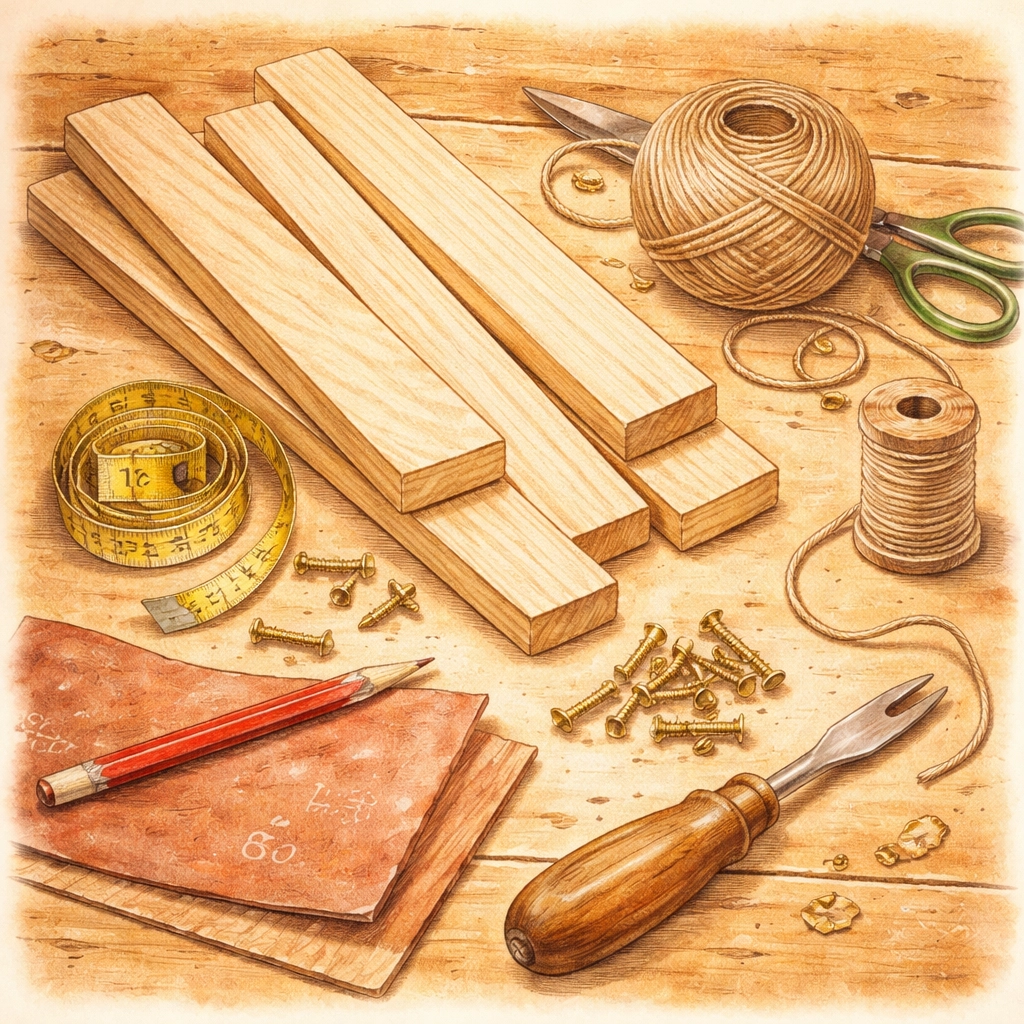
Materials You'll Need (Budget: Under $10)
Here's the beauty of this project, you can source nearly everything from a single hardware store trip, and most stores will even cut wood to size for free if you ask nicely.
| Item | Quantity | Approximate Cost |
|---|---|---|
| Pine wood strips (1"x2"x8') | 3 | $3.84 |
| Small wood screws (1.5") | 12 | $1.50 |
| Twine or garden wire | 1 roll | $2.00 |
| Sandpaper (medium grit) | 1 sheet | $0.75 |
| Small L-brackets (optional) | 4 | $1.50 |
| Total | $9.59 |
Tools Required (likely already in your garage):
- Screwdriver or drill
- Measuring tape
- Pencil
- Scissors (for twine)
Pro Tip: Cedar wood costs a bit more but naturally resists rot and insects. If you're planning to keep this garden outdoors year-round, the upgrade is worth considering for a future build.
Step-by-Step Building Instructions
Step 1: Measure and Mark Your Wood
Start by laying out your three 8-foot pine strips. You'll cut these into the following pieces:
- 4 pieces at 36 inches (these form the A-frame legs)
- 2 pieces at 24 inches (these are the horizontal support bars)
- 2 pieces at 18 inches (optional bottom stabilizers)
Have your child help with measuring, this is fantastic practice for basic math skills. Let them mark the cutting lines with a pencil.
Step 2: Cut Your Wood to Size
If you're comfortable with a hand saw, this is a great opportunity for older kids (8+) to try supervised sawing. For younger helpers, many hardware stores cut wood to your specifications for free.
Once cut, have your child sand all the edges smooth. This prevents splinters and gives little hands an important job. Work the sandpaper in the direction of the wood grain for best results.
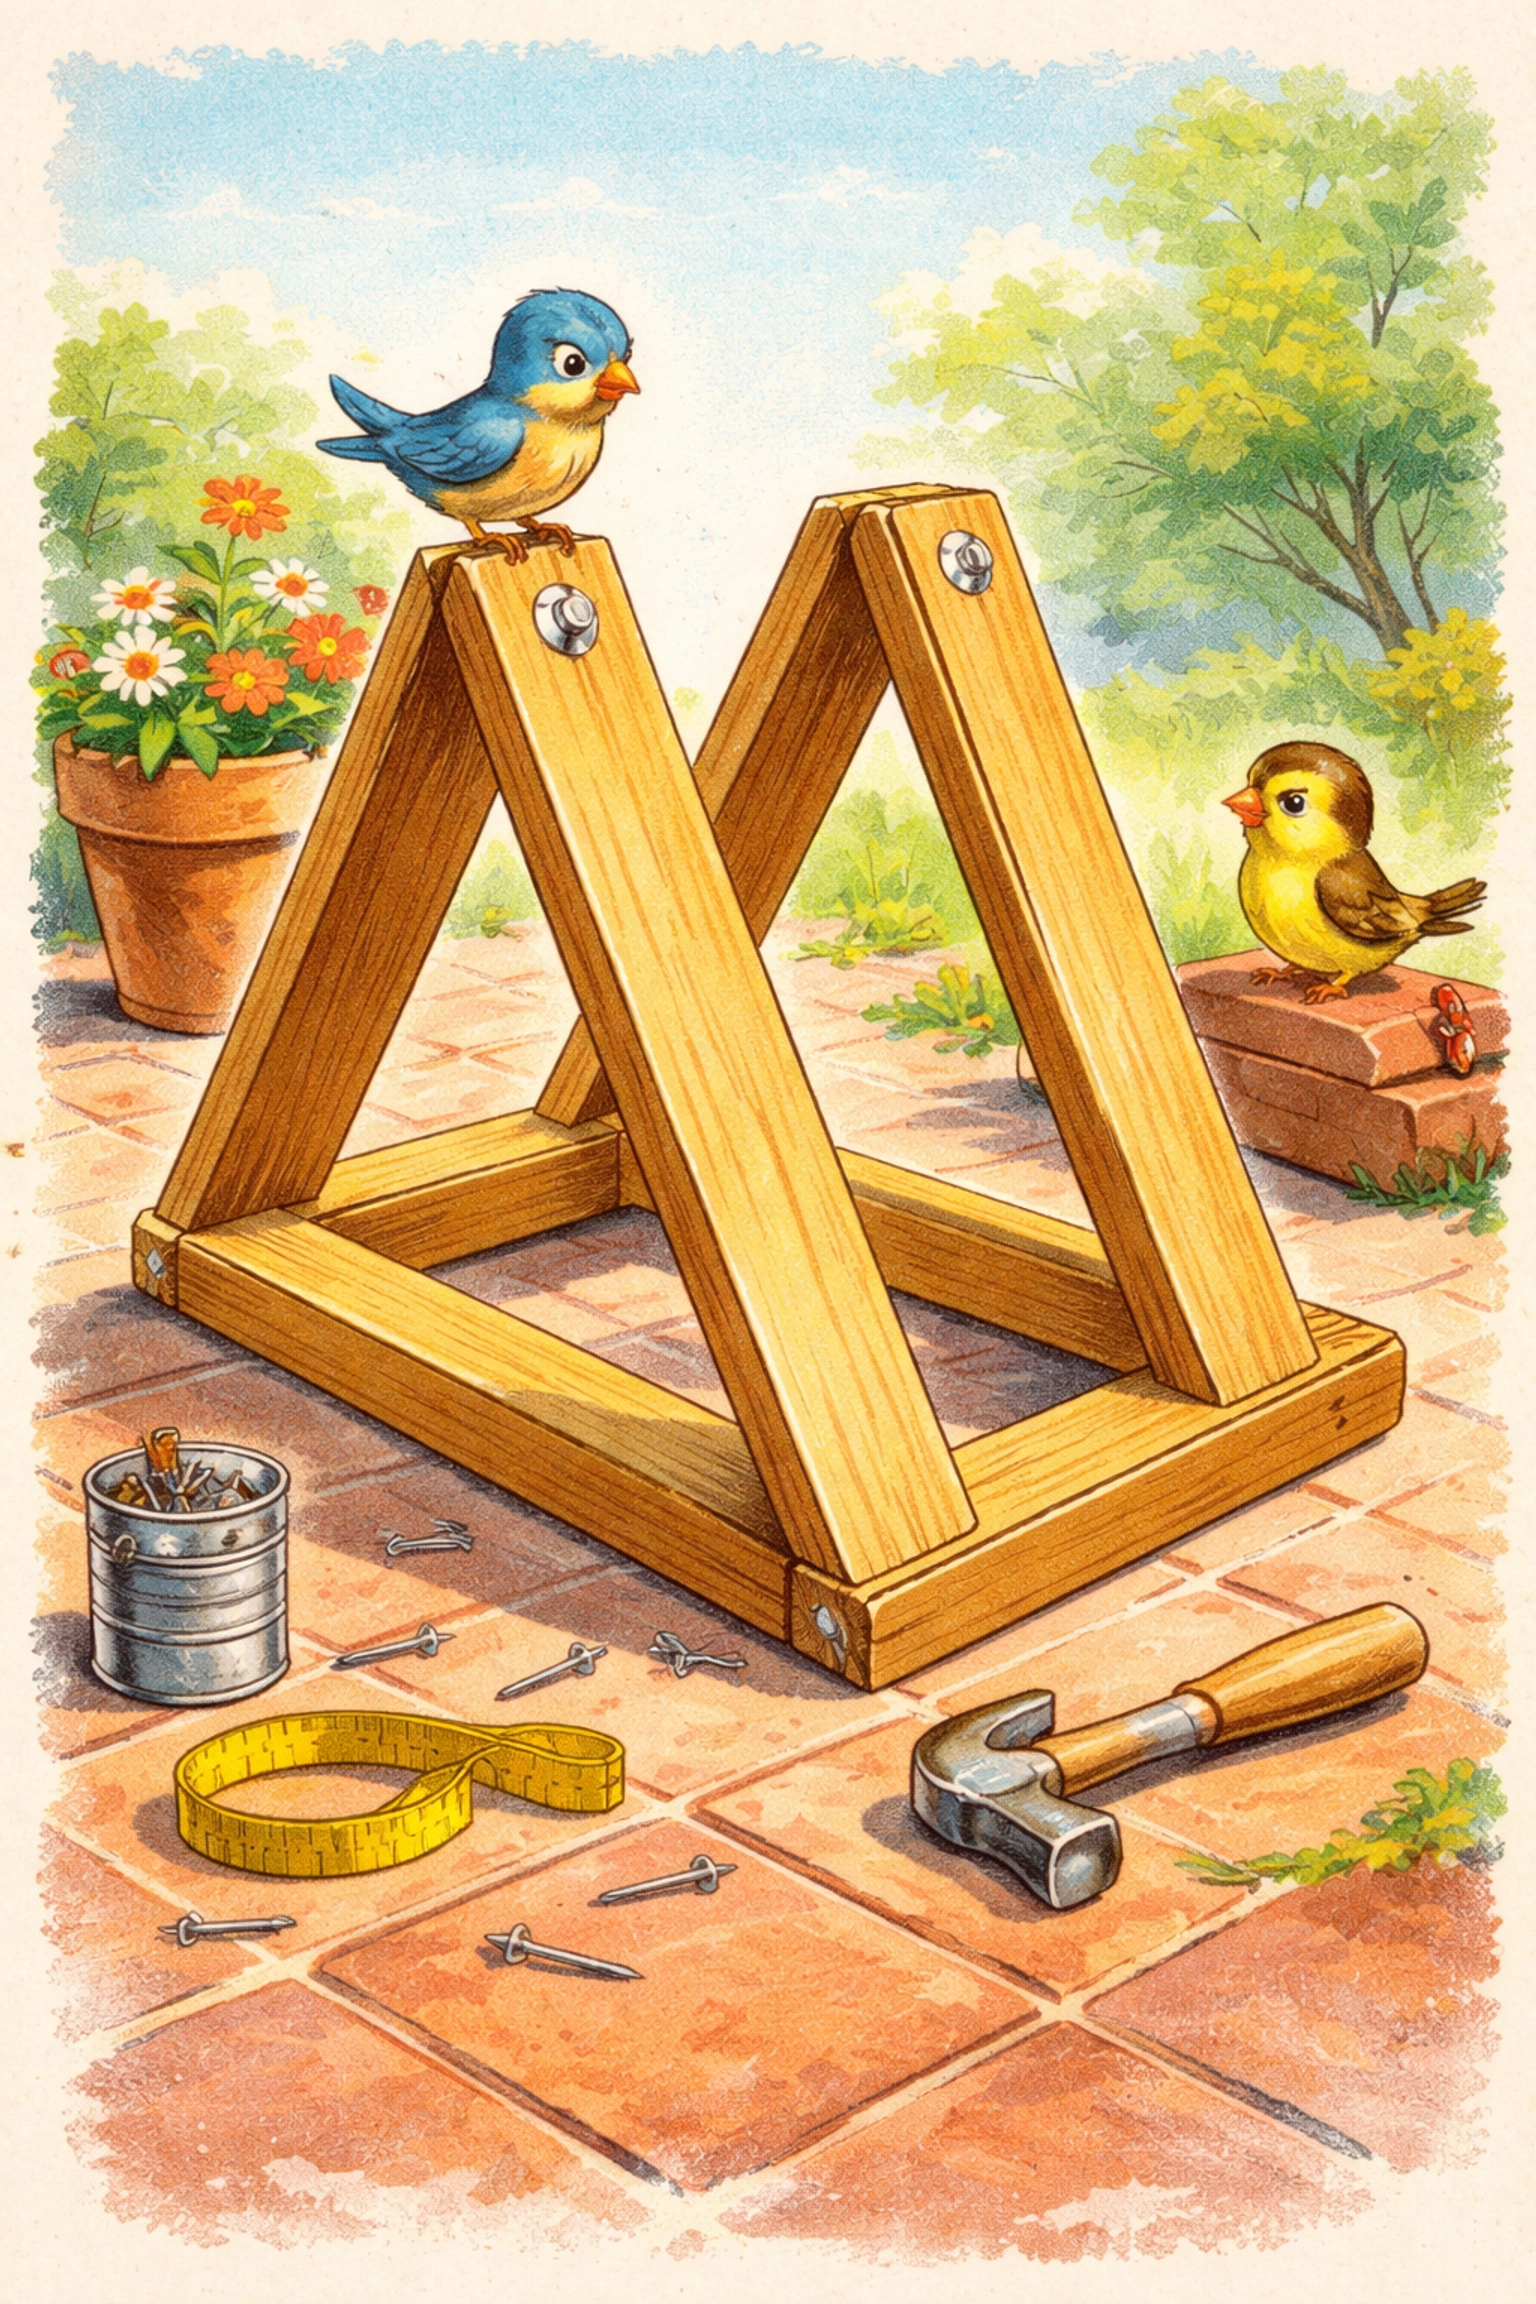
Step 3: Assemble the A-Frame Sides
Take two 36-inch pieces and arrange them in a "V" shape, crossing at the top with about a 2-inch overlap. This crossing point is where you'll secure them with screws.
Here's the trick: Have one person hold the pieces in place while another drives the screw. This is where teamwork really shines, and why this project is so great for parent-child bonding.
Repeat with the remaining two 36-inch pieces to create a second matching "V" frame.
Step 4: Connect the Two Sides
Stand both V-frames upright, positioned about 18-24 inches apart (depending on how deep you want your garden). Connect them at the top crossing points using your horizontal 24-inch bars.
Drive screws through the horizontal bars into the leg pieces. You should now have a stable, free-standing A-frame structure.
Step 5: Add Horizontal Plant Supports
This is where you have options:
Option A – Twine Method (Easiest):
Wrap garden twine horizontally across the frame at 6-inch intervals. This creates "shelves" where hanging pots can hook on, or climbing plants can grab hold.
Option B – Wood Slat Method:
Cut additional wood strips and screw them horizontally across the frame. This creates actual shelves for small pots or planter boxes.
Option C – Wire Grid Method:
Attach a piece of garden fencing or wire grid to one side of the frame. Perfect for climbing vegetables like peas or small beans.
Step 6: Stabilize the Base (Optional but Recommended)
If your A-frame will live outdoors, add the two 18-inch pieces across the bottom of each side. This creates a wider stance and prevents the legs from spreading apart over time.
For extra stability on soft ground, you can drive small stakes into the soil and tie the frame to them.
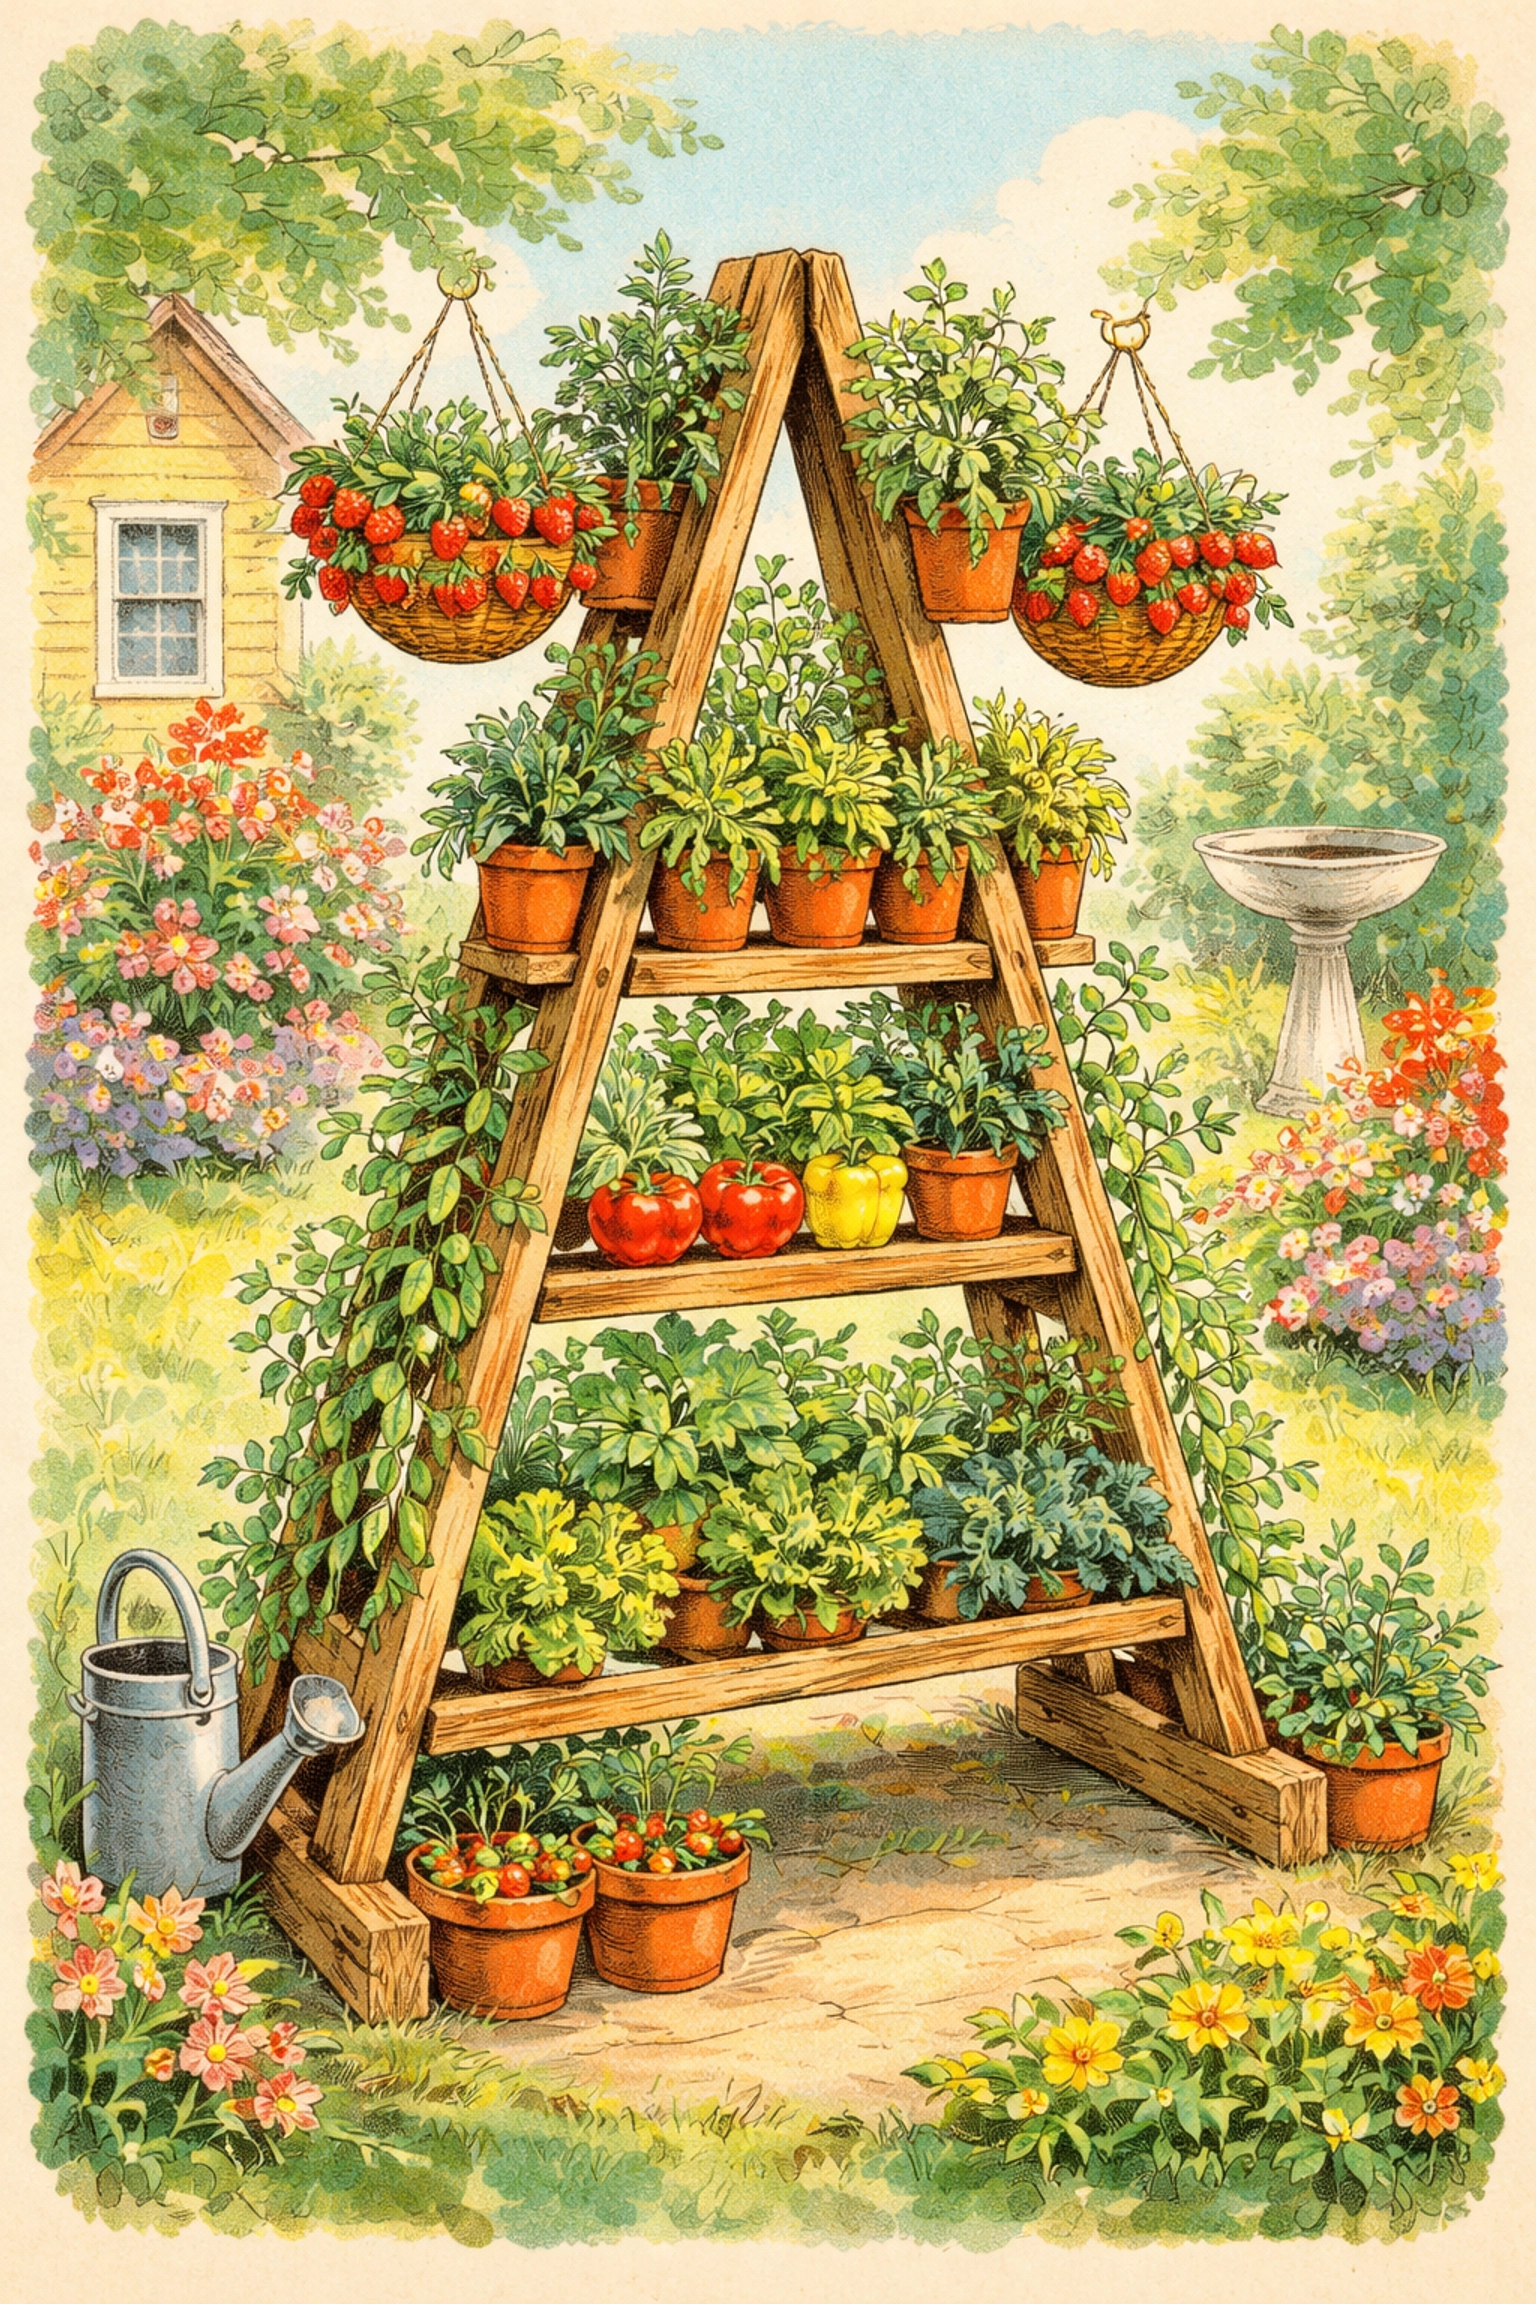
Best Plants for Your A-Frame Garden
Now for the fun part, choosing what to grow! The A-frame design works best with:
Hanging Options:
- Strawberries in hanging baskets
- Trailing herbs like oregano or thyme
- Small succulents in decorative pots
Climbing Plants:
- Sugar snap peas (kid-favorite for snacking!)
- Compact cucumber varieties
- Nasturtiums (edible flowers)
Potted Herbs (on slat shelves):
- Basil
- Mint (keep contained, it spreads like wildfire)
- Chives
- Parsley
For more ideas on maximizing small growing spaces, check out our guide on how much space you need for a productive hydroponic garden.
Helpful Tips for Success
Location Matters: Position your A-frame where it'll receive at least 6 hours of sunlight daily. Most herbs and vegetables need this to thrive.
Water Wisely: The top plants will dry out faster than lower ones. Teach kids to check soil moisture with their finger before watering, if it's dry an inch down, it's time to water.
Rotate Regularly: If only one side gets good sun, rotate the entire frame every few weeks so all plants get their fair share.
Seasonal Care: In harsh winters, move your A-frame to a protected area or cover it with burlap to prevent wood from cracking.
If your family will be traveling, our post on easy DIYs to keep plants watered when kids are away has some clever solutions.
Taking It Further
Once your family masters this basic build, consider adding:
- A chalkboard paint section for labeling plants
- Small hooks for hanging kid-sized garden tools
- Paint or wood stain in fun colors (use non-toxic, outdoor-rated products)
- A rain collection system using plastic bottles
This project also pairs wonderfully with other garden learning activities like creating a DIY worm composting bin with children.
Frequently Asked Questions
What age is appropriate for this project?
Kids as young as 4 can help with measuring, sanding, and planting. Children 8 and older can participate in supervised cutting and drilling. Adjust responsibilities based on your child's comfort and skill level.
How long will a wooden A-frame garden last outdoors?
Untreated pine lasts 2-3 years outdoors. Cedar or pressure-treated wood can last 10+ years. Applying a natural wood sealant annually extends lifespan significantly.
Can this design support heavy pots?
The basic design supports lightweight pots and hanging containers (up to 5 lbs each). For heavier planters, use thicker lumber (2"x2") and add additional horizontal supports.
What if I don't have power tools?
No problem! A hand saw works perfectly for this project. It just takes a bit more elbow grease, and patience is a great skill for kids to practice anyway.
How do I prevent the wood from rotting?
Line any planter boxes with landscape fabric before adding soil. Avoid letting wood sit in standing water. Apply linseed oil or outdoor wood sealant for protection.
Can I build this indoors?
Absolutely! Indoor A-frames work great for herbs in a sunny kitchen window. Just place a tray underneath to catch any water drips.
What if my A-frame wobbles?
Add diagonal bracing between the legs, or attach the frame to a wall or fence with a simple bracket.
Is this design safe for toddlers?
Yes: the A-frame is inherently stable and doesn't have sharp edges when properly sanded. Always supervise young children around any garden structure.
References
- Ana White Woodworking Plans – 3-Tier A-Frame Planter Box Design Specifications
- Lowe's Home Improvement – Wood Cutting Services and Material Pricing
- University of Georgia Extension – Vertical Gardening for Limited Spaces
- Budget Garden Building Guides – A-Frame Trellis Construction Under $10
Happy building, and may your little gardeners grow something wonderful!


