

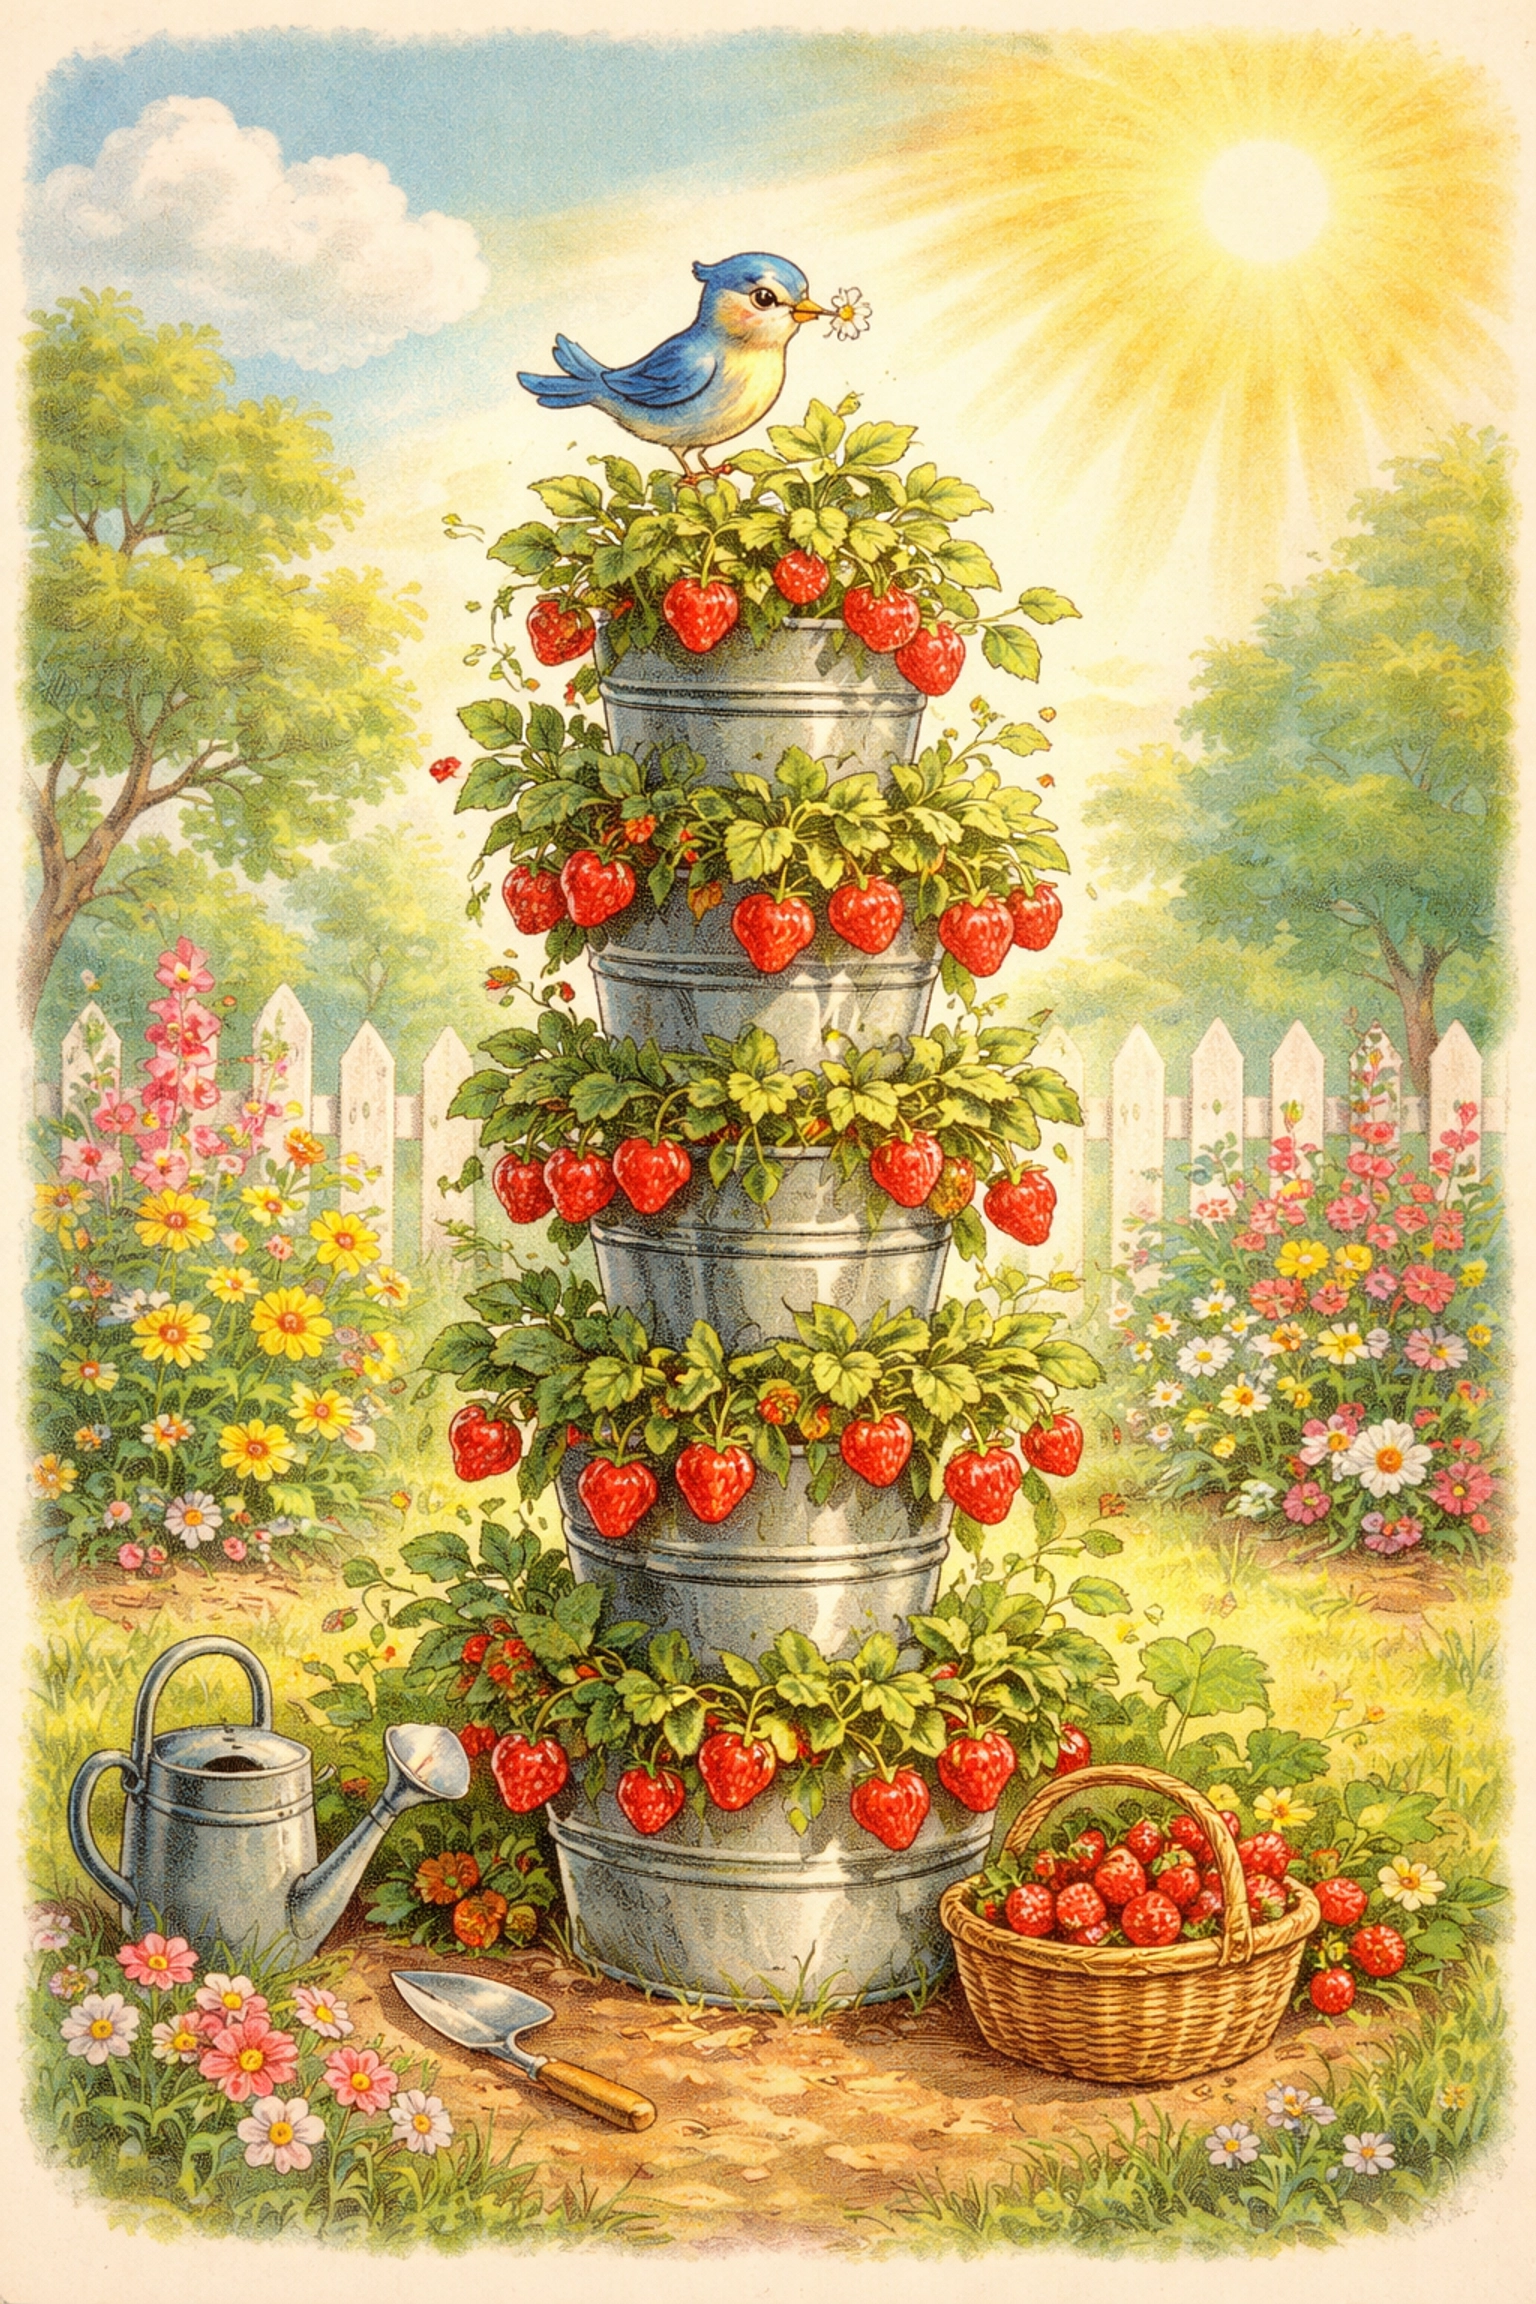
How to build a vertical PVC Strawberry Tower on a budget?
You can build a vertical strawberry tower for under $10 by repurposing five-gallon buckets, adding a simple PVC watering pipe down the center, and drilling 2-inch holes around the sides for your strawberry plants. This upcycled approach saves money, maximizes growing space, and makes a fantastic hands-on STEAM project for kids who want to grow their own sweet summer snacks!
Why Build a Vertical Strawberry Tower?
If you've ever tried growing strawberries in a traditional garden bed, you know the struggle. Slugs love them. Squirrels steal them. And they sprawl everywhere, taking up precious real estate in your backyard.
A vertical strawberry tower solves all of that. By growing upward instead of outward, you can fit dozens of strawberry plants in a single square foot of space. The elevated design keeps fruit off the ground (away from pests), improves air circulation, and makes harvesting a breeze, even for little hands.
Plus, building one together is a wonderful way to teach kids about plant biology, water distribution, and sustainable gardening practices. It's engineering meets botany, all wrapped up in a delicious, berry-filled package.
Budget Breakdown: What Will This Cost?
One of our core principles at Tierney Family Farms is keeping projects accessible. Here's a realistic budget table for this build:
| Item | Estimated Cost | Notes |
|---|---|---|
| Five-gallon buckets (3-4) | $0 – $4 | Often free from restaurants, bakeries, or delis |
| 1-inch PVC pipe (3-4 ft) | $2 – $3 | Available at most hardware stores |
| PVC cement (small tube) | $3 – $4 | Optional but recommended for stability |
| 2-inch hole saw bit | $5 – $8 | A one-time purchase you'll use for future projects |
| Potting soil | $4 – $8 | Or mix your own from compost |
| Strawberry starts | $3 – $10 | Varies by quantity; consider sharing with neighbors |
Total Estimated Cost: $8 – $25 (depending on what you already have)
Pro Tip: Ask local restaurants or grocery store bakeries for their empty five-gallon buckets. Many businesses throw them away daily and are happy to give them to you for free!
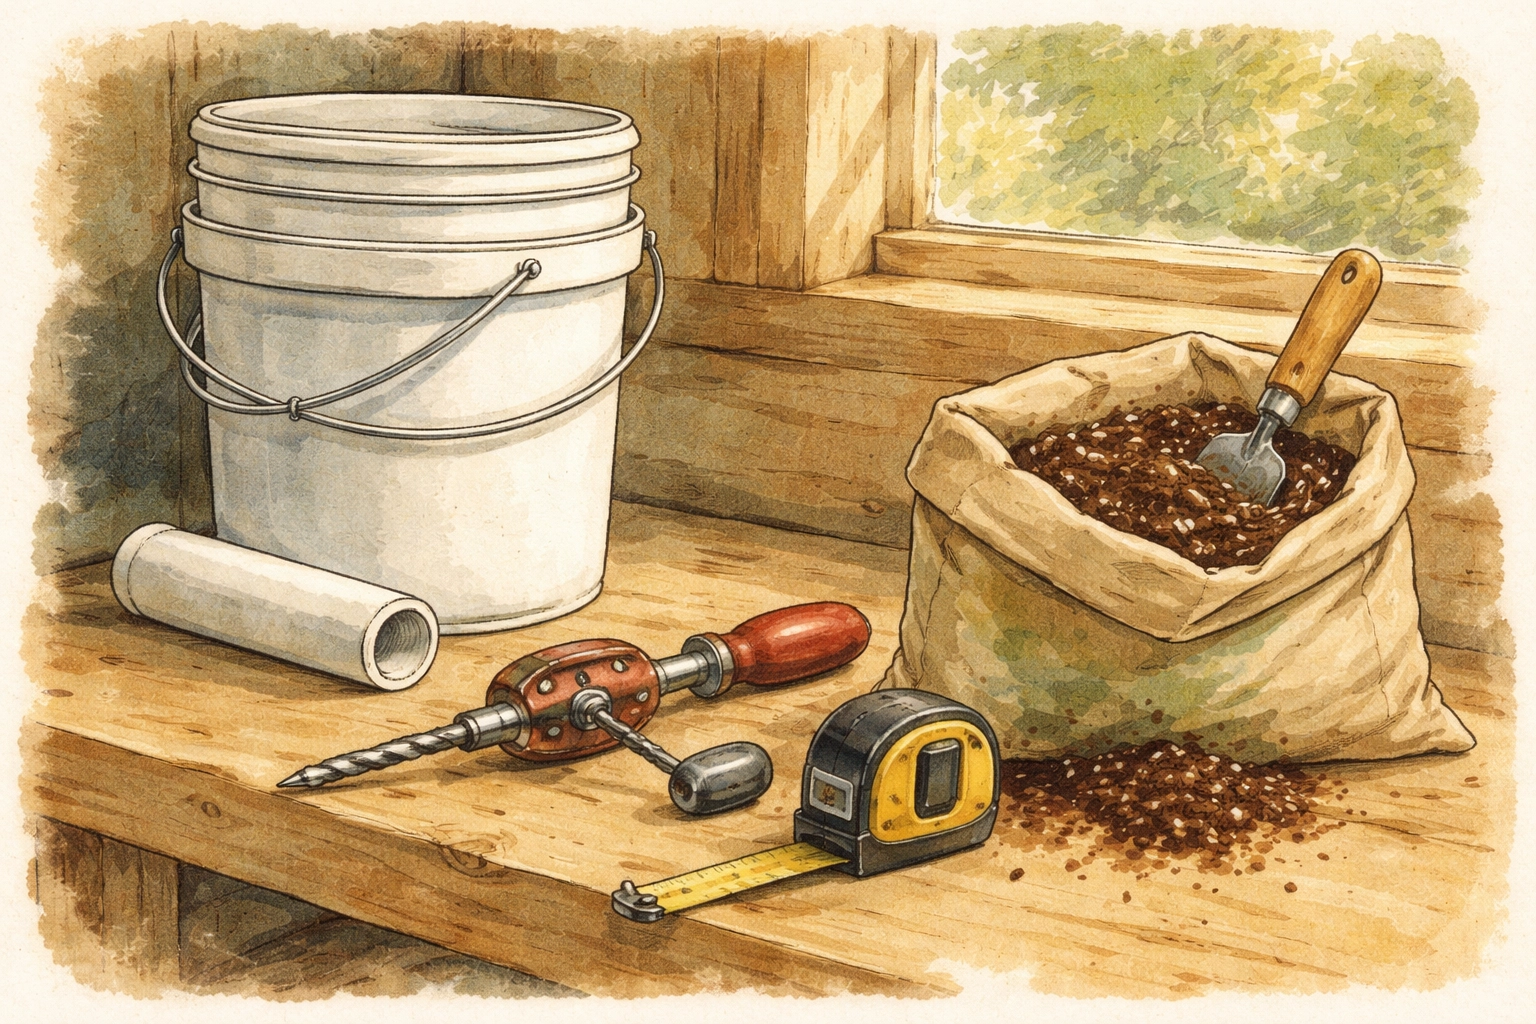
Materials You'll Need
Before you start drilling, gather these supplies:
- 3-4 five-gallon buckets (with at least one lid for the bottom)
- 1-inch diameter PVC pipe (cut to the height of your stacked tower, plus 2 inches)
- PVC all-purpose cement (optional but helpful)
- 2-inch hole saw drill bit
- Power drill
- Marker or chalk
- Measuring tape
- Potting soil (enough to fill your tower)
- Strawberry starter plants (6-12 depending on tower height)
- Spray paint (optional, for aesthetics)
Step-by-Step Instructions
Step 1: Prepare Your Buckets
Start by cleaning your buckets thoroughly, especially if they previously held food products. Remove any labels and let them dry completely.
Stack the buckets to see how they nest together. Most five-gallon buckets will sit inside each other with a few inches of overlap. This creates a tall, stable tower structure.
Step 2: Mark Your Planting Holes
Using a marker, draw circles around the outside of each bucket where you want your strawberry plants to grow. Space them approximately 4 inches apart, and stagger them so holes on one bucket don't line up directly with holes on the bucket below.
A good rule of thumb: 4-6 holes per bucket, spiraling around the sides like a candy cane stripe.
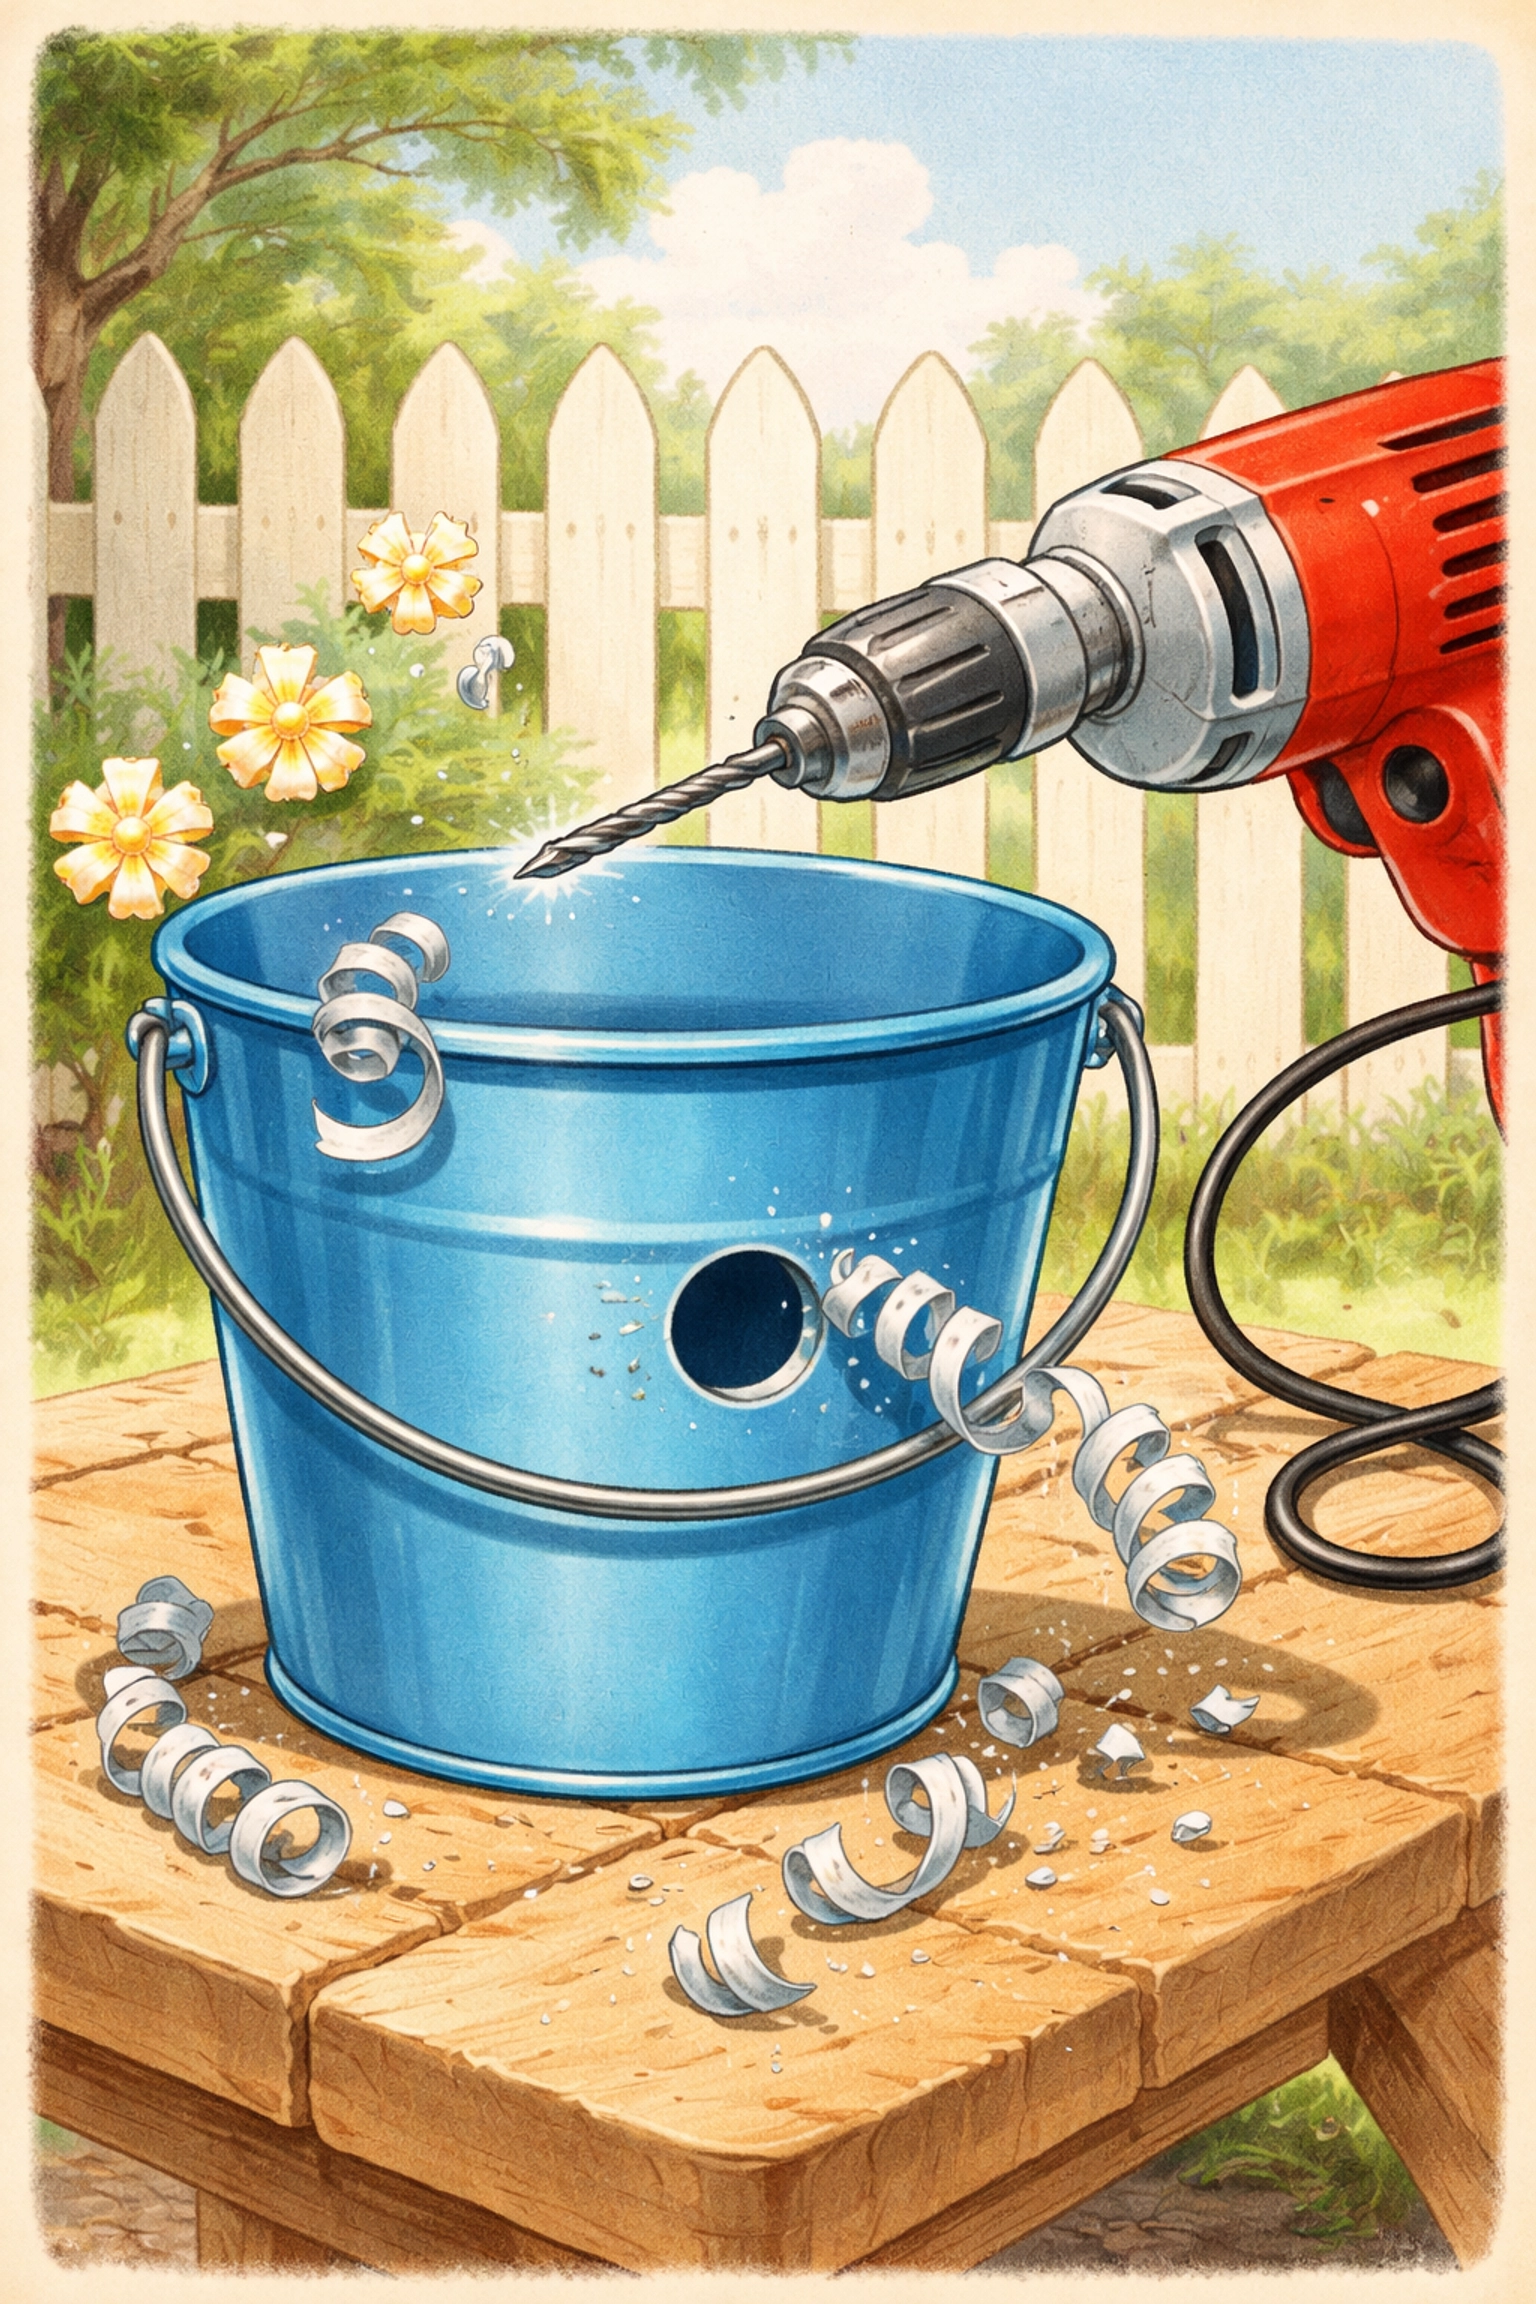
Step 3: Drill the Planting Holes
Attach your 2-inch hole saw bit to your drill. Carefully drill out each marked circle. Take your time here, rushing can crack the plastic.
Safety Note: This step requires adult supervision. Kids can help mark the holes and hold buckets steady, but drilling should be handled by a grown-up.
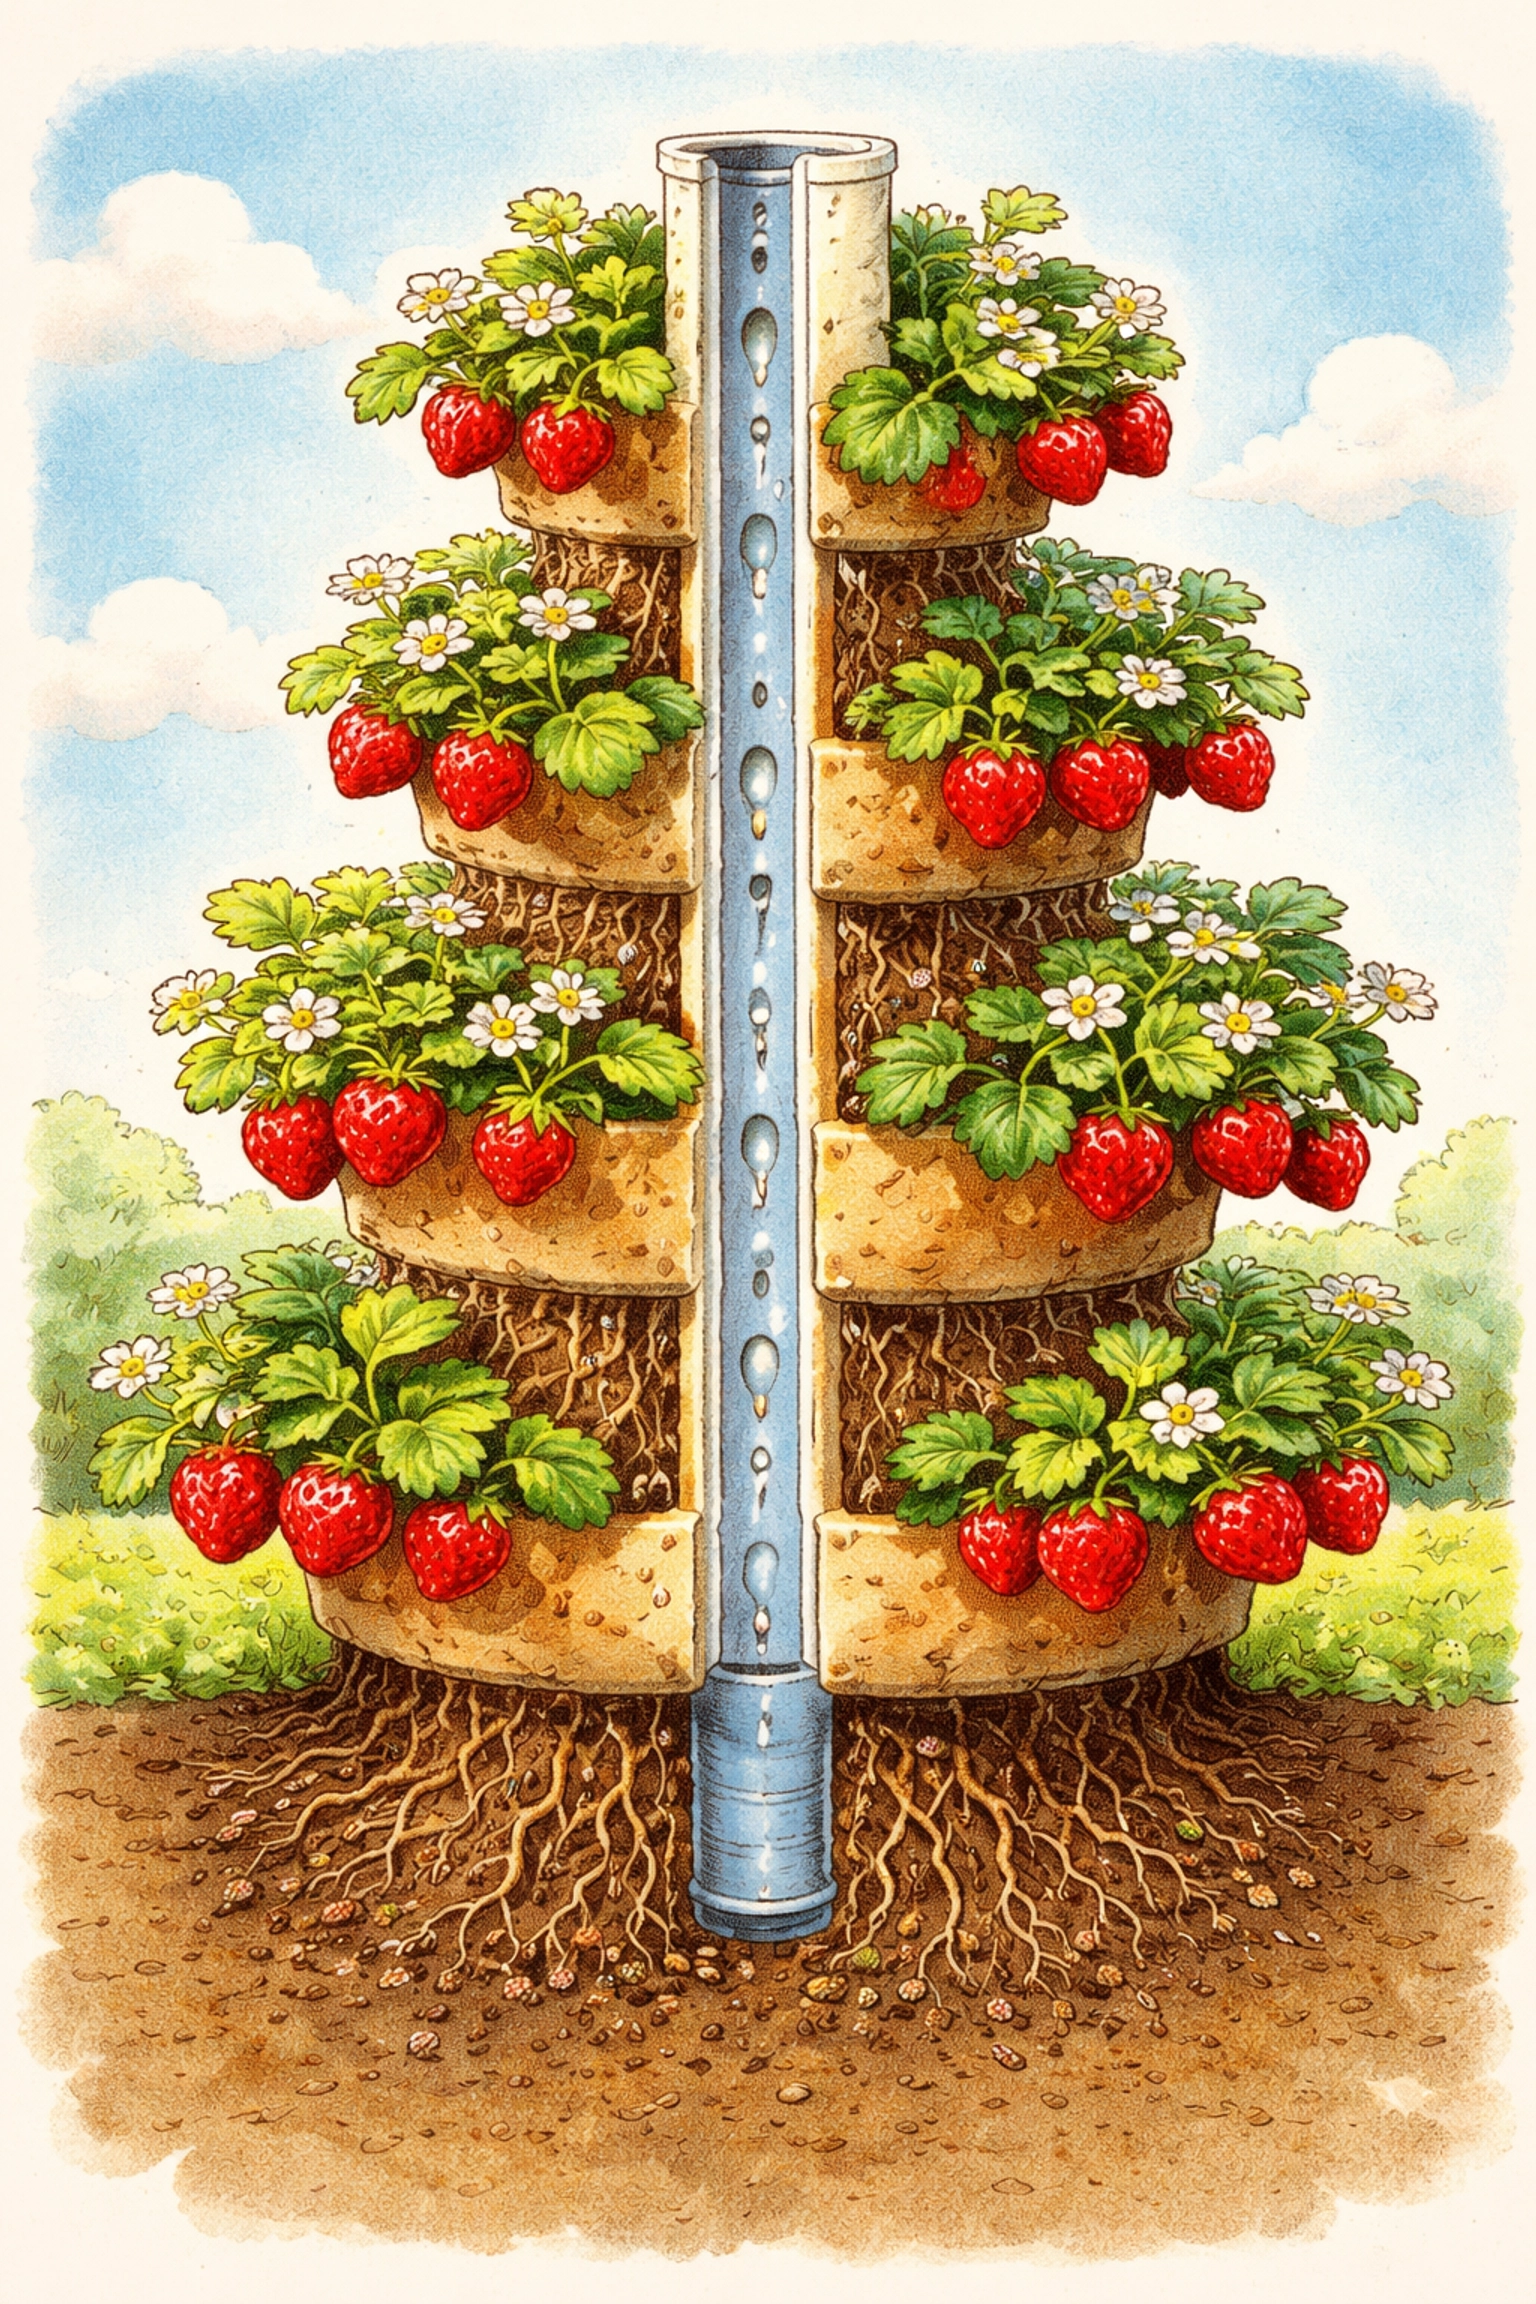
Step 4: Prepare the Watering Pipe
Your PVC pipe will act as an internal watering system, delivering moisture directly to the roots throughout the tower.
Drill small holes (about ¼ inch) every 2-3 inches along the entire length of the pipe. These holes allow water to seep out slowly and evenly.
If you're using PVC cement, attach the bottom of the pipe to the center of your bucket lid. This keeps it stable and upright.
Step 5: Assemble the Tower
- Place the lid on your bottom bucket with the PVC pipe standing straight up in the center.
- Fill the bottom bucket with potting soil, packing it gently around the pipe.
- Insert strawberry plants into the drilled holes from the outside, with roots pointing inward toward the soil.
- Stack the next bucket on top, add more soil, and repeat the planting process.
- Continue until all buckets are stacked and planted.
Leave the top open for watering and perhaps a few extra plants right on the surface!
Step 6: Water and Watch
Pour water directly into the PVC pipe at the top. The drilled holes will distribute moisture throughout the entire tower, reaching roots at every level.
Strawberries generally need about 1-2 inches of water per week. In hot weather, check the soil moisture every few days.
Tips for Strawberry Tower Success
Location matters. Strawberries love sunshine, aim for 6-8 hours of direct sunlight daily. Place your tower on a sunny patio, deck, or driveway.
Feed your plants. A balanced organic fertilizer every few weeks helps produce bigger, sweeter berries. Compost tea works wonderfully too.
Pinch the runners. Strawberry plants send out "runners" (long stems that try to root new plants). Pinching these off directs energy back into fruit production.
Rotate if needed. If one side of your tower gets more sun, give it a quarter turn every week so all plants get equal light exposure.
Overwinter wisely. In colder climates, move your tower to a garage or cover it with burlap to protect plants through winter. Many strawberry varieties are perennial and will produce for 3-5 years!
Frequently Asked Questions
How many strawberry plants can fit in one tower?
A three-bucket tower typically holds 12-18 plants comfortably, depending on hole spacing.
What type of strawberries grow best in vertical towers?
Ever-bearing and day-neutral varieties tend to perform well because they produce fruit continuously throughout the season rather than all at once.
Can I use this same design for other plants?
Absolutely! Herbs, lettuce, spinach, and small flowers all thrive in vertical bucket towers.
How often should I water my strawberry tower?
Check soil moisture every 2-3 days. The PVC watering pipe helps distribute water evenly, but hot weather may require more frequent watering.
Do I need drainage holes in the buckets?
Yes! Drill a few small holes in the bottom of each bucket to prevent waterlogging and root rot.
Can kids help build this project?
Definitely. Kids can mark holes, mix soil, plant strawberries, and decorate buckets with paint. Drilling should be supervised by adults.
How long until I get strawberries?
Most plants produce fruit within 4-6 weeks of planting, depending on the variety and growing conditions.
Is PVC safe for growing food?
Standard PVC pipe is generally considered safe for irrigation purposes. If you prefer, food-grade alternatives are available at slightly higher cost.
What if I don't have buckets?
You can build a similar tower using wire fencing lined with landscaping fabric: a great PVC-free alternative that's equally budget-friendly!
References
- University of Florida IFAS Extension – "Growing Strawberries in the Home Garden"
- Cornell University Cooperative Extension – "Vertical Gardening Techniques"
- National Gardening Association – "Container Strawberry Growing Guide"