


What Is the Ball Ramp Challenge and How Do You Set It Up?
A ball ramp challenge is a hands-on building activity where kids construct ramps from cardboard and household materials, then test how far different balls can roll or jump. You can create one using a flattened cardboard box, some tape, and a few items to prop up the ramp: then add targets or distance markers to turn it into a game.
This project works well for rainy days, weekend afternoons, or anytime you need an engaging activity that doesn't require a trip to the store.
Quick Project Overview
| Detail | Information |
|---|---|
| Skill Age Range | 4–7 years old |
| Enjoyment Age Range | 3–10 years old (younger kids enjoy rolling, older kids enjoy engineering challenges) |
| Time to Complete | 20–30 minutes for basic setup; can extend with add-ons |
| Budget | $0–$5 (often free with recycled materials) |
A note on ages: Some sources suggest this activity works best for children 5 and up, while others indicate kids as young as 3 can participate with help. In our experience, children around 4–7 tend to get the most out of the building process, while younger and older kids can still enjoy the play aspect.
Materials You'll Need
Here's what you'll want to gather before getting started. Many families have these items around the house already.
| Material | Purpose | Estimated Cost |
|---|---|---|
| Cardboard box or large cardboard pieces | Main ramp structure | $0 (recycled) |
| Masking tape or duct tape | Securing ramp sections | $0–$3 |
| Books, blocks, or a sturdy container | Propping up the ramp | $0 (items from home) |
| Various balls (ping pong, tennis, small bouncy balls) | Testing and racing | $0–$2 |
| Scissors or utility knife (adult use) | Cutting cardboard | $0 (household item) |
| Optional: Plastic cups, muffin tin, or small containers | Target practice | $0–$1 |
| Optional: Markers or stickers | Decorating and marking distances | $0–$1 |
Total estimated cost: $0 if you use what you have, up to about $5 if you need to pick up tape or balls.
Step-by-Step Instructions
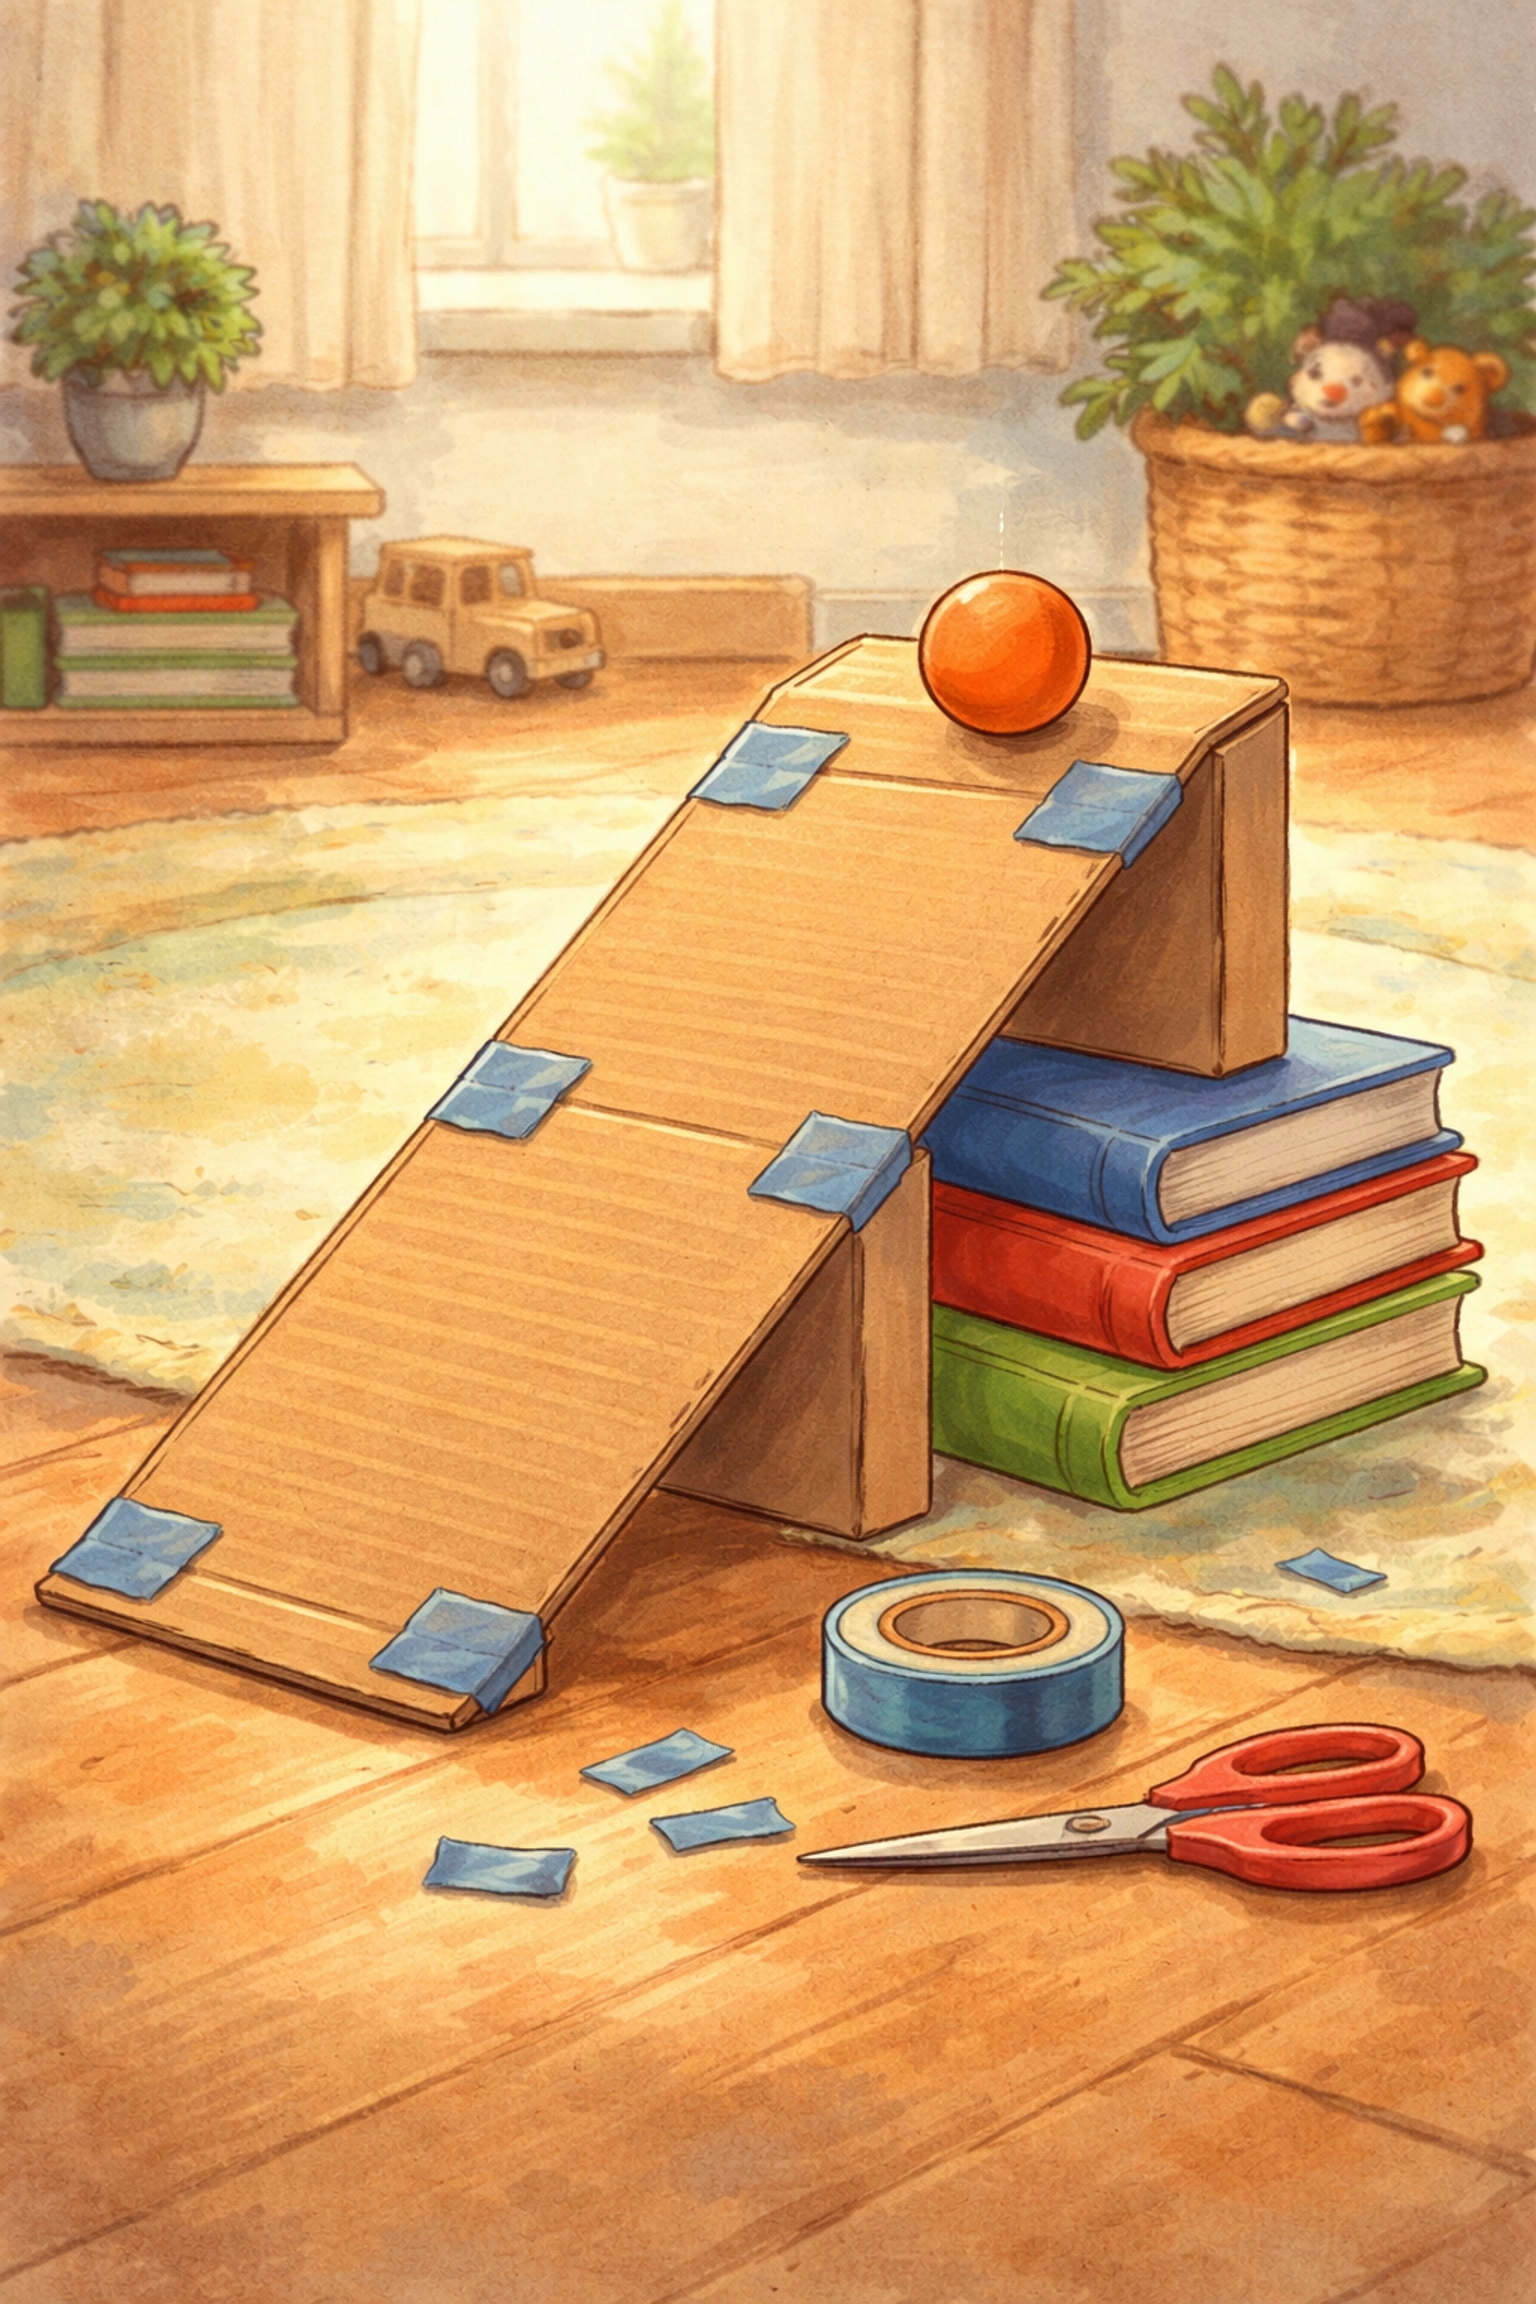
Step 1: Gather and Prepare Your Cardboard
Find a cardboard box: a shipping box, cereal box, or appliance box section can work. Flatten it out so you have a long, relatively smooth surface. If you're using smaller pieces, you can tape them together to create a longer ramp.
Tip: Cardboard that's too thin may buckle under the weight of heavier balls. Look for corrugated cardboard (the kind with the wavy layer inside) for better results.
Step 2: Create the Ramp Slope
Prop one end of your cardboard on a stable surface to create an incline. You can use:
- A stack of books
- Building blocks
- An overturned storage bin
- A chair seat
Start with a gentle slope: about 6 to 12 inches of height works well for beginners. You can adjust the height later to see how it affects ball speed and distance.
Step 3: Secure the Ramp
Use masking tape or duct tape to attach the top of the ramp to your prop surface. This keeps the cardboard from sliding around when balls roll down.
If you want to get fancy, fold up the bottom edge of the cardboard slightly (like a ski jump) to give balls a little lift at the end. Tape this fold in place so it holds its shape.
Step 4: Add Side Rails (Optional but Helpful)
If balls keep rolling off the sides, create simple guardrails by:
- Folding up the edges of the cardboard and taping them in place
- Taping popsicle sticks or cardboard strips along the sides
- Using rolled-up newspaper secured with tape
This step isn't required, but it can reduce frustration for younger builders.
Step 5: Set Up a Landing Zone
Clear a space at the bottom of your ramp where balls can roll freely. If you have hardwood or tile floors, balls will travel farther than on carpet.
For target practice, place plastic cups, a muffin tin, or small containers at the end of the ramp. You can assign point values to different targets if you want to turn it into a scoring game.
Step 6: Test and Adjust
This is where the real fun begins. Let your child roll different balls down the ramp and observe what happens:
- Does the ball go straight or veer off?
- How far does it travel?
- Does it hit the target?
Encourage adjustments. Maybe the ramp needs to be steeper, or perhaps the guardrails need tweaking. This trial-and-error process is part of the learning experience.
Challenge Ideas to Try
Once your basic ramp is working, here are some ways to extend the activity:
Distance Challenge
Mark the floor with tape at different intervals (use a ruler or just estimate). See which ball travels the farthest and keep track of results.
Ball Comparison Test
Gather several different balls: ping pong, golf ball, bouncy ball, marble, foam ball: and predict which will go farthest before testing. Talk about why heavier or bouncier balls might behave differently.
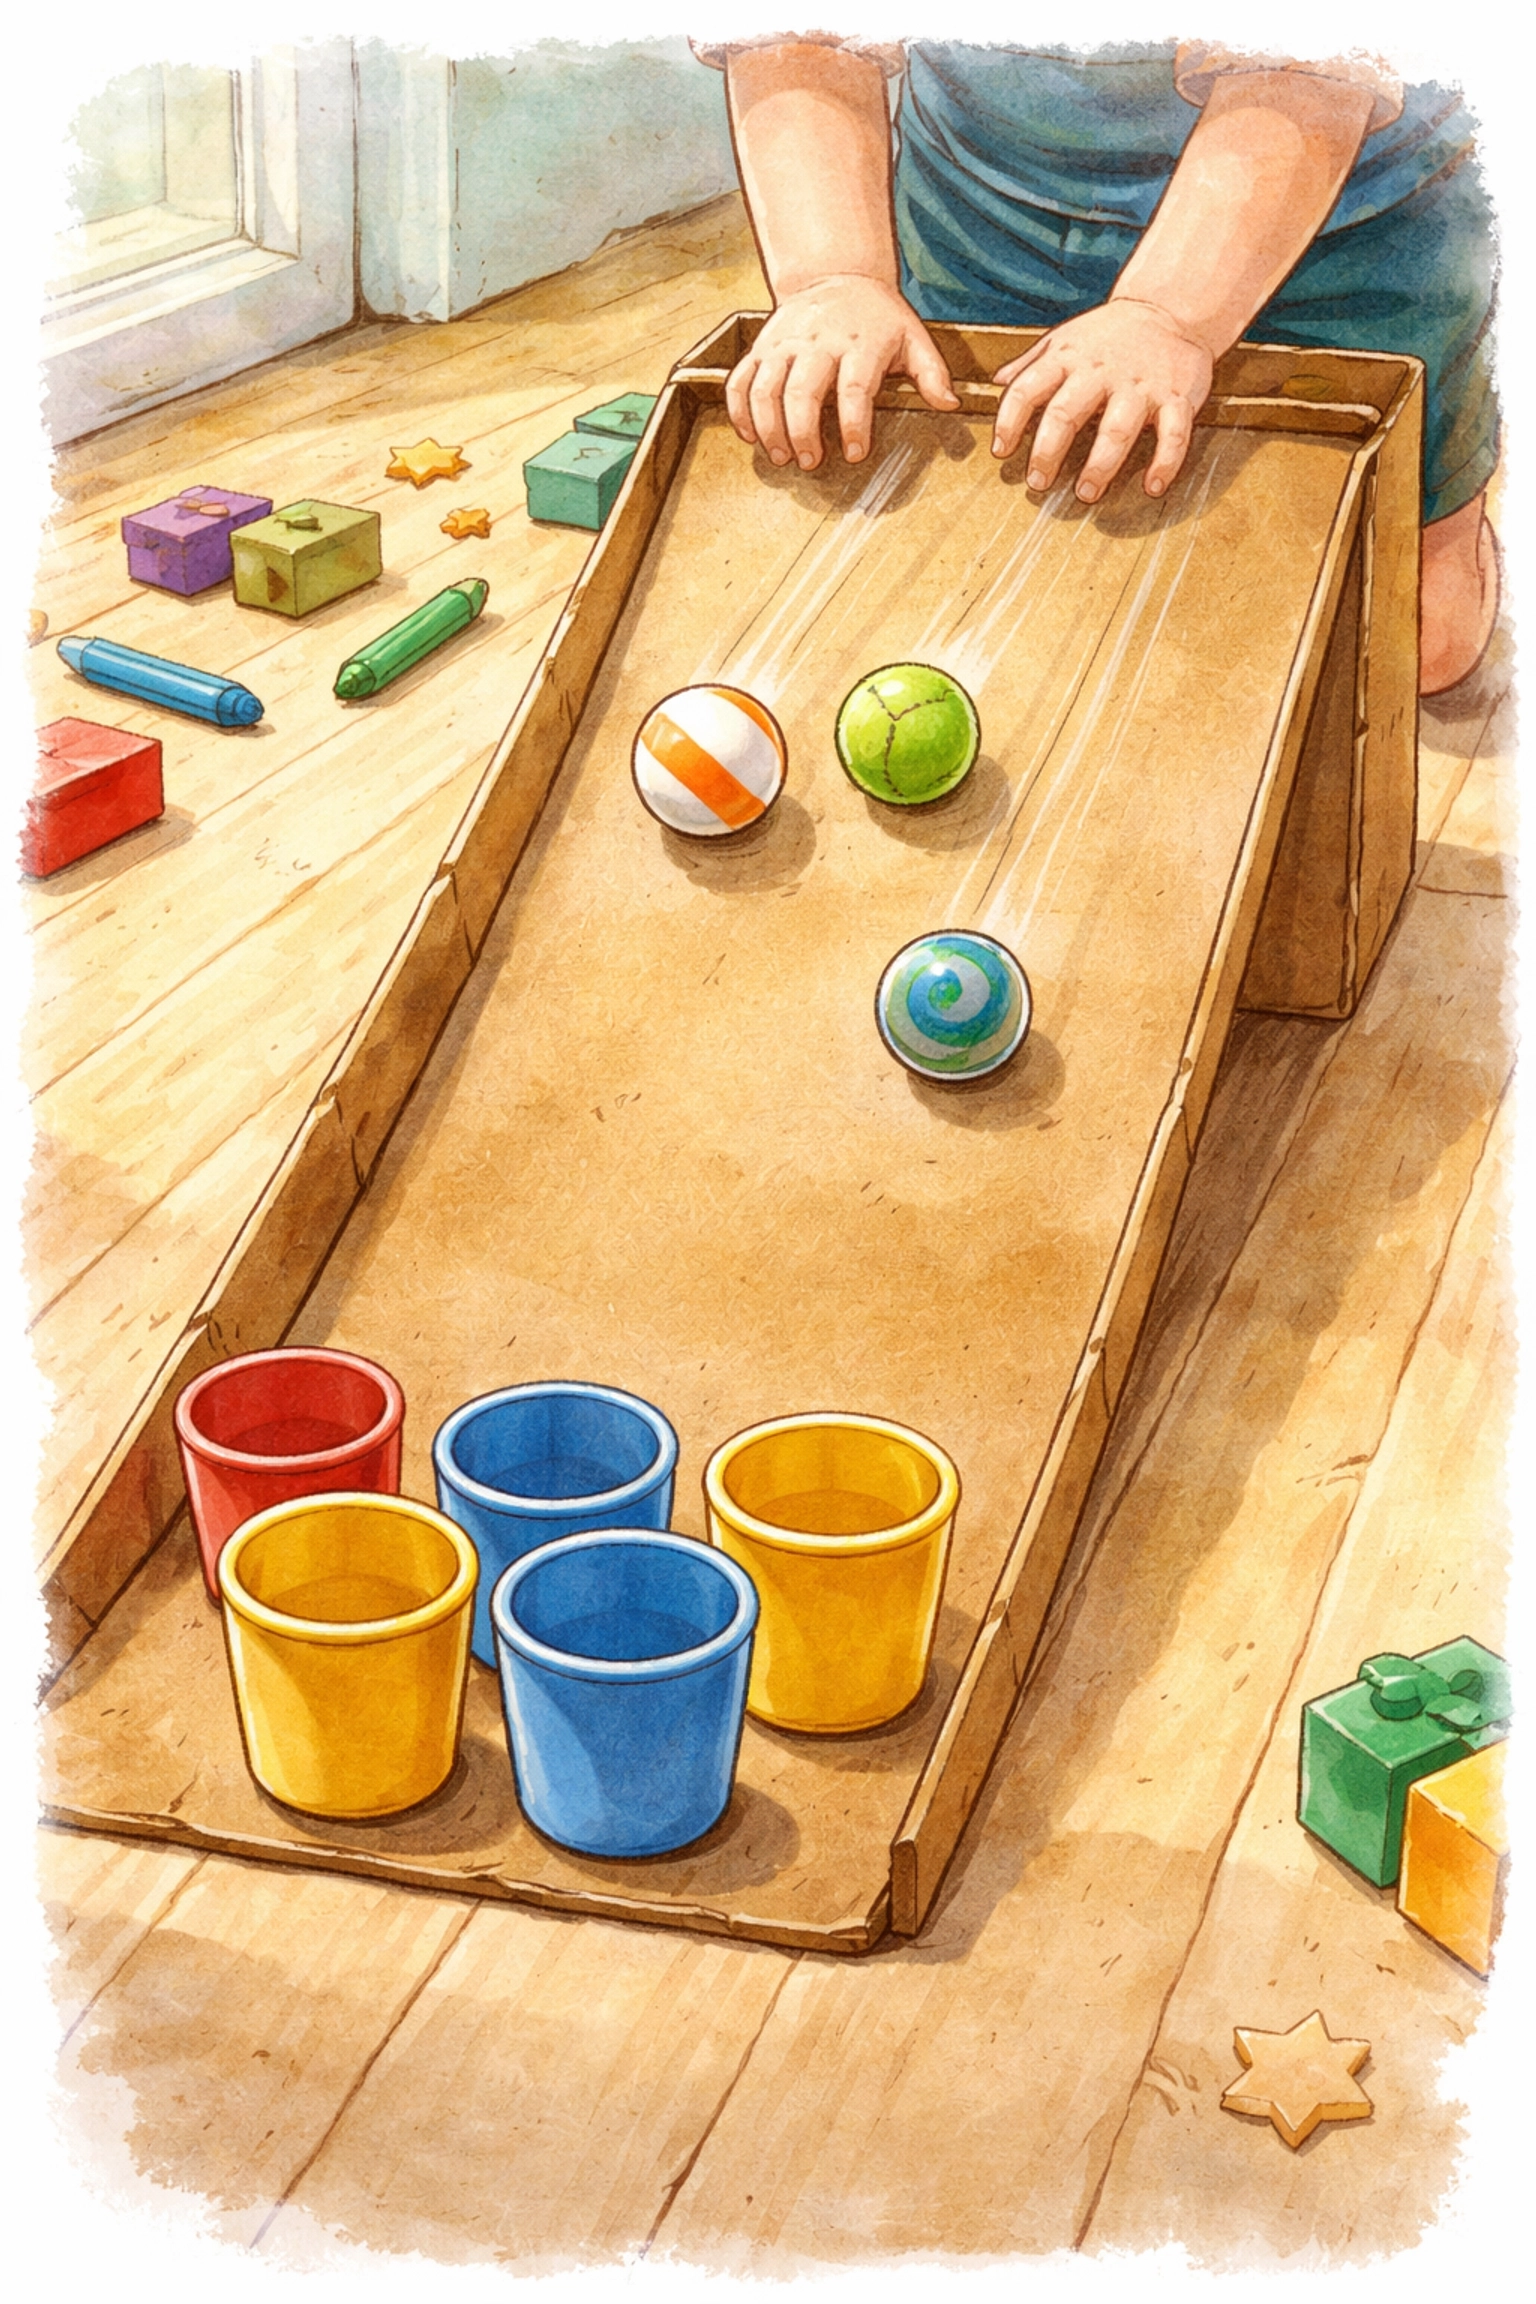
Target Practice
Set up cups or containers at various distances. Assign point values (closer targets = fewer points, farther targets = more points). Take turns and keep score.
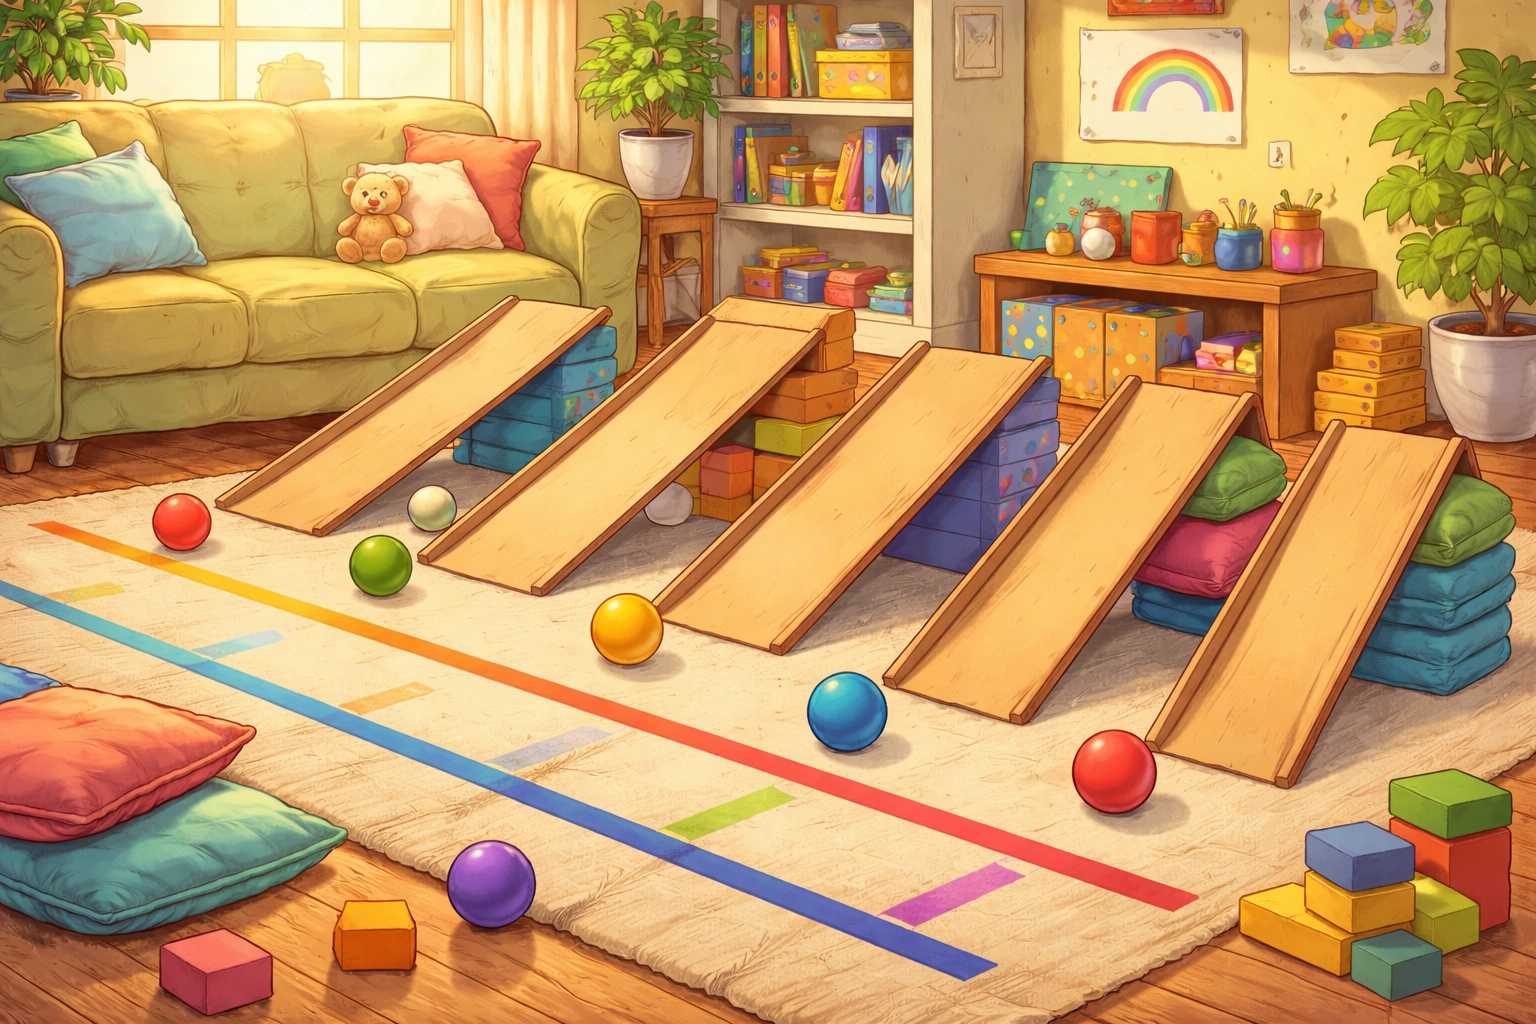
Multi-Level Ramps
For kids who want more of a challenge, try building ramps that connect: one ramp leads into another at a different angle. This takes more patience and problem-solving but can be satisfying for older children in the 6–10 range.
Speed Races
If you have two cardboard sections, build two ramps side by side and race balls simultaneously. This works great for siblings or playdates.
What Kids Learn from This Activity
While this project feels like pure play, children often pick up a few concepts along the way:
- Cause and effect: Changing the ramp height or angle changes how the ball behaves
- Basic physics: Gravity pulls the ball down; smoother surfaces reduce friction
- Problem-solving: When something doesn't work, they figure out how to fix it
- Fine motor skills: Taping, folding, and positioning materials
You don't need to turn it into a formal lesson: these ideas tend to come up naturally through play and conversation.
Helpful Tips for Success
Start simple. A basic ramp with one slope is plenty for younger kids. You can add complexity once they've mastered the basics.
Expect some trial and error. Ramps may collapse, balls may fly off the sides, and targets may get missed repeatedly. This is normal and part of the process.
Let kids lead. Resist the urge to "fix" everything for them. Offer suggestions, but let them experiment with their own solutions when possible.
Protect your floors. If you're using markers to track distances, put down a drop cloth or use removable tape instead.
Keep materials accessible. Store your cardboard pieces and balls together so kids can rebuild or modify their ramps another day.
Cleanup and Storage
Cardboard ramps can be flattened and stored in a closet or under a bed for future use. If the cardboard gets too bent or torn, it can go straight into your recycling bin: no waste guilt here.
Related Projects You Might Enjoy
If your family likes hands-on building activities, check out some of our other DIY projects:
- How to Build a Mini Windmill from Recycled Materials
- How to Make a DIY Mini Greenhouse Out of Plastic Bottles
FAQ: Ball Ramp Challenge
What is the best material for a ball ramp? Cardboard tubes from paper towels or wrapping paper are perfect. You can also use pool noodles cut in half lengthwise or even flat pieces of cardboard with edges folded up.
How do I make the ramp stable? Use plenty of painter's tape to secure the tubes to walls or furniture. Creating "triangles" with the tape or resting the tubes on chair rungs can also add extra support.
What types of balls work best? Ping pong balls, marbles, and pompoms are all great choices. Just make sure the ball is small enough to fit through your tubes but large enough that it doesn't get stuck in the gaps.
References
- DIY cardboard ramp construction methods and target ideas
- Wooden ball ramp designs with point systems
- Multi-level box ramp approaches
- Speed and distance testing variables
- Troubleshooting tips for ball ramp projects


